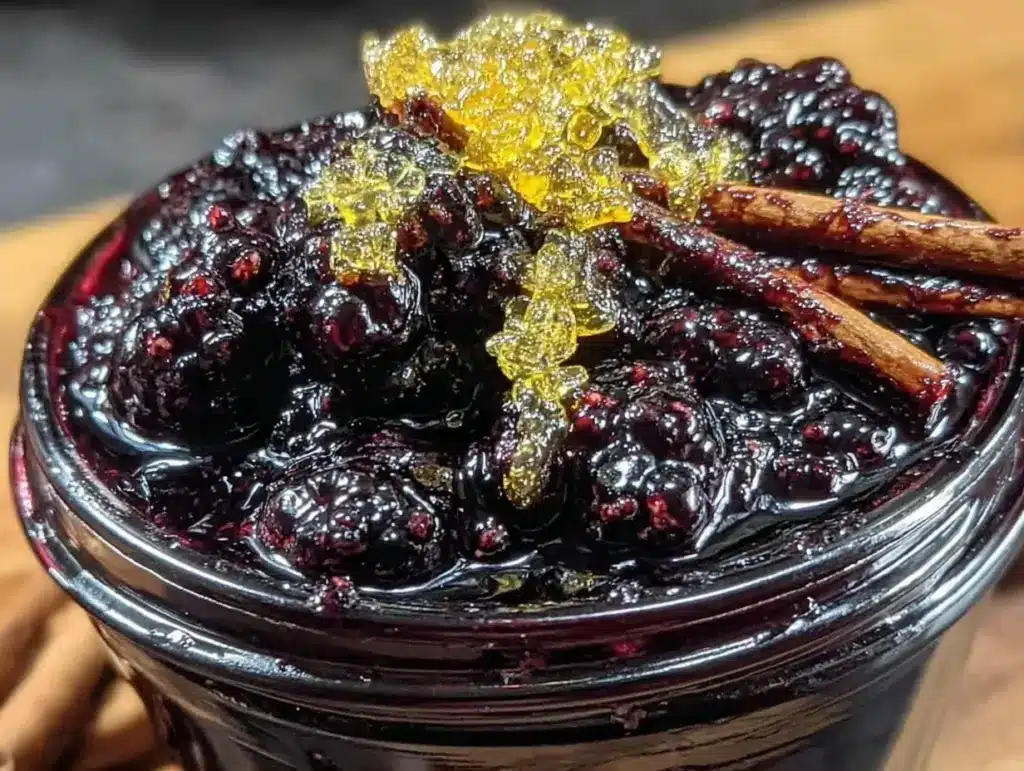
There was a winter, about five years ago, when my immune system decided to go on strike. I’m talking three weeks of sniffles, two colds in a row, and a general feeling of being completely drained before I even started my day. I was tired of buying those bright orange, overly sweet syrups from the health food store that tasted like medicine and cost a fortune. I wanted something that actually tasted like comfort, something that felt like a hug in a glass, but still worked.
That’s when I started tinkering with homemade elderberry syrup. I’d heard the rumors—everyone in my wellness-obsessed friend group swore by it—but I was skeptical. Could a dark purple syrup really keep me from missing work? I made my first batch in November, simmering dried berries with cinnamon sticks and raw honey until my kitchen smelled like a cozy cabin in the woods. The first time I took a spoonful during a sneeze attack, I was shocked. It didn’t just soothe my throat; it felt like it gave me a little boost of energy I hadn’t had in weeks.
Now, this homemade elderberry syrup with raw honey and cinnamon is non-negotiable in my house. Every autumn, when the leaves turn and the air gets crisp, I make a big batch. It’s become my go-to for fall slow cooker spiced caramel apple cider additions, too, adding a deep, berry-rich complexity that store-bought spices just can’t match. It’s not magic, but it’s close. It’s simple, it’s cheap, and it tastes incredible. If you’ve been looking for a natural way to support your immune system this season, you need to try this. It’s the kind of thing you’ll make on repeat because it’s just that good.
Why You’ll Love This Elderberry Syrup
I know what you’re thinking. “Another syrup? I have enough stuff in my pantry.” But hear me out. This isn’t just a sweetener; it’s liquid wellness that actually tastes like a treat. Here’s why this homemade elderberry syrup has earned a permanent spot on my counter:
- It Tastes Like Dessert, Acts Like Medicine — Seriously. The combination of tart elderberries, warm cinnamon, and sweet raw honey is addictive. My kids ask for it “for breakfast” every morning. I don’t judge. It’s basically fruit sauce with benefits.
- Super Simple, Zero Fuss — You don’t need fancy equipment or rare ingredients. Just a pot, some dried berries (or fresh if you’re lucky), water, cinnamon, and honey. If you can boil water, you can make this. I make this while helping my kids with homework or while watching a show. It does most of the work itself.
- Costs Pennies Compared to Store-Bought — A bottle of high-quality elderberry syrup at the grocery store can run you $15-$20. This batch? Maybe $8 for ingredients that last for months. That’s less than the cost of a takeout coffee. I keep a jar in the fridge and another in the freezer, so I’m always covered.
- Versatility is Through the Roof — Yes, you can take it straight from the spoon. But it’s also amazing stirred into warm water with lemon, drizzled over pumpkin spice overnight oats for a fiber-rich breakfast, or mixed into cozy turkey white bean chili for a tangy twist. It’s a flavor bomb that works in sweet and savory applications.
- Whole-Food Fuel — Unlike those processed supplements, this is real food. Elderberries are packed with antioxidants and vitamins C and E. The cinnamon helps regulate blood sugar, and the raw honey provides enzymes and natural sweetness. It’s fuel that keeps you going without feeling like a diet compromise.
This is my answer to “how do I stay healthy this winter?” without spending a fortune or swallowing a handful of pills. It’s reliable, delicious, and makes my home smell incredible.
Ingredients You’ll Need
Here’s the best part: you probably have most of this already, or it’s easy to grab at any grocery store. I’m particular about the quality of a few items here, and I’ll tell you exactly why.
For the Syrup Base
Dried Elderberries (1 cup / 120g) — This is the star. Do not use fresh elderberries unless you’ve processed them correctly (fresh ones can be toxic). Dried is safer, easier to find, and concentrates the flavor. Look for organic, sun-dried berries. I buy mine in bulk online because it’s cheaper than the health food store. They should be dark purple-black and slightly shriveled.
Water (2 cups / 480ml) — Just plain tap water is fine. No need for filtered unless your water tastes weird. The water extracts the nutrients and flavor from the berries.
Cinnamon Sticks (2-3 sticks) — Use Ceylon cinnamon if you can find it (it’s milder and sweeter), but standard cassia cinnamon works great too. I love the warm, woody aroma it adds. If you don’t have sticks, 1 teaspoon of ground cinnamon works, but add it at the end so it doesn’t get muddy.
Whole Cloves (4-5 cloves) — Optional, but I highly recommend it. They add a deep, spicy warmth that pairs perfectly with the berries. Don’t overdo it—you want to taste the elderberry, not clove.
For the Sweetener & Preservation
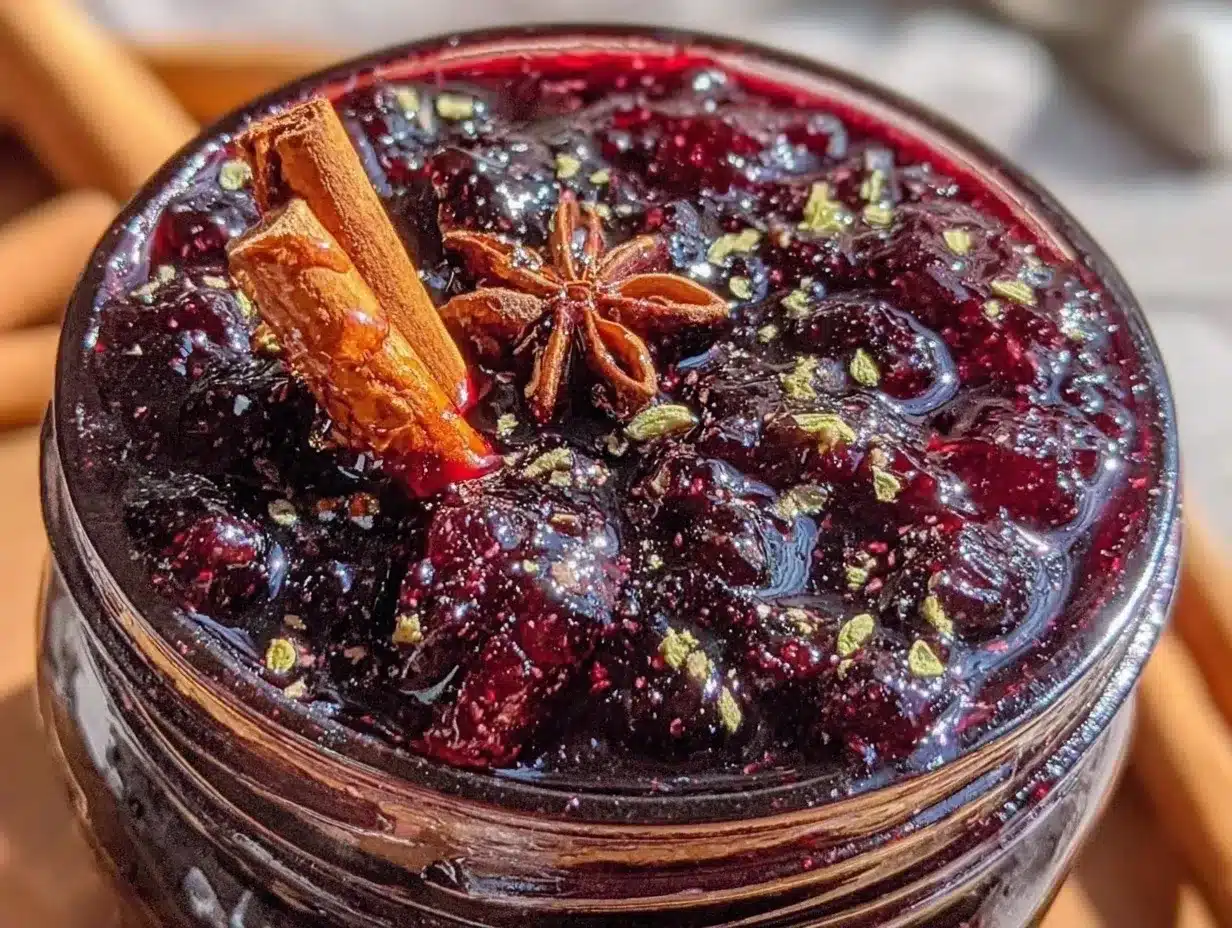
Raw Honey (½ cup / 170g) — This is crucial. Use raw, unfiltered honey. It has natural enzymes and antimicrobial properties that complement the elderberries. Manuka honey is amazing but expensive; local raw honey is perfect and supports local bees. Do not use processed white honey or corn syrup. It changes the texture and health benefits.
Lemon Juice (2 tablespoons / 30ml) — Freshly squeezed. The acid brightens the flavor and helps preserve the syrup. It also adds a bit of vitamin C, which is great for immunity.
Optional: Ginger (1-inch piece, sliced) — If you like a little kick, add a few slices of fresh ginger to the simmering pot. It adds anti-inflammatory benefits and a zesty warmth. I do this when I feel a tickle in my throat.
Equipment You’ll Need
You don’t need fancy gear for this. Here’s what I actually use:
Medium Saucepan — A 2-3 quart pot is perfect. It needs to hold the berries, water, and foam that forms during simmering. My stainless steel pot works great, but enameled cast iron is nice too because it doesn’t react with the acidic berries.
Mesh Strainer or Cheesecloth — You need to strain out the berry skins and seeds. A fine-mesh strainer works well if you’re okay with a little pulp. For a super smooth syrup, line the strainer with cheesecloth or a nut milk bag. I use cheesecloth because it’s reusable and easy to clean.
Wooden Spoon — For stirring. Don’t use metal if you’re using a non-stick pot.
Glass Jar with Lid — A quart-sized mason jar or similar glass container for storing the syrup. Glass is important because the acidity can interact with some metals over time. I love the look of amber glass jars on the counter.
Measuring Cups and Spoons — Standard stuff. Dollar store versions work fine.
How to Make It: Step-by-Step
Alright, let’s make this! I’m walking you through exactly how I do it, including the little tricks I’ve picked up over the years.
Step 1: Combine and Simmer (20 minutes)
In your saucepan, combine the dried elderberries, water, cinnamon sticks, and cloves. If you’re adding ginger, toss it in now. Stir everything together. Place the pot over medium-high heat and bring it to a boil. Once it boils, reduce the heat to low. Let it simmer gently for 20-30 minutes. You’ll see the water turn a deep, dark purple. The berries will soften and burst. This is where the magic happens—the nutrients and flavor are extracting into the water. Don’t rush this step.
Step 2: Mash and Steep (10 minutes)
After 30 minutes of simmering, turn off the heat. Use your wooden spoon to gently mash the berries against the side of the pot. This releases more juice and flavor. Let the mixture steep in the pot, covered, for another 10-15 minutes. This resting period allows the flavors to meld and the cinnamon to infuse deeply. While it steeps, prepare your strainer and jar.
Step 3: Strain the Syrup (5 minutes)
Place your mesh strainer (lined with cheesecloth if using) over a large bowl or measuring cup. Pour the berry mixture through the strainer. Let it drip naturally. Don’t press too hard on the berries with a spoon, or the syrup will become cloudy and gritty. If you want a thicker, more concentrated syrup, you can gently press the berries, but I prefer a clear, elegant syrup. Discard the spent berries and spices.
Step 4: Add Honey and Lemon (2 minutes)
Wait until the strained liquid has cooled to room temperature or is just slightly warm. Important: Do not add honey to hot liquid. High heat destroys the beneficial enzymes in raw honey. Once it’s cool enough to touch the bowl comfortably, stir in the raw honey and lemon juice. Whisk until the honey is completely dissolved. The syrup will thicken slightly as it cools.
Step 5: Bottle and Store
Pour the finished syrup into your clean glass jar. Seal tightly and store in the refrigerator. It will keep for up to 3 months. If you want to keep it longer, freeze it in ice cube trays for easy portioning, then transfer the cubes to a freezer bag. Each cube is a perfect single dose.
Total Time: About 45 minutes (20 minutes active, 25 minutes mostly hands-off simmering and steeping)
Troubleshooting Tips
- Syrup is too thin: Simmer it longer before straining to reduce the water content. Or, add a teaspoon of pectin powder during the simmer.
- Syrup is too sweet: Add more lemon juice or a splash of apple cider vinegar to balance the sweetness.
- Syrup is cloudy: This usually happens if you pressed the berries too hard during straining. Next time, let it drip naturally.
- Honey crystallized: This is normal! Just warm the jar in a bowl of hot water to liquefy it again.
Expert Tips & Tricks
Here’s everything I’ve learned from making this dozens of times. These tips will save you from my mistakes.
Never Use Fresh Elderberries Raw
I cannot stress this enough. Fresh elderberries contain cyanogenic glycosides, which can be toxic. Always use dried elderberries, or if you have fresh ones, cook them thoroughly for at least 30 minutes. Dried is safer and easier for beginners.
Patience with the Honey
Adding honey to hot syrup kills its probiotic benefits. I always wait until the syrup is cool to the touch. It’s worth the wait. The flavor is better, and you get the health benefits.
Boost the Immunity
Add a teaspoon of echinacea or turmeric powder to the simmering pot. It adds an earthy depth and extra immune support. I do this during cold and flu season.
Use a Funnel
Pouring thick syrup into a small jar mouth is messy. Use a small funnel to avoid sticky counters. I learned this the hard way with a sticky floor.
Label and Date
Write the date on the jar with a marker. Elderberry syrup lasts 3 months in the fridge, but I usually finish a batch in 6 weeks because it’s so good.
Variations & Substitutions
Once you’ve nailed the basic version, here’s how you can mix it up. I’ve tried all of these.
Double Berry Blast
Add ½ cup dried blackberries or blueberries to the pot. It adds a different fruity note and more antioxidants. My daughter loves this variation because it’s sweeter.
Spiced Apple Cider Syrup
Replace 1 cup of the water with apple cider. Add a slice of apple to the pot. This pairs beautifully with fall caramel apple crisp or warm cider. It’s like liquid apple pie.
Zero-Honey Option
If you’re avoiding honey (for vegans or babies under 1 year), use maple syrup or agave nectar. Add it after cooling. The flavor will be slightly different, but still delicious. Maple syrup adds a nice woody note.
Extra Zing
Add 1 teaspoon of black pepper to the simmering pot. It sounds weird, but it enhances the flavor of the cinnamon and adds anti-inflammatory benefits. I do this when I’m feeling really under the weather.
Dietary Modifications:
- Vegan: Use maple syrup instead of honey.
- Gluten-Free: Naturally gluten-free. Just check your cinnamon and honey for cross-contamination if you’re sensitive.
- Dairy-Free: Naturally dairy-free. Perfect for cozy turkey white bean chili nights or any dairy-free diet.
Serving & Storage
How to Serve:
I usually take 1-2 tablespoons straight from the spoon when I feel a cold coming on. But here are other ways I’ve enjoyed it:
- Stirred into warm water with lemon for a soothing tea.
- Drizzled over pumpkin spice overnight oats for a fiber-rich breakfast.
- Mixed into soft buttery cinnamon sugar pretzel bites for a dipping sauce.
- Added to fall slow cooker spiced caramel apple cider for a berry twist.
Storage Instructions:
Store in an airtight glass jar in the refrigerator for up to 3 months. If you see mold or it smells off, toss it. The high sugar content from honey acts as a preservative, but it’s not infinite. For longer storage, freeze in ice cube trays.
Nutrition Information
I’m not a nutritionist, but here’s the breakdown if you’re tracking. Per serving (1 tablespoon):
- Calories: 35
- Carbs: 9g
- Sugar: 8g (natural from honey and berries)
- Protein: 0g
- Fat: 0g
What’s Good: Packed with antioxidants from elderberries, anti-inflammatory properties from cinnamon, and natural enzymes from raw honey. It’s a nutrient-dense fuel that supports your immune system without empty calories. Just remember, it’s still sweet, so use it mindfully. It’s better than any processed candy, but it’s not water.
Final Thoughts
So that’s my homemade elderberry syrup! I’ve probably talked your ear off at this point, but when you make a recipe this often, you have a lot to say about it. This has been a game-changer for my family’s winter health. It’s my answer to “how do I stay healthy?” without spending a fortune or swallowing pills. It’s simple, it’s cheap, and it tastes incredible.
Make it yours! Try different spices, swap the honey for maple syrup, or add extra ginger. The best recipes are the ones you adapt to your tastes. If you make this, drop a comment and let me know how it turns out! I love hearing how recipes work in your kitchen. And if something doesn’t work, tell me—I’m here to help troubleshoot.
Happy cooking! I hope your kitchen smells half as good as mine does right now.
Frequently Asked Questions
Can I use fresh elderberries?
Not unless you cook them thoroughly. Fresh elderberries contain cyanogenic glycosides, which can be toxic if not processed. Dried elderberries are safer and easier to find. If you have fresh ones, simmer them for at least 30 minutes to make them safe. I always stick to dried for simplicity and safety.
How long does homemade elderberry syrup last?
In the refrigerator, it lasts up to 3 months. In the freezer (in ice cube trays), it lasts up to 6 months. Always check for signs of spoilage like mold or an off smell before using.
Can I give this to my kids?
Yes! This is a great immune support for kids. Start with 1 teaspoon per day for young children and 1-2 tablespoons for older kids. Never give honey to babies under 1 year old due to botulism risk. For infants, use maple syrup instead.
Why is my syrup cloudy?
Cloudiness usually happens if you press the berries too hard when straining. For a clear syrup, let it drip naturally through a cheesecloth or fine-mesh strainer. It still tastes great, just looks less elegant.
Can I double the recipe?
Absolutely! Double everything and use a larger pot. The cooking times stay the same. I double it every year because we go through it fast. Just make sure your jar is big enough to hold it all.
Does it taste like medicine?
Not at all! With the cinnamon and honey, it tastes like a tart, sweet berry syrup. Most people, including kids, love the flavor. It’s one of the easiest ways to get immune support without a fight.
Can I use this in cooking?
Yes! It’s amazing in marinades, glazes, or stirred into cozy turkey white bean chili for a tangy twist. It also works well in salad dressings or drizzled over roasted vegetables. Get creative!
Pin This Recipe!
Homemade Elderberry Syrup: Easy Immune Fuel Youll Make on Repeat
- Total Time: 45 minutes
- Yield: Approximately 1 quart (32 servings) 1x
Description
A simple, homemade elderberry syrup made with dried berries, cinnamon, and raw honey. This immune-boosting syrup is easy to make, costs less than store-bought versions, and tastes like a comforting treat.
Ingredients
- 1 cup dried elderberries (120g)
- 2 cups water (480ml)
- 2–3 cinnamon sticks
- 4–5 whole cloves
- 1-inch piece fresh ginger, sliced (optional)
- ½ cup raw honey (170g)
- 2 tablespoons lemon juice (30ml)
Instructions
- In a medium saucepan, combine dried elderberries, water, cinnamon sticks, and cloves. Add ginger if using.
- Place the pot over medium-high heat and bring to a boil. Once boiling, reduce heat to low and simmer gently for 20-30 minutes until the liquid turns deep purple and berries soften.
- Turn off the heat and gently mash the berries against the side of the pot with a wooden spoon to release juice.
- Let the mixture steep, covered, for 10-15 minutes to allow flavors to meld.
- Place a mesh strainer lined with cheesecloth over a bowl. Pour the mixture through the strainer, letting it drip naturally. Avoid pressing hard on the berries to keep the syrup clear.
- Discard the spent berries and spices.
- Wait for the strained liquid to cool to room temperature or slightly warm. Do not add honey to hot liquid.
- Stir in raw honey and lemon juice until the honey is completely dissolved.
- Pour the finished syrup into a clean glass jar, seal tightly, and store in the refrigerator for up to 3 months.
Notes
Never use fresh elderberries raw as they can be toxic; always use dried or cook fresh ones thoroughly for at least 30 minutes. Do not add honey to hot liquid as high heat destroys beneficial enzymes. For a clearer syrup, let it drip naturally through the strainer rather than pressing the berries. Can be frozen in ice cube trays for longer storage.
- Prep Time: 5 minutes
- Cook Time: 40 minutes
- Category: Condiments
- Cuisine: American
Nutrition
- Serving Size: 1 tablespoon
- Calories: 35
- Sugar: 8
- Carbohydrates: 9
Keywords: elderberry syrup, immune support, homemade syrup, raw honey, cinnamon syrup, natural remedies, winter wellness, gluten-free, dairy-free, vegan option



