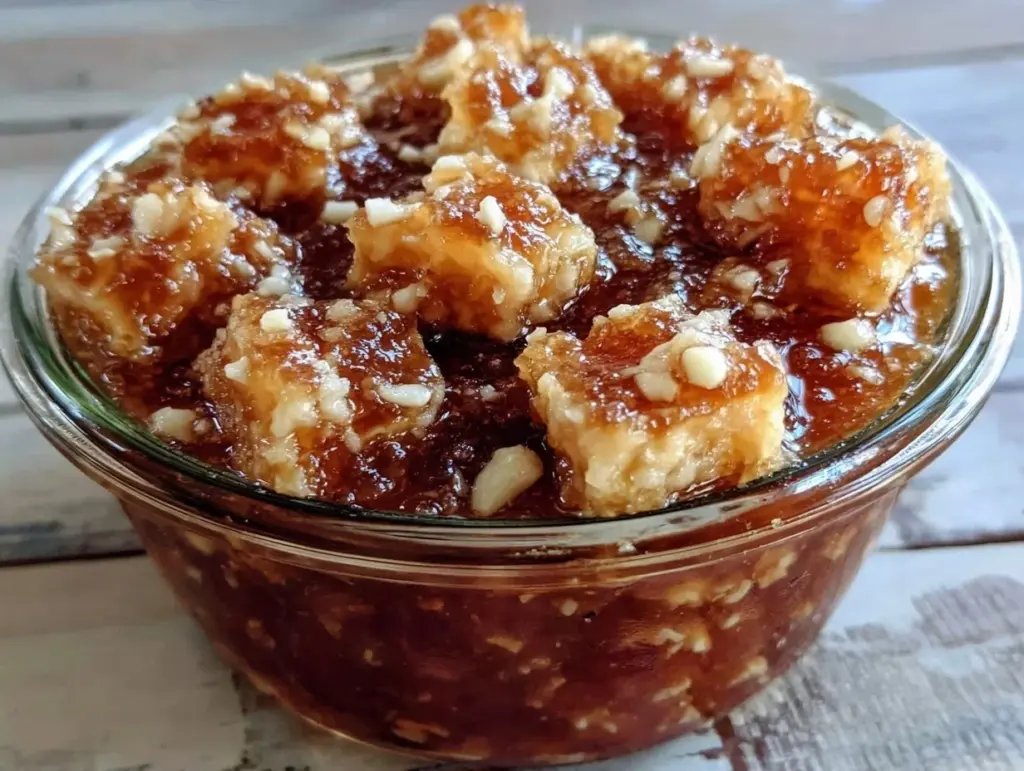
Last November, I woke up at 3:00 AM with that specific, heavy chest-cough that makes you feel like you’ve swallowed a handful of gravel. My throat was raw, my head was pounding, and the thought of brewing tea or swallowing a pill felt like climbing Everest. My partner shuffled into the kitchen, rubbing sleep from their eyes, and handed me a small jar of this dark, amber-colored honey. “Just a teaspoon,” they said. “It’s been sitting on the counter for two weeks. Let it work.”
I took it. I didn’t expect much. Honey is sweet, sure, but honey with garlic? It sounded like a folk remedy from a movie, something a village elder would whisper about while shaking their head at modern medicine.
But ten minutes later, I felt the difference. It wasn’t magic—it was chemistry. The honey coated my throat, soothing the inflammation, while the garlic (which had mellowed into something almost savory-sweet) kicked off an immune response that actually made me feel like my body was fighting back. I went back to sleep. When I woke up, the cough was gone. Well, mostly gone. The rest of the cold cleared up in two days because I kept taking it.
That was three winters ago. Since then, this garlic infused raw honey has become my first line of defense. It’s not just a remedy; it’s a pantry staple I prep in late autumn, right when the garlic harvest comes in and the days start getting shorter. I’ve made it dozens of times, tweaking the ratios, testing different honeys, and learning exactly how long to let it sit so the garlic doesn’t turn bitter or, worse, unsafe.
Here’s the thing about cold season: you can’t control the virus, but you can control your kitchen. And while I’m a huge fan of cozy fall chicken and dumplings for when you’re already sick, this honey is for when you feel that tickle. It’s the proactive move. It’s the “make it now” strategy that pays off in December.
Why You’ll Love This Garlic Infused Raw Honey
I know what you’re thinking. Garlic in honey? Isn’t that weird? Is it safe? Will it taste terrible? I had those exact same doubts. But after making this for my family, my friends, and basically anyone who visits during flu season, I can tell you: it’s a game-changer. Here’s why I keep making this batch after batch.
It’s Actually Delicious — I promise. The raw honey is floral and complex, and the garlic loses its sharp, pungent bite after soaking. What you’re left with is a savory-sweet syrup that tastes like you’re drizzling it over a fancy appetizer, not taking medicine. I eat it straight off the spoon. My kids think it’s a “special treat” and beg for it.
It’s Nature’s Immune Booster — Garlic is loaded with allicin, which has powerful antimicrobial and antiviral properties. Raw honey is a natural antibacterial and soother for sore throats. Together, they’re a powerhouse. I don’t claim it’s a cure-all, but it’s the best natural support I’ve found for kicking off a cold.
It’s Stupidly Simple — You don’t need to cook anything. You don’t need to measure anything precisely. You just chop, jar, and wait. It’s the perfect “make it while you’re watching TV” project. I usually make it on a Sunday afternoon while prepping for the week.
It Lasts Forever — Unlike fresh juice or smoothies, this stuff keeps for months in the pantry. Once the jar is sealed, it’s good for 3-6 months. I make a big batch in November and have enough to last until spring. It’s basically free insurance against the sniffles.
It’s Versatile — Sure, you can take it by the spoonful for a cold. But it’s also amazing in tea, drizzled over roasted vegetables (like my fall brown butter sage gnocchi), or mixed into yogurt. It adds a depth of flavor that regular honey just can’t touch.
This isn’t just about getting better when you’re sick. It’s about feeling proactive. It’s about having something in your kitchen that says, “I’ve got this.” And honestly, that peace of mind is worth the ten minutes it takes to make.
Ingredients You’ll Need
The beauty of this recipe is that you only need two ingredients. But because this is about flavor and potency, the quality of those two ingredients matters. I’m particular about which garlic and which honey I use, and here’s why.
Raw, Unfiltered Honey (2 cups / 600ml) — This is non-negotiable. You need raw honey because it contains enzymes, pollen, and natural antibacterial properties that pasteurized honey has been cooked out of. Look for honey that’s cloudy or has some sediment at the bottom—that’s a sign it’s real. Local wildflower honey is my favorite because it’s already adapted to my local allergens, but clover or orange blossom works too. Avoid “honey blends” or anything that’s crystal clear and runny—that’s processed sugar syrup.
Fresh Garlic Cloves (1 full head / about 10-12 cloves) — Use fresh, firm garlic. If your cloves are sprouting green in the middle, they’re old and bitter. Use them up in a stir-fry instead. I prefer organic garlic if I can find it, because the skin is thinner and the flavor is more complex. But any good grocery store garlic will do. Don’t use jarred minced garlic—it has preservatives that can interfere with the fermentation process and tastes metallic.
Optional: A Pinch of Ginger — If you’re feeling extra zesty, add a small slice of fresh ginger to the jar. It boosts the anti-inflammatory properties and adds a nice warmth. I do this when I feel a cold coming on.
Optional: A Strip of Lemon Zest — Just the outer yellow part, no white pith. It adds a bright citrus note that cuts through the garlic. It’s not traditional, but it’s delicious.
One Glass Jar — A 16oz or 24oz mason jar with a tight-fitting lid. Glass is essential. Plastic can absorb the garlic smell and flavor, and metal can react with the acidity. I use an old pasta sauce jar that I’ve cleaned thoroughly. It’s free and works perfectly.
Why Raw Honey? — Pasteurized honey has been heated to high temperatures, which kills off the beneficial enzymes and bacteria-fighting properties. Since we’re making this for health benefits, raw is the way to go. It’s thicker and sweeter, and it crystallizes over time—which is normal and actually a sign of quality. If your honey crystallizes, just put the jar in a bowl of warm water to liquefy it again.
Equipment Needed
You don’t need fancy tools for this. Here’s what I actually use.
Mason Jar — 16oz or larger. Make sure it’s clean and dry. Any moisture can introduce mold, so rinse it out and let it air dry completely.
Peeler or Knife — To peel the garlic. I use a paring knife because it gives me more control. If you’re lazy, you can smash the cloves with the flat side of a heavy knife to loosen the skin, then peel. Learned that trick years ago.
Chopping Board — Any size. I keep a small one just for garlic so I don’t have to wash the big one.
Fork or Whisk — To stir the honey and garlic occasionally. A fork works fine.
Funnel (Optional) — If you’re pouring the honey into a narrow-mouth jar, a funnel saves sticky messes. I usually just pour carefully, but a funnel is nice.
Knife for Chopping — You’ll be chopping the garlic finely. A sharp chef’s knife is best, but a paring knife works too. Dull knives make you crush the garlic more, which releases more allicin (the good stuff).
Storage Container (Optional) — Once the infusion is done, you might want to strain the garlic out and transfer the honey to a smaller jar for daily use. A small 8oz jar is perfect for keeping on the counter.
How to Make It: Step-by-Step
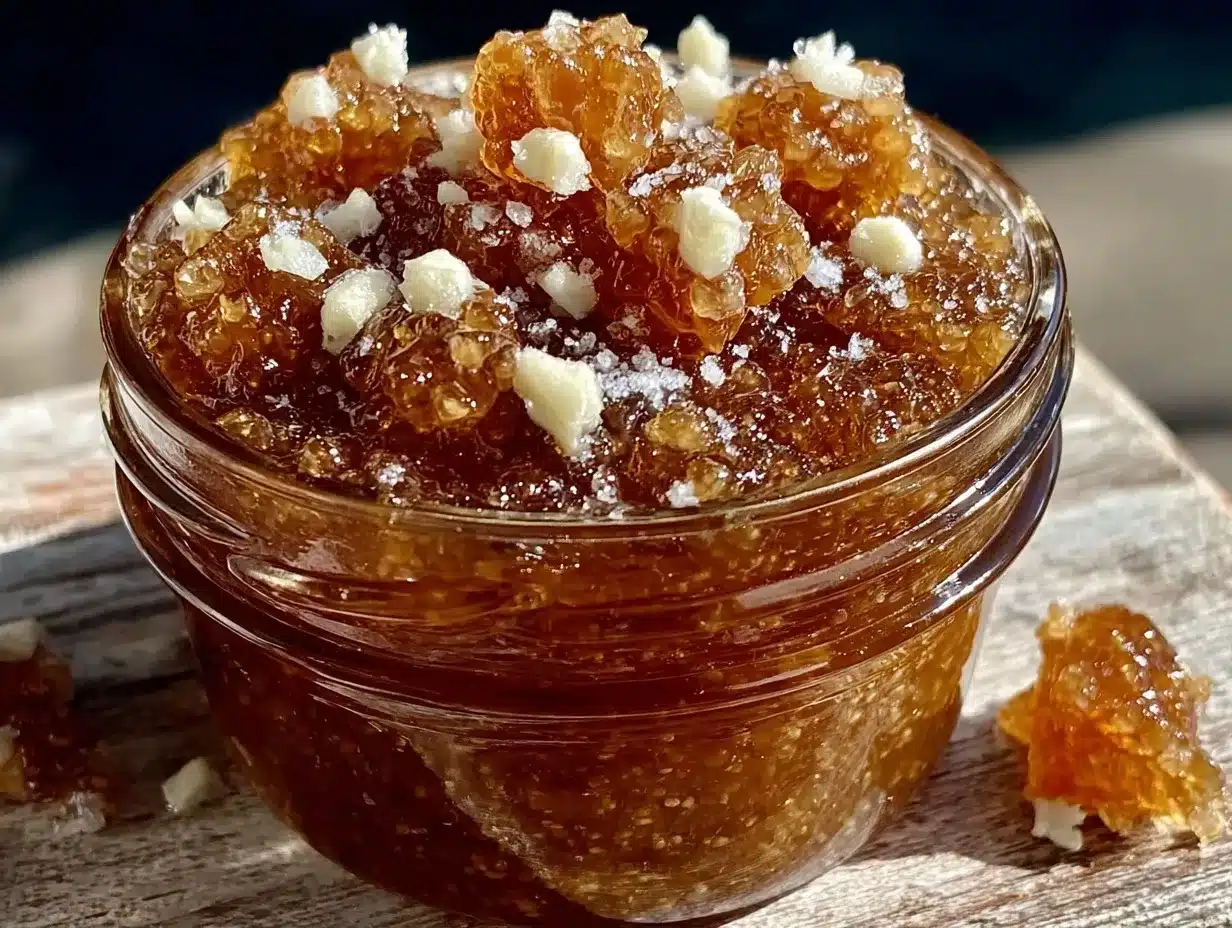
Alright, let’s make this! I’m walking you through exactly how I do it, including the little tricks I’ve picked up over the years.
Step 1: Prep Your Jar (2 minutes)
Wash your glass jar with hot, soapy water. Rinse it thoroughly. Then, dry it completely. I usually put it in the oven at 200°F for 5 minutes to ensure there’s zero moisture inside. Moisture is the enemy here—it can cause mold. Let it cool before you start. A clean, dry jar is the most important step.
Step 2: Peel and Chop the Garlic (5 minutes)
Take your head of garlic and separate the cloves. You want about 10-12 cloves for 2 cups of honey. Peel them by hand or with a knife. If the cloves are stubborn, smash them gently with the flat side of your knife to loosen the skin. Once peeled, chop the garlic finely. I like small pieces because they release more flavor into the honey. You don’t need to mince it to a paste, just small chunks. Put the chopped garlic into your prepared jar.
Step 3: Pour the Honey (3 minutes)
Pour the raw honey over the garlic. Use enough to completely submerge the garlic. There should be no garlic pieces sticking out of the honey. If you’re using a funnel, now’s the time. If not, pour slowly to avoid spills. The honey will slowly sink around the garlic pieces. Tap the jar gently on the counter to release any air bubbles trapped around the garlic. Air bubbles can lead to spoilage.
Step 4: Stir and Seal (2 minutes)
Use a clean fork or small whisk to gently stir the garlic and honey together. Make sure all the garlic is coated and submerged. This helps the infusion start immediately. Wipe the rim of the jar with a clean paper towel to remove any sticky honey. Seal the lid tightly. Label the jar with the date and contents. I always write the date on a piece of masking tape and stick it to the jar.
Step 5: The Infusion Wait (1-2 weeks)
Store the jar at room temperature, away from direct sunlight. Every day for the first week, give the jar a gentle stir. This helps distribute the garlic flavor and ensures no bubbles are trapped. After the first week, stir it every few days. The garlic will start to look pale and slightly translucent. The honey will darken slightly and become more fluid as the garlic releases its oils.
Let it sit for at least one week, but two weeks is better for a stronger flavor. I usually let mine sit for three weeks. The longer it sits, the more potent it gets. But don’t wait longer than a month, or the garlic might start to ferment or turn bitter.
Step 6: Strain and Enjoy (Optional)
After two weeks, the honey is infused. You can eat the garlic-infused honey as is, with the garlic pieces in it. Or, if you prefer a smoother texture, strain it. Line a fine-mesh strainer with a cheesecloth or a coffee filter over a bowl. Pour the honey through. The garlic pieces will be left behind. Squeeze the cloth gently to get all the honey out. The strained honey is golden and smooth, ready for daily use.
The leftover garlic? Don’t throw it away! It’s still flavorful. Chop it up and add it to soups, stews, or sautéed vegetables. It’s like having pre-cooked garlic on hand.
Total Time: About 15 minutes active, plus 1-2 weeks of waiting.
Expert Tips & Tricks
Here’s everything I’ve learned from making this dozens of times. These tips will save you from my mistakes.
Keep It Submerged
The #1 rule is that the garlic must be completely covered by honey. If any part of the garlic is exposed to air, it can mold. If the honey rises up as the garlic absorbs it, just add a little more honey to cover it.
Use Raw Honey Only
As I mentioned, pasteurized honey doesn’t have the same enzymes. It’s not that it won’t work, but you’re missing out on the health benefits. Look for honey that’s local and raw. It’s worth the extra cost.
Stir Daily at First
In the first few days, air bubbles can get trapped around the garlic. Stirring daily releases these bubbles and ensures even infusion. I set a reminder on my phone for the first week.
Watch for Fermentation
If you see lots of bubbles rising to the top, or if the jar smells alcoholic, it’s fermenting. This can happen if there was moisture in the jar or if the honey wasn’t raw. If it’s just a few bubbles, it’s fine. But if it’s foaming, toss it and start over. Better safe than sorry.
Don’t Rush It
One week is the minimum, but two weeks is the sweet spot. I’ve tried it in 3 days, and the garlic flavor was weak. Two weeks gives you that deep, savory-sweet taste.
Strain for Daily Use
If you’re taking a teaspoon daily, you don’t want chunks of garlic in your tea or yogurt. Strain it into a smaller jar for easy dispensing. The unstrained jar can stay in the pantry for longer infusions.
Store in a Cool, Dark Place
Sunlight can degrade the honey and the garlic compounds. Keep the jar in a cupboard or pantry, not on the counter in direct sun.
Variations & Substitutions
Once you’ve nailed the basic version, here’s how you can mix it up. I’ve tried all of these.
Ginger Boost
Add a 2-inch piece of fresh ginger, sliced thinly, to the jar with the garlic. It adds a warming kick and boosts anti-inflammatory properties. Great for chest congestion.
Lemon Zest
Add the zest of one lemon (no white pith) to the jar. It adds a bright citrus note that complements the garlic beautifully. It’s like a spa day for your immune system.
Apple Cider Vinegar
Add 1 tablespoon of raw apple cider vinegar to the jar. It adds acidity and helps with digestion. The vinegar will thin the honey slightly, so stir it well. This is my go-to when I feel a sore throat coming on.
Turmeric
Add 1 teaspoon of turmeric powder to the jar. It’s anti-inflammatory and adds a beautiful golden color. It might stain, so be careful with your clothes.
Chili Flake
Add a pinch of red pepper flakes. It adds heat and helps clear sinuses. Great for colds with congestion.
Single Clove Infusion
If you don’t want to make a whole jar, just put one peeled garlic clove in a small cup of honey. Let it sit for 24 hours. It’s a quick fix for a single cough.
Dietary Modifications:
This recipe is naturally vegan, gluten-free, and dairy-free. It’s suitable for most diets, including paleo and keto (in moderation, due to the honey).
Serving & Storage
How to Use It:
Take 1-2 teaspoons daily as a preventive measure. When you feel a cold coming on, take 1 teaspoon every 2-3 hours. I usually take it straight, letting it dissolve slowly in my mouth. You can also stir it into warm (not hot) tea, mix it into yogurt, or drizzle it over oatmeal. Never add it to boiling water, as heat can destroy the beneficial enzymes in the raw honey.
Side Dishes:
It’s not a meal, but it pairs well with anything. I like it with my fall cranberry pecan sourdough focaccia for a savory-sweet snack.
Storage Instructions:
Store the jar in a cool, dark place. It will keep for 3-6 months. Once opened, it’s good for up to 6 months. If it crystallizes, just warm the jar in a bowl of hot water to liquefy it again.
Refrigerator:
You don’t need to refrigerate it, but if you live in a very hot climate, you can. It will thicken up in the fridge, so let it come to room temperature before using.
Freezing:
Honey doesn’t freeze well. It becomes solid and grainy. Don’t freeze it.
Pro tip:
If you’re using it for a cold, keep a small jar on your nightstand. Set a reminder on your phone to take it every few hours. It’s easier to remember when it’s right next to your bed.
Nutrition Information
I’m not a nutritionist, but here’s the breakdown if you’re tracking.
Per Serving (1 teaspoon):
- Calories: 20
- Protein: 0g
- Carbs: 5g
- Fiber: 0g
- Sugar: 5g
- Fat: 0g
- Sodium: 0mg
What’s Good:
Raw honey contains antioxidants and enzymes. Garlic has allicin, which is antimicrobial. It’s a small dose, but it adds up over time.
What to Know:
It’s high in sugar, so use it in moderation if you’re watching your sugar intake. It’s not a substitute for medical treatment, but a supportive supplement.
My Take:
Look, this is sweet. It’s honey. But the benefits of raw honey and garlic outweigh the sugar content for most people. When I’m fighting a cold, I don’t worry about the calories. I worry about getting better. And this helps.
Final Thoughts
So that’s my garlic infused raw honey! I’ve probably talked your ear off at this point, but when you make a remedy this often, you have a lot to say about it.
This has saved me from turning a sniffle into a full-blown cold more times than I can count. It’s my answer to “what can I do naturally” when the weather turns cold. My family loves it, my friends ask for it, and I make it every autumn like clockwork.
Make it yours! Try adding ginger or lemon. Adjust the garlic to your taste. The best remedies are the ones you enjoy taking. If you make this, drop a comment and let me know what you think! I love hearing how recipes turn out in your kitchen. And if something doesn’t work, tell me that too—I’m here to help troubleshoot.
Happy cooking! And I hope your kitchen smells half as good as mine does right now.
Frequently Asked Questions
Can I use regular honey instead of raw honey?
You can, but you’ll miss out on the enzymes and antibacterial properties. Pasteurized honey has been heated, which kills off the good stuff. If you must use regular honey, it will still work as an infusion, but it’s less potent. I always use raw for this reason.
Why did my honey turn dark?
This is normal. As the garlic infuses, the honey darkens slightly. It’s a sign that the infusion is working. If it turns very dark brown or black, it might be over-infused or exposed to heat. But a slight darkening is expected.
Can I eat the garlic after it’s been in the honey?
Yes! The garlic is still edible and flavorful. It’s softer and sweeter than raw garlic. I chop it up and add it to soups, stews, or sautéed veggies. It’s a great way to use up the garlic without waste.
How long does it take to work for a cold?
It’s not instant. It’s a supportive remedy. I take it at the first sign of a tickle in my throat. Most people feel better within 24-48 hours. It’s not a cure, but it helps your body fight the virus.
Can I add other ingredients?
Absolutely. Ginger, lemon zest, turmeric, and chili flakes all work well. Just make sure they’re completely submerged in the honey. Avoid adding anything with high moisture content, like fresh fruit pieces, as it can cause mold.
Why is my honey crystallizing?
This is normal for raw honey. It’s a sign of quality. To liquefy it, place the jar in a bowl of warm water (not boiling) and stir until it’s liquid again. Don’t microwave it, as heat can damage the enzymes.
Is it safe to give to children?
Yes, but not for children under 1 year old. Honey can contain botulism spores, which are safe for older kids and adults but dangerous for infants. For kids over 1, a small teaspoon is fine. Adjust the amount based on their age.
Pin This Recipe!

Garlic Infused Raw Honey for Cold Season
- Total Time: 15 minutes plus 1-2 weeks infusion time
- Yield: Approximately 2 cups 1x
Description
A simple, no-cook immune-boosting remedy made by infusing raw honey with fresh garlic cloves. This savory-sweet syrup soothes sore throats and supports the immune system during cold and flu season.
Ingredients
- 2 cups (600ml) raw, unfiltered honey
- 1 head of fresh garlic (approx. 10–12 cloves)
- Optional: 1 small slice of fresh ginger
- Optional: 1 strip of lemon zest
- Optional: 1 tablespoon raw apple cider vinegar
- Optional: 1 teaspoon turmeric powder
- Optional: Pinch of red pepper flakes
Instructions
- Wash a 16oz or larger glass mason jar with hot, soapy water, rinse thoroughly, and dry completely (optional: bake at 200°F for 5 minutes to ensure zero moisture).
- Separate and peel 10-12 garlic cloves. Chop them finely into small chunks and place them into the prepared jar.
- Pour the raw honey over the garlic, ensuring all garlic pieces are completely submerged. Tap the jar gently to release air bubbles.
- Stir gently with a clean fork or whisk to coat the garlic. Wipe the rim clean, seal tightly, and label with the date.
- Store at room temperature away from direct sunlight. Stir daily for the first week, then every few days thereafter.
- Let infuse for at least 1-2 weeks (up to 3 weeks for stronger flavor). Do not exceed one month.
- Optional: Strain the honey through a cheesecloth or coffee filter into a smaller jar for daily use. Reserve the infused garlic for cooking.
Notes
[‘Ensure the jar is completely dry to prevent mold.’, ‘Garlic must be fully submerged in honey to prevent spoilage.’, ‘Do not use jarred minced garlic as preservatives can interfere with the process.’, ‘Never add honey to boiling water as heat destroys beneficial enzymes.’, ‘Not safe for children under 1 year old due to botulism risk.’, ‘If fermentation occurs (foaming/alcohol smell), discard and start over.’]
- Prep Time: 15 minutes
- Cook Time: 0 minutes
- Category: Condiment
- Cuisine: American
Nutrition
- Serving Size: 1 teaspoon
- Calories: 20
- Sugar: 5
- Carbohydrates: 5
Keywords: garlic honey, immune booster, natural cold remedy, raw honey, garlic infusion, sore throat relief, winter wellness, vegan remedy



