I have to confess something. For years, I avoided making rice dishes at home. Why? Because I was terrified of the mush. You know the type—the sticky, clumpy, overcooked disaster that looks like it belongs in a cafeteria line from 1995. I’d just order takeout, or stick to pasta, because pasta is forgiving. Pasta doesn’t judge you if you walk away for two minutes.
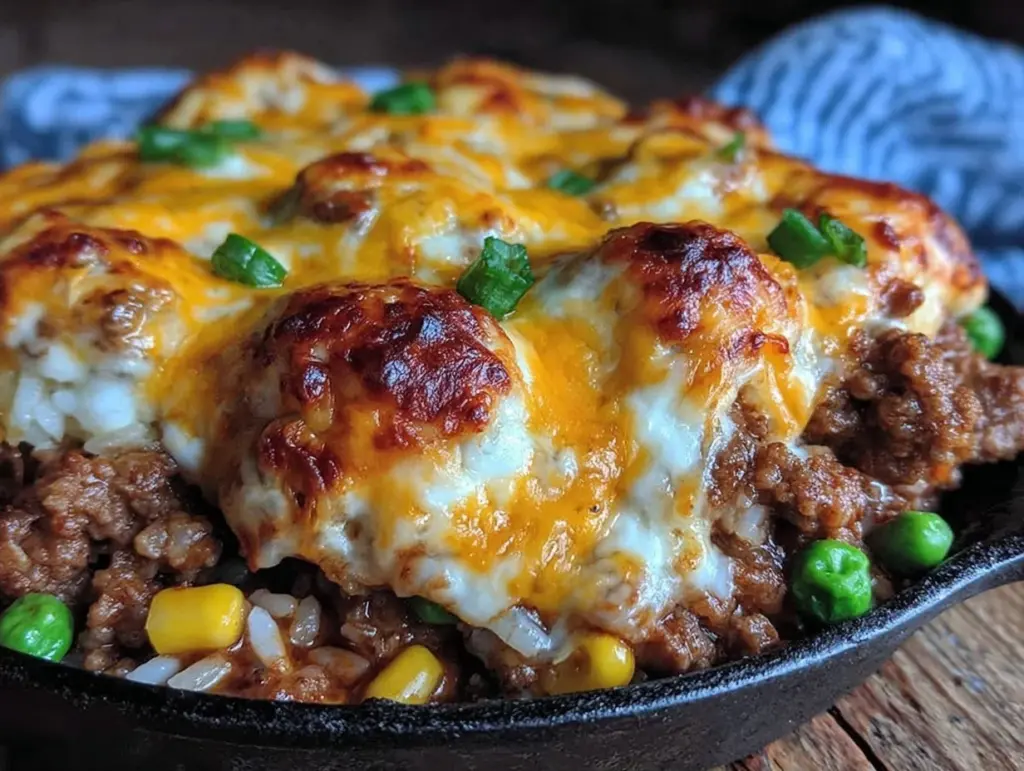
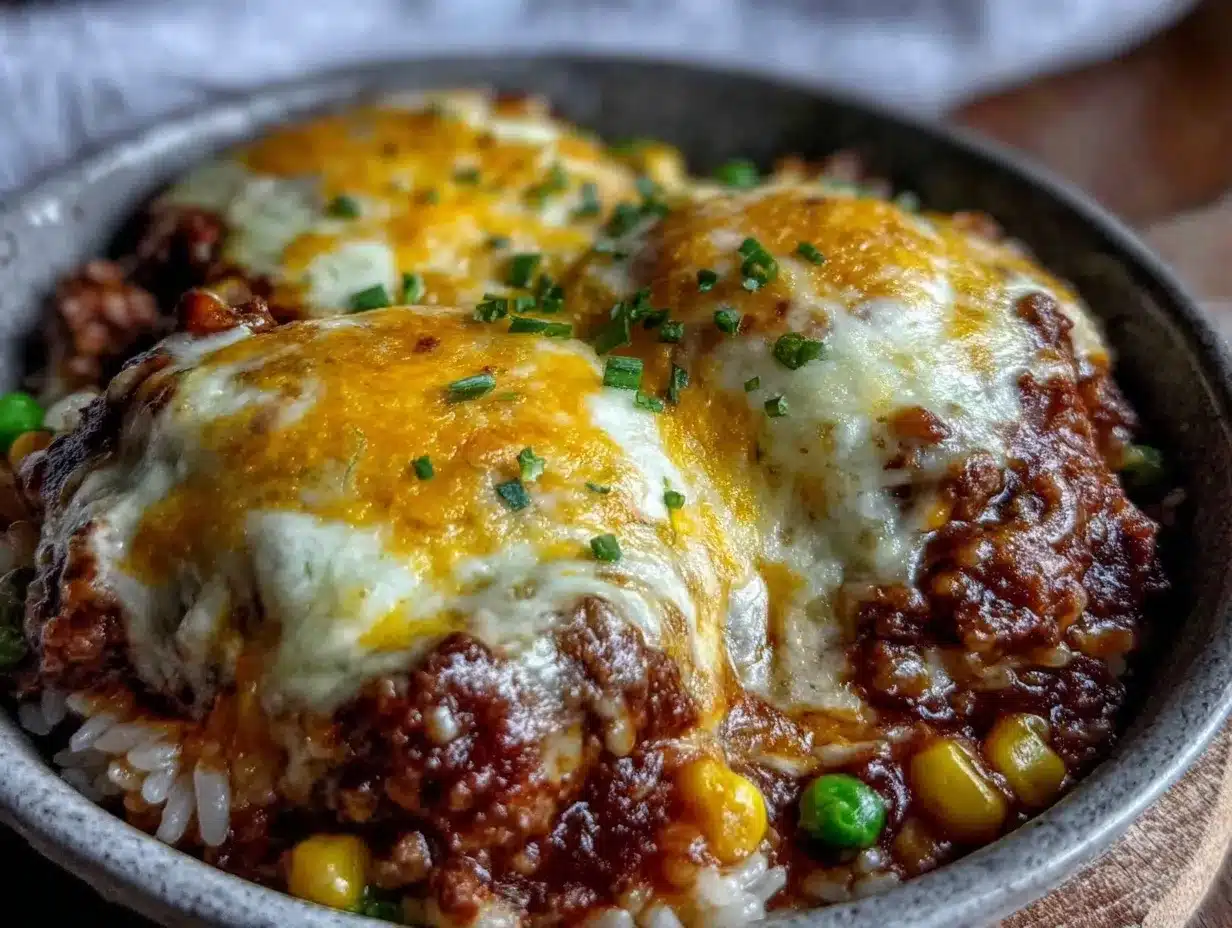
But then I made this sheet pan ground beef and rice skillet. Just one time. And now? I make it at least twice a month. It’s not just because it’s easy (though it is stupidly simple). It’s because the rice comes out fluffy, the beef gets seasoned perfectly, and that layer of melted cheese on top? It’s the kind of comfort food that feels like a warm hug on a cold Tuesday.
This recipe changed how I think about weeknight dinners. It’s not about rushing. It’s about simplicity. You dump everything in a pan, bake it, top it with cheese, and let the oven do the heavy lifting. If you can only make one thing this week, make this. You really can’t mess it up.
Why You’ll Love This Recipe
There are about ten reasons I keep making this sheet pan ground beef and rice skillet, but here are the big ones that have me coming back for seconds (and thirds).
- Minimal Cleanup — Seriously, this is the #1 reason. Everything cooks in one skillet. No boiling rice in a separate pot, no browning beef in another pan. Just one skillet. One pan to wash. My husband thinks I’m a genius, but really, I just hate doing dishes.
- Beginner-Proof — I’ve walked my teenage niece through this recipe over FaceTime. She was nervous about cooking rice, but because everything bakes together, there’s no timing guesswork. The rice absorbs the liquid, the beef cooks through, and the cheese melts. It’s foolproof.
- Flavor That Actually Develops — Some people think “dump and bake” means bland. Not here. We brown the beef first (in the pan, on the stove), which builds a fond—those brown bits stuck to the bottom—that infuses the rice with deep, savory flavor. Then the oven finishes it off. It tastes like it took hours, but it took 30 minutes.
- Customizable Comfort — This is your blank canvas. Add corn, black beans, salsa, jalapeños, or extra cheese. I make this basic version for my picky eaters, but when I want something spicy, I add diced green chilies and hot sauce. It adapts to whatever you have in the fridge.
- Makes Amazing Leftovers — This actually tastes better the next day. The rice continues to absorb the sauce and becomes even more flavorful. I deliberately make extra for lunch. It reheats beautifully in the microwave, becoming soft and cheesy again.
- Budget-Friendly — Ground beef, rice, onions, and cheese. These are pantry staples. You can feed four people for under $15. That’s less than what I pay for a single sandwich at a fast-food place.
This is my go-to when I need dinner to just work. No complicated techniques, no weird ingredients, just reliable, delicious food that makes everyone happy. It’s the kind of meal that reminds you why cooking at home is better than ordering out.
Ingredients You’ll Need
Here’s the best part: you probably have most of this already. This isn’t a shopping list that requires a trip to three different specialty stores. It’s simple, accessible ingredients that come together to make something special.
For the Base
Ground beef (1 pound / 450g) — I use 80/20 lean. The extra fat keeps the rice moist and adds flavor. If you’re health-conscious, 90/10 works, but add a tablespoon of olive oil to the pan to compensate. Don’t use lean turkey unless you want dry rice; turkey absorbs moisture differently.
White onion (1 medium, diced / about 150g) — Yellow onions work too, but white onions are sweeter and cook faster. I dice mine small so it integrates into every bite. If you hate onions, you can skip them, but you’ll miss out on the sweetness.
Rice (1 ½ cups / 300g) — I use long-grain white rice. It’s fluffy and holds its shape. Do not use instant rice—it will turn to mush. Do not use brown rice unless you’re willing to adjust liquid and time; brown rice needs more water and longer cooking, and this recipe is tuned for white. Jasmine rice works too if you prefer a slightly stickier texture.
Chicken broth (1 ½ cups / 360ml) — Low-sodium is best so you can control the salt. I keep it stocked because I use it for everything. Vegetable broth works for a vegetarian version, but the beef flavor won’t be there, so add extra seasoning.
For the Flavor
Garlic (3 cloves, minced / about 1 tablespoon) — Fresh only. No jarred garlic in this recipe. The raw bite of fresh garlic mellows out in the oven and becomes sweet and savory. If you’re really sensitive to garlic, use 2 cloves, but don’t go lower.
Tomato sauce (½ cup / 120ml) — Not marinara, just plain tomato sauce. It adds acidity and moisture without making it too saucy. I use a small can or even a squeeze bottle. If you’re out, you can substitute with a few tablespoons of tomato paste mixed with water, but sauce is easier.
Italian seasoning (1 teaspoon) — Or use equal parts dried basil, oregano, and thyme. It’s the classic flavor profile that makes this taste like comfort food. If you don’t have it, just use dried oregano.
Salt and black pepper — To taste. I use about 1 teaspoon of salt total, but taste your broth first. If it’s salty, reduce the added salt.
For the Topping
Cheddar cheese (1 cup / 100g, shredded) — Sharp cheddar is my favorite because it stands up to the beef. Mild cheddar is fine if you prefer it. Shred it yourself. Pre-shredded cheese has anti-caking agents that prevent it from melting smoothly. I learned this the hard way with a grainy, separated cheese layer.
Optional Add-ins — Green onions (2, sliced) for freshness. Jalapeños (1, diced) for heat. Corn (½ cup, frozen or canned) for sweetness. Black beans (½ cup, drained) for fiber. I throw these in before baking, except for green onions, which I sprinkle on top after.
Personal Tips: I always buy Kirkland Signature ground beef because it’s consistently good quality. For cheese, I buy blocks and grate them on a box grater—it takes 2 minutes and makes a huge difference in texture. If you’re making this for kids, keep the cheese mild and skip the spices.
Equipment Needed
You don’t need fancy equipment for this. Here’s what I actually use.
10 or 12-inch Oven-Safe Skillet — This is the most important tool. It needs to go from stovetop to oven. Cast iron is my favorite because it distributes heat evenly, but stainless steel or an oven-safe non-stick skillet works too. If your skillet has a plastic handle, you can’t put it in the oven. Check your pan first!
Wooden Spoon — For stirring the beef and mixing the rice. Silicone works too. Don’t use metal on non-stick pans.
Measuring Cups and Spoons — Standard stuff. Dollar store versions work fine. Accuracy matters more here than in some recipes because the rice-to-liquid ratio is key.
Sharp Knife and Cutting Board — For dicing the onion and mincing the garlic. A dull knife makes you cry more—learned this the hard way.
Box Grater — For the cheese. Or a microplane if you want it super fine. Food processor works if you’re grating lots of cheese, but for this amount, hand-grating is quick.
Optional but nice: Tongs — For serving. Spatula — For scraping the bottom of the pan if any rice sticks.
How to Make It: Step-by-Step
Alright, let’s make this! I’m walking you through exactly how I do it, including the little tricks I’ve picked up.
Step 1: Prep Your Ingredients (5 minutes)
Before you start cooking, dice your onion, mince your garlic, and measure out your rice and broth. I know it seems fussy, but it makes the actual cooking way less stressful. Grate your cheese while you’re at it. Once you start cooking, things move fast, and you won’t want to stop stirring to chop.
Step 2: Brown the Beef (5-7 minutes)
Heat your oven-safe skillet over medium-high heat. Add the ground beef. Break it up with your wooden spoon as it cooks. You want to cook it until it’s no longer pink, about 5-7 minutes. Drain any excess fat if there’s a lot of it (leave a little for flavor). This step builds the base flavor. Don’t rush it—if the beef is undercooked, it’ll steam instead of brown.
Step 3: Sauté the Aromatics (2 minutes)
Add the diced onion to the beef. Cook for 2 minutes, stirring, until the onion starts to soften. Add the minced garlic and Italian seasoning. Cook for 30 seconds, stirring constantly. The garlic should smell amazing but not brown—browned garlic tastes bitter. This step releases the flavors of the garlic and herbs.
Step 4: Combine and Bake (25-30 minutes)
Stir in the rice, chicken broth, and tomato sauce. Mix well, scraping the bottom of the pan to release any browned bits. Taste the liquid—it should be seasoned well, maybe a little too salty because the rice will absorb it. Add salt and pepper to taste.
Cover the skillet tightly with foil. Place it in a preheated 375°F (190°C) oven. Bake for 25-30 minutes. Do not open the oven during the first 20 minutes. The rice needs to steam and absorb the liquid. After 25 minutes, check the rice. It should be tender and the liquid should be mostly absorbed. If it’s still crunchy, bake for 5 more minutes.
Step 5: Add the Cheese (2 minutes)
Remove the skillet from the oven. Carefully peel back the foil (watch out for steam). Sprinkle the shredded cheese evenly over the top. Return the skillet to the oven, uncovered, for 2-3 minutes, or until the cheese is melted and bubbly. You can also broil it for 1 minute if you want a little crisp on top, but watch it closely—cheese burns fast.
Step 6: Rest and Serve
Let the skillet rest for 5 minutes before serving. This allows the rice to settle and finish absorbing any remaining liquid. It also makes it easier to scoop. Serve hot, topped with green onions, jalapeños, or sour cream if you want.
Total Time: About 35 minutes (10 minutes active, 25 minutes hands-off)
Expert Tips & Tricks
Here’s everything I’ve learned from making this dozens of times. These tips will save you from my mistakes.
Don’t Skip the Foil
Covering the skillet is non-negotiable. It traps the steam, which cooks the rice evenly. If you bake it uncovered, the rice will dry out and burn on top. I use heavy-duty foil to make sure it seals tight.
Use the Right Rice
Long-grain white rice is your friend. It’s fluffy and doesn’t get sticky. Short-grain rice (like sushi rice) will turn into a porridge. Brown rice will not work in this recipe unless you increase the liquid by half and bake for 45+ minutes. Stick to white rice for foolproof results.
Shred Your Own Cheese
Pre-shredded cheese contains cellulose, which prevents clumping but also prevents smooth melting. Your cheese will be grainy and separate. Buy a block of cheddar and grate it. It takes 2 minutes and makes the topping silky and delicious.
Rest Before Serving
I know it’s tempting to dig in immediately, but letting the skillet rest for 5 minutes makes a huge difference. The rice continues to cook and absorb liquid, and the cheese sets slightly. It’s easier to serve and the texture is better.
Check for Doneness
Every oven is different. After 25 minutes, open the oven and check the rice. If it’s still hard, cover it and bake for 5 more minutes. If the liquid is gone but the rice is done, you’re good. If there’s still liquid, bake uncovered for a few minutes to evaporate it.
Variations & Substitutions
Once you’ve nailed the basic version, here’s how you can mix it up. I’ve tried all of these.
Tex-Mex Version
Add 1 can (15oz) drained black beans and 1 cup frozen corn to the mixture. Use salsa instead of tomato sauce. Top with Monterey Jack cheese and sour cream. This is my family’s favorite variation.
Spicy Jalapeño Version
Add 1 diced jalapeño (seeds removed for less heat) with the onions. Use pepper jack cheese. Add a tablespoon of hot sauce to the broth. This adds a nice kick.
Vegetarian Version
Skip the beef. Use 1 cup diced mushrooms and 1 cup diced zucchini. Sauté them with the onions. Use vegetable broth. Add extra Italian seasoning. It’s hearty and satisfying.
Chicken Version
Use diced cooked chicken instead of ground beef. Add it at the end with the rice and broth. It cooks faster, so reduce baking time to 20 minutes. This is lighter and still delicious.
Cheese Variations
You can use any melting cheese. Monterey Jack, mozzarella, or a Mexican blend all work. For a tangier flavor, use a mix of cheddar and cream cheese (dollops on top). For a sharper flavor, use aged gouda.
Serving & Storage
How to Serve:
I usually serve this straight from the skillet at the dinner table—it looks rustic and stays warm. But here are other ways I’ve enjoyed it:
- Garlic Bread — Obviously. It’s the perfect side for soaking up the cheesy sauce.
- Simple Green Salad — A light salad with vinaigrette cuts through the richness of the cheese and beef.
- Roasted Broccoli — Adds a healthy crunch and balances the meal.
- Sour Cream and Salsa — For those who want extra creaminess and tang.
Storage Instructions:
Refrigerator:
Store leftovers in an airtight container for up to 4 days. The rice will absorb more liquid in the fridge, so it might look dry. That’s normal.
Reheating:
Best method: Add a splash of chicken broth or water to a skillet, cover, and heat over medium-low heat. Stir occasionally until heated through. The liquid rehydrates the rice.
Microwave method: Heat in 1-minute intervals, stirring between. Add a splash of water if it’s too dry. It works, but the texture isn’t quite as good as stovetop.
Freezing:
Honestly, this doesn’t freeze well. The rice becomes mushy when thawed, and the cheese separates. Make it fresh or store in the fridge for up to 4 days.
Pro tip: If leftovers are drying out, stir in a tablespoon of butter and a splash of milk when reheating. Brings back that creamy texture.
Nutrition Information
I’m not a nutritionist, but here’s the breakdown if you’re tracking.
Per Serving (based on 6 servings):
- Calories: 450
- Protein: 25g
- Carbs: 40g
- Fiber: 2g
- Sugar: 4g
- Fat: 20g
- Saturated Fat: 10g
- Cholesterol: 70mg
- Sodium: 500mg
What’s Good:
Decent protein from beef and cheese. Calcium from the cheese. Can add vegetables to boost nutrition. More filling than it looks.
What to Know:
Higher in calories from cheese and beef. Contains dairy and gluten (if using certain broths). Moderate sodium (use low-sodium broth to reduce).
My Take:
Look, this is comfort food with cheese and beef. It’s not a diet recipe. But it’s way better than takeout, costs less, and I know exactly what’s in it. When I want to make it lighter, I use 90/10 beef and less cheese. But usually? I just eat a reasonable portion and enjoy it.
Final Thoughts
So that’s my go-to sheet pan ground beef and rice skillet! I’ve probably talked your ear off at this point, but when you make a recipe this often, you have a lot to say about it.
This has saved weeknight dinners more times than I can count. It’s my answer to “what’s for dinner” when I’m tired, don’t want takeout, and still want something that tastes really good. My kids are happy, my husband’s happy, and I’m happy because I’m not stressed about cooking.
Make it yours! Try different add-ins, swap in your favorite vegetables, adjust the spice level. The best recipes are the ones you adapt to your family’s tastes. If you want more easy, one-pan meals, check out my sticky honey BBQ chicken thighs for another no-fuss dinner option.
If you make this, drop a comment and let me know what you think! I love hearing how recipes turn out in your kitchen. And if something doesn’t work, tell me that too—I’m here to help troubleshoot. Happy cooking! And I hope your kitchen smells half as good as mine does right now.
Frequently Asked Questions
Q: Can I use instant rice?
A: No. Instant rice will turn to mush because it’s already partially cooked and will absorb the liquid too quickly. Use long-grain white rice. It’s the only way to get fluffy, separate grains.
Q: My rice is still crunchy—what happened?
A: Either the liquid wasn’t enough, or it wasn’t baked long enough. Check the rice after 25 minutes. If it’s hard, cover it and bake for 5-10 more minutes. Make sure you used the correct amount of broth. If it’s still crunchy after 35 minutes, add a splash of water and bake longer.
Q: Can I make this ahead for a dinner party?
A: Yes! You can assemble the skillet (steps 1-4) up to 24 hours ahead. Cover and refrigerate. When ready to cook, let it sit at room temperature for 15 minutes, then bake as directed. You may need to add 5-10 minutes to the baking time since it’s starting cold. Top with cheese and bake as usual.
Q: Why did my cheese separate or get grainy?
A: The heat was too high, or you used pre-shredded cheese. Always shred your own cheese. Also, make sure you’re not broiling it for too long. Cheese melts best at moderate heat. If it’s already grainy, stir in a splash of cream or milk to bring it back together.
Q: Can I use brown rice?
A: Not in this recipe as written. Brown rice needs more liquid and longer cooking time. If you want to use brown rice, you’ll need to increase the broth by ½ cup and bake for 45-50 minutes. But I recommend sticking to white rice for this specific method.
Q: How do I reheat leftovers without it getting dry?
A: Add a splash of water or broth to the skillet, cover, and heat gently on the stovetop. The liquid rehydrates the rice. In the microwave, add a splash of water and heat in short bursts, stirring in between.
Q: Can I double this recipe?
A: Yes, but you’ll need a larger skillet or two pans. Double the ingredients and bake as directed. Keep an eye on it, as larger volumes may take slightly longer to cook through. Make sure your skillet is oven-safe.
Pin This Recipe!


Sheet Pan Ground Beef and Rice Skillet
- Total Time: 35 minutes
- Yield: 6 servings 1x
Description
An easy, one-pot weeknight dinner featuring seasoned ground beef, fluffy long-grain rice, and melted cheddar cheese baked in a single skillet for minimal cleanup.
Ingredients
- 1 pound ground beef (80/20 lean)
- 1 medium white onion, diced
- 1 ½ cups long-grain white rice
- 1 ½ cups chicken broth (low-sodium)
- 3 cloves garlic, minced
- ½ cup tomato sauce
- 1 teaspoon Italian seasoning
- Salt and black pepper to taste
- 1 cup shredded cheddar cheese
- Optional: 2 sliced green onions, 1 diced jalapeño, ½ cup corn, ½ cup black beans
Instructions
- Preheat oven to 375°F (190°C). Dice onion, mince garlic, and measure rice and broth.
- Heat an oven-safe skillet over medium-high heat. Add ground beef and break it up with a wooden spoon. Cook until no longer pink (5-7 minutes). Drain excess fat if desired.
- Add diced onion to the beef and cook for 2 minutes until softened. Add garlic and Italian seasoning; cook for 30 seconds until fragrant.
- Stir in rice, chicken broth, and tomato sauce. Mix well, scraping the bottom of the pan. Season with salt and pepper to taste.
- Cover the skillet tightly with foil. Bake for 25-30 minutes without opening the oven for the first 20 minutes. Check for doneness; rice should be tender and liquid absorbed.
- Remove skillet from oven. Carefully peel back foil. Sprinkle shredded cheese evenly over the top.
- Return to oven uncovered for 2-3 minutes until cheese is melted and bubbly (or broil for 1 minute for crispiness).
- Let rest for 5 minutes before serving.
Notes
Do not use instant rice as it will turn to mush. Shred your own cheese to ensure smooth melting. Covering the skillet with foil is essential to steam the rice. If using brown rice, increase liquid by half and bake for 45+ minutes. This recipe does not freeze well.
- Prep Time: 10 minutes
- Cook Time: 25 minutes
- Category: Main Course
- Cuisine: American
Nutrition
- Serving Size: 1 serving
- Calories: 450
- Sugar: 4
- Sodium: 500
- Fat: 20
- Saturated Fat: 10
- Carbohydrates: 40
- Fiber: 2
- Protein: 25
Keywords: ground beef, rice skillet, one pot meal, easy dinner, weeknight dinner, sheet pan dinner, comfort food, cheesy rice