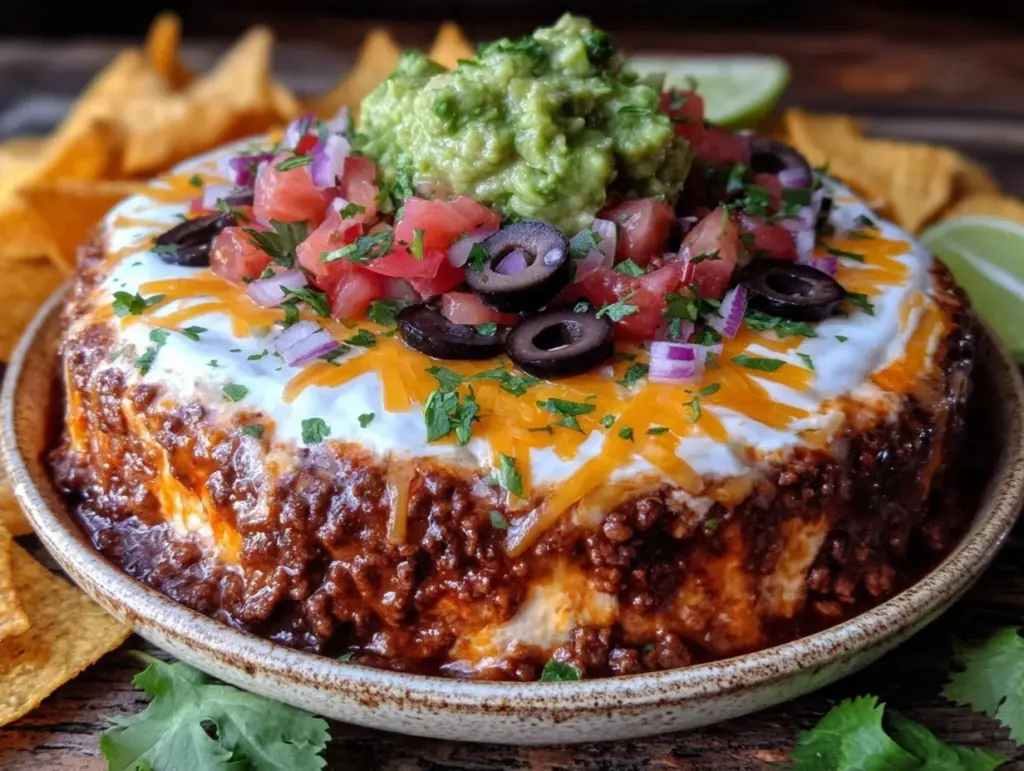
I still remember the exact moment I realized store-bought tortilla chips were a mistake. It was a Super Bowl Sunday, and I had bought a giant tub of the thick, ridged kind. They were sturdy, sure. But they were also dry, salty, and frankly, kind of boring next to a bowl of dip that actually had personality. My husband took one bite of my seven layer taco dip and looked at me like I’d just invented fire. He didn’t say anything, just went back for a third scoop. That was five years ago, and now, whenever someone asks for a party appetizer, I don’t even think twice. This seven layer taco dip is the answer. It’s colorful, it’s crunchy, it’s creamy, and it tastes better than anything you’ll get from a takeout container.
Here’s the thing about this dip: it looks complicated because of all those layers, but it’s actually incredibly simple. You’re not cooking anything. You’re not sautéing onions or simmering a sauce. You’re just assembling ingredients that already taste amazing on their own. I’ve made this for housewarming parties, tailgates, and lazy Sunday nights when I want something that feels festive but requires zero stress. It’s my go-to for any occasion where I need to feed a crowd and look like I put in way more effort than I actually did.
I’ve tested this recipe dozens of times, tweaking the ratios until it was perfect. The secret isn’t in a fancy technique; it’s in the quality of the ingredients and the order in which you layer them. Get this right, and you’ll have a dip that keeps people coming back to your bowl all night long. And trust me, it will disappear fast.
Why You’ll Love This Seven Layer Taco Dip
There are about ten reasons I keep making this dip, but here are the big ones that keep it in my regular rotation.
- Zero Cooking Required — Seriously, if you can open a can and spread mayo, you can make this. I’ve made this while hosting a dinner party where the main course was still in the oven. It’s the ultimate multitasker.
- Make-Ahead Magic — This dip actually gets better after it sits in the fridge for an hour. The flavors meld together, and the layers settle into a cohesive unit. I often make it the morning of the party and just grab it on my way out the door.
- Customizable for Everyone — I’ve served this to picky eaters and foodies alike. Kids love the cheese and guacamole. Adults love the spicy beans and zesty sour cream. You can tweak the heat level or swap ingredients without anyone noticing.
- Visually Stunning — Let’s be honest, we eat with our eyes first. The bright green guacamole, the red salsa, the white sour cream, and the dark beans create a rainbow effect that looks incredible in a clear glass bowl. It’s basically Instagram food before Instagram was even a thing.
- Cost-Effective — Feeds 6-8 people for under $15. That’s cheaper than ordering appetizers at a restaurant and way fresher. Plus, you control the sodium and fat content, which is a nice bonus.
- Perfect with Crispy Chips — This dip needs a sturdy chip. I always pair it with thick, restaurant-style tortilla chips. If you want to go the extra mile, try my crispy loaded potato skins for a different texture, but honestly, nothing beats a good chip with this dip.
This is my go-to when I need an appetizer that just works. No complicated techniques, no weird ingredients, just reliable, delicious food that makes everyone happy. It’s the culinary equivalent of a warm hug.
Ingredients You’ll Need
Here’s the best part: you probably have most of this already. This looks like a long list, but most of it is pantry basics or fridge staples. I’m particular about three ingredients here, and I’ll tell you exactly why.
For the Base Layer
Refried Beans (1 can / 16oz) — I use black beans or pinto beans. I prefer black refried beans because they have a richer, earthier flavor that holds up well against the spices. Make sure you use the creamy kind, not the chunky style. If you can’t find refried beans, you can mash a can of regular black beans with a fork and a little cumin, but the texture won’t be as smooth.
Taco Seasoning (2 tablespoons) — You can use a store-bought packet, but I always make my own. It’s just chili powder, cumin, garlic powder, onion powder, paprika, and a pinch of salt. It tastes fresher and isn’t loaded with anti-caking agents. If you’re in a rush, a packet works fine, just use half a packet if it’s extra spicy.
For the Creamy Layers
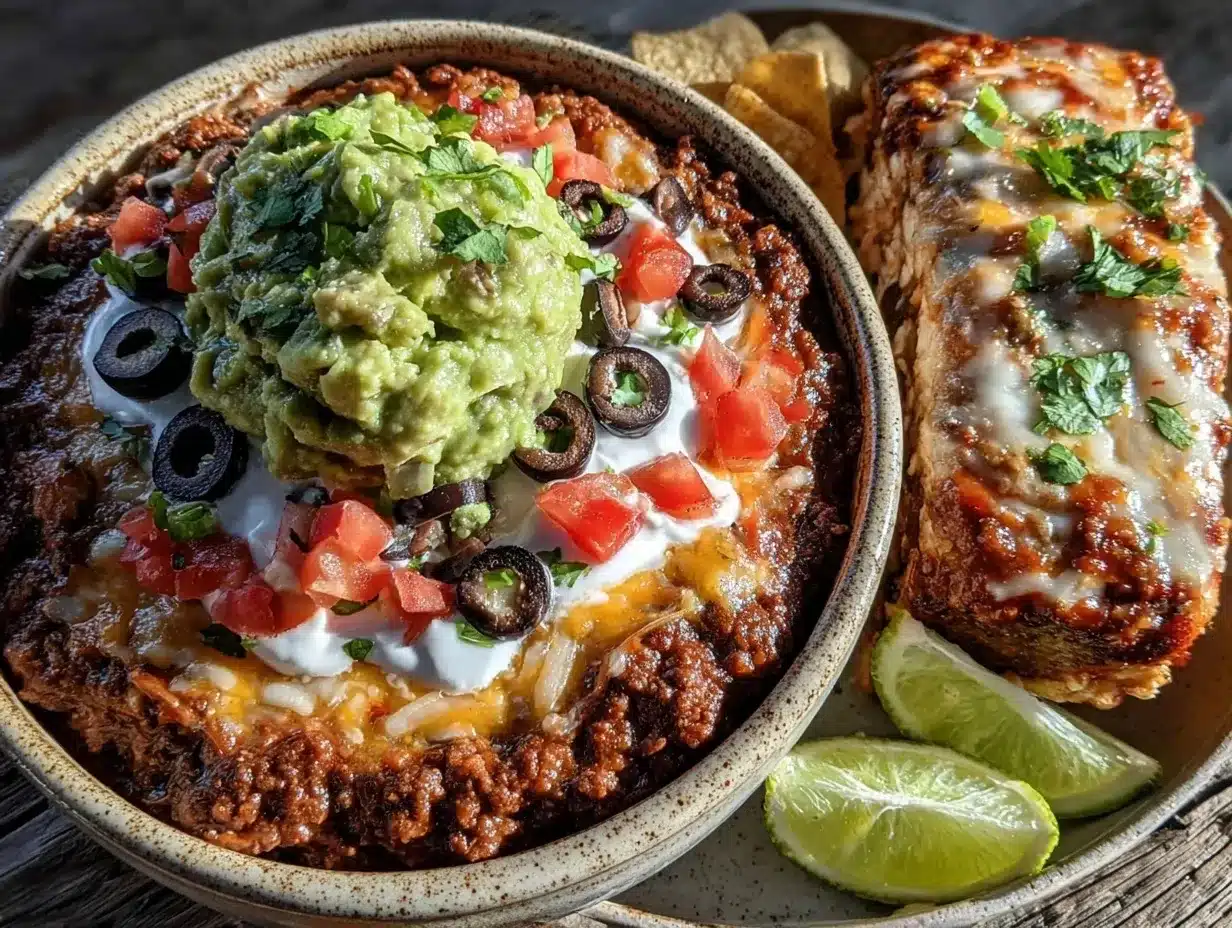
Sour Cream (1 cup / 240g) — Full-fat sour cream is non-negotiable here. Low-fat versions tend to separate and become watery when mixed with lime juice. I like to whisk it with a little lime juice and garlic powder to make a tangy base. This balances the richness of the other layers.
Mayonnaise (½ cup / 120g) — Yes, mayo in a taco dip. Don’t knock it until you try it. It adds a silky smoothness that sour cream alone can’t achieve. I use a good quality mayo like Hellmann’s or Duke’s. If you want to skip it, you can double the sour cream, but the texture will be slightly different.
Guacamole (1.5 cups / 360g) — I make my own guacamole because jarred versions often taste metallic or overly processed. Mashed avocado, lime juice, cilantro, onion, and jalapeño. If you’re in a bind, a high-quality jarred guacamole like Guacamole Ready works, but fresh is always better. The freshness of the avocado is crucial for the flavor profile.
For the Toppings
Shredded Cheese (2 cups / 200g) — I use a Mexican blend cheese, which usually includes cheddar, Monterey Jack, and queso quesadilla. It melts slightly into the layers and adds a salty, creamy bite. You can also use just cheddar if that’s what you have.
Tomatoes (2 medium, diced / about 300g) — Roma tomatoes are best because they’re less watery. If you use beefsteak tomatoes, salt them and let them drain in a colander for 10 minutes first. You don’t want your dip to get soggy.
Green Onions (4 stalks, sliced / about ½ cup) — Both the white and green parts work. They add a sharp, fresh bite that cuts through the richness of the cheese and beans.
Jalapeños (1-2, sliced or diced) — Fresh jalapeños add a crisp heat. If you’re sensitive to spice, remove the seeds and membranes before slicing. For a milder version, use a diced green bell pepper instead.
Cilantro (½ cup, chopped) — Fresh cilantro is the garnish that makes everything taste like a taco. If you’re one of those people who thinks cilantro tastes like soap, you can skip it, but it really ties the flavors together.
Optional Add-ins
Black Olives (½ cup, sliced) — Adds a briny crunch. I love them, but some people don’t. Add them if you’re serving a crowd with varied tastes.
Corn (1 cup, canned or frozen) — Sweet corn adds a nice contrast to the savory beans. Drain it well if using canned.
Equipment Needed
You don’t need fancy equipment for this. Here’s what I actually use.
- Serving Bowl — A wide, shallow glass bowl is ideal. It allows you to see the layers and makes it easy for guests to scoop. A pie dish works too, but a bowl looks more elegant.
- Whisk — For mixing the sour cream and mayo. A whisk ensures there are no lumps and the mixture is smooth.
- Measuring Cups and Spoons — Pretty standard stuff. Dollar store versions work fine.
- Knife and Cutting Board — For dicing tomatoes, slicing green onions, and chopping jalapeños. A sharp knife makes this much easier.
- Spatula — A small offset spatula is perfect for spreading the layers evenly. A regular spoon works too, but an spatula gives you better control.
- Mashing Tool — If you’re mashing your own beans, a potato masher or fork works well.
Tool Tips: Don’t have a glass bowl? A ceramic bowl works, but you won’t see the pretty layers. If you’re serving this at a party, the visual appeal is half the fun. I’m also a big fan of using a smoky caramelized onion dip for variety, but this seven layer version is a classic for a reason.
How to Make It: Step-by-Step
Alright, let’s make this! I’m walking you through exactly how I do it, including the little tricks I’ve picked up.
Step 1: Prep Your Ingredients (10 minutes)
Before you start assembling, get everything ready. Dice your tomatoes, slice your green onions, chop your cilantro, and grate your cheese. If you’re making your own guacamole, do that now. Having everything prepped makes the assembly process smooth and stress-free. Once you start layering, you want to move quickly to keep the ingredients fresh.
Step 2: Make the Bean Base (5 minutes)
In a medium bowl, mix the refried beans with the taco seasoning. If the beans are too thick, add a splash of water or milk to thin them out slightly. You want a spreadable consistency, like peanut butter. Taste and adjust seasoning if needed. This is the foundation of your dip, so make sure it’s well-seasoned.
Step 3: Spread the Beans (2 minutes)
Spoon the bean mixture into the bottom of your serving bowl. Use a spatula to spread it evenly to the edges. Press it down firmly so it creates a solid base. This layer should cover the entire bottom of the bowl. If there are any gaps, the layers above might slide off.
Step 4: Mix the Creamy Layer (3 minutes)
In a separate bowl, whisk together the sour cream, mayonnaise, lime juice, and garlic powder. The mixture should be smooth and creamy. If it’s too thick, add a teaspoon of milk. This layer adds tang and richness that balances the earthy beans.
Step 5: Spread the Cream Layer (2 minutes)
Spoon the sour cream mixture over the bean layer. Spread it evenly, covering the beans completely. Use gentle strokes to avoid mixing the layers too much. You want distinct bands of color. If you mix them, it’ll look muddy instead of pretty.
Step 6: Add the Guacamole (2 minutes)
Spoon the guacamole over the sour cream layer. Spread it evenly. If your guacamole is a bit watery, pat it dry with a paper towel first. You want it to sit nicely on top without seeping into the cream layer. This adds freshness and creaminess.
Step 7: Sprinkle the Cheese (1 minute)
Sprinkle the shredded cheese evenly over the guacamole. Don’t worry about covering every inch; you want some guacamole to peek through. The cheese adds salt and texture. If you’re using a blend, it melts slightly into the warm spots, which is nice.
Step 8: Add the Fresh Toppings (5 minutes)
This is the fun part. Sprinkle the diced tomatoes, sliced green onions, jalapeños, and cilantro over the cheese. Arrange them evenly so the colors are distributed throughout. This layer adds crunch, freshness, and visual appeal. It’s the finishing touch that makes the dip look professional.
Step 9: Chill and Serve
Refrigerate the dip for at least 30 minutes before serving. This helps the layers set and the flavors meld. Serve with sturdy tortilla chips. I recommend restaurant-style chips for the best experience. Enjoy!
Total Time: About 30 minutes (mostly prepping, 5 minutes active assembly)
Expert Tips & Tricks
Here’s everything I’ve learned from making this dozens of times. These tips will save you from my mistakes.
Keep the Layers Distinct
The key to a good seven layer taco dip is clean layers. Use a small offset spatula to spread each layer. Work gently and don’t press too hard. If you mix the layers, it’ll look messy and the textures will get confused.
Drain Your Tomatoes
Watery tomatoes are the enemy. After dicing your tomatoes, place them in a colander and let them drain for 10 minutes. You can even pat them dry with a paper towel. This prevents your dip from becoming soupy.
Make Your Own Guacamole
Jarred guacamole often has preservatives that affect the taste and texture. Fresh guacamole is bright, vibrant, and tastes like actual avocado. It’s worth the extra 5 minutes.
Use Sturdy Chips
Thin, fragile chips will break and make a mess. Look for thick, restaurant-style tortilla chips. They hold up to the weight of the dip and provide a satisfying crunch. If you want to try something different, check out my bacon wrapped smokies for a sweet and savory contrast, but for this dip, stick to thick chips.
Chill Before Serving
Don’t skip the chilling step. It allows the flavors to meld and the layers to set. If you serve it immediately, the layers might slide around. Chill it for at least 30 minutes, or up to 4 hours.
Common Mistakes (and how to avoid them)
- Mistake: Dip is too runny Fix: Drain your tomatoes and guacamole. Use full-fat sour cream, not low-fat.
- Mistake: Layers are muddy Fix: Use a spatula and spread gently. Don’t mix the layers.
- Mistake: Dip is bland Fix: Season each layer slightly. Taste the beans and adjust the seasoning before spreading.
Variations & Substitutions
Once you’ve nailed the basic version, here’s how you can mix it up. I’ve tried all of these.
Vegetarian Version
This recipe is naturally vegetarian. If you want to make it vegan, use vegan cheese, dairy-free sour cream and mayo, and vegan refried beans. It’s surprisingly good.
Spicy Version
Add diced jalapeños to the bean layer. Use a spicy salsa if you’re adding one (though this recipe doesn’t typically use salsa). Add more fresh jalapeños on top.
Chicken Version
Add shredded rotisserie chicken to the bean layer. It makes it more filling and adds protein. Great for a main dish appetizer.
Bean Variation
Use pinto beans instead of black beans. Or try a mix of both. You can also use whole black beans for a chunkier texture, but you’ll need to mash them slightly.
Cheese Variation
Use pepper jack cheese for extra heat. Or use a blend of cheddar and Monterey Jack for mildness. Any shredded cheese works.
Guacamole Variation
If you don’t like avocado, you can skip it and add more sour cream and cheese. But honestly, the avocado is a key component for the texture and flavor.
Serving & Storage
How to Serve:
I usually serve this straight from the fridge in a glass bowl. It looks rustic and colorful. Pair it with sturdy tortilla chips. I also like to serve it with crispy oven-baked garlic parmesan wings for a party spread that has both hot and cold options.
Side Dishes:
This dip is a standalone appetizer. You don’t need much else. But if you’re serving a larger meal, it pairs well with rice and beans, grilled chicken, or a simple salad.
Storage Instructions:
- Refrigerator: Store in an airtight container for up to 3 days. The layers may merge slightly, but it will still taste great.
- Reheating: Do not reheat. This dip is best served cold or room temperature. Heating it will make the guacamole brown and the sour cream separate.
- Freezing: Do not freeze. The dairy and avocado will separate and become grainy.
Pro Tip: If the dip starts to look dry after a day, sprinkle a little extra sour cream or guacamole on top before serving. It’ll refresh the appearance.
Nutrition Information
I’m not a nutritionist, but here’s the breakdown if you’re tracking.
Per Serving (based on 8 servings):
- Calories: 280
- Protein: 8g
- Carbs: 18g
- Fiber: 5g
- Sugar: 3g
- Fat: 18g
- Saturated Fat: 6g
- Cholesterol: 25mg
- Sodium: 450mg
What’s Good:
Decent fiber from the beans and avocado. Good source of healthy fats from the avocado. Can be made lower sodium by using low-sodium beans and cheese.
What to Know:
Higher in calories from the cheese and sour cream. Contains dairy. Moderate sodium.
My Take:
Look, this is a dip. It’s rich, creamy, and delicious. It’s not a diet food. But it’s way better than store-bought appetizers, and you control the ingredients. When I want to make it lighter, I use low-fat sour cream and less cheese. But usually? I just eat a reasonable portion and enjoy it.
Final Thoughts
So that’s my seven layer taco dip! I’ve probably talked your ear off at this point, but when you make a recipe this often, you have a lot to say about it.
This has saved party appetizers more times than I can count. It’s my answer to “what should I bring to the potluck” when I’m tired, don’t want to cook, and still want something that tastes really good. My friends are happy, my family is happy, and I’m happy because I’m not stressed about cooking.
Make it yours! Try different add-ins, swap in your favorite vegetables, adjust the heat. The best recipes are the ones you adapt to your family’s tastes.
If you make this, drop a comment and let me know what you think! I love hearing how recipes turn out in your kitchen. And if something doesn’t work, tell me that too—I’m here to help troubleshoot.
Happy cooking! And I hope your kitchen smells half as good as mine does right now.
Frequently Asked Questions
Q: Can I make this ahead of time?
A: Absolutely! This dip is actually better the next day. You can assemble it up to 24 hours in advance. Just cover it tightly with plastic wrap and refrigerate. The flavors will meld together, making it even tastier.
Q: Can I use jarred guacamole?
A: You can, but fresh guacamole tastes so much better. Jarred versions often have preservatives that affect the flavor. If you must use jarred, choose a high-quality brand like Guacamole Ready. But honestly, fresh is worth the extra 5 minutes.
Q: Why did my dip turn out watery?
A: Usually, this means your tomatoes or guacamole were too wet. Make sure to drain your tomatoes after dicing. If your guacamole is watery, pat it dry with a paper towel before spreading. Also, use full-fat sour cream, not low-fat.
Q: Can I substitute the beans?
A: Yes! You can use pinto beans, black beans, or even a mix. If you’re using whole beans, mash them slightly with a fork. The key is to have a spreadable consistency.
Q: How long does this dip last?
A: It lasts up to 3 days in the refrigerator. After that, the guacamole may start to brown, and the flavors may dull. It’s best eaten fresh.
Q: Can I freeze this dip?
A: No, do not freeze this dip. The dairy and avocado will separate and become grainy when thawed. It’s best made fresh and served immediately or chilled.
Q: What kind of chips work best?
A: Thick, restaurant-style tortilla chips are best. They hold up to the weight of the dip and provide a satisfying crunch. Avoid thin, fragile chips as they will break.
Pin This Recipe!


Seven Layer Taco Dip: Better Than Takeout
- Total Time: 30 minutes
- Yield: 8 servings 1x
Description
A colorful, creamy, and crunchy no-cook appetizer that is perfect for parties and gatherings. This easy-to-assemble dip features distinct layers of seasoned beans, tangy cream, guacamole, cheese, and fresh toppings.
Ingredients
- 1 can (16oz) refried black beans or pinto beans
- 2 tablespoons taco seasoning (homemade or store-bought)
- 1 cup (240g) full-fat sour cream
- 1/2 cup (120g) mayonnaise
- 1.5 cups (360g) fresh guacamole
- 2 cups (200g) shredded Mexican blend cheese
- 2 medium Roma tomatoes, diced and drained
- 4 stalks green onions, sliced
- 1–2 fresh jalapeños, sliced or diced
- 1/2 cup fresh cilantro, chopped
- 1 lime (for juice)
- 1/2 teaspoon garlic powder
- Splash of water or milk (optional, to thin beans)
Instructions
- Prep all ingredients: dice tomatoes, slice green onions, chop cilantro, grate cheese, and prepare guacamole.
- In a medium bowl, mix refried beans with taco seasoning. Add a splash of water or milk if needed to achieve a spreadable consistency.
- Spoon the bean mixture into the bottom of a wide, shallow serving bowl. Spread evenly and press down firmly to create a solid base.
- In a separate bowl, whisk together sour cream, mayonnaise, lime juice, and garlic powder until smooth.
- Spoon the sour cream mixture over the bean layer. Spread gently to cover the beans completely without mixing the layers.
- Spoon guacamole over the sour cream layer. Spread evenly; pat dry with a paper towel if watery.
- Sprinkle shredded cheese evenly over the guacamole.
- Arrange diced tomatoes, green onions, jalapeños, and cilantro over the cheese layer.
- Refrigerate for at least 30 minutes to allow flavors to meld and layers to set.
- Serve with sturdy, restaurant-style tortilla chips.
Notes
[‘Drain diced tomatoes in a colander for 10 minutes to prevent a watery dip.’, ‘Use full-fat sour cream to avoid separation.’, ‘Chill for at least 30 minutes before serving to help layers set.’, ‘Do not freeze or reheat, as dairy and avocado will separate.’, ‘Store in an airtight container in the refrigerator for up to 3 days.’]
- Prep Time: 20 minutes
- Cook Time: 0 minutes
- Category: Appetizer
- Cuisine: Mexican
Nutrition
- Serving Size: 1 serving
- Calories: 280
- Sugar: 3
- Sodium: 450
- Fat: 18
- Saturated Fat: 6
- Carbohydrates: 18
- Fiber: 5
- Protein: 8
Keywords: seven layer taco dip, party appetizer, no cook dip, taco dip, guacamole dip, crowd pleaser, easy appetizer



