Two weeks ago, I came home from work at 6:45 PM, exhausted, with a headache that felt like a vice grip around my temples. The last thing I wanted to do was stand over a hot stove, sweat through my shirt, and worry about burning dinner. I wanted crispy, juicy, comforting food, but I didn’t have the energy to manage three pans, a messy oven, or a complicated recipe that required five hours of prep.
I opened the freezer and pulled out a bag of chicken thighs. I’d bought them on sale because they’re cheaper and more forgiving than breasts, but I’ve always struggled with getting them actually crispy without spending an hour in front of the stove. Then I looked at my air fryer, sitting in the corner like a judgmental little black box. I’d been using it for sweet potato fries and frozen nuggets, but never really committed to it for a real meal.
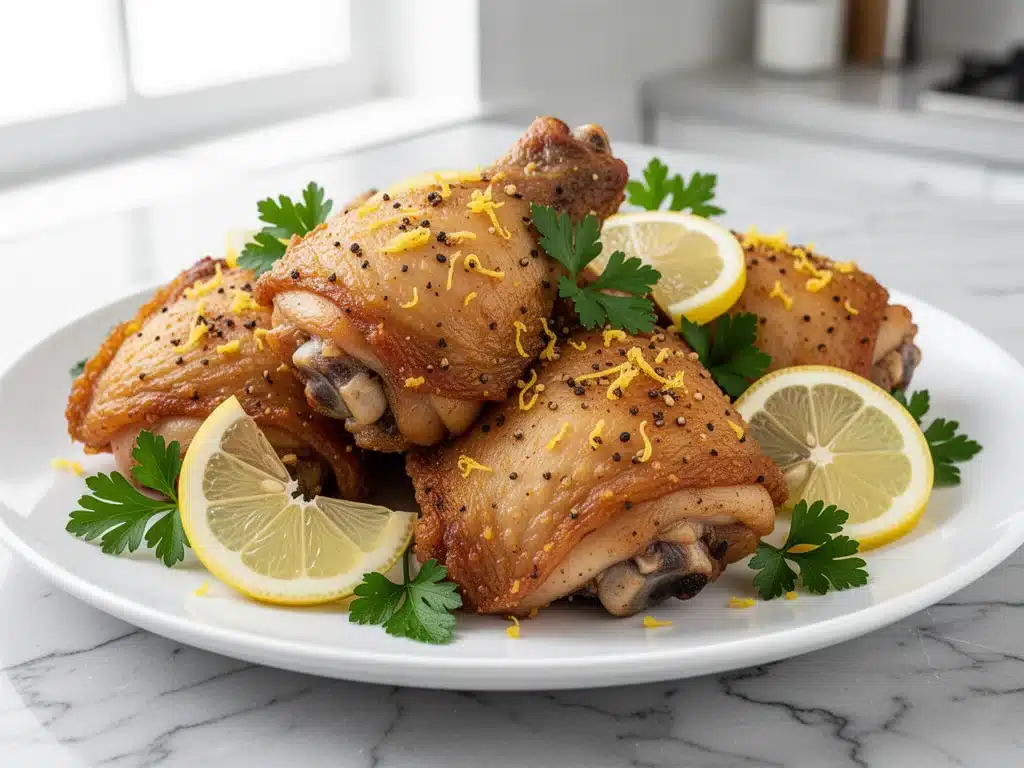
I tossed the thighs in a bowl with some oil and spices, cranked the dial, and went to take a shower. Twenty minutes later, the smell of roasted garlic and paprika filled the house. When I opened the basket, the skin was golden brown and shattering when I tapped it. The meat was juicy enough to drip slightly when I pulled it apart. It was, hands-down, the best chicken dinner I’d made in months, and I hadn’t even moved from my couch.
That night changed everything for me. I realized that crispy air fryer chicken thighs weren’t just a gimmick for college students or people with tiny kitchens. They were a legitimate weeknight hero. Since then, I’ve made this specific version of crispy air fryer chicken thighs at least once a week. It’s become my secret weapon for those “I’m too tired to cook but I refuse to eat cereal” nights. If you’ve been intimidated by the air fryer or think you can’t get good texture without deep frying, you need to try this. It’s faster than ordering takeout, cheaper than delivery, and tastes like you actually tried.
Why You’ll Love This Recipe
I know what you’re thinking. “Another chicken recipe?” But hear me out. This isn’t just cooked chicken. This is the kind of chicken that makes people ask for the recipe before they’ve even finished the first bite. Here’s why crispy air fryer chicken thighs have permanently replaced my oven-roasted chicken routine:
- Actually Crispy Skin — Most air fryer recipes leave the skin rubbery. Not this one. By using a specific drying technique and a touch of baking powder (yes, really), the skin gets shatteringly crisp. I’ve tested this with chicken breasts, but thighs have enough fat to stay juicy while the skin crisps up. It’s the perfect balance.
- Set It and Forget It — You don’t need to babysit this. I set the timer for 15 minutes, and I don’t open the basket until halfway through to flip. That’s it. I can answer emails, fold laundry, or just stare at the wall without worrying about burning dinner.
- Juicy Inside, Crispy Outside — Chicken breasts dry out in the air fryer if you look at them wrong. Thighs? They’re forgiving. The higher fat content keeps the meat moist and tender, while the hot air circulates around the edges to create that crackly exterior. It’s culinary magic.
- Clean Up Takes 30 Seconds — Line the basket with parchment paper (or just wipe it down). No greasy roasting pan to soak. No splattered oven racks. This is the easiest dinner cleanup I’ve ever experienced.
- Meal Prep Friendly — These reheat surprisingly well. I make a batch on Sunday, store them in the fridge, and reheat them in the air fryer for 3-4 minutes before lunch. They stay crispy, unlike oven-baked chicken which gets soggy in the microwave.
This recipe is my go-to when I need dinner to just work. No fancy techniques, no weird ingredients, just reliable, delicious food that makes everyone happy. It’s especially great if you’re trying to eat healthier but still want that comfort food satisfaction.
Ingredients You’ll Need
Here’s the best part: you probably have most of this already in your pantry and fridge. The beauty of this crispy air fryer chicken thighs recipe is how simple the flavor profile is. It lets the chicken shine, with a spice rub that adds depth without overpowering.
For the Chicken
Chicken thighs (2 pounds / 900g) — Boneless, skin-on thighs are non-negotiable here. Skin-on means crispy. Boneless means easy to eat. I prefer boneless because they cook faster and fit better in smaller air fryer baskets. If you can only find bone-in, you’ll need to increase the cooking time by 5-7 minutes, and the crispiness won’t be as even. Look for thighs that are roughly the same size so they cook evenly.
Avocado oil or olive oil (2 tablespoons / 30ml) — You need a little fat to help the spices stick and to promote browning. Avocado oil has a higher smoke point, which is great for air frying. Olive oil works too, but make sure it’s extra virgin so you get that fruity flavor. Don’t use butter—it burns too easily in the air fryer.
Garlic powder (1 teaspoon / 3g) — Fresh garlic burns in the air fryer. Powder gives you that savory garlic flavor without the risk of bitter, charred bits. I use a generous amount because garlic flavor is key here.
Smoked paprika (1 teaspoon / 2g) — This is the secret ingredient. It adds a subtle smokiness that mimics grilled chicken. Regular paprika works, but smoked paprika gives you that “I cooked this outside” vibe. It also adds a beautiful red color.
Onion powder (½ teaspoon / 1g) — Adds a mild sweetness and depth. Don’t skip this; it balances the savory garlic and smoky paprika.
Dried thyme (½ teaspoon / 1g) — Thyme pairs beautifully with chicken. If you don’t have thyme, dried oregano or Italian seasoning works as a substitute. Just keep it simple.
Salt (1 teaspoon / 6g) — Kosher salt is best because it’s easier to control. If you use table salt, reduce to ¾ teaspoon. Salt draws out moisture, which helps the skin crisp up, so don’t be shy with it.
Black pepper (½ teaspoon / 1g) — Freshly cracked is best. It adds a little heat and bite.
Baking powder (1 teaspoon / 2g) — This is the game-changer. I know it sounds weird, but a tiny bit of baking powder raises the pH of the skin, helping it break down proteins faster and crisp up like fried chicken. Make sure it’s aluminum-free baking powder, not baking soda. This is crucial for the texture.
For Serving (Optional)

Lemon wedges — A squeeze of fresh lemon juice right before eating cuts through the richness of the chicken and brightens up the dish. It’s a restaurant trick that I use all the time.
Fresh parsley — Chopped parsley adds a pop of color and freshness. It’s not strictly necessary, but it makes the plate look more appealing, especially if you’re taking photos for Pinterest or Instagram.
Equipment Needed
You don’t need fancy equipment for this. Here’s what I actually use. If you’re just starting with an air fryer, this is the perfect recipe to learn with.
Air Fryer — Obviously. I use a 5.8-quart basket style. If you have a smaller one (3-4 quarts), you’ll need to cook in two batches. Do not overcrowd the basket! Overcrowding steams the chicken instead of crisping it. I’ve ruined batches by trying to fit too many pieces in at once. Trust me.
Bowls — One medium bowl for tossing the chicken with oil and spices. One small bowl for mixing the dry rub if you want to be precise, though I usually just dump it all in.
Paper towels — This is the most important tool you might overlook. You need paper towels to pat the chicken completely dry before seasoning. Moisture is the enemy of crispiness. If the chicken is wet, it’ll steam. Dry it like your life depends on it.
Tongs — For flipping the chicken halfway through. Tongs give you better control than a fork, which pierces the meat and lets the juices escape.
Parchment paper liners (optional) — I use these to make cleanup easier. They have holes in them for air circulation. Just make sure they don’t block the airflow completely. You can also just spray the basket with oil and skip the liners if you prefer.
Cutting board and knife — For slicing the chicken if you want to serve it in strips, or for prepping any side dishes.
How to Make It: Step-by-Step
Alright, let’s make this! I’m walking you through exactly how I do it, including the little tricks I’ve picked up over dozens of batches. This process is straightforward, but attention to detail makes the difference between okay chicken and amazing crispy air fryer chicken thighs.
Step 1: Prep the Chicken (5 minutes)
Take your chicken thighs out of the packaging and pat them thoroughly dry with paper towels. I mean really dry. Rub every surface. If there’s visible moisture, the skin won’t crisp. Place the dried thighs in a large bowl. This step is boring but critical. I learned this the hard way when I rushed it and ended up with rubbery skin.
Step 2: Mix the Spice Rub (2 minutes)
In a small bowl, combine the garlic powder, smoked paprika, onion powder, dried thyme, salt, black pepper, and baking powder. Mix it well with a fork so there are no clumps of salt or baking powder. You want an even distribution of flavor.
Step 3: Coat the Chicken (3 minutes)
Drizzle the avocado oil over the chicken thighs. Use your hands or tongs to toss the chicken until every piece is lightly coated. Then, sprinkle the spice rub over the chicken. Toss again, making sure to rub the spices into the skin. Don’t be shy with the rub. You want a good layer of seasoning. If some pieces look bare, add a little more rub. Consistency is key.
Step 4: Preheat the Air Fryer (2 minutes)
While you’re coating the chicken, preheat your air fryer to 400°F (200°C). This takes about 3-5 minutes depending on your model. Preheating ensures the chicken starts cooking immediately, which helps with browning. If you skip this, the chicken might release more moisture before the crisping starts.
Step 5: Cook the Chicken (15-18 minutes)
Arrange the chicken thighs in the air fryer basket in a single layer. Do not overlap them! Air needs to circulate around each piece. If you have a small air fryer, cook in batches. I usually fit 4-5 thighs in my basket. Cook at 400°F (200°C) for 15 minutes.
At the 7-8 minute mark, open the basket and flip the thighs. Use tongs to turn them over. You’ll see the skin starting to brown. Flip them so the other side gets equal exposure to the heat. This ensures even cooking and crispiness on both sides.
Step 6: Check for Doneness (2 minutes)
After 15 minutes, check the internal temperature of the chicken. It should reach 165°F (74°C) at the thickest part. If it’s not quite there, cook for another 2-3 minutes. Thighs can handle a little more time than breasts without drying out, so don’t stress if they need a few extra minutes. The skin should be deeply golden and crispy.
Step 7: Rest and Serve (5 minutes)
Transfer the chicken to a plate and let it rest for 5 minutes. This allows the juices to redistribute throughout the meat. If you cut into it immediately, the juices will run out, and the chicken will be drier. While it rests, squeeze a little lemon juice over the top if you like. Garnish with fresh parsley if you want that restaurant presentation. Serve immediately while the skin is still hot and crisp.
Total Time: About 25 minutes (5 minutes prep, 15-18 minutes cook, 5 minutes rest)
Expert Tips & Tricks
Here’s everything I’ve learned from making this dozens of times. These tips will save you from my mistakes and guarantee you get that perfect crunch.
Pat Dry, Pat Dry, Pat Dry
I can’t stress this enough. Moisture is the enemy of crispiness. If your chicken thighs are wet from the package, spend the extra 2 minutes drying them. I use paper towels, but a clean kitchen towel works too. The drier the skin, the crispier the result.
Don’t Skip the Baking Powder
I was skeptical too. But the baking powder changes the chemistry of the skin. It helps break down the collagen and promotes browning. Just make sure it’s baking powder, not baking soda. Baking soda can leave a soapy taste if you use too much. One teaspoon is perfect for 2 pounds of chicken.
Single Layer Only
Overcrowding is the most common mistake people make with air fryers. If the chicken pieces are touching, they’ll steam each other. Cook in batches if you have to. It’s better to have 10 minutes of extra cooking time than rubbery chicken. I’ve sacrificed a few batches for this lesson.
Flip Halfway Through
Even if your air fryer has a rotating function, flipping ensures even browning. The heating element is usually at the top, so the top side gets more direct heat. Flipping balances this out. Plus, it’s a good way to check for doneness.
Rest the Meat
I know it’s tempting to dig in immediately, but resting is crucial. It keeps the juices inside the meat. Think of it like steak. If you cut it right away, all the good stuff goes on the plate. Wait those 5 minutes. Your taste buds will thank you.
Common Mistakes (and how to avoid them):
- Mistake: Chicken is dry. Fix: You overcooked it. Thighs are forgiving, but 20 minutes at 400°F might be too long for smaller pieces. Check the temperature early.
- Mistake: Skin is soft. Fix: You didn’t dry the chicken enough, or you overcrowded the basket. Try the paper towel trick and cook in smaller batches.
- Mistake: Spices burned. Fix: Your air fryer runs hot. If the spices are browning too fast, lower the temperature to 380°F (190°C) and add 2-3 minutes to the cook time.
Variations & Substitutions
Once you’ve nailed the basic version, here’s how you can mix it up. I’ve tried all of these, and they’re all winners.
Spicy Version
Add ½ teaspoon of cayenne pepper or red pepper flakes to the spice rub. If you like heat, this is a must. I love the kick it adds to the smoky paprika. It pairs well with a cool dip like ranch or tzatziki.
Honey Garlic Glaze
Instead of dry rub, toss the chicken in a mixture of 2 tablespoons honey, 1 tablespoon soy sauce, and 1 teaspoon garlic powder. Cook as usual. The honey caramelizes in the air fryer, creating a sticky, sweet-savory crust. Just watch it closely because sugar burns fast.
Herb-Crusted
Swap the paprika for fresh rosemary and thyme. Chop them finely and mix with the olive oil. This gives a more Mediterranean flavor profile. Great with roasted vegetables.
BBQ Style
After cooking, brush the thighs with your favorite BBQ sauce. Return to the air fryer for 2-3 minutes to set the sauce. The sauce gets sticky and caramelized. This is my kids’ favorite version.
Dietary Modifications:
- Gluten-Free — This recipe is naturally gluten-free. Just make sure your spices and baking powder are certified gluten-free.
- Dairy-Free — Naturally dairy-free. No butter or cream needed.
- Keto/Low-Carb — Perfect for keto. High protein, low carb. Skip the honey glaze and stick to the dry rub.
If you’re looking for other crispy air fryer chicken thighs variations, you can also try marinating the chicken in buttermilk for 30 minutes before cooking. This tenderizes the meat and adds a tangy flavor. I’ve used this method for chicken and dumplings in the past, but it works great for air frying too.
Serving & Storage
How to serve these crispy air fryer chicken thighs depends on your mood. I usually serve them straight from the air fryer basket at the dinner table—it looks rustic and stays warm. But here are other ways I’ve enjoyed them:
Side Dishes:
- Roasted Vegetables — Toss broccoli, asparagus, or green beans in olive oil and roast them in the air fryer while the chicken cooks. Dinner in one appliance!
- Mashed Potatoes — Classic comfort food. The crispy chicken contrasts nicely with the creamy potatoes.
- Caesar Salad — A simple green salad with a crispy chicken topper is a light but satisfying lunch.
- Rice or Quinoa — Fluffy grains soak up any juices from the chicken. Great for a balanced meal.
Toppings Bar:
When I have guests, I put out: lemon wedges, hot sauce, fresh herbs, and a creamy dipping sauce. Everyone customizes their bowl. It’s interactive and fun.
Storage Instructions:
Refrigerator: Store leftovers in an airtight container for up to 4 days. The skin will soften in the fridge, which is normal.
Reheating: Best method: Reheat in the air fryer at 375°F (190°C) for 3-4 minutes. This restores the crispiness. Microwave reheating makes the skin soggy, so avoid it if you care about texture.
Freezing: You can freeze cooked chicken thighs for up to 3 months. Thaw in the fridge overnight and reheat in the air fryer. The texture might be slightly different, but it’s still good.
Pro tip: If you’re meal prepping, cook the chicken on Sunday, store it in the fridge, and reheat individual portions in the air fryer for a quick, healthy lunch. It’s way better than ordering takeout.
Nutrition Information
I’m not a nutritionist, but here’s the breakdown if you’re tracking. This is per serving (based on 4 servings, 4 thighs per serving):
- Calories: 320
- Protein: 28g
- Carbs: 2g
- Fiber: 0g
- Sugar: 0g
- Fat: 22g
- Saturated Fat: 6g
- Cholesterol: 140mg
- Sodium: 450mg
What’s Good:
- High protein from the chicken thighs
- Low carb, making it keto-friendly
- No added sugars in the basic version
What to Know:
- Higher in fat due to the skin. If you want to reduce fat, remove the skin before eating.
- Sodium content depends on how much salt you use. Use low-sodium spices if you’re watching salt.
My Take:
Look, this is comfort food. Chicken thighs are naturally fattier than breasts, but that fat is what keeps them juicy and flavorful. It’s not a diet recipe, but it’s high in protein and low in carbs. When I want to make it lighter, I remove the skin after cooking. But usually? I just enjoy the crispy skin and call it a win.
Final Thoughts
So that’s my go-to crispy air fryer chicken thighs! I’ve probably talked your ear off at this point, but when you make a recipe this often, you have a lot to say about it. This has saved weeknight dinners more times than I can count. It’s my answer to “what’s for dinner” when I’m tired, don’t want takeout, and still want something that tastes really good. My kids are happy, my husband’s happy, and I’m happy because I’m not stressed about cooking.
Make it yours! Try different spices, add a glaze, or serve it with your favorite sides. The best recipes are the ones you adapt to your family’s tastes. If you make this, drop a comment and let me know what you think! I love hearing how recipes turn out in your kitchen. And if something doesn’t work, tell me that too—I’m here to help troubleshoot.
Happy cooking! And I hope your kitchen smells half as good as mine does right now.
Frequently Asked Questions
Can I use chicken breasts instead of thighs?
You can, but the results will be different. Chicken breasts have less fat, so they cook faster and dry out more easily. If you use breasts, reduce the cooking time to 12-14 minutes and check the temperature early. They won’t be as juicy as thighs, but they’ll still be crispy. I prefer thighs because they’re more forgiving, but breasts work in a pinch.
Why is my chicken skin not crispy?
This usually happens for three reasons: 1) The chicken wasn’t dry enough before seasoning. Moisture prevents crisping. 2) The basket was overcrowded. Pieces need space to circulate air. 3) You didn’t use baking powder. The baking powder helps break down the skin proteins for better browning. Try patting the chicken drier and cooking in smaller batches next time.
Can I freeze raw chicken thighs with the spice rub?
Yes! You can marinate the chicken in the spice rub and freeze it in a ziplock bag. When you’re ready to cook, thaw it in the fridge overnight. The spices might bleed a little, but it won’t affect the flavor. Cook as directed, adding 2-3 minutes to the cook time if the chicken is still cold.
Do I need to flip the chicken halfway through?
Yes, flipping ensures even browning. The air fryer’s heating element is at the top, so the top side gets more direct heat. Flipping balances this out. If you don’t flip, one side might be perfectly crispy while the other is pale and soft. It’s a small step that makes a big difference.
What temperature should I set my air fryer to?
400°F (200°C) is the sweet spot. It’s hot enough to crisp the skin quickly without burning the spices. If your air fryer runs hot, you can lower it to 380°F (190°C) and add 2-3 minutes to the cook time. Always check the internal temperature to ensure the chicken is cooked through.
Can I cook frozen chicken thighs in the air fryer?
I don’t recommend it. Frozen chicken releases a lot of moisture as it thaws, which steam-cooks the skin instead of crisping it. It’s better to thaw the chicken in the fridge overnight before cooking. If you’re in a rush, you can cook frozen thighs, but you’ll need to increase the cook time by 5-7 minutes, and the skin won’t be as crispy.
How do I reheat leftovers without losing crispiness?
The microwave will make the skin soggy. The best way to reheat is in the air fryer at 375°F (190°C) for 3-4 minutes. This restores the crispiness. If you don’t have an air fryer, use a toaster oven or a regular oven at 400°F for 5-7 minutes. Avoid the microwave unless you don’t care about texture.
Pin This Recipe!


Crispy Air Fryer Chicken Thighs: 15 Min Easy Dinner
- Total Time: 25 minutes
- Yield: 4 servings 1x
Description
Juicy, crispy air fryer chicken thighs made with a simple spice rub and baking powder for maximum crunch. A quick, forgiving weeknight dinner that requires minimal prep and cleanup.
Ingredients
- 2 pounds (900g) boneless, skin-on chicken thighs
- 2 tablespoons (30ml) avocado oil or olive oil
- 1 teaspoon (3g) garlic powder
- 1 teaspoon (2g) smoked paprika
- ½ teaspoon (1g) onion powder
- ½ teaspoon (1g) dried thyme
- 1 teaspoon (6g) kosher salt
- ½ teaspoon (1g) black pepper
- 1 teaspoon (2g) aluminum-free baking powder
- Lemon wedges for serving (optional)
- Fresh parsley for garnish (optional)
Instructions
- Pat chicken thighs thoroughly dry with paper towels to ensure crispy skin.
- In a small bowl, mix garlic powder, smoked paprika, onion powder, dried thyme, salt, black pepper, and baking powder.
- Place dried chicken in a large bowl, drizzle with oil, and toss to coat. Sprinkle spice rub over chicken and toss again, rubbing spices into the skin.
- Preheat air fryer to 400°F (200°C).
- Arrange chicken thighs in the air fryer basket in a single layer, ensuring they do not overlap. Cook at 400°F (200°C) for 15 minutes.
- Flip the chicken thighs halfway through cooking (at the 7-8 minute mark) to ensure even browning.
- Check internal temperature; it should reach 165°F (74°C). If needed, cook for an additional 2-3 minutes.
- Transfer chicken to a plate and let rest for 5 minutes before serving.
- Serve with lemon wedges and fresh parsley if desired.
Notes
Patting the chicken dry is crucial for crispiness. Do not overcrowd the basket; cook in batches if necessary. Use aluminum-free baking powder, not baking soda. Resting the meat helps redistribute juices. For reheating, use the air fryer at 375°F for 3-4 minutes to restore crispiness.
- Prep Time: 5 minutes
- Cook Time: 15-18 minutes
- Category: Main Course
- Cuisine: American
Nutrition
- Serving Size: 4 thighs per serving
- Calories: 320
- Sodium: 450
- Fat: 22
- Saturated Fat: 6
- Carbohydrates: 2
- Protein: 28
Keywords: air fryer chicken, crispy chicken thighs, easy dinner, weeknight meals, keto friendly, gluten free, high protein



