Last Tuesday, I was staring at the clock, knowing it was 6:45 PM and dinner was still a complete mystery. My husband had mentioned he was “starving,” which is code for “I will lose my temper if we don’t eat in the next twenty minutes.” My first instinct was to grab the phone and order from that greasy spot down the street—the one where the honey mustard sauce always tastes like high-fructose corn syrup and regret.
But then I looked at the clock again. It takes twenty minutes to drive there, thirty to wait, and another twenty to get home. That’s an hour gone. Plus, I knew the tenders would be soggy by the time they arrived.
So, I did something I rarely do: I decided to make crispy baked honey mustard chicken tenders from scratch. And not just any version. I wanted one that actually had crunch, that tasted like real honey and sharp mustard, and didn’t leave me feeling like I needed a nap immediately after eating. I pulled out the chicken breast, the panko breadcrumbs, and the jar of Dijon mustard that’s been sitting in my fridge since Christmas. I had no idea if it would work. I just knew I was tired of the takeout cycle.
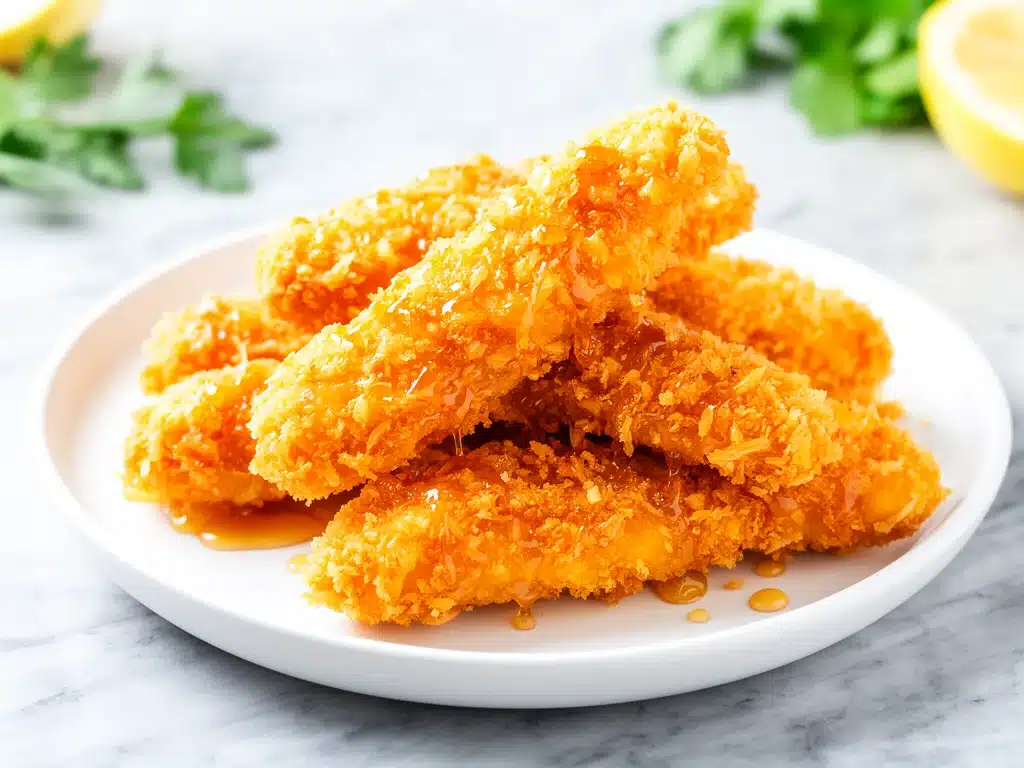
Thirty minutes later, the kitchen smelled like a high-end restaurant, not a fast-food joint. We dug in, and my husband actually paused mid-bite. “Is this… is this the good stuff?” he asked. The kind with the golden crust that shatters when you bite it? The kind with a sauce that’s tangy, sweet, and addictive? I nodded, trying to hide my pride. It was better than takeout. Honestly, it was miles ahead.
That night changed my weeknight routine. I realized I didn’t need to compromise on health or speed to get that crave-worthy comfort food experience. Since then, I’ve made these chicken tenders at least fifteen times. I’ve tweaked the breading, tested different mustards, and figured out the exact oven temperature to keep them crispy without drying them out. This recipe is my answer to “what’s for dinner?” when I want something delicious, satisfying, and genuinely good for us. It’s my go-to for busy nights, and I promise you, once you try it, you’ll never look at a takeout menu for chicken tenders again.
Why You’ll Love This Recipe
There are a lot of chicken tender recipes out there, but this specific take on crispy baked honey mustard chicken tenders hits a sweet spot that’s hard to find. It’s not just about the flavor; it’s about the texture and the convenience. Here’s why this has become a permanent fixture in our weekly meal rotation:
- Actually Crispy (Not Soggy) — The secret isn’t deep frying; it’s the panko breadcrumb coating and the baking rack. I’ve tried just throwing them on a sheet pan, and they get soggy in the middle. Using a wire rack allows air to circulate, so you get that shatteringly crisp exterior that reminds me of restaurant-quality food, but baked in my own oven.
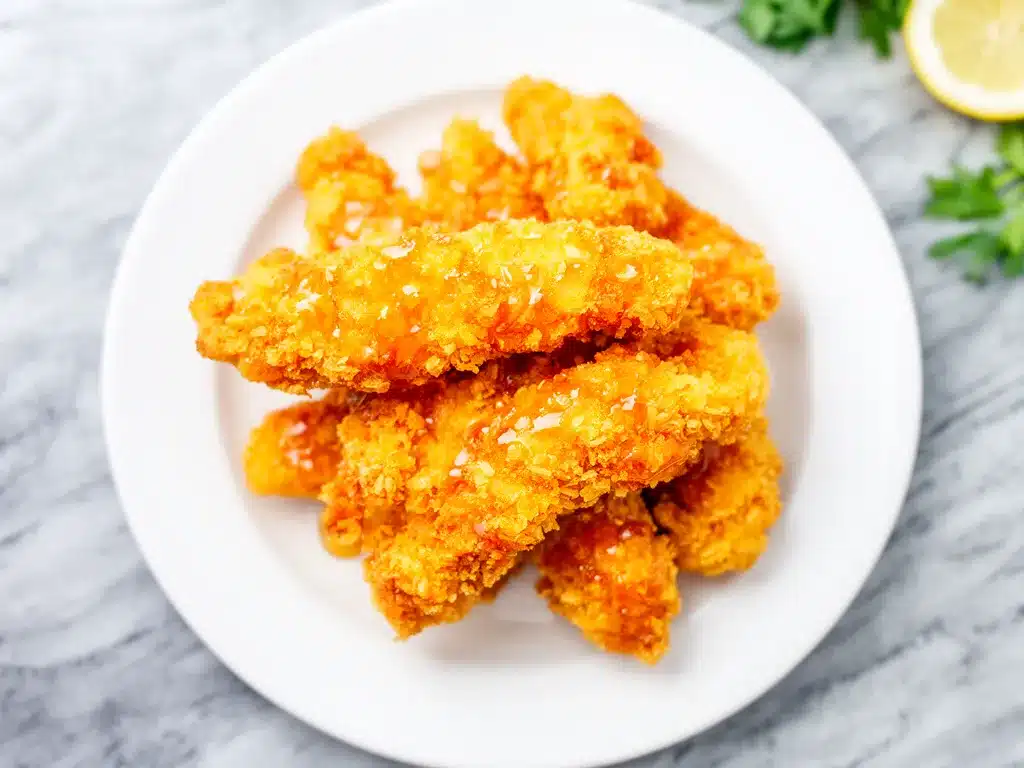
- Sauce That Sticks — Most honey mustard recipes result in a watery mess that slides off the chicken. I developed a glaze technique where you brush the sauce on *after* baking, then broil for just a minute. It caramelizes slightly and clings to the breading. It’s sticky, sweet, and tangy in the perfect ratio.
- Under 30 Minutes — From thawing the chicken to pulling it out of the oven, it takes about 25 minutes. I can get this on the table faster than I can scroll through delivery apps. It’s the ultimate weeknight savior.
- Healthier Without Sacrificing Flavor — Baking means significantly less oil than frying. You get that crunch without the heavy grease. My kids eat them for lunch, and I don’t feel guilty serving them up. It’s protein-packed and feels like a treat.
- Perfect for Meal Prep — These keep well in the fridge for up to four days. I often make a double batch on Sunday. They reheat surprisingly well in the air fryer or toaster oven, keeping that crunch intact. It’s my secret weapon for busy Wednesday lunches.
Real talk: this is the recipe I make when I want to feel like a good cook without spending hours in the kitchen. It’s reliable, delicious, and universally loved, even by the pickiest eaters in my house.
Ingredients You’ll Need
One of the best things about these crispy baked honey mustard chicken tenders is that you likely have most of these ingredients already. It’s a pantry-friendly recipe that relies on simple, high-quality components. I’m particular about a few things here, so pay close attention to the details.
For the Chicken & Breading
Chicken Breast (1.5 pounds / 680g) — I use boneless, skinless chicken breasts. For even cooking, I slice them into strips about 1-inch thick. If your breasts are huge, cut them in half lengthwise first. Uniform size is key so they all cook at the same rate.
Panko Breadcrumbs (1 cup / 100g) — This is non-negotiable. Regular breadcrumbs are too dense and will make the coating heavy. Panko creates those airy, crispy flakes that we all love. I buy the Japanese-style panko from the Asian aisle or the large container at Costco for better value.
All-Purpose Flour (½ cup / 60g) — This acts as the glue. It helps the egg wash stick to the chicken and the breadcrumbs stick to the egg wash. Don’t skip this step, or your breading will slide off in the oven.
Eggs (2 large) — Beaten with a fork. Some people use buttermilk, but I prefer the egg wash for a lighter coating. If you want extra tang, you can whisk a teaspoon of Dijon into the eggs.
Seasonings — I use a mix of 1 teaspoon garlic powder, 1 teaspoon onion powder, ½ teaspoon paprika, ½ teaspoon salt, and ¼ teaspoon black pepper. The paprika adds a subtle warmth and helps with that golden-brown color. If you have smoked paprika, use it—it adds a nice depth.
For the Honey Mustard Glaze
Dijon Mustard (3 tablespoons) — I use a good quality Dijon, like Grey Poupon or a local brand. It has a sharp, tangy bite that cuts through the sweetness. Avoid the yellow prepared mustard; it’s too sweet and lacks complexity.
Raw Honey (3 tablespoons) — Use real honey. Artificial honey substitutes don’t caramelize the same way and can taste waxy. If you’re out of honey, maple syrup is a decent backup, but the flavor profile changes slightly.
Apple Cider Vinegar (1 teaspoon) — This is the secret weapon. It adds acidity to balance the sweet honey and savory mustard. It brightens up the whole sauce. Don’t skip it, even if you think it’s too much.
Mayonnaise (1 tablespoon) — Yes, mayonnaise. It emulsifies the sauce, making it creamy and helping it stick to the chicken without being too runny. It adds richness without overpowering the other flavors.
Optional: Sriracha or Cayenne — If you like a little heat, add ½ teaspoon of sriracha or a pinch of cayenne. It turns it into a spicy honey mustard, which is amazing with cold beer.
Equipment Needed
You don’t need fancy gadgets for this. Here’s what I actually use to get the best results.
Wire Rack — This is the most important tool. Place a wire cooling rack over a baking sheet. This elevates the chicken, allowing hot air to circulate underneath. Without it, the bottom gets soggy. I use a standard 12×16 inch rack.
Baking Sheet — A large rimmed baking sheet to catch any drips. Line it with parchment paper for easy cleanup, though it’s not strictly necessary since the rack does most of the work.
Three Shallow Bowls — For the dredging station. One for flour, one for eggs, one for panko. I use small pie dishes or shallow casserole dishes. They’re wide enough to roll the chicken in easily.
Pastry Brush — For applying the glaze. Silicone brushes are easier to clean than bristle ones. Make sure it’s heat-resistant if you plan to use it under the broiler.
Sharp Knife — For slicing the chicken breasts into even strips. A dull knife will tear the meat and make uneven pieces.
How to Make It: Step-by-Step
Alright, let’s make this! I’m walking you through exactly how I do it, including the little tricks I’ve picked up over time.
Step 1: Prep the Chicken (5 minutes)
Take your chicken breasts and place them on a cutting board. If they have a thick end, slice that off and trim it to match the thickness of the rest. You want uniform pieces. Slice the breasts into strips about 1-inch wide and 3-4 inches long. This ensures they cook evenly and stay juicy. Pat them dry with paper towels. Moisture is the enemy of crispiness, so get them as dry as possible.
Step 2: Set Up Your Dredging Station (5 minutes)
Arrange three shallow bowls in a row. In the first bowl, mix the flour with half of your seasonings (salt, pepper, garlic powder, paprika). In the second bowl, whisk the eggs. In the third bowl, mix the panko breadcrumbs with the remaining seasonings. This ensures every bite is seasoned perfectly.
Step 3: Bread the Chicken (5 minutes)
Dredge each chicken strip in the flour, shaking off any excess. Dip it into the egg wash, letting the excess drip off. Finally, press it firmly into the panko mixture. Make sure to coat it well, pressing down gently so the breadcrumbs adhere. Place the breaded tenders on a clean plate. Don’t stack them; let them sit for a minute while you finish the rest. This helps the breading set.
Step 4: Bake to Crispiness (20 minutes)
Preheat your oven to 400°F (200°C). Place the wire rack on the baking sheet and spray it lightly with cooking spray. Arrange the chicken tenders on the rack, leaving space between each piece. This air circulation is crucial. Bake for 15 minutes, then flip the tenders over. Spray the tops lightly with oil or cooking spray—this helps them brown. Bake for another 5-7 minutes, or until the internal temperature reaches 165°F (74°C) and the coating is golden brown.
Step 5: Make the Glaze (2 minutes)
While the chicken bakes, whisk together the Dijon mustard, honey, apple cider vinegar, mayonnaise, and any optional spices in a small bowl. It should be smooth and glossy. Taste it. If it’s too sweet, add a splash more vinegar. If it’s too tangy, add a teaspoon more honey.
Step 6: Glaze and Broil (2 minutes)
Remove the chicken from the oven. Brush a generous layer of the honey mustard sauce over the top of each tender. Turn the oven to broil (high). Place the rack back in the oven for 1-2 minutes. Watch it closely! You want the sauce to bubble and caramelize slightly, not burn. The sugars in the honey can go from golden to black very quickly.
Step 7: Serve Immediately
Take them out and let them rest for 2 minutes. This allows the juices to redistribute. Serve with extra honey mustard for dipping. They’re best eaten hot and crispy.
Expert Tips & Tricks
Here’s everything I’ve learned from making these dozens of times. These tips will save you from my early mistakes.
Don’t Skip the Rack
I cannot stress this enough. If you bake them directly on the pan, the bottoms steam instead of bake. You’ll get a soggy underside. The rack is the difference between “okay” and “amazing.”
Press the Breadcrumbs
When you coat the chicken in panko, press down. Don’t just roll it. You want those flakes to embed into the egg wash. If they’re loose, they’ll fall off in the oven. Use your fingers to pat them on.
Use Room Temperature Ingredients
For the glaze, make sure your honey and mayonnaise are at room temperature. Cold ingredients can seize up or separate. If your honey is crystallized, microwave it for 10 seconds to loosen it up.
Watch the Broiler
Broilers are powerful. One minute can mean perfect caramelization; two minutes means charcoal. Keep the oven door slightly ajar if your broiler runs hot, and stand there with a timer. Do not walk away.
Double Batch for Leftovers
These reheat beautifully. I often make double the amount. Store leftovers in an airtight container in the fridge. To reheat, use an air fryer at 350°F for 3-4 minutes. It restores the crispiness better than the microwave.
Variations & Substitutions
Once you’ve nailed the basic version, here’s how you can mix it up. I’ve tried all of these.
Spicy Honey Mustard
Add 1 teaspoon of sriracha or ½ teaspoon of cayenne pepper to the glaze. It adds a kick that pairs perfectly with the sweetness. Great for adults who like heat.
Gluten-Free Option
Swap the all-purpose flour for a 1:1 gluten-free flour blend. Use gluten-free panko breadcrumbs (available at most major grocery stores). The texture is slightly denser but still crispy.
Whole Wheat Crunch
Mix half regular panko with half whole wheat panko for a nuttier flavor and extra fiber. It’s a subtle change but adds a nice depth.
Baked, Not Broiled
If you’re worried about burning the glaze, skip the broiler. Brush the sauce on during the last 5 minutes of baking. It won’t caramelize as much, but it will be safer and still delicious.
Dipping Sauce Version
Make extra glaze and serve it on the side for dipping. This is great for parties or if you have kids who prefer their tenders plain.
Serving & Storage
How to Serve:
I usually serve these with a simple side of roasted sweet potato fries or a crisp green salad with vinaigrette. The tangy salad cuts through the richness of the chicken. Garlic bread is also a classic choice.
Storage:
Store leftovers in an airtight container in the refrigerator for up to 4 days. The breading will soften slightly over time, which is normal.
Reheating:
Avoid the microwave if you want to preserve the crunch. Use an air fryer or toaster oven at 350°F for 3-5 minutes. This revives the crispiness. If you must use the microwave, place a paper towel under the chicken to absorb moisture, but expect a softer texture.
Freezing:
You can freeze the unbreaded chicken strips, but I don’t recommend freezing the breaded ones before baking. The breading can get soggy upon thawing. If you have leftover cooked tenders, freeze them in a single layer on a baking sheet, then transfer to a freezer bag. They’ll keep for 2 months. Reheat from frozen in the air fryer.
Nutrition Information
I’m not a nutritionist, but here’s the breakdown if you’re tracking. These are estimates per serving (based on 4 servings).
- Calories: 380
- Protein: 35g
- Carbs: 25g
- Fat: 15g
- Fiber: 1g
- Sugar: 12g
What’s Good: High in protein, which keeps you full. The baking method reduces fat compared to frying.
What to Know: The honey adds sugar, so keep an eye on portion sizes if you’re watching carbs. The sodium is moderate, mostly from the mustard and flour.
Look, this is comfort food. It’s not a diet recipe, but it’s far healthier than takeout. I balance it with vegetables and enjoy it as a treat.
Final Thoughts
So that’s my go-to crispy baked honey mustard chicken tenders! I’ve probably talked your ear off at this point, but when you make a recipe this often, you have a lot to say about it. This has saved weeknight dinners more times than I can count. It’s my answer to “what’s for dinner?” when I’m tired, don’t want takeout, and still want something that tastes really good.
My kids are happy, my husband’s happy, and I’m happy because I’m not stressed about cooking. Make it yours! Try different mustards, add some heat, or serve it with your favorite sides. The best recipes are the ones you adapt to your family’s tastes.
If you make this, drop a comment and let me know what you think! I love hearing how recipes turn out in your kitchen. And if something doesn’t work, tell me that too—I’m here to help troubleshoot. Happy cooking! And I hope your kitchen smells half as good as mine does right now.
Frequently Asked Questions
Can I use chicken thighs instead of breasts?
Yes, but they will cook faster and have a higher fat content. Use boneless, skinless thighs and reduce the baking time by about 5 minutes. They’ll be juicier but less “tender-like” in texture.
Why did my breading fall off?
Usually, this happens because the chicken wasn’t patted dry, or you didn’t press the breadcrumbs firmly enough. Moisture prevents the flour from sticking. Make sure to pat the chicken dry and press the panko on with your fingers.
Can I make this in an air fryer?
Absolutely! Air fry at 375°F for 10-12 minutes, flipping halfway. Spray with oil before cooking. It’s even crispier than baking. Brush with glaze in the last 2 minutes.
What’s the best mustard to use?
Dijon is the standard for a reason—it’s tangy and smooth. If you want a milder flavor, use whole grain mustard. Avoid yellow mustard; it’s too sharp and lacks the complexity needed for a glaze.
Can I prep these ahead of time?
Yes! Bread the chicken strips and store them on a parchment-lined baking sheet in the fridge for up to 24 hours. Bake them straight from the fridge, adding 2-3 minutes to the cooking time.
Is the honey mustard sauce too sweet?
The recipe is balanced, but taste it before brushing. If it’s too sweet for you, add a teaspoon more vinegar or a pinch of salt to balance the flavors.
How do I store leftovers?
Store in an airtight container in the fridge for up to 4 days. Reheat in an air fryer or toaster oven to maintain crispiness.
Pin This Recipe!
Crispy Baked Honey Mustard Chicken Tenders: Better Than Takeout
- Total Time: 35 minutes
- Yield: 4 servings 1x
Description
These crispy baked honey mustard chicken tenders are a healthier, faster alternative to takeout. Using panko breadcrumbs and a wire rack ensures a shatteringly crisp exterior, while a tangy-sweet glaze adds flavor without the grease.
Ingredients
- 1.5 pounds boneless, skinless chicken breasts
- 1 cup panko breadcrumbs
- ½ cup all-purpose flour
- 2 large eggs, beaten
- 1 teaspoon garlic powder
- 1 teaspoon onion powder
- ½ teaspoon paprika
- ½ teaspoon salt
- ¼ teaspoon black pepper
- 3 tablespoons Dijon mustard
- 3 tablespoons raw honey
- 1 teaspoon apple cider vinegar
- 1 tablespoon mayonnaise
- Cooking spray
- Optional: ½ teaspoon sriracha or cayenne pepper
Instructions
- Preheat oven to 400°F (200°C). Place a wire rack on a rimmed baking sheet and spray lightly with cooking spray.
- Slice chicken breasts into 1-inch wide strips, trimming thick ends for uniform size. Pat dry with paper towels.
- Set up a dredging station with three shallow bowls: one with flour mixed with half the seasonings, one with beaten eggs, and one with panko mixed with remaining seasonings.
- Dredge each chicken strip in flour, dip in egg wash, then press firmly into panko breadcrumbs. Place on a clean plate.
- Arrange tenders on the wire rack, leaving space between pieces. Bake for 15 minutes.
- Flip tenders, spray tops lightly with oil or cooking spray, and bake for another 5-7 minutes until internal temperature reaches 165°F (74°C).
- While chicken bakes, whisk together Dijon mustard, honey, apple cider vinegar, mayonnaise, and optional spices to make the glaze.
- Remove chicken from oven. Brush generously with glaze.
- Broil on high for 1-2 minutes, watching closely, until sauce bubbles and caramelizes slightly.
- Let rest for 2 minutes before serving immediately with extra sauce for dipping.
Notes
Do not skip the wire rack; it prevents the bottom from getting soggy by allowing air circulation. Press breadcrumbs firmly onto the chicken to ensure they adhere. Watch the broiler closely as honey can burn quickly. For leftovers, reheat in an air fryer at 350°F for 3-4 minutes to restore crispiness.
- Prep Time: 15 minutes
- Cook Time: 20 minutes
- Category: Main Course
- Cuisine: American
Nutrition
- Serving Size: 1 serving (approx. 3
- Calories: 380
- Sugar: 12
- Sodium: 450
- Fat: 15
- Saturated Fat: 3
- Carbohydrates: 25
- Fiber: 1
- Protein: 35
Keywords: chicken tenders, honey mustard chicken, baked chicken, healthy dinner, weeknight meals, panko chicken, crispy chicken, better than takeout