Last winter, during one of those brutal cold snaps that makes you want to hibernate under three blankets, I ordered a sheet cake from a fancy bakery. You know the type—the one that promises “decadence” and “richness” on their website. I paid $40 for a square of dry, cardboard-like sponge topped with a layer of frosting so sweet it made my teeth ache. It sat on my counter for two days, staring at me like a judgmental ghost. I finally cut a slice, and it tasted like… well, like sugar and disappointment.
That was the breaking point. I looked at the ingredients list (hydrogenated oil? really?), threw the rest in the trash, and decided I was done paying premium prices for dessert that didn’t taste like love. I wanted something that looked impressive enough for a dinner party but felt like a hug from the inside out. I wanted the kind of chocolate cake that makes you close your eyes and forget your to-do list for five minutes.
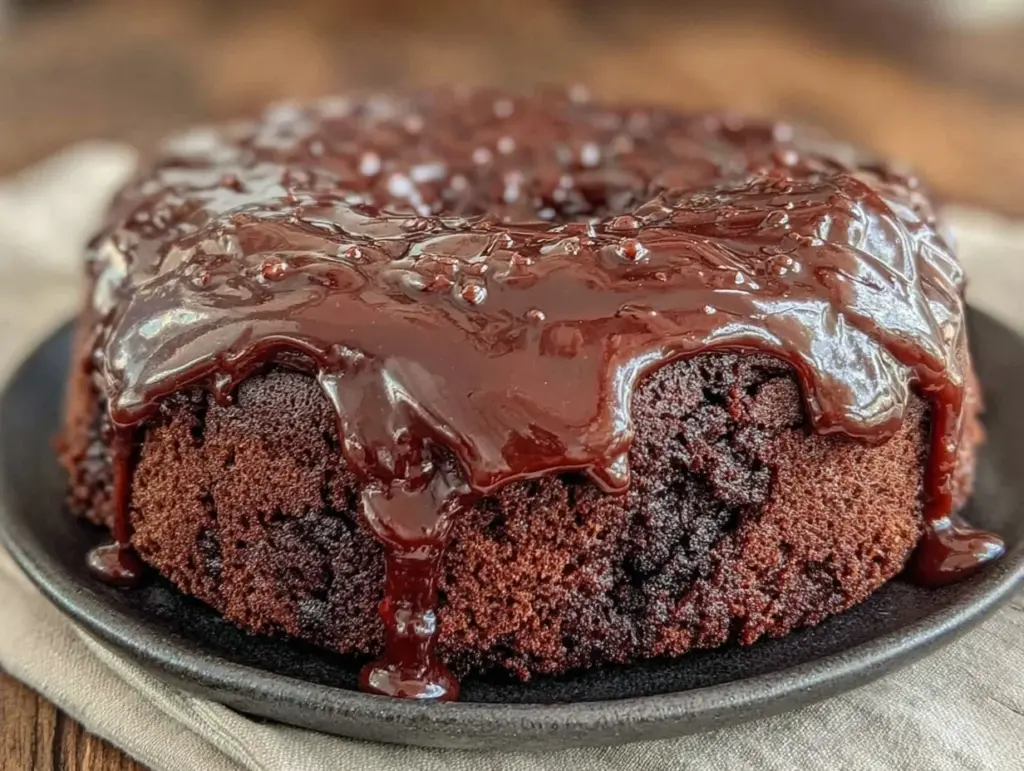
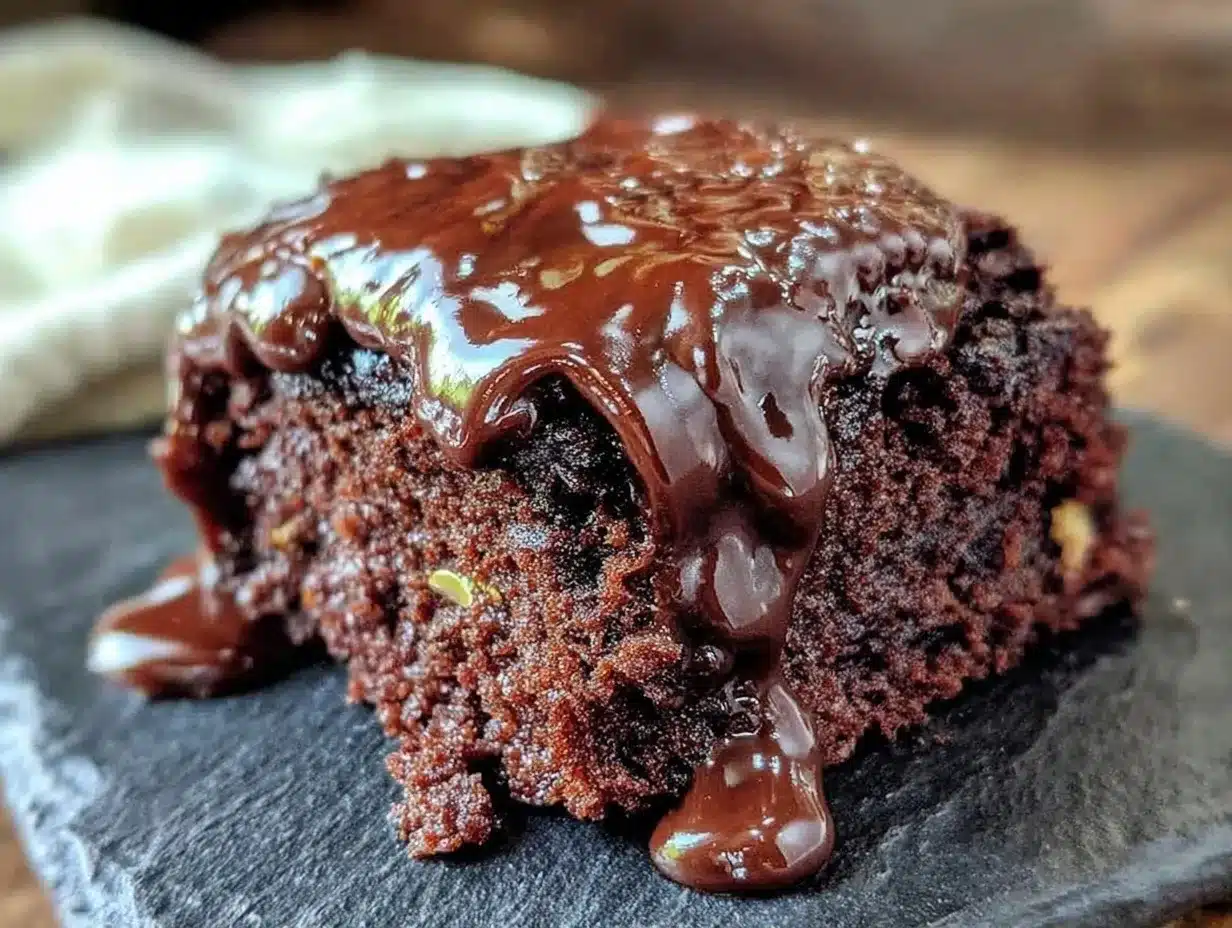
So, I went into my kitchen and started testing. And testing. And testing. I tried every ratio of cocoa to flour, every type of chocolate, every method of mixing. I burned two batches of the frosting because I wasn’t paying attention to the heat (oops). I ended up with a cake that is dark, moist, and utterly fudgy—a texture closer to a brownie than a traditional sponge. The kicker? The frosting. It’s a warm, poured chocolate glaze that sets into a thin, crackly shell while staying gooey underneath.
This ultra-fudgy chocolate sheet cake has become my secret weapon. I’ve made it for holiday gatherings, last-minute dinner parties, and just because it was Tuesday. It’s better than takeout, better than bakery boxes, and honestly? It’s easier than most people think. Once you make this, you’ll never buy a boxed mix again. Trust me on this one.
Why You’ll Obsess Over This Chocolate Sheet Cake
Let’s be real: life is hard. Dinner is hard. Kids are hard. Dessert shouldn’t be hard. It should be the reward. This cake is that reward. It’s the dessert that saves your evening when you’re tired but still want to treat your family like royalty. Here’s why this ultra-fudgy chocolate sheet cake has taken over my kitchen (and my heart):
- It’s Actually Fudgy, Not Dry — Most chocolate cakes are airy and light. This one is dense, moist, and rich. It has that brownie-like texture that makes people ask, “Wait, you baked this yourself?” I’ve had friends who claim they “don’t like chocolate cake” go back for seconds because it just tastes like pure chocolate joy.
- One-Bowl Batter — Seriously. No electric mixer required. You whisk the dry ingredients, add the wet, mix until smooth, and pour it into the pan. That’s it. If you can whisk, you can make this. I’ve made this while holding a toddler and managing a barking dog. It’s that simple.
- The Warm Poured Frosting is Magic — This isn’t your standard whipped buttercream. It’s a warm, glossy chocolate glaze that you pour over the hot cake. It soaks in slightly, creating a fudgy layer between the cake and the crust. The texture contrast—crackly top, gooey middle—is addictive. It’s the kind of detail that makes you feel like a pro baker.
- It Serves a Crowd (Easily) — Because it’s a sheet cake, it’s perfect for feeding people. I’ve cut it into 24 squares for a party, and it lasted all night. It’s also great for meal prepping desserts. Unlike my homemade pumpkin bagels which are best fresh, this cake actually improves after sitting for a day, letting the flavors meld and the frosting set perfectly.
- It Tastes Better Than Takeout — I said it before, and I’ll say it again. That $40 bakery cake? Nowhere near this. This costs about $5 in ingredients and tastes like something from a high-end chocolate shop. It’s indulgent without being pretentious.
This is my go-to when I need to impress but don’t have hours to spare. It’s comfort food elevated. It’s the dessert that turns a regular Tuesday night into a celebration.
Ingredients You’ll Need for Fudgy Perfection
Here’s the good news: you probably have most of this already. This recipe relies on pantry staples, but the *quality* of those staples matters. We’re not cutting corners on the chocolate here.
For the Cake Batter
All-purpose flour (1 ½ cups / 190g) — Standard flour works fine. Don’t switch to cake flour unless you want a lighter crumb, which we don’t. We want fudgy.
Granulated sugar (1 ½ cups / 300g) — Yes, it’s sweet. But the dark chocolate balances it out. Don’t reduce the sugar unless you want a dry cake. Sugar adds moisture.
Cocoa powder (¾ cup / 65g) — Use good quality unsweetened cocoa. I prefer Dutch-processed for a deeper, darker color and less acidity. Natural cocoa works too, but the flavor will be slightly brighter and lighter.
Baking powder & baking soda (1 tsp & 1 ½ tsp respectively) — The double leavening helps the cake rise without becoming airy. It keeps it dense.
Salt (1 tsp) — Crucial. Salt makes chocolate taste like chocolate. Don’t skip it.
Eggs (2 large) — Room temperature is best for emulsifying the batter.
Buttermilk (1 cup / 240ml) — This is the secret to moisture. The acidity tenderizes the gluten. If you don’t have buttermilk, add 1 tablespoon of vinegar or lemon juice to regular milk and let it sit for 5 minutes. It’s a lifesaver.
Vegetable oil (½ cup / 120ml) — Oil keeps cakes moist longer than butter. Butter tastes great, but oil wins for fudgy texture. I use a neutral oil so it doesn’t overpower the chocolate.
Hot coffee or boiling water (1 cup / 240ml) — This is the game-changer. Pouring hot liquid “blooms” the cocoa powder, intensifying the chocolate flavor. You won’t taste coffee; you’ll just taste richer chocolate. If you hate coffee, use boiling water, but coffee is better.
Vanilla extract (2 tsp) — Pure vanilla, please. Fake vanilla will make it taste chemical.
For the Warm Poured Frosting
Semi-sweet chocolate chips (1 ½ cups / 270g) — Don’t use baking chips labeled “low fat.” Use regular semi-sweet. I like Ghirardelli or Lindt for their smooth melt.
Heavy cream (½ cup / 120ml) — Full fat is non-negotiable. This creates the glossy ganache texture.
Unsalted butter (2 tablespoons) — Adds shine and richness.
Salt (a pinch) — Elevates the chocolate.
Optional: Flaky sea salt — For sprinkling on top after pouring. It looks fancy and tastes amazing.
Equipment Needed
You don’t need fancy gear for this. Here’s what I actually use:
9×13 inch baking pan — Glass or metal works. I use glass because I can see the bottom browning. Grease it well and line the bottom with parchment paper for easy removal (though most people just eat it straight from the pan).
Large mixing bowl — Something big enough to whisk the batter without splashing. I use a 4-quart bowl.
Whisk — A balloon whisk is best for incorporating the flour smoothly.
Small saucepan — For melting the frosting. I use a small 1-quart saucepan. It’s easier to control the heat than in a microwave.
Spatula — A heat-proof silicone spatula for scraping the bowl and stirring the frosting.
Measuring cups and spoons — Level off your dry ingredients. Don’t pack them down unless the recipe says so (it doesn’t).
How to Make It: Step-by-Step
Alright, let’s make this! I’m walking you through exactly how I do it, including the little tricks I’ve picked up over dozens of batches.
Step 1: Prep Your Oven and Pan
Preheat your oven to 350°F (175°C). Grease a 9×13 inch pan with butter or non-stick spray. For extra insurance, line the bottom with parchment paper and grease that too. This ensures the cake doesn’t stick, especially since it’s so moist.
Step 2: Mix the Dry Ingredients
In your large bowl, whisk together the flour, sugar, cocoa powder, baking powder, baking soda, and salt. Make sure there are no lumps of cocoa. If you’re feeling paranoid, sift it. I usually just whisk vigorously for 30 seconds.
Step 3: Add the Wet Ingredients
Add the eggs, buttermilk, oil, and vanilla to the dry mix. Whisk until smooth. The batter will be thick and dark. Don’t worry if it looks a bit lumpy; that’s fine.
Step 4: The Hot Liquid Magic
Slowly pour in the hot coffee or boiling water while whisking constantly. The batter will become thin and watery. This is normal! It’s supposed to look like this. The hot liquid activates the cocoa and ensures a fudgy texture. Pour it into the prepared pan.
Step 5: Bake
Bake for 30-35 minutes. Check it at 30 minutes. A toothpick inserted into the center should come out with moist crumbs, not wet batter. If it’s clean, it’s overbaked. We want fudgy, not dry. The cake will pull away slightly from the edges.
Step 6: Make the Warm Frosting
While the cake bakes, make the frosting. In a small saucepan, heat the heavy cream over medium heat until it just starts to simmer (small bubbles around the edges). Do not boil it vigorously. Pour the hot cream over the chocolate chips in a heat-proof bowl. Let it sit for 2 minutes. Then add the butter and salt. Stir gently until smooth and glossy. This is your warm poured frosting.
Step 7: Pour and Finish
Once the cake comes out of the oven, let it cool in the pan for 10 minutes. Then, slowly pour the warm chocolate frosting over the top. Use a spatula to spread it to the edges. It will look glossy and perfect. If you’re feeling fancy, sprinkle flaky sea salt on top immediately.
Let it cool completely before cutting. This lets the frosting set into that amazing crackly shell.
Expert Tips & Tricks
Here’s everything I’ve learned from making this dozens of times. These tips will save you from my mistakes.
Don’t Overbake — This is the #1 mistake. Chocolate cake continues to cook in the hot pan after you take it out. If the toothpick comes out clean, it’s done. If it comes out with wet batter, it needs 2 more minutes. If it comes out with moist crumbs, pull it out immediately.
Use Hot Coffee — I know, I know, you’re not a coffee drinker. But the heat blooms the cocoa. It makes the chocolate flavor 10x stronger. You won’t taste the coffee. I promise. My husband, who hates coffee, loved this cake.
Let the Frosting Sit — When you pour the hot cream over the chips, let it sit for 2 minutes. If you stir immediately, it won’t melt evenly. Patience pays off.
Room Temperature Eggs — Cold eggs can cause the batter to seize slightly. Take them out of the fridge 30 minutes before you start.
Storage is Key — This cake keeps well covered at room temperature for 2 days. After that, refrigerate it. It tastes better cold, like a truffle.
Variations & Substitutions
Once you’ve nailed the basic version, here’s how you can mix it up. I’ve tried all of these.
Dark Chocolate Version — Swap semi-sweet chips for dark chocolate (70% cocoa). It’s richer and less sweet. Perfect if you like your chocolate intense.
Espresso Frosting — Add 1 tablespoon of instant espresso powder to the frosting. It deepens the chocolate flavor even more.
Marshmallow Frosting — Skip the chocolate frosting and pour a warm marshmallow fluff over the cake. It’s like a s’mores cake. My kids love this version.
Gluten-Free — Use a 1:1 gluten-free flour blend. The texture might be slightly denser, but it’s still delicious. I’ve used Bob’s Red Mill and it works great.
Dairy-Free — Use oat milk or almond milk instead of buttermilk (with vinegar). Use coconut oil instead of butter in the frosting. It’s still fudgy and good.
Serving & Storage
How to Serve: I usually serve this straight from the pan with a fork. It’s rustic and inviting. But for a dinner party, I cut it into squares and serve it on a platter with whipped cream on the side. It pairs beautifully with a glass of red wine or a strong cup of coffee. It’s also a great alternative to heavier holiday desserts like my fall brown butter sweet potato pie or the brown sugar bourbon pecan pie bars when you want something chocolate-focused.
Storage: Cover with plastic wrap or foil. It keeps at room temperature for 2 days. In the fridge, it lasts up to 5 days. The frosting hardens in the fridge, so let it come to room temperature before serving for the best texture.
Freezing: You can freeze slices for up to 3 months. Wrap tightly in plastic and foil. Thaw in the fridge overnight. The texture might be slightly drier, but it’s still good.
Nutrition Information
I’m not a nutritionist, but here’s the breakdown if you’re tracking. One square (out of 12) contains approximately:
- Calories: 380
- Protein: 5g
- Carbs: 52g
- Fat: 18g
- Sugar: 38g
Look, this is chocolate cake. It’s supposed to be indulgent. It’s not a diet recipe. But it’s better than anything you’ll buy at a store. When I want to make it lighter, I cut smaller squares and serve it with fresh berries on the side. But usually? I just eat a square and enjoy it.
Final Thoughts
So that’s my ultra-fudgy chocolate sheet cake! I’ve probably talked your ear off at this point, but when you make a recipe this often, you have a lot to say about it. This cake has saved my dessert game more times than I can count. It’s my answer to “what’s for dessert?” when I’m tired, don’t want to bake a complicated pie, and still want something that tastes really good.
Make it yours! Try different chocolates, add nuts to the batter, or skip the salt if you prefer. The best recipes are the ones you adapt to your family’s tastes. If you make this, drop a comment and let me know what you think! I love hearing how recipes turn out in your kitchen. And if something doesn’t work, tell me that too—I’m here to help troubleshoot.
Happy baking! And I hope your kitchen smells half as good as mine does right now.
Frequently Asked Questions
Can I use water instead of coffee?
Yes, you can. Boiling water works fine. But coffee makes the chocolate flavor deeper and richer. If you’re worried about the coffee taste, use a mild roast or espresso powder. You won’t taste the coffee, just the chocolate.
Why did my cake sink in the middle?
Usually means it was underbaked. Chocolate cakes are dense and need time to set. Check your oven temperature with a thermometer—it might be running hot. Also, don’t open the oven door too early. I know it’s tempting, but it can cause the cake to collapse.
Can I make this ahead?
Absolutely. Bake the cake a day ahead. Let it cool completely, then cover it tightly. Make the frosting the day you serve it. The cake actually tastes better after sitting overnight as the moisture redistributes.
Why is my frosting grainy?
The heat was too high when you melted the chocolate, or you didn’t stir it enough. Always remove the cream from heat before pouring over chips. Let it sit, then stir gently. If it’s already grainy, you can try adding a tablespoon of warm cream and whisking vigorously to smooth it out.
Can I use milk instead of buttermilk?
Yes, but you need to add acid. Mix 1 tablespoon of vinegar or lemon juice with 1 cup of milk. Let it sit for 5-10 minutes until it curdles slightly. This mimics the acidity of buttermilk, which is key for tenderness.
How do I cut clean slices?
Use a sharp knife. Wipe the knife clean between cuts. For even cleaner cuts, dip the knife in hot water and dry it before each slice. The warm knife cuts through the fudgy frosting without dragging.
Pin This Recipe!
Ultra-Fudgy Chocolate Sheet Cake: 10-Min Homemade Indulgence
- Total Time: 45 minutes
- Yield: 12 servings 1x
Description
A dense, moist, and utterly fudgy chocolate sheet cake with a warm, poured chocolate glaze that sets into a thin, crackly shell. This one-bowl recipe is easier than boxed mixes and tastes better than bakery cakes.
Ingredients
- 1 ½ cups (190g) all-purpose flour
- 1 ½ cups (300g) granulated sugar
- ¾ cup (65g) unsweetened cocoa powder (Dutch-processed preferred)
- 1 tsp baking powder
- 1 ½ tsp baking soda
- 1 tsp salt
- 2 large eggs (room temperature)
- 1 cup (240ml) buttermilk
- ½ cup (120ml) vegetable oil
- 1 cup (240ml) hot coffee or boiling water
- 2 tsp vanilla extract
- 1 ½ cups (270g) semi-sweet chocolate chips
- ½ cup (120ml) heavy cream
- 2 tablespoons unsalted butter
- a pinch of salt (for frosting)
- flaky sea salt (optional, for topping)
Instructions
- Preheat oven to 350°F (175°C). Grease a 9×13 inch baking pan and line the bottom with parchment paper.
- In a large mixing bowl, whisk together the flour, sugar, cocoa powder, baking powder, baking soda, and 1 tsp salt until no lumps remain.
- Add the eggs, buttermilk, vegetable oil, and vanilla extract to the dry ingredients. Whisk until the batter is smooth and thick.
- Slowly pour in the hot coffee or boiling water while whisking constantly. The batter will become thin and watery; this is normal. Pour the batter into the prepared pan.
- Bake for 30-35 minutes, or until a toothpick inserted into the center comes out with moist crumbs (not wet batter). The cake will pull away slightly from the edges.
- While the cake bakes, make the frosting: In a small saucepan, heat the heavy cream over medium heat until it just starts to simmer. Pour the hot cream over the chocolate chips in a heat-proof bowl and let sit for 2 minutes.
- Add the 2 tablespoons of butter and a pinch of salt to the chocolate mixture. Stir gently until smooth and glossy.
- Once the cake is done, let it cool in the pan for 10 minutes.
- Pour the warm chocolate frosting over the cake and spread to the edges. Sprinkle with flaky sea salt if desired.
- Let the cake cool completely before cutting to allow the frosting to set into a crackly shell.
Notes
Do not overbake the cake, as it continues to cook in the hot pan. Use hot coffee to ‘bloom’ the cocoa powder for deeper flavor, though boiling water can be substituted. The cake keeps well at room temperature for 2 days or in the fridge for up to 5 days. For gluten-free, use a 1:1 gluten-free flour blend. For dairy-free, substitute buttermilk with almond/oat milk plus vinegar and butter with coconut oil.
- Prep Time: 10 minutes
- Cook Time: 35 minutes
- Category: Dessert
- Cuisine: American
Nutrition
- Serving Size: 1 square (out of 12)
- Calories: 380
- Sugar: 38
- Sodium: 350
- Fat: 18
- Saturated Fat: 8
- Carbohydrates: 52
- Fiber: 3
- Protein: 5
Keywords: chocolate cake, sheet cake, fudgy cake, easy dessert, one-bowl cake, chocolate glaze, homemade cake, holiday dessert



