I still remember the first time I made these cookies. It was a Tuesday, and I was feeling that specific kind of baking fatigue where you just want something sweet but don’t have the energy to cream butter, sift flour, and chill dough for three hours. I was staring at my pantry, half-expecting to find a shortcut that didn’t exist. Then I found the box mix. Just kidding. (Mostly.)
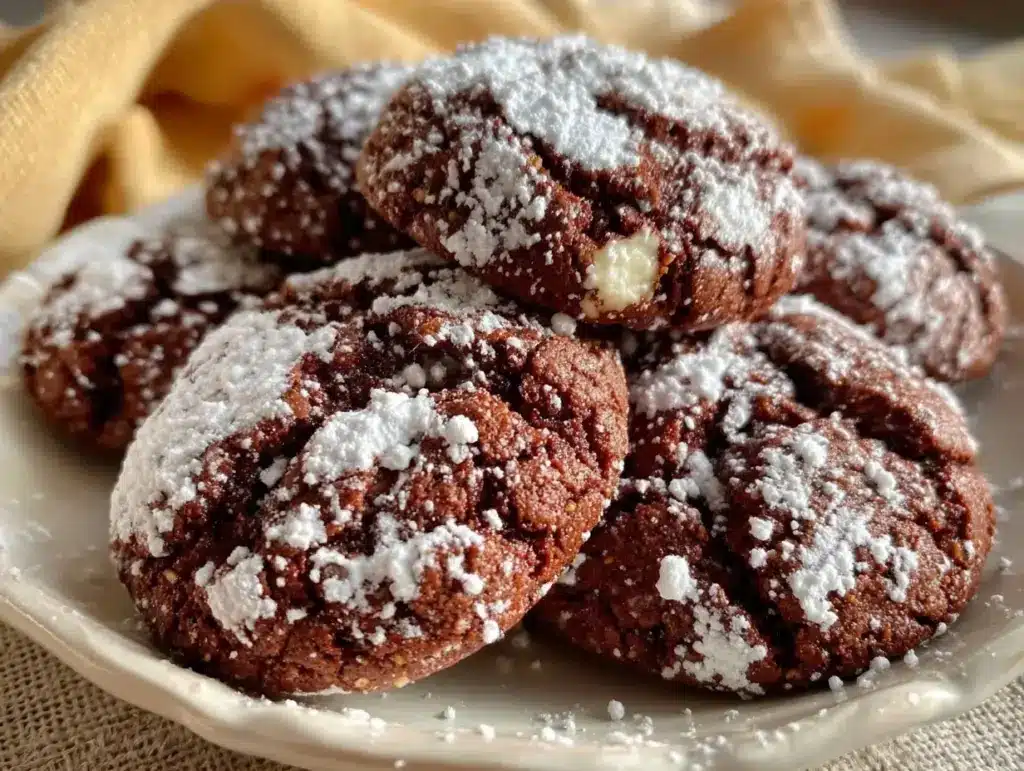
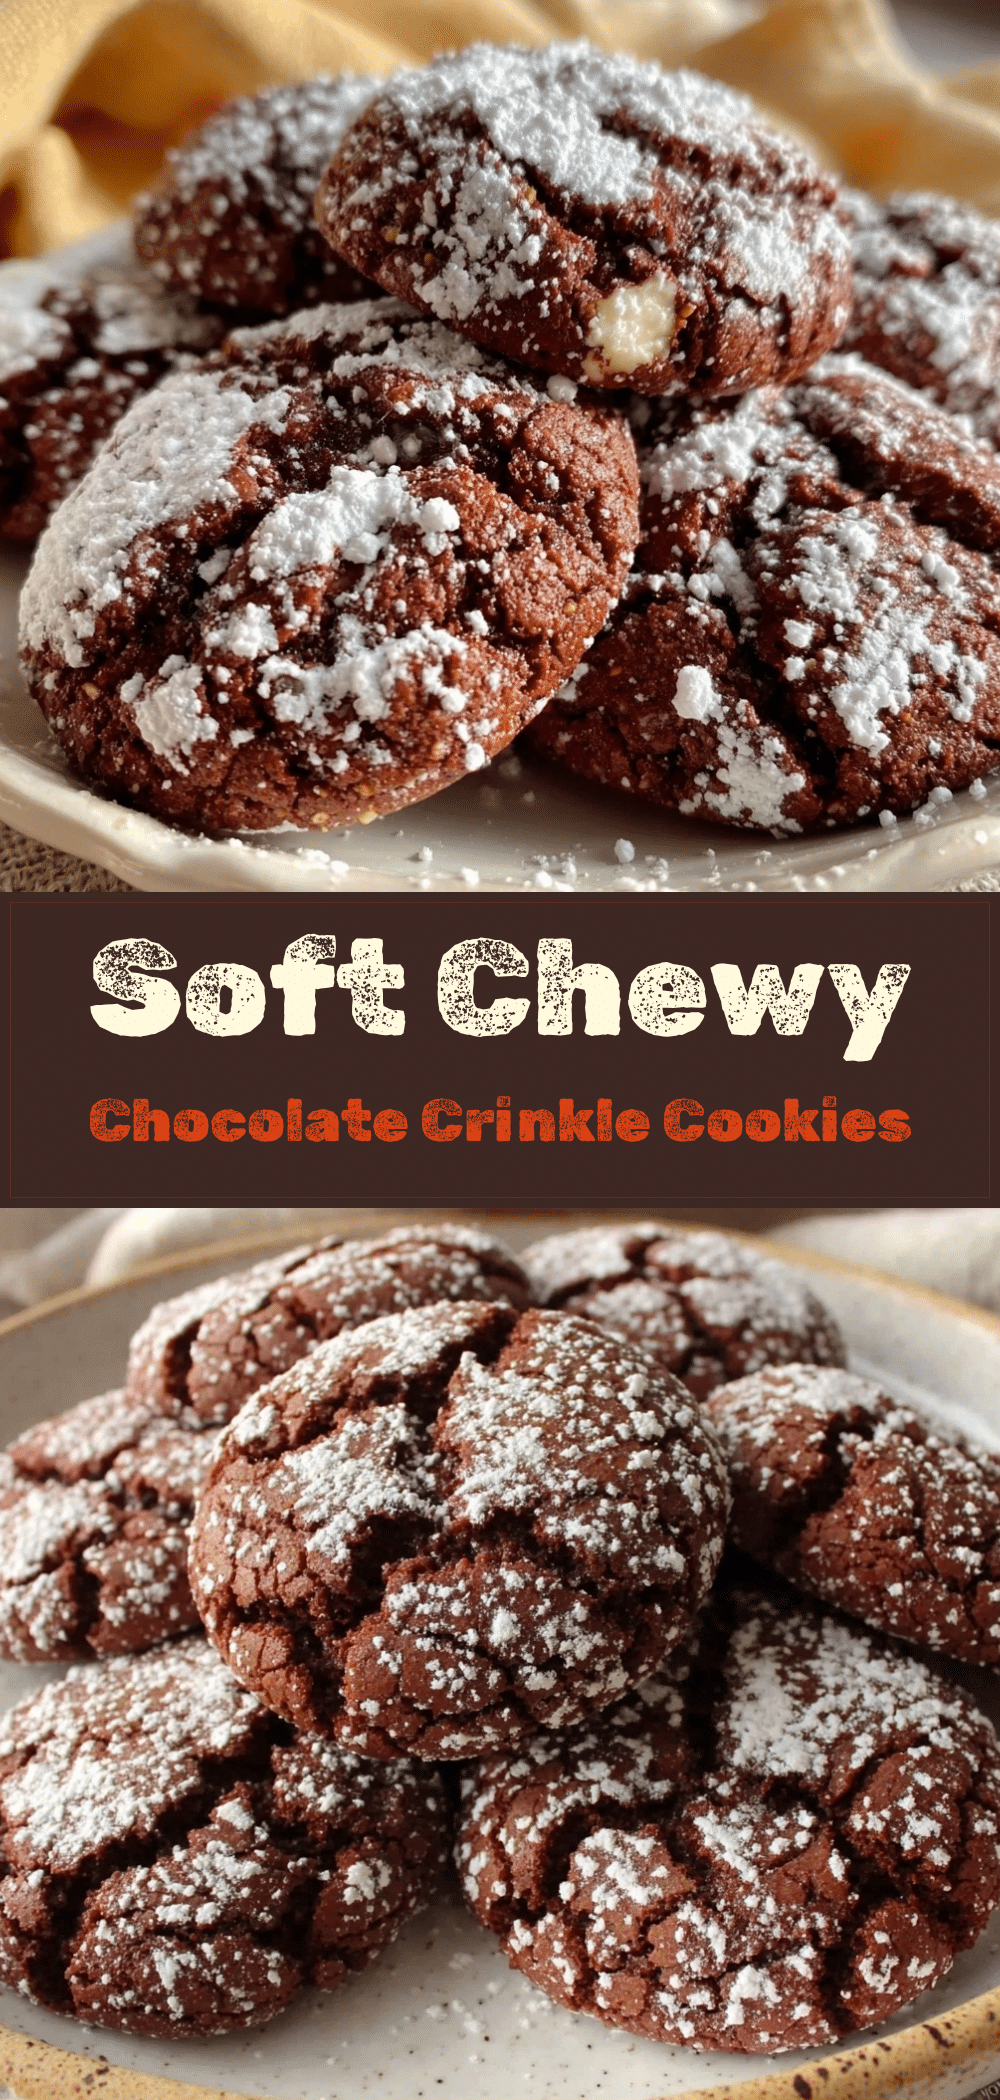
I decided to hack the system. I wanted that deep, dark chocolate flavor, those signature jagged cracks, and the snowy dusting of powdered sugar, but I wanted to do it with ingredients I already had and zero fuss. I mixed, rolled, and baked. When I pulled the tray out of the oven, the cookies looked like little chocolate moons covered in snow. I took one bite, and the texture was exactly what I was hoping for: crisp on the outside, fudgy and soft on the inside.
That was three years ago. Since then, I’ve made these chocolate crinkle cookies so many times that I’ve lost count. They are the ultimate “I need to bake something, but I’m tired” solution. You really can’t mess this up. If you can stir a bowl and roll a ball, you can make bakery-quality cookies at home. No fancy equipment, no tempering chocolate, no complicated techniques. Just simple, delicious, chocolatey goodness.
These cookies have become my go-to for last-minute gatherings, school bake sales, and quiet Tuesday nights. They are forgiving, they are fast, and they taste like you spent hours in the kitchen (even though you didn’t). Let me show you why this is the only chocolate cookie recipe you’ll ever need.
Why You’ll Love This Chocolate Crinkle Cookie Recipe
There are a million cookie recipes out there, but this 3-ingredient chocolate crinkle cookie hits a sweet spot that few others do. It’s not just about being easy; it’s about the result being genuinely impressive.
Stupid Simple — Seriously. You mix the dough, roll it in sugar, and bake. That’s it. I’ve made this with my seven-year-old niece, and she didn’t spill a single thing. If you can boil water, you can make these cookies.
Zero Chill Time — Most chocolate cookie recipes require you to chill the dough for hours so it doesn’t spread. Not this one. The high cocoa content and the way the sugar coating works mean the dough holds its shape perfectly at room temperature. You can go from bowl to oven in under 15 minutes.
Textural Perfection — I’ve tried cookies that are cakey, and I’ve tried cookies that are too crisp. These are in the Goldilocks zone. The edges set into a delicate, crisp shell with those beautiful cracks, while the center stays soft and chewy. It’s the best of both worlds.
Pantry Staples — You probably already have everything you need. Cocoa powder, sugar, eggs, oil, and vanilla. No need for a special trip to the store. It’s the perfect recipe for when you’re craving something sweet but don’t want to order takeout or run out.
Beginner-Proof — This is the recipe I give to people who are scared of baking. There’s no creaming method, no folding, no tempering. You just mix. If you overmix, it doesn’t matter. If you undermix, it still works. It’s designed for success.
I love that these cookies don’t require perfection. They are rustic, they are messy, and they are delicious. They remind me that baking doesn’t have to be a high-stakes performance. It can just be fun, simple, and rewarding.
Ingredients You’ll Need
Here’s the best part: the ingredient list is shorter than most coffee orders. You don’t need fancy chocolate chips or expensive vanilla extract. You just need basics, and you need to use them well.
The Chocolate Base
Unsweetened Cocoa Powder (1 cup / 100g) — This is the star. Use natural, unsweetened cocoa powder, not a chocolate drink mix. I prefer Dutch-processed cocoa because it has a deeper, richer flavor and darker color, but natural works too. Just make sure it’s 100% cocoa, no sugar added. This gives the cookies that intense chocolate taste without needing chocolate chips.
Granulated Sugar (1 cup / 200g) — This goes into the dough. It sweetens the batter and helps create that crisp exterior. Don’t try to reduce this too much, or you’ll lose the texture.
Vegetable Oil (½ cup / 120ml) — I use vegetable or canola oil. Some recipes call for melted butter, but oil keeps these cookies chewy and moist for days. Butter makes them crispier and they stale faster. Oil is the secret to that fudgy center. Olive oil works, but it might add a fruity flavor that doesn’t fit the classic crinkle profile.
Eggs (2 large) — Room temperature eggs are ideal, but straight from the fridge works fine. They provide structure and help the cookies spread slightly. Don’t skip them—they’re the binder.
Vanilla Extract (1 teaspoon) — Enhances the chocolate flavor. Use real vanilla, not imitation. If you’re out, it’s okay, but you’ll miss that warm, aromatic note.
The Coating
Granulated Sugar (½ cup / 100g) — For rolling. This is what creates the contrast between the dark cookie and the white cracks.
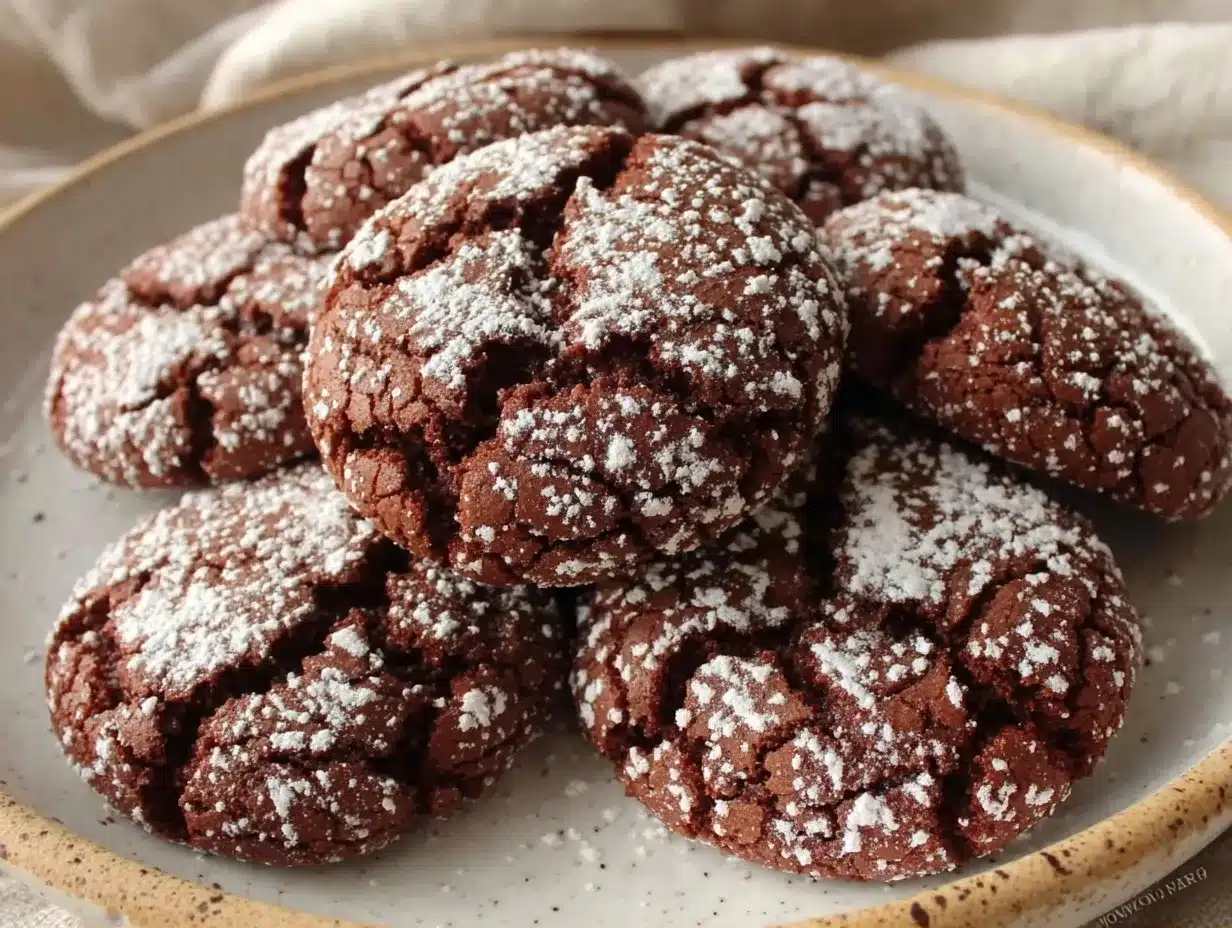
Confectioners’ Sugar (Powdered Sugar) (1 cup / 120g) — The final dusting. This is what makes them “crinkles.” The fine texture creates that snowy, crackled effect. Don’t skip this step—it’s what gives the cookie its name.
Salt (½ teaspoon) — A pinch of salt balances the sweetness and makes the chocolate taste more like chocolate. Don’t skip it.
Quick Tip: Sift your powdered sugar if it’s clumpy. You want a fine, even coating on the cookies. Clumpy sugar leads to uneven cracks.
Equipment Needed
You don’t need a stand mixer or a food processor. In fact, using those might make the dough too soft. Here’s what I actually use:
Large Mixing Bowl — A big bowl gives you room to stir. I use a glass or ceramic bowl because it’s heavy and doesn’t slide around.
Whisk or Fork — For mixing the wet and dry ingredients. A whisk is better for incorporating air, but a fork works in a pinch.
Measuring Cups and Spoons — Accuracy matters here because the ratio of cocoa to sugar is key. Level off your cups.
Baking Sheets — Standard half-sheet pans. I line them with parchment paper for easy cleanup. Silicone mats work too, but parchment gives a slightly crispier bottom.
Cooling Rack — To cool the cookies evenly. If you leave them on the hot pan, they’ll keep cooking and might get too crisp.
Small Bowl — For holding the granulated sugar for rolling.
Small Sifter or Sieve — Optional, but highly recommended for the powdered sugar dusting. It makes the finish look professional.
How to Make It: Step-by-Step
Alright, let’s make these cookies! I’m walking you through exactly how I do it, including the little tricks that ensure those beautiful cracks every time.
Step 1: Mix the Dry Ingredients (2 minutes)
In your large bowl, whisk together the cocoa powder, granulated sugar (1 cup), salt, and baking powder (if using—some recipes skip it, but I add a pinch for lift). Whisk until there are no lumps of cocoa. This is important because cocoa powder clumps easily. If you see brown lumps, your cookies will have bitter pockets.
Step 2: Add the Wet Ingredients (2 minutes)
Add the eggs, oil, and vanilla extract to the dry mixture. Stir with a spoon or whisk until fully combined. The batter will look thick, dark, and glossy. It might seem a bit dry at first, but keep stirring. It will come together into a stiff dough. Don’t worry if it looks crumbly; it will bind as you roll it.
Step 3: Chill (Optional but Recommended)
I know this recipe is supposed to be no-fuss, but if you have 30 minutes, chill the dough. Place the bowl in the fridge. Chilled dough is easier to roll and holds its shape better in the oven, leading to more dramatic cracks. If you’re in a hurry, skip this, but the cookies will spread a little more.
Step 4: Preheat and Prep (5 minutes)
Preheat your oven to 350°F (175°C). Line two baking sheets with parchment paper. Put the ½ cup of granulated sugar in a small shallow bowl. Put the powdered sugar in a fine-mesh sieve or another small bowl.
Step 5: Roll the Cookies (10 minutes)
Scoop about 1 tablespoon of dough (a small cookie scoop is perfect, but a teaspoon works) and roll it into a ball between your palms. Roll the ball in the granulated sugar until it’s fully coated. Then, place it on the baking sheet, spaced 2 inches apart. The sugar coating is what creates the contrast.
Step 6: Bake (10-12 minutes)
Bake for 10-12 minutes. You’ll know they’re done when the edges are set and cracked, but the centers still look slightly soft and shiny. They will firm up as they cool. Do not overbake, or they’ll be dry. The cracks should be wide and visible.
Step 7: Cool and Dust (5 minutes)
Let the cookies cool on the baking sheet for 5 minutes. Then, transfer them to a cooling rack. While they are still warm (but not hot), sift a generous layer of powdered sugar over them. The warmth helps the sugar adhere slightly. Let them cool completely. The powdered sugar will melt into the cracks, creating that signature snowy look.
Expert Tips & Tricks
Here’s everything I’ve learned from making these dozens of times. These tips will save you from my mistakes.
Don’t Skip the Sugar Roll
The granulated sugar coating is crucial. It creates a barrier that prevents the cookie from spreading too much, and it creates the contrast that makes the cracks visible. If you skip this, you just have a dark chocolate cookie, not a crinkle.
Roll Them Tight
When you roll the dough into balls, make sure there are no cracks in the surface. If you see cracks, roll it again. A smooth ball ensures that the cracks form evenly in the oven. If the dough is dry and crumbly, add a teaspoon of oil.
Space Them Out
These cookies do spread. Leave at least 2 inches between them. If they touch, they’ll merge into one big cookie blob. I like them individual, not connected.
Watch the Oven
Ovens vary. Start checking at 10 minutes. The cookies are done when the edges are firm. If you wait until the center is firm, they’ll be dry. They should look slightly underbaked in the center. Trust me.
Dust While Warm
For the best adherence, dust the powdered sugar when the cookies are still warm. If they’re cold, the sugar will just fall off. If they’re too hot, the sugar will melt into a glaze. Warm is the sweet spot.
Storage is Key
Store these in an airtight container at room temperature for up to 5 days. They stay soft and chewy. If you want them extra fresh, add a slice of bread to the container—the cookies will absorb the moisture.
Variations & Substitutions
Once you’ve nailed the basic version, here’s how you can mix it up. I’ve tried all of these.
White Chocolate Crinkles
Replace the cocoa powder with white chocolate chips (melted) and reduce the sugar slightly. The result is a creamy, sweet cookie with a beautiful crack. It’s less intense but still delicious.
Red Velvet Crinkles
Add 1 tablespoon of cocoa powder and 1 tablespoon of red food coloring to the dough. The result is a festive, red cookie with white cracks. Great for holidays.
Mint Crinkles
Add ½ teaspoon of peppermint extract to the dough. Roll them in crushed peppermint candies instead of granulated sugar for a holiday twist.
Espresso Crinkles
Add 1 tablespoon of instant espresso powder to the dry ingredients. It intensifies the chocolate flavor without making the cookies taste like coffee. Perfect for coffee lovers.
Gluten-Free
Use a 1:1 gluten-free flour blend in place of the granulated sugar? No, that won’t work. This recipe is naturally gluten-free if you use gluten-free cocoa powder and baking powder. Check your labels to be sure.
Vegan
Replace eggs with 2 flax eggs (2 tbsp ground flaxseed + 6 tbsp water). Replace oil with melted coconut oil. The texture will be slightly different, but still tasty.
Serving & Storage
How to Serve:
I serve these straight from the cooling rack. They’re best with a cold glass of milk. I also like them with a dollop of whipped cream or a scoop of vanilla ice cream for a dessert plate.
Side Dishes:
These are a dessert, so they pair well with coffee, tea, or hot chocolate. If you’re serving them at a party, they go well with white chocolate macadamia nuts for a contrasting flavor profile.
Storage Instructions:
Refrigerator: Store in an airtight container for up to 1 week.
Freezer: These freeze beautifully. Freeze the dough balls on a baking sheet, then transfer to a bag. Bake from frozen, adding 1-2 minutes to the bake time. Or freeze baked cookies for up to 3 months.
Reheating:
Microwave for 10-15 seconds to soften. They’ll be warm and gooey.
Nutrition Information
I’m not a nutritionist, but here’s the breakdown if you’re tracking. These are calorie-dense because of the sugar and oil, but they are small treats.
Per Cookie (makes about 24 cookies):
– Calories: 90
– Protein: 1g
– Carbs: 14g
– Fiber: 1g
– Sugar: 10g
– Fat: 4g
– Saturated Fat: 0.5g
– Cholesterol: 10mg
– Sodium: 15mg
What’s Good:
– Simple ingredients
– No artificial colors
– Small portion size
What to Know:
– High in sugar
– Contains eggs
– Not suitable for vegans (unless modified)
Final Thoughts
So that’s my go-to chocolate crinkle cookies recipe! I’ve probably talked your ear off at this point, but when you make a recipe this often, you have a lot to say about it.
This has saved my dessert game more times than I can count. It’s my answer to “I need to bring something to the potluck” or “I want to bake, but I’m tired.” My kids are happy, my friends are happy, and I’m happy because I’m not stressed about cooking.
Make it yours! Try different extracts, add nuts, or change the sugar coating. The best recipes are the ones you adapt to your family’s tastes. If you make this, drop a comment and let me know what you think! I love hearing how recipes turn out in your kitchen. And if something doesn’t work, tell me that too—I’m here to help troubleshoot.
Happy baking! And I hope your kitchen smells half as good as mine does right now.
Frequently Asked Questions
Can I use melted chocolate instead of cocoa powder?
You can, but the texture will be different. Melted chocolate makes the cookies denser and fudgier, almost like a brownie. Cocoa powder gives them that light, cakey-crunchy texture. If you use melted chocolate, reduce the oil slightly.
Why did my cookies spread too much?
This usually happens if the dough wasn’t chilled enough or if the oven temperature was too low. Make sure your oven is fully preheated. Also, ensure you’re rolling the dough balls tightly. Loose dough spreads more.
Can I make the dough ahead?
Yes! Store the dough in the fridge for up to 3 days, or freeze it for up to 3 months. Let it come to room temperature before rolling.
Why didn’t my cookies crinkle?
This can happen if the dough was too wet or if you didn’t roll them in enough sugar. Make sure the dough is stiff. If it’s too soft, chill it longer. Also, ensure you’re using the right ratio of cocoa to sugar.
Can I use brown sugar instead of granulated?
You can, but the cookies will be chewier and darker. Granulated sugar creates that crisp exterior. Brown sugar retains moisture, which can prevent the cracks from forming as dramatically.
How do I store the powdered sugar coating?
The powdered sugar will absorb moisture over time and become sticky. Store the cookies in an airtight container with a layer of parchment paper between layers. They’re best eaten within 2-3 days for the best texture.
Can I double this recipe?
Absolutely! Double everything and use your biggest bowl. The baking time stays the same. I do this when I’m feeding a crowd. Just make sure you have enough baking sheets.
Pin This Recipe!
Chocolate Crinkle Cookies: 3-Ingredient No-Fuss Recipe
- Total Time: 25 minutes
- Yield: 24 cookies 1x
Description
These easy chocolate crinkle cookies require just a few pantry staples and zero chill time. They feature a crisp exterior with jagged cracks and a soft, fudgy center, making them perfect for beginners and last-minute baking.
Ingredients
- 1 cup (100g) unsweetened cocoa powder (Dutch-processed preferred)
- 1 cup (200g) granulated sugar (for dough)
- 1/2 cup (120ml) vegetable or canola oil
- 2 large eggs
- 1 teaspoon vanilla extract
- 1/2 cup (100g) granulated sugar (for rolling)
- 1 cup (120g) confectioners’ sugar (powdered sugar, for dusting)
- 1/2 teaspoon salt
- 1/2 teaspoon baking powder (optional, for lift)
Instructions
- Preheat oven to 350°F (175°C) and line two baking sheets with parchment paper.
- In a large mixing bowl, whisk together the cocoa powder, 1 cup granulated sugar, salt, and baking powder until no lumps remain.
- Add the eggs, oil, and vanilla extract to the dry ingredients. Stir with a whisk or spoon until a thick, dark, glossy dough forms.
- Place the 1/2 cup granulated sugar in a small shallow bowl and the powdered sugar in a sieve or small bowl.
- Scoop about 1 tablespoon of dough and roll it into a tight ball between your palms, ensuring no surface cracks.
- Roll the dough ball in the granulated sugar until fully coated, then place on the baking sheet 2 inches apart.
- Bake for 10-12 minutes until edges are set and cracked but centers still look slightly soft.
- Let cookies cool on the baking sheet for 5 minutes, then transfer to a cooling rack.
- While cookies are still warm, sift a generous layer of powdered sugar over them.
- Allow to cool completely before serving.
Notes
Chilling the dough for 30 minutes is optional but recommended for more dramatic cracks and easier rolling. Store in an airtight container at room temperature for up to 5 days. For best results, dust with powdered sugar while cookies are warm. Ensure dough balls are rolled tightly to prevent excessive spreading.
- Prep Time: 15 minutes
- Cook Time: 10-12 minutes
- Category: Dessert
- Cuisine: American
Nutrition
- Serving Size: 1 cookie
- Calories: 90
- Sugar: 10
- Sodium: 15
- Fat: 4
- Saturated Fat: 0.5
- Carbohydrates: 14
- Fiber: 1
- Protein: 1
Keywords: chocolate crinkle cookies, easy cookie recipe, 3 ingredient cookies, no chill cookies, fudgy chocolate cookies, beginner baking