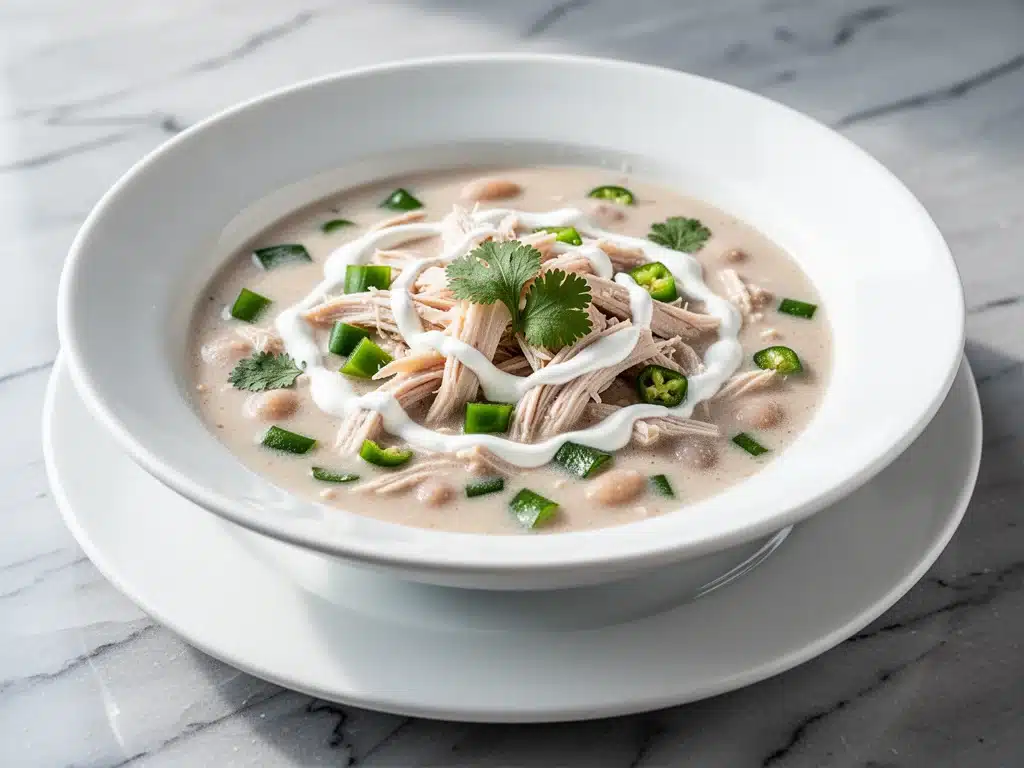
There is a specific kind of magic that happens when the first real chill hits the air. You know the one. It’s that Tuesday evening in October when the wind picks up, the leaves are turning that deep, burnt orange, and your house suddenly feels like a fortress against the cold. I remember the first time I realized I needed a recipe to match that mood. I was standing in my kitchen, shivering in a sweater that was too thin, staring at a pot of beef chili that felt way too heavy for the weather. It wasn’t wrong, exactly, but it wasn’t comforting, either. I wanted something that wrapped around my ribs like a warm blanket, something creamy and bright that tasted like autumn without weighing me down.
That night, I raided the pantry and the freezer. I threw together what I thought would be a quick, mediocre soup. But ten minutes later, the smell of cumin, garlic, and melting cheese pulled my family out of the living room. It was my ultra-creamy fall white chicken chili with green chiles. It hit every single note: warm, spicy, rich, and deeply comforting. Since then, this white chicken chili has been my anchor during the colder months. I’ve made it so many times that I can do it with my eyes closed, but I’ve tweaked it, tested it, and refined it until it’s absolutely perfect.
If you’ve ever wondered how to make white chicken chili that actually tastes creamy without using a pound of cream cheese, or how to get that perfect balance of heat and comfort, you’re in the right place. This isn’t just soup; it’s a hug in a bowl. It’s the kind of dinner that makes you cancel your plans, put on your coziest socks, and stay home for the night. Let me walk you through exactly how to make this cozy masterpiece.
Why You’ll Love This White Chicken Chili Recipe
I’ve tried dozens of white chili recipes over the years, and most of them fall into one of two camps: they’re too soupy and lack flavor, or they’re thick pastes that taste like nothing but heavy cream. This recipe sits in the perfect sweet spot. Here’s why this ultra-creamy fall white chicken chili has earned a permanent spot in my weekly rotation:
It’s Actually Creamy (Without the Guilt) — We use a blend of cream cheese and sour cream to get that rich, velvety texture, but we balance it with the tang of the cheese and the brightness of the chiles. It feels indulgent but doesn’t leave you feeling sluggish. I’ve made this for my fitness-obsessed sister, and she devoured three bowls without a second thought.
Ready in 45 Minutes — I know, “chili” usually implies hours of simmering. But because we’re using cooked chicken (or quick-cooking raw thighs), this comes together in under an hour. It’s perfect for those nights when you get home exhausted and need dinner on the table fast. I often make this on Sundays when I’m meal-prepping, but it’s also my go-to for busy Wednesday nights.
Perfectly Balanced Heat — The green chiles bring a fresh, mild kick that wakes up your palate, while the cumin and chili powder add warmth. It’s spicy enough to feel exciting but mild enough that my kids can eat it (with a little less heat). It’s the kind of spice that makes you sweat just a little, which is exactly what you want when it’s cold outside.
Freezer-Friendly Comfort — This chili freezes beautifully. I love making a double batch so I have a few containers in the freezer for those unexpected late nights or when I just don’t want to think about cooking. It reheats perfectly, which is rare for dairy-based soups.
Customizable for Any Diet — Want it lighter? Use Greek yogurt instead of sour cream. Want it heartier? Add white beans. Want it vegan? Swap the chicken for chickpeas and use vegan cream cheese. This recipe is incredibly forgiving and adapts to whatever you have on hand.
This is my go-to when the weather turns and I need something that feels like a treat but is actually easy to make. It’s reliable, delicious, and always, always makes everyone happy.
Ingredients You’ll Need for the Best White Chicken Chili
Here’s the best part: you probably have most of these ingredients already, or they’re cheap staples you’ll want to keep stocked. I’m particular about a few things here, especially the type of chicken and the quality of the spices, because they make a huge difference in the final flavor.
For the Base
Chicken Breasts or Thighs (1.5 lbs / 680g) — I prefer boneless, skinless chicken thighs for this because they stay juicier and don’t dry out as easily as breasts. If you use breasts, be careful not to overcook them. Rotisserie chicken works great too—just shred it up and save the prep time.
White Onion (1 large, diced / about 300g) — White onions are sharper and more pungent than yellow onions, which gives the chili a better bite. I dice them finely so they melt into the sauce. Yellow onions work, but white is traditional for a reason.
Garlic (4 cloves, minced / about 2 tablespoons) — Fresh garlic is non-negotiable here. Jarred garlic just doesn’t have the same punch. Mince it finely so it distributes evenly throughout the chili.
Green Chiles (1 can, 4oz / 113g) — Look for diced green chiles, like Ro*Tel or a generic brand. They’re mild but add that essential flavor. If you like it spicier, you can add a chopped jalapeño with the seeds.
Chicken Broth (2 cups / 480ml) — Use low-sodium broth so you can control the saltiness. Homemade broth is amazing if you have it, but a good quality store-bought carton works perfectly fine.
For the Creamy Texture

Cream Cheese (8 oz / 225g, softened) — This is the secret to the ultra-creamy texture. Soften it at room temperature so it melts smoothly into the chili. Don’t skip this step, or you’ll end up with little lumps of cheese.
Sour Cream (½ cup / 120g) — Adds tang and richness. Full-fat is best here, but light works if you’re watching calories. Stir it in at the very end, off the heat, to prevent curdling.
Heavy Cream (¼ cup / 60ml) — Optional, but it makes the chili even silkier. I use it when I want to feel extra indulgent. If you’re keeping it lighter, you can skip it.
For the Flavor
Cumin (2 teaspoons) — Ground cumin is the backbone of this chili. It adds that earthy, warm flavor that screams “fall.” Use freshly ground if you can, but store-bought is fine.
Chili Powder (1 tablespoon) — Not just cayenne! Look for a blend that includes garlic powder, oregano, and other spices. It adds depth and color.
Oregano (1 teaspoon, dried) — Adds a subtle herbal note that complements the cumin. Mexican oregano is ideal if you can find it, but regular works too.
Salt and Black Pepper — To taste. Start with 1 teaspoon of salt and adjust as you go.
Optional Add-ins
White Beans (1 can, 15oz / 425g, drained) — Cannellini or Great Northern beans add heartiness and fiber. I love adding them for a more filling meal.
Cilantro (½ cup, chopped) — Fresh cilantro is essential for garnish. It adds a bright, fresh contrast to the rich, heavy chili.
Lime (1 lime, cut into wedges) — A squeeze of lime juice right before eating brightens up all the flavors. Don’t skip it!
Equipment Needed
You don’t need fancy equipment for this. Here’s what I actually use.
Large Dutch Oven or Heavy-Bottomed Pot — I use a 6-quart Dutch oven because it distributes heat evenly and keeps the chili warm at the table. A large stockpot works too, just make sure it has a heavy bottom to prevent burning.
Wooden Spoon — For stirring. Silicone works too, but I like the feel of wood. Don’t use metal on non-stick surfaces.
Sharp Knife and Cutting Board — For dicing onions and mincing garlic. A good knife makes this step much faster and safer.
Measuring Spoons — For the spices. Accuracy matters here, especially with the cumin and chili powder.
Immersion Blender (Optional) — If you like your chili extra smooth, you can use an immersion blender to puree a portion of the chili before adding the cream cheese. I usually leave it chunky, but it’s a good trick if you want a creamier texture.
How to Make It: Step-by-Step
Alright, let’s make this! I’m walking you through exactly how I do it, including the little tricks I’ve picked up over the years.
Step 1: Prep Your Ingredients (5 minutes)
Before you start cooking, dice your onion, mince your garlic, and soften your cream cheese. I know it seems fussy, but it makes the actual cooking way less stressful. Once you start cooking, things move fast, and you won’t want to be chopping while the onions are sizzling.
Step 2: Sauté the Aromatics (5 minutes)
Heat 2 tablespoons of olive oil in your Dutch oven over medium heat. Add the diced onion and cook for 3-4 minutes until it starts to soften and turn translucent. Add the minced garlic and cook for 1 more minute, stirring constantly. The garlic should smell amazing but not brown—browned garlic tastes bitter. This step builds the flavor foundation for the entire chili.
Step 3: Add the Chicken and Spices (5 minutes)
Add the chicken pieces to the pot. Season them generously with salt and pepper. Sprinkle the cumin, chili powder, and oregano over the chicken and onions. Stir well to coat everything in the spices. Let the chicken cook for 2-3 minutes on each side until it starts to brown. The spices will toast in the oil, releasing their essential oils and creating a deeper, more complex flavor.
Step 4: Simmer the Chili (20 minutes)
Pour in the chicken broth and scrape up any browned bits from the bottom of the pot. Those bits are flavor gold. Add the green chiles and their juice. Bring the mixture to a boil, then reduce the heat to low. Cover and let it simmer for 15-20 minutes, or until the chicken is cooked through. If you’re using raw chicken, it should reach an internal temperature of 165°F (74°C). If you’re using rotisserie chicken, just heat it through for 10 minutes.
Step 5: Shred and Cream (5 minutes)
Remove the chicken from the pot and shred it with two forks. Discard any skin or fat. Return the shredded chicken to the pot. Reduce the heat to low. Add the softened cream cheese and stir until it’s completely melted and smooth. This is the moment where the chili transforms from a soup into a creamy, hearty meal.
Step 6: Finish with Sour Cream (2 minutes)
Remove the pot from the heat. Stir in the sour cream and heavy cream (if using). Taste and adjust the seasoning. Add more salt, pepper, or chili powder if needed. The chili should be thick, creamy, and flavorful. If it’s too thick, add a splash of broth. If it’s too thin, let it simmer for a few more minutes.
Step 7: Serve
Ladle the chili into bowls. Top with fresh cilantro, a squeeze of lime, and a dollop of sour cream. Serve with crusty bread or tortilla chips. Enjoy!
Total Time: About 45 minutes (15 minutes active, 30 minutes mostly hands-off)
Expert Tips & Tricks
Here’s everything I’ve learned from making this dozens of times. These tips will save you from my mistakes.
Don’t Skip the Searing — Browning the chicken and toasting the spices before adding the broth makes a huge difference in flavor. It adds a layer of complexity that you can’t get by just boiling everything together.
Softened Cream Cheese is Key — If your cream cheese is cold, it won’t melt smoothly. Cut it into small cubes and let it sit on the counter for 30 minutes before you start cooking. Or, microwave it for 10-15 seconds to soften it up.
Balance the Heat — Green chiles vary in heat level. Start with one can and taste the chili before adding more. If you want it spicier, add a chopped jalapeño or a pinch of cayenne pepper. If you want it milder, use mild green chiles and skip the jalapeño.
Use Low-Sodium Broth — Canned chiles and cream cheese can be salty. Using low-sodium broth gives you control over the final saltiness. Taste before adding extra salt.
Add Beans for Heartiness — If you want to stretch the chili further or add more fiber, add a can of drained white beans. Cannellini or Great Northern beans work best. Add them in the last 5 minutes of simmering to heat through.
Make It Ahead — This chili tastes even better the next day. The flavors meld together and deepen overnight. Make it in the morning, let it cool, and refrigerate. Reheat gently on the stove, adding a splash of broth if it’s too thick.
Variations & Substitutions
Once you’ve nailed the basic version, here’s how you can mix it up. I’ve tried all of these.
Vegan White Chili — Swap the chicken for chickpeas or white beans. Use vegan cream cheese and vegan sour cream. Use vegetable broth. It’s surprisingly delicious and just as creamy.
Turkey White Chili — Use ground turkey instead of chicken. Brown it with the onions and spices. It’s leaner and has a different flavor profile, but still tastes great.
Spicy White Chili — Add a diced jalapeño with the onions. Use hot green chiles. Add a pinch of cayenne pepper. Top with sliced jalapeños and hot sauce.
Loaded White Chili — Add crispy bacon bits, shredded cheddar cheese, and diced avocado as toppings. It’s like a baked potato in chili form.
Slow Cooker Version — Sauté the onions and garlic in a pan, then add everything to the slow cooker. Cook on low for 6-8 hours or high for 3-4 hours. Add the cream cheese and sour cream in the last 30 minutes.
Serving & Storage
How to Serve: I usually serve this straight from the pot at the dinner table—it looks rustic and stays warm. But here are other ways I’ve enjoyed it:
Side Dishes: Crusty sourdough bread, cornbread, or tortilla chips are perfect for dipping. A simple green salad with a vinaigrette balances the richness of the chili.
Toppings Bar: When I have guests, I put out: extra sour cream, shredded cheddar, fresh cilantro, diced avocado, lime wedges, and hot sauce. Everyone customizes their bowl.
Storage Instructions:
Refrigerator: Store in an airtight container for up to 4 days. The chili will thicken in the fridge—totally normal. Just add a splash of broth when reheating to loosen it up.
Reheating: Best method: Add to a skillet with a splash of milk or broth over low heat. Stir until heated through and creamy again. Microwave method: Heat in 30-second intervals, stirring between. Add a splash of milk if it’s too thick.
Freezing: This chili freezes well for up to 3 months. Let it cool completely, then transfer to freezer-safe containers. Thaw in the fridge overnight and reheat gently. The texture might be slightly different after freezing, but it still tastes great.
Nutrition Information
I’m not a nutritionist, but here’s the breakdown if you’re tracking.
Per Serving (based on 6 servings):
– Calories: 380
– Protein: 30g
– Carbs: 12g
– Fiber: 3g
– Sugar: 4g
– Fat: 22g
– Saturated Fat: 12g
– Cholesterol: 90mg
– Sodium: 650mg
What’s Good: High in protein, decent amount of fiber if you add beans, and packed with flavor without being too heavy.
What to Know: Higher in saturated fat from the cream cheese and sour cream. If you’re watching your intake, use light versions or Greek yogurt.
My Take: Look, this is comfort food with cream and cheese. It’s not a diet recipe. But it’s way better than takeout, costs less, and I know exactly what’s in it. When I want to make it lighter, I use Greek yogurt and less cream cheese. But usually? I just eat a reasonable portion and enjoy it.
Final Thoughts
So that’s my go-to ultra-creamy fall white chicken chili! I’ve probably talked your ear off at this point, but when you make a recipe this often, you have a lot to say about it.
This has saved weeknight dinners more times than I can count. It’s my answer to “what’s for dinner” when I’m tired, don’t want takeout, and still want something that tastes really good. My kids are happy, my husband’s happy, and I’m happy because I’m not stressed about cooking.
Make it yours! Try different add-ins, swap in your favorite vegetables, adjust the heat. The best recipes are the ones you adapt to your family’s tastes. If you make this, drop a comment and let me know what you think! I love hearing how recipes turn out in your kitchen. And if something doesn’t work, tell me that too—I’m here to help troubleshoot.
Happy cooking! And I hope your kitchen smells half as good as mine does right now.
Frequently Asked Questions
Can I use rotisserie chicken?
Absolutely! In fact, I often use rotisserie chicken because it saves time. Just shred it and add it in the last 10 minutes of cooking to heat through. It’s a great way to use up leftovers.
Why is my chili too watery?
Usually, this means you didn’t simmer it long enough after adding the broth. Let it simmer uncovered for 10-15 minutes to reduce the liquid. You can also add a splash of cornstarch mixed with water to thicken it, but usually, just more simmering does the trick.
Can I make this in a slow cooker?
Yes! Sauté the onions and garlic first, then add everything to the slow cooker. Cook on low for 6-8 hours or high for 3-4 hours. Add the cream cheese and sour cream in the last 30 minutes. It’s a great hands-off option.
Can I freeze this chili?
Yes, it freezes well for up to 3 months. Let it cool completely, then transfer to freezer-safe containers. Thaw in the fridge overnight and reheat gently. The texture might be slightly different after freezing, but it still tastes great.
What’s the best way to reheat leftovers?
Reheat gently on the stove over low heat, adding a splash of broth or milk to loosen it up. Avoid high heat, which can cause the dairy to separate. Microwave in short bursts, stirring in between, if you’re in a hurry.
Can I make this vegetarian?
Yes! Swap the chicken for white beans or chickpeas. Use vegetable broth instead of chicken broth. The flavor will be slightly different, but it’s still delicious and creamy.
How spicy is this chili?
It’s mild to medium heat, depending on the green chiles you use. If you want it spicier, add a chopped jalapeño or a pinch of cayenne pepper. If you want it milder, use mild green chiles and skip the jalapeño.
Pin This Recipe!


Ultra-Creamy Fall White Chicken Chili
- Total Time: 45 minutes
- Yield: 6 servings 1x
Description
A cozy, ultra-creamy white chicken chili that balances rich dairy flavors with the bright kick of green chiles and warm spices. Ready in under 45 minutes, this comfort food is perfect for chilly autumn evenings.
Ingredients
- 1.5 lbs boneless, skinless chicken thighs or breasts
- 1 large white onion, diced
- 4 cloves garlic, minced
- 1 can (4oz) diced green chiles
- 2 cups low-sodium chicken broth
- 8 oz cream cheese, softened
- 1/2 cup sour cream
- 1/4 cup heavy cream (optional)
- 2 teaspoons ground cumin
- 1 tablespoon chili powder
- 1 teaspoon dried oregano
- Salt and black pepper to taste
- 2 tablespoons olive oil
- Optional: 1 can (15oz) white beans, drained
- Optional: 1/2 cup fresh cilantro, chopped
- Optional: 1 lime, cut into wedges
Instructions
- Prep ingredients by dicing the onion, mincing the garlic, and softening the cream cheese.
- Heat olive oil in a large Dutch oven over medium heat. Add diced onion and cook for 3-4 minutes until translucent.
- Add minced garlic and cook for 1 minute until fragrant.
- Add chicken pieces to the pot. Season with salt and pepper. Sprinkle cumin, chili powder, and oregano over the chicken and onions. Stir to coat.
- Cook chicken for 2-3 minutes on each side until it begins to brown.
- Pour in chicken broth, scraping up browned bits from the bottom. Add green chiles and their juice.
- Bring to a boil, then reduce heat to low. Cover and simmer for 15-20 minutes until chicken is cooked through (165°F).
- Remove chicken from pot and shred with two forks. Return shredded chicken to the pot.
- Reduce heat to low. Add softened cream cheese and stir until completely melted and smooth.
- Remove pot from heat. Stir in sour cream and heavy cream (if using).
- Taste and adjust seasoning with salt, pepper, or more chili powder. If too thick, add a splash of broth.
- Serve hot, topped with fresh cilantro, a squeeze of lime, and extra sour cream.
Notes
For best results, soften the cream cheese at room temperature before adding to prevent lumps. If using rotisserie chicken, add it in the last 10 minutes just to heat through. This chili freezes well for up to 3 months; reheat gently with a splash of broth or milk to maintain creaminess.
- Prep Time: 15 minutes
- Cook Time: 30 minutes
- Category: Main Course
- Cuisine: American
Nutrition
- Serving Size: 1 bowl
- Calories: 380
- Sugar: 4
- Sodium: 650
- Fat: 22
- Saturated Fat: 12
- Carbohydrates: 12
- Fiber: 3
- Protein: 30
Keywords: white chicken chili, creamy chili, fall recipes, comfort food, easy dinner, one pot meal, chicken chili recipe



