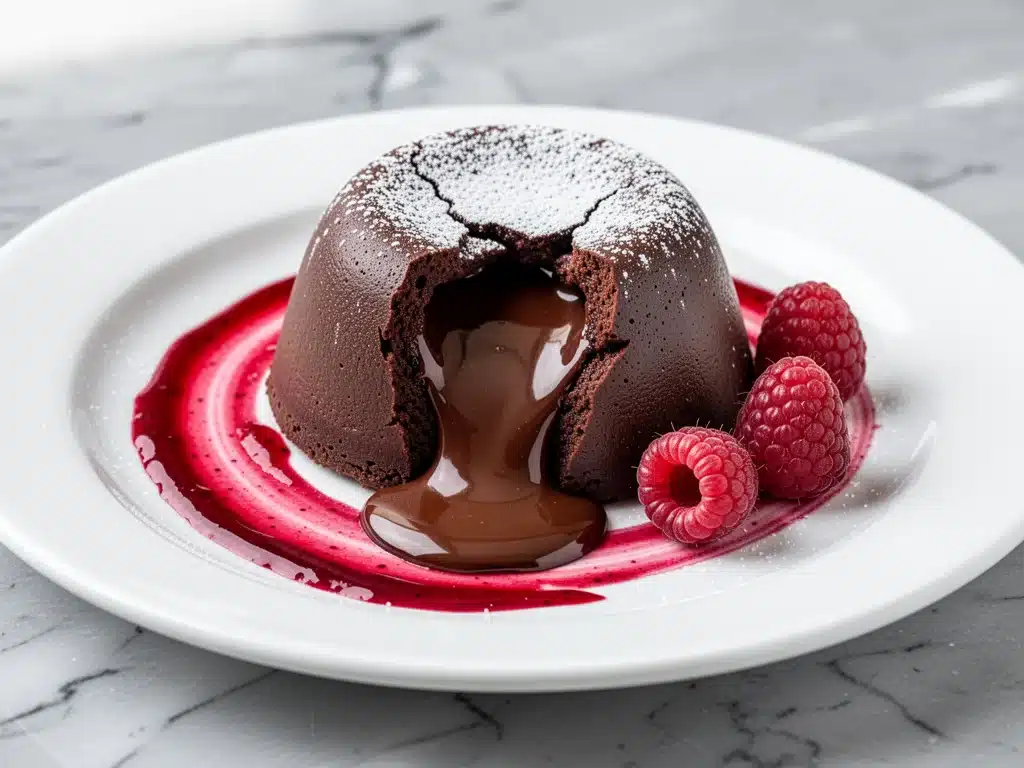
I still remember the first time I tried to make chocolate lava cake at home. It was supposed to be a romantic anniversary dinner, and I was feeling pretty confident. I found a “simple” recipe online, melted the chocolate, mixed the batter, and popped them into the oven. I set a timer for twelve minutes. When I pulled them out, they looked perfect. Golden, puffy, and promising. I flipped one onto a plate, brought it to my partner, and waited for that glorious molten center to spill out.
Instead, it was a dense, overcooked chocolate brick. It was dry. It was sad. And honestly? It tasted like failure.
That night, we ended up ordering takeout and eating it on the couch in our pajamas. But that failure stuck with me. I couldn’t shake the image of that dry cake. I wanted to make it. I wanted to master that delicate balance where the outside is a warm, tender sponge and the inside is a rich, flowing river of dark chocolate. So, I started experimenting. I ruined three more batches. I burned one batch of chocolate. I even accidentally made a chocolate soufflé once, which was delicious but definitely not a lava cake.
After months of trial and error—and a lot of chocolate tasting—I finally cracked the code. It turns out, the difference between a disappointment and a restaurant-quality dessert comes down to three things: the quality of your chocolate, the exact timing, and a little trick with the ramekins. This recipe is my go-to when I want to impress. It’s actually easier than making my fall apple cider doughnut cake because you don’t need a mixer, and it cooks in under 20 minutes. It’s the perfect dessert for date night, a dinner party, or just when you need a serious mood boost on a Tuesday.
Why You’ll Love This Recipe
There are a million chocolate desserts out there. Brownies, cakes, mousse, truffles. But there is something primal about a warm, molten chocolate center that hits different. Here is why this restaurant-style molten chocolate lava cake has earned a permanent spot in my rotation.
It Takes Less Time Than Takeout Delivery — Seriously. From start to finish, including prep and baking, this whole process takes about 25 minutes. I can have this dessert ready before my pizza arrives. That is some serious power move for a home cook.
It’s Impressively Fancy (But Not Hard) — When you serve this, people assume you spent hours in the kitchen. They assume you hired a pastry chef. But it’s basically just melted chocolate and eggs. The visual of that gooey center pouring out is pure magic. It makes you look like a genius.
You Control the Chocolate Quality — Restaurant desserts are often made with compound chocolate or lower-quality cocoa to save money. When you make this at home, you use real, high-quality chocolate. You can use your favorite bar. You can go dark, milk, or even add a touch of sea salt. It’s your dessert, your rules.
It Pairs Perfectly with Raspberry Coulis — I know, I know, making a raspberry sauce sounds like extra work. But it’s actually just raspberries, sugar, and water simmered for five minutes. The tartness cuts through the rich, heavy chocolate perfectly. It balances the plate so you don’t feel like you’re eating a solid block of sugar. It’s the kind of detail that makes people ask for the recipe.
It’s Forgiving (Once You Know the Trick) — My biggest fear was overcooking it. But once you learn to pull them out when the tops are just set but still jiggly, they are incredibly forgiving. You can even prepare the batter ahead of time and bake them right before guests arrive. That’s a lifesaver for entertaining.
This isn’t just a recipe; it’s a confidence booster. It’s the dessert that says, “I put effort into this, but I also know how to keep it simple.” And honestly? That’s the best kind of cooking.
Ingredients You’ll Need
Before we get to the baking, let’s talk about what goes into this. You don’t need a fancy pantry for this. In fact, the fewer ingredients, the better. This recipe relies on the quality of a few key items, so don’t skimp on the chocolate.
Dark Chocolate (60-70% cacao) (8 ounces / 225g) — This is the star of the show. Do not use chocolate chips. They have stabilizers that prevent them from melting smoothly. Use a high-quality baking bar or a premium bar like Ghirardelli, Lindt, or Guittard. Chop it finely yourself for the best melt. I prefer 60-70% because it’s rich but not bitter. If you use something too dark (85%), it might taste too intense against the sweet batter.
Unsalted Butter (½ cup / 113g) — This adds richness and helps create that silky texture. Use real butter, not margarine. I like to cube it so it melts faster. If you’re using salted butter, reduce the added salt in the recipe by half.
Eggs (2 large + 2 yolks) — This ratio is crucial. The whole eggs provide structure, while the extra yolks add fat and richness, which helps create that molten center. Don’t swap this for just whites or just whole eggs. The yolks are the secret weapon here.
Sugar (½ cup / 100g) — Granulated white sugar works best here. It dissolves easily into the batter and creates that slightly crisp exterior. You can use brown sugar, but it will make the cake denser and chewier, which isn’t what we want for a lava cake.
All-Purpose Flour (2 tablespoons / 16g) — Just a little bit. We’re not making a bread. The flour gives the outside a little bit of structure so it doesn’t collapse completely, but too much will make it cakey. Measure it lightly—don’t pack it down.
Cocoa Powder (1 tablespoon / 5g) — I use unsweetened cocoa powder (Dutch-processed or natural both work, but Dutch-processed gives a deeper color). This boosts the chocolate flavor without adding more sugar.
Salt (¼ teaspoon) — Salt is non-negotiable. It wakes up the chocolate flavor. Without it, the cake tastes flat.
For the Raspberry Coulis:
Fresh or Frozen Raspberries (1 cup / 150g) — Fresh is nicer, but frozen works great and is often cheaper. If you use frozen, don’t thaw them first; just dump them in the pan.
Sugar (2 tablespoons / 25g) — Adjust based on how tart your berries are. Taste as you go.
Water (2 tablespoons / 30ml) — Just enough to help the berries break down and create a sauce consistency.
Optional Garnish: Powdered sugar, fresh mint leaves, or a scoop of vanilla bean ice cream. I always have vanilla ice cream on hand for this. It’s the classic combo.
Equipment Needed
You don’t need a fancy kitchen to make this. Here’s what you’ll actually use.
4 Ramekins (6-ounce size) — These are small ceramic or porcelain dishes. You can find them at any thrift store or kitchen supply shop. Make sure they are heatproof. I use 6-ounce ramekins because they give the perfect portion size. If you use smaller ones, the cake might overflow. If you use larger ones, it won’t cook in the center.
Microwave-Safe Bowl or Double Boiler — For melting the chocolate and butter. A microwave bowl is faster, but a double boiler (a glass bowl over a pot of simmering water) gives you more control and prevents scorching. I usually just use the microwave in 30-second bursts.
Mixing Bowls — One medium bowl for the chocolate mixture, one for the eggs and sugar.
Whisk — You need a good whisk to beat the eggs and sugar until they are pale and fluffy. A fork works, but it takes longer.
Pastry Brush or Paper Towel — For greasing the ramekins. This is important for getting that clean release.
Sieve or Fine Mesh Strainer — For the raspberry coulis. It makes the sauce silky smooth instead of seedy. If you don’t mind seeds, you can skip this, but the texture is so much better if you strain it.
Small Saucepan — For cooking down the raspberries.
Baking Sheet — Optional but recommended. Place your ramekins on a baking sheet before putting them in the oven. It makes it easier to slide them in and out, and if one leaks, your oven stays clean.
How to Make It: Step-by-Step
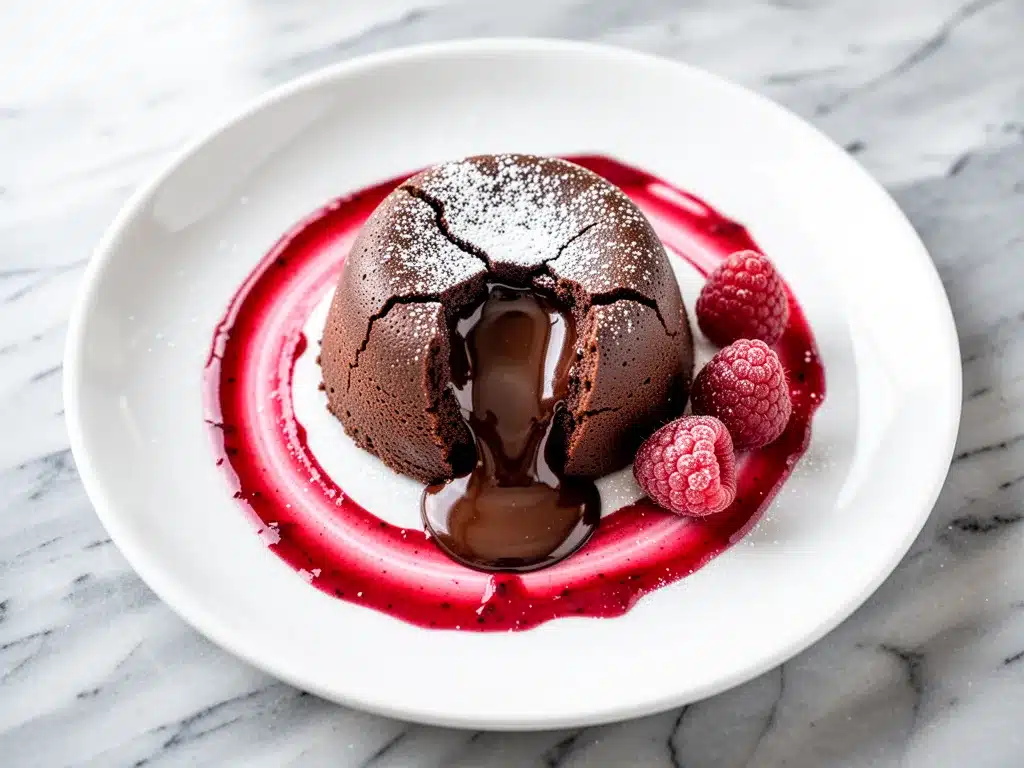
Alright, let’s get into the kitchen. This process is straightforward, but precision matters. I’m going to walk you through exactly how I do it, including the timing tricks that make the difference.
Step 1: Prep Your Ramekins (5 minutes)
This is the step most people skip, and it’s the reason their cakes stick. Take your four 6-ounce ramekins. Butter them generously with softened butter. Get into every nook and cranny. Then, dust them with cocoa powder. Tap out the excess. The cocoa powder prevents the cake from looking white and dusty; it keeps the exterior chocolate-colored. If you don’t have cocoa powder, use a little flour, but cocoa is better.
Step 2: Melt the Chocolate and Butter (2 minutes)
Chop your chocolate into small chunks. Put it in a microwave-safe bowl with the cubed butter. Microwave on high for 30 seconds. Stir. If it’s not fully melted, do another 15 seconds. Stir until smooth. Let it cool slightly so it doesn’t cook the eggs when you add them. It should be warm, not hot.
Step 3: Whisk Eggs and Sugar (3 minutes)
In a separate bowl, whisk the two whole eggs and two egg yolks with the sugar and salt. Whisk vigorously for about 2-3 minutes. You want the mixture to lighten in color and become slightly fluffy. This incorporates air, which helps the cake rise. Don’t rush this step.
Step 4: Combine Wet and Dry Ingredients (2 minutes)
Pour the melted chocolate mixture into the egg mixture. Stir gently with a spatula until combined. Sift in the flour and cocoa powder. Fold them in gently. Do not overmix. You just want to eliminate the white streaks of flour. The batter will be thick and glossy.
Step 5: Fill the Ramekins (2 minutes)
Divide the batter evenly among the four prepared ramekins. Use a spatula to smooth the tops. If you want a “lava” effect, you can press a small cube of chocolate or a few chocolate chips into the center of each ramekin before baking. This ensures a gooey center even if you bake them a minute too long. I do this for guests who might not pull them out at the exact right second.
Step 6: Bake (12-14 minutes)
Preheat your oven to 425°F (220°C). Place the ramekins on a baking sheet (or carefully place them directly on the oven rack if you’re brave). Bake for 12-14 minutes. Here is the visual cue: the edges should be puffed and set, but the center should still look soft and jiggly when you gently shake the ramekin. It will look slightly underbaked. This is correct. If you bake them until the top is firm, they will be cakes, not lava cakes.
Step 7: Make the Raspberry Coulis (While Baking)
While the cakes bake, make the sauce. Combine raspberries, sugar, and water in a small saucepan over medium heat. Cook for 5-7 minutes, mashing the berries with a fork as they soften. The mixture will bubble and thicken. Remove from heat and push the mixture through a fine-mesh sieve into a bowl to remove seeds. Stir in a teaspoon of lemon juice if you want a brighter flavor. Keep it warm or let it cool slightly.
Step 8: Unmold and Serve (2 minutes)
Remove the ramekins from the oven. Let them sit for exactly 1 minute. This allows the cake to set just enough to hold its shape but still be hot and gooey. Run a knife around the edge to loosen. Place a small plate upside down over the ramekin, then flip it over in one confident motion. Lift the ramekin off. The cake should slide out cleanly. If it sticks, you didn’t butter it enough, or it baked too long.
Drizzle with warm raspberry coulis. Dust with powdered sugar. Serve immediately. The clock starts ticking the moment it hits the plate.
Expert Tips & Tricks
I’ve made this recipe dozens of times, and I’ve learned a few things that save the day. Here is how to guarantee success.
Timing is Everything — This is the hardest part. Ovens vary. Start checking at 12 minutes. If your oven runs hot, 11 minutes might be enough. If it runs cool, 14 minutes. The jiggle test is your best friend. The center should wobble like Jell-O, not be liquid like soup.
Chill the Batter Ahead of Time — This is a pro move. After filling the ramekins, you can cover them with plastic wrap and refrigerate them for up to 24 hours. When you’re ready to serve, just pop them in the oven. You might need to add 1-2 minutes to the baking time since they’re cold. This is perfect for dinner parties because you can prep everything in the morning.
Don’t Use Chocolate Chips — I said it before, but I’ll say it again. Chocolate chips contain stabilizers (like soy lecithin) that keep their shape. They won’t melt into a smooth sauce. Use a bar of chocolate and chop it yourself. The texture difference is huge.
Room Temperature Eggs — Make sure your eggs are at room temperature before you start. Cold eggs can cause the melted chocolate to seize up when you add them, creating lumps. Take them out of the fridge 30 minutes before you cook.
The “Secret” Center Trick — If you are nervous about undercooking, drop a small square of chocolate into the center of the batter before baking. As the cake bakes, the outer batter sets, but the inner chocolate square melts, creating a guaranteed molten pocket. It’s a fail-safe for beginners.
Serve on Warm Plates — If your plates are cold, the lava cake cools down instantly, and the chocolate hardens. Warm your plates in the oven for a minute before serving. It keeps the lava flowing longer.
Variations & Substitutions
Once you’ve mastered the classic version, here are some ways to twist it up. I’ve tried all of these, and they all work.
Salted Caramel Lava Cake — Instead of raspberry coulis, drizzle warm salted caramel sauce over the top. Or, swirl a tablespoon of caramel into the batter before baking. It’s rich, sweet, and salty. Perfect for holidays.
Espresso Lava Cake — Add 1 teaspoon of instant espresso powder to the melted chocolate mixture. It intensifies the chocolate flavor without tasting like coffee. Great for after-dinner drinks.
Orange Zest Lava Cake — Add the zest of one orange to the batter. It adds a bright, floral note that pairs beautifully with dark chocolate. Serve with a blood orange coulis instead of raspberry.
Coconut Lava Cake — Substitute half the butter with coconut oil. Use coconut milk instead of water in the coulis (or just serve with coconut cream). It adds a tropical twist.
Gluten-Free Version — Simply swap the all-purpose flour for a 1:1 gluten-free flour blend. The texture might be slightly denser, but it still works. Make sure your chocolate is certified gluten-free if you have celiac disease.
Dairy-Free Option — Use vegan butter and dairy-free chocolate (like Enjoy Life or Guittard’s dairy-free bars). The eggs provide structure, so it still rises. Serve with coconut whipped cream instead of ice cream.
Single Serving — You can easily make this in a microwave-safe mug. Use 2 tablespoons of chocolate, 1 tablespoon of butter, 1 egg yolk, 1 tablespoon of sugar, and 1 tablespoon of flour. Microwave for 60-90 seconds. It’s not as pretty as the ramekin version, but it satisfies the craving instantly.
Serving & Storage
How to Serve — This dessert is all about presentation. I usually plate it simply: the cake on the plate, a zigzag of raspberry coulis, a dusting of powdered sugar, and maybe a few fresh raspberries on the side. Add a mint leaf for color. If you’re serving ice cream, scoop it right next to the cake, not on top, so it doesn’t melt into the lava immediately. I love pairing this with a glass of port or a sweet dessert wine, but it’s also great with black coffee.
Storage — You cannot store baked lava cakes. They must be eaten immediately. The magic is in the temperature contrast. If you have leftover batter, you can cover it and refrigerate it for up to 24 hours. Then bake fresh ramekins when needed.
Reheating — If you accidentally make too many and have leftovers (unlikely, but possible), you can reheat them in the microwave for 15-20 seconds. But be warned: the texture will change. The center might not be as molten, and the outside might get chewy. It’s better to eat them fresh.
Freezing — Do not freeze baked lava cakes. The dairy and eggs will separate, and the texture will be ruined. You can freeze the batter in the ramekins for up to a month. Thaw in the fridge overnight, then bake as directed, adding 2-3 minutes to the baking time.
Nutrition Information
I’m not a nutritionist, but here’s the breakdown if you’re tracking. Keep in mind this is a rich, indulgent dessert.
Per Serving (1 lava cake with 1 tbsp coulis):
– Calories: 380
– Protein: 6g
– Carbs: 32g
– Fiber: 3g
– Sugar: 24g
– Fat: 26g
– Saturated Fat: 15g
– Cholesterol: 140mg
– Sodium: 80mg
What’s Good: It has some protein from the eggs and fiber from the chocolate and raspberries. Dark chocolate has antioxidants.
What to Know: It’s high in calories and sugar because of the chocolate, butter, and sugar. It’s a treat, not a health food. If you’re watching sugar, reduce the sugar in the batter to ¼ cup and use unsweetened cocoa powder. The coulis can also be made with a sugar substitute if needed.
My Take: Look, this is comfort food. It’s chocolate and butter. It’s supposed to be rich. When I make this, I enjoy one cake and savor it. I don’t try to eat three. Moderation is key, and honestly, one is usually enough.
Final Thoughts
So, that’s my restaurant-style molten chocolate lava cake. It’s a recipe that used to scare me, but now it’s one of my favorite things to make. There is something so satisfying about pulling a hot ramekin out of the oven, flipping it, and watching that chocolate river spill out. It’s a moment of pure joy.
I’ve made this for birthday dinners, date nights, and random Tuesdays when I just need a hug in dessert form. It’s impressive, but it’s also forgiving once you know the tricks. And with the raspberry coulis, it feels like you went to a fancy French bistro.
Make it yours! Try different chocolates, add different fruits to the coulis, or serve it with different toppings. The best recipes are the ones you adapt to your tastes. If you make this, drop a comment and let me know how it went. Did your lava flow? Did you burn it? I want to hear about it. And if you need more dessert inspiration, check out my brown sugar bourbon pecan pie bars for a different kind of sweet treat.
Happy baking! And I hope your kitchen smells like heaven right now.
Frequently Asked Questions
Why did my lava cakes turn out like regular cakes?
This usually means they were overbaked. The key is to pull them out when the tops look set but the center is still jiggly. They continue to cook a little from the residual heat after you take them out of the oven. If you wait until the center is firm, they will be dense cakes. Start checking at 12 minutes.
Can I make these ahead of time?
You can prep the batter and fill the ramekins up to 24 hours in advance. Cover them tightly with plastic wrap and refrigerate. When you’re ready to serve, take them out of the fridge and bake them. You may need to add 1-2 minutes to the baking time since the batter is cold. Do not bake them ahead and reheat; the texture will suffer.
Can I use milk chocolate instead of dark chocolate?
You can, but the result will be much sweeter and the lava might not flow as smoothly. Milk chocolate has more milk solids and sugar, which can make it thicker. If you use milk chocolate, I recommend adding a little more butter to keep the texture loose. For the best balance of sweet and rich, stick with 60-70% dark chocolate.
Why is my coulis too thick or too thin?
If it’s too thick, add a splash of water or milk while reheating. If it’s too thin, let it simmer longer to reduce. The consistency should be like warm honey. It will thicken slightly as it cools, so don’t make it too runny in the pan.
Can I make this in muffin tins instead of ramekins?
Yes, but you need to grease the muffin tin very well and dust it with cocoa powder. The baking time might be slightly shorter because the batter is thinner in a muffin tin. Check at 10 minutes. The edges might get crispier, which is nice, but the classic ramekin presentation is hard to beat.
Is there a way to make this gluten-free?
Absolutely. Just swap the all-purpose flour for a gluten-free 1:1 baking flour. The recipe works exactly the same way. Make sure your chocolate and cocoa powder are certified gluten-free if you have celiac disease.
What kind of ice cream goes best with this?
Vanilla bean ice cream is the classic choice because it’s neutral and creamy. But salted caramel ice cream, espresso ice cream, or even strawberry sorbet (to match the coulis) are amazing. I usually keep vanilla on hand because it’s the most versatile.
Pin This Recipe!
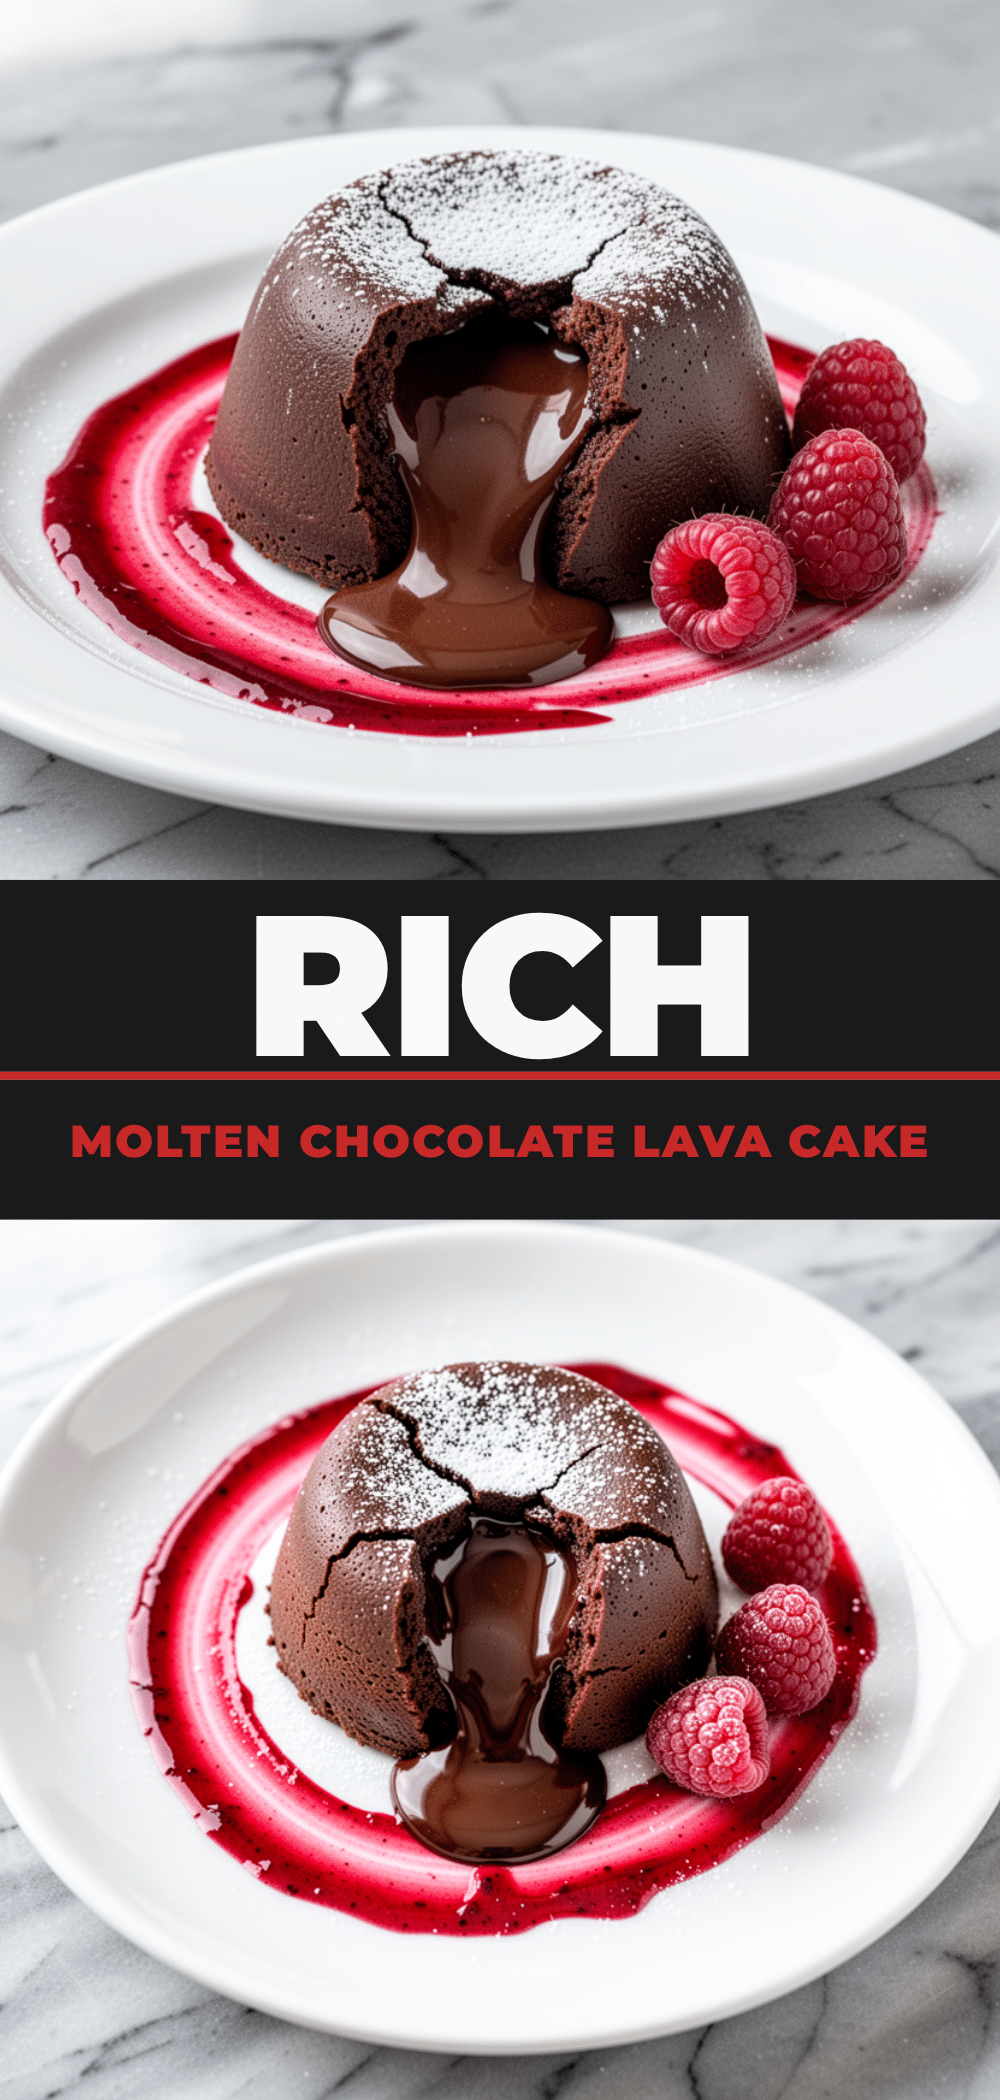
Restaurant-Style Molten Chocolate Lava Cake: Best Easy Recipe
- Total Time: 25 minutes
- Yield: 4 servings 1x
Description
A rich, indulgent dessert featuring a warm, tender sponge exterior and a flowing molten dark chocolate center, served with a homemade raspberry coulis.
Ingredients
- 8 ounces (225g) high-quality dark chocolate (60-70% cacao), chopped
- ½ cup (113g) unsalted butter, cubed
- 2 large eggs
- 2 egg yolks
- ½ cup (100g) granulated white sugar
- 2 tablespoons (16g) all-purpose flour
- 1 tablespoon (5g) unsweetened cocoa powder
- ¼ teaspoon salt
- 1 cup (150g) fresh or frozen raspberries (for coulis)
- 2 tablespoons (25g) sugar (for coulis)
- 2 tablespoons (30ml) water (for coulis)
- Powdered sugar, fresh mint, or vanilla ice cream for garnish
Instructions
- Preheat oven to 425°F (220°C). Generously butter four 6-ounce ramekins and dust with cocoa powder, tapping out excess.
- Melt chocolate and butter together in a microwave-safe bowl in 30-second intervals, stirring until smooth. Let cool slightly.
- In a separate bowl, whisk eggs, egg yolks, sugar, and salt vigorously for 2-3 minutes until pale and fluffy.
- Pour melted chocolate mixture into egg mixture and stir gently. Sift in flour and cocoa powder, folding until just combined.
- Divide batter among ramekins. For extra gooeyness, press a small chocolate cube into the center of each.
- Bake for 12-14 minutes until edges are set but centers are still jiggly.
- While baking, simmer raspberries, sugar, and water for 5-7 minutes. Strain through a fine-mesh sieve to make coulis.
- Let cakes rest for 1 minute. Run a knife around edges, place a plate upside down over the ramekin, and flip to unmold.
- Serve immediately with warm raspberry coulis and optional garnishes.
Notes
Timing is critical; check at 12 minutes. The center should jiggle like Jell-O, not be liquid. Do not use chocolate chips as they contain stabilizers. Batter can be prepped and refrigerated for up to 24 hours before baking. Serve on warm plates to keep the lava flowing.
- Prep Time: 15 minutes
- Cook Time: 12-14 minutes
- Category: Dessert
- Cuisine: French
Nutrition
- Serving Size: 1 lava cake with 1 t
- Calories: 380
- Sugar: 24
- Sodium: 80
- Fat: 26
- Saturated Fat: 15
- Carbohydrates: 32
- Fiber: 3
- Protein: 6
Keywords: molten chocolate lava cake, chocolate dessert, raspberry coulis, date night dessert, easy baking, restaurant style dessert



