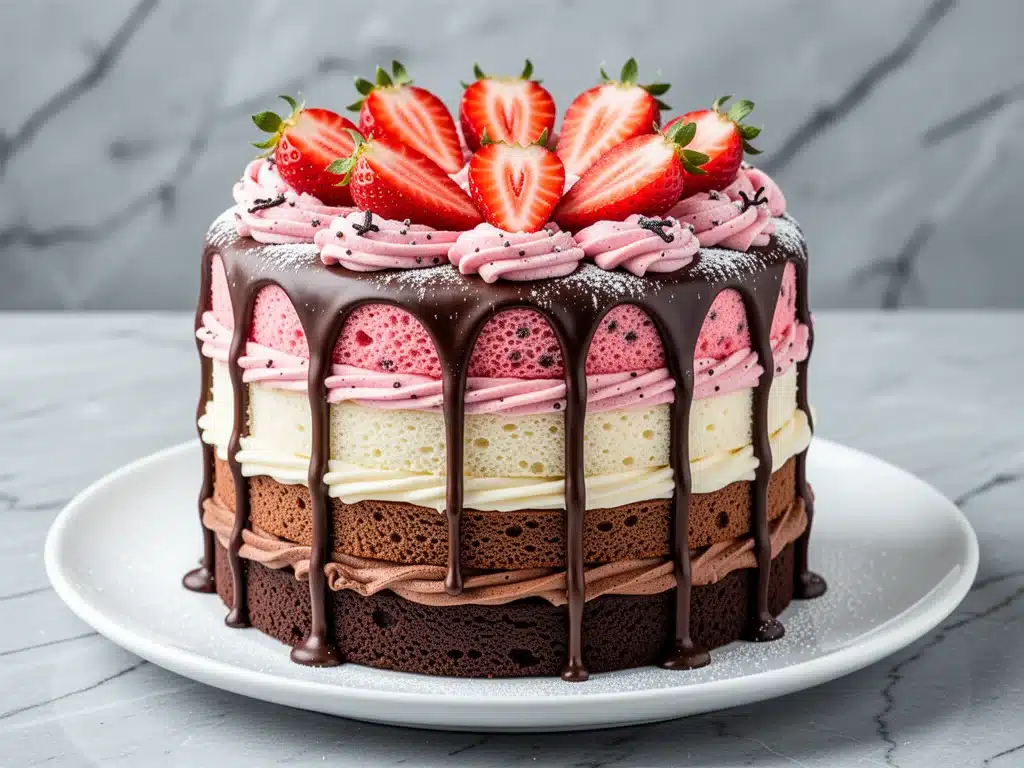
My daughter turned six last month. Six. I blinked, and she’s suddenly asking for “big kid” parties instead of cartoon characters. For her birthday, she didn’t want a princess or a superhero. She wanted something nostalgic, something colorful, and most importantly, something that tasted like her favorite ice cream. She specifically mentioned Neapolitan ice cream—the pink strawberry, the white vanilla, and the brown chocolate layers stacked together.
I’ll be honest: I panicked. I’ve baked cakes before. I’ve made traditional yom kippur honey cake for family gatherings, and I’m decent at roasting vegetables, but a three-flavor layer cake? With distinct colors and separate buttercreams? That felt like a whole new level of baking stress. I worried about the flavors bleeding into each other, the layers collapsing, or worst of all, my daughter looking at the cake and saying, “I wanted the ice cream kind, not this dry sponge.”
So I did what I always do when I’m unsure. I tested it. I baked this Neapolitan Layer Cake four times in two weeks. I adjusted the ratios, I fought with my oven temperatures, and I tasted enough strawberry buttercream to make my teeth sensitive. But on the fifth attempt, I cut into it, and the layers were distinct. The colors were vibrant. The flavors didn’t mix in a muddy mess. It looked exactly like a slice of Neapolitan ice cream, but warm, soft, and made with real butter.
That cake was the star of the party. I watched kids who usually pick off the frosting go back for seconds. I saw adults asking for the recipe. It wasn’t just a dessert; it was the moment that made the birthday feel special. If you’ve been intimidated by the idea of a three-flavor cake, let me tell you: it’s easier than you think. You just need to know the tricks to keep those layers separate and those buttercreams stable. This is the Neapolitan Layer Cake that actually works, and I’m going to walk you through exactly how to make it without the headache.
Why You’ll Love This Neapolitan Layer Cake
There are about a dozen reasons I keep coming back to this recipe, but let’s get to the ones that matter most when you’re standing in the kitchen at 10 PM the night before a party.
It Looks Impossible But Isn’t — Seriously. When you see the striped layers, you’ll think a professional baker made it. But it’s just three separate cakes baked in springform pans (or round pans if you’re careful) and stacked. I’ve baked this with zero professional training. If you can follow a recipe, you can do this.
It Hits Every Nostalgia Button — Neapolitan ice cream is a childhood classic for a reason. It’s sweet, creamy, and familiar. This cake captures that exact flavor profile but elevates it with homemade vanilla bean buttercream and rich chocolate ganache-style frosting. It’s nostalgic without being boring.
It’s a Crowd-Pleaser — I’ve served this to picky eaters and dessert snobs alike. The separate flavors mean everyone gets exactly what they want. Chocolate lovers get the chocolate layer. Vanilla purists get the vanilla. Strawberry fans get the pink. No arguments at the table.
It Freezes Well — This is my secret weapon. I bake the layers a week ahead, wrap them tight, and freeze them. When it’s time to decorate, I just let them thaw. This takes the stress out of party planning. You’re not scrambling on the morning of the event.
It’s Visually Stunning — Let’s be real. We eat with our eyes first. The pink, white, and brown stripes are Instagram-ready. But more importantly, they look homemade and thoughtful, not store-bought. It makes you look like a hero to your party guests.
This is my go-to when I need a centerpiece dessert that feels fancy but doesn’t require a degree in pastry arts. It’s reliable, delicious, and makes everyone happy. No complicated techniques, just good ingredients and a little patience.
Ingredients You’ll Need for the Cake and Frosting
Here’s the best part: you probably have most of the base ingredients in your pantry. The key to a good Neapolitan Layer Cake is quality butter and fresh extracts. Don’t skimp on the vanilla. And for the chocolate, use good cocoa powder, not the sugary drink mix stuff.
For the Vanilla Cake Base
All-purpose flour (3 cups / 375g) — I use Gold Medal. It gives a tender crumb. Cake flour is nicer but harder to find. This works perfectly.
Granulated sugar (2 cups / 400g) — Standard white sugar. Don’t substitute with brown sugar here; you want that light color for the vanilla layer.
Baking powder (2 teaspoons) — Check the expiration date. Old baking powder makes flat cakes. I replace mine every few months.
Salt (1 teaspoon) — Enhances all the flavors. Don’t skip it.
Unsalted butter (1 cup / 225g, softened) — Room temperature is crucial. If it’s cold, it won’t cream with the sugar. If it’s melted, the texture changes. Softened means you can indent it with your finger.
Eggs (4 large, room temperature) — Again, room temp helps them emulsify better. Take them out of the fridge an hour before you start.
Vanilla extract (2 teaspoons) — Use real vanilla, not imitation. The difference is huge in a vanilla cake. I use Nielsen-Massey.
Whole milk (1.5 cups / 360ml) — Full fat is best for richness. Buttermilk works too and makes it tangier.
For the Strawberry Layer
Strawberry jam or preserves (½ cup / 150g) — I use a high-quality brand like Smucker’s or a homemade batch. Seedless is easier to mix in smoothly, but seeds add texture if you don’t mind them.
Food coloring (Red gel paste) — Liquid coloring makes the batter watery. Gel paste gives intense color without changing the consistency. A little goes a long way.
Strawberry extract (½ teaspoon) — Optional, but boosts the strawberry flavor. If you skip it, the jam provides enough taste.
For the Chocolate Layer
Unsweetened cocoa powder (¾ cup / 75g) — Natural cocoa is standard. Dutch-process is darker and less acidic. Either works, but natural is easier to find. Sift it to avoid lumps.
Hot coffee (½ cup / 120ml) — Yes, coffee. It doesn’t make the cake taste like coffee; it deepens the chocolate flavor. I use instant espresso powder dissolved in hot water if I’m out of brew.
For the Buttercreams
Unsalted butter (2 cups / 450g, softened) — You’ll need a lot of butter for the frosting. Make sure it’s perfectly soft.
Confectioners’ sugar (6-7 cups / 750g-875g) — Sift this! Clumps in frosting are the worst. I sift twice just to be safe.
Heavy cream (4-6 tablespoons) — Adjust for consistency. You want it pipeable but not runny.
Vanilla extract (1 tablespoon) — For the white buttercream.
Strawberry jam (½ cup) — Strained through a sieve to remove seeds, then mixed with butter and sugar.
Cocoa powder (½ cup) — For the chocolate buttercream.
Salt (½ teaspoon) — Cuts the sweetness. Essential.
Equipment Needed
You don’t need fancy gadgets for this. Here’s what I actually use.
Three 8-inch round cake pans — I use springform pans because they release the layers so easily. If you use regular pans, grease them heavily and line the bottoms with parchment paper. Trust me on the parchment.
Electric mixer — Stand mixer is ideal, but a hand mixer works fine. You need to cream the butter and sugar until it’s light and fluffy, which takes muscle if you’re doing it by hand.
Sifting tool — A fine-mesh sieve is non-negotiable for the sugar and cocoa. Lumpy frosting is a tragedy.
Cooling racks — Two of them. You need to cool the cakes completely before frosting, or the buttercream will melt.
Spatulas — One rubber spatula for mixing batter, one offset spatula for frosting. The offset spatula makes leveling the layers so much easier.
Pastry bag — Optional, but makes decorating the sides look professional. A ziplock bag with the corner cut off works in a pinch.
Cake turntable — Nice to have, but not necessary. I just rotate the cake with my hands.
How to Make It: Step-by-Step
Alright, let’s make this! I’m walking you through exactly how I do it, including the little tricks I’ve picked up over four test runs.
Step 1: Prep Your Pans and Oven (10 minutes)
Preheat your oven to 350°F (175°C). Grease your three cake pans with butter or non-stick spray. Line the bottoms with parchment circles. This ensures the cakes don’t stick. If you’re using regular pans, dust them with flour after greasing. Tap out the excess.
Step 2: Make the Vanilla Base Batter (10 minutes)
In a large bowl, whisk together the flour, baking powder, and salt. In the bowl of your mixer, beat the softened butter and sugar on medium-high speed for 4-5 minutes. It should look pale and fluffy. This step is crucial for a tender cake. Add the eggs one at a time, beating well after each. Mix in the vanilla extract. Alternately add the dry ingredients and the milk, starting and ending with the flour. Mix until *just* combined. Don’t overmix!
Step 3: Divide the Batter (5 minutes)
Divide the vanilla batter into three equal parts. Keep one part plain for the vanilla layer. To the second part, add the strawberry jam, strawberry extract, and red gel food coloring. Mix until uniform. To the third part, sift in the cocoa powder, then add the hot coffee. Stir until smooth. The coffee will make the batter liquidy, which is normal.
Step 4: Bake the Layers (25-30 minutes)
Pour each batter into a prepared pan. Bake for 25-30 minutes. Test for doneness by inserting a toothpick into the center. If it comes out clean, they’re done. The chocolate layer might take a minute longer. Let the cakes cool in the pans for 10 minutes, then turn them out onto cooling racks to cool completely. This is the most impatient part. Do not rush it. Warm cake = melted frosting.
Step 5: Make the Buttercreams (20 minutes)
Vanilla Buttercream: Beat 1 cup of butter until creamy. Gradually add 3 cups of sifted powdered sugar. Add vanilla, salt, and enough cream to reach piping consistency. Beat on high for 3 minutes until fluffy.
Strawberry Buttercream: In a separate bowl, beat 1 cup of butter. Add ½ cup of strained strawberry jam (cook it down slightly first to remove excess water, or it will make the frosting runny). Gradually add 2 cups of powdered sugar. Beat until fluffy.
Chocolate Buttercream: Beat 1 cup of butter. Sift in ½ cup cocoa powder. Gradually add 2 cups of powdered sugar. Add a splash of cream. Beat until smooth.
Step 6: Assemble the Cake (15 minutes)
Place the vanilla layer on your serving plate. Spread a thick layer of vanilla buttercream on top. Place the strawberry layer on top. Spread strawberry buttercream. Place the chocolate layer on top. Spread chocolate buttercream over the top and sides. Use an offset spatula to create swirls or smooth it out. I like a rustic swirl look.
Step 7: Chill and Serve
Refrigerate the cake for at least 30 minutes to set the frosting. This makes slicing much cleaner. Garnish with fresh strawberries or chocolate shavings if you want. Slice and serve.
Expert Tips & Tricks
Here’s everything I’ve learned from making this dozens of times. These tips will save you from my mistakes.
Strain Your Strawberry Jam — This is the #1 tip for the pink layer. Fresh jam has seeds and water. If you mix it directly into buttercream, it will be gritty and runny. Cook the jam in a small saucepan for 5 minutes to reduce it, then strain it through a fine-mesh sieve to remove seeds. Let it cool completely before mixing with butter. It will be smooth and intense.
Room Temperature Ingredients — I can’t stress this enough. Cold butter doesn’t cream. Cold eggs cause the batter to curdle. Take everything out of the fridge at least an hour before you start. It saves you from fixing broken emulsions later.
Cool Completely — I know you’re eager to frost. But if the cakes are even slightly warm, the butter in the frosting will melt. The cake will slide apart. Wrap the cooled layers in plastic wrap and freeze them for an hour. This makes them firm and easy to handle.
Sift Your Sugar — Clumps in powdered sugar are the enemy. Sift it into your mixer bowl. It takes two minutes but makes the frosting silky smooth.
Use Gel Food Coloring — Liquid food coloring adds water to your batter, which can throw off the flour-to-liquid ratio. Gel paste gives vibrant color without altering the texture. Just a dab is enough for the strawberry layer.
Common Mistakes (and how to avoid them):
Mistake: Layers are domed. Fix: Bake at a slightly lower temperature (325°F) or use cake strips around the pans. They keep the edges from baking too fast.
Mistake: Frosting is too sweet. Fix: Add a pinch more salt to each buttercream. It balances the sugar perfectly.
Mistake: Cake is dry. Fix: You might be overbaking. Check it 2 minutes before the timer goes off. The toothpick should have a few moist crumbs, not be bone dry.
Variations & Substitutions
Once you’ve nailed the basic version, here’s how you can mix it up. I’ve tried all of these.
Strawberry Shortcake Style — Instead of strawberry buttercream, use fresh whipped cream sweetened with sugar. Layer fresh sliced strawberries between the vanilla and strawberry cake layers. It’s lighter and less sweet.
Chocolate Chip Twist — Fold ½ cup of mini chocolate chips into the chocolate cake layer. Adds texture and bursts of chocolate.
Gluten-Free — Use a 1:1 gluten-free flour blend. The texture is slightly denser but still delicious. I’ve used Bob’s Red Mill and it works well.
Dairy-Free — Use coconut oil instead of butter in the cake and frosting. Use coconut cream instead of milk. The frosting will be softer, so chill it well.
Vegan — Use flax eggs (1 tbsp ground flax + 3 tbsp water per egg) and vegan butter. Use coconut cream for the frosting. It’s rich and creamy.
Different Flavors — Swap the strawberry for raspberry, and the chocolate for caramel. The technique is the same. I’ve made a birthday cake with lemon, blueberry, and chocolate layers, and it was amazing.
Serving & Storage
How to Serve:
I usually serve this straight from the fridge. The cold frosting is firm and holds its shape. Let it sit at room temperature for 10 minutes before slicing for the best texture. Pair it with a simple green salad or fruit platter for a complete party spread.
Side Dishes:
– Fresh berries
– Lemonade or iced tea
– Tres leches cake for a different dairy-rich option if you’re serving multiple desserts (though one is plenty!)
Storage Instructions:
Refrigerator:
Store in an airtight container or under a cake dome for up to 5 days. The frosting will harden in the fridge. Let it come to room temperature before serving for the best flavor.
Freezing:
You can freeze the unfrosted cake layers for up to 3 months. Wrap them tightly in plastic wrap and then foil. Thaw overnight in the fridge before frosting. Do not freeze the assembled cake; the frosting will separate and look grainy.
Reheating:
No need to reheat. Serve at room temperature or slightly chilled.
Nutrition Information
I’m not a nutritionist, but here’s the breakdown if you’re tracking. This is a rich dessert, so portion control is key.
Per Serving (based on 12 servings):
– Calories: 650
– Protein: 6g
– Carbs: 85g
– Fiber: 2g
– Sugar: 60g
– Fat: 32g
– Saturated Fat: 18g
– Cholesterol: 85mg
– Sodium: 350mg
What’s Good:
– Real butter and eggs provide some protein and fat.
– The vanilla layer has no added sugar beyond the frosting.
What to Know:
– High in sugar and saturated fat. This is a treat, not a health food.
– Contains gluten and dairy.
My Take:
“Look, this is a birthday cake. It’s supposed to be indulgent. I don’t feel guilty eating a slice. It’s better than store-bought because you control the ingredients. When I want to make it lighter, I reduce the frosting on the sides and use a thinner layer. But usually? I just enjoy a small slice and savor it.”
Final Thoughts
So that’s my Neapolitan Layer Cake! I’ve probably talked your ear off at this point, but when you make a recipe this often, you have a lot to say about it. This cake has saved my sanity during birthday parties. It’s my answer to “what’s the dessert?” when I want something special but manageable. My kids are happy, my friends are impressed, and I’m happy because I’m not stressed about cooking.
Make it yours! Try different extracts, swap in your favorite berries, adjust the sweetness. The best recipes are the ones you adapt to your family’s tastes. If you make this, drop a comment and let me know what you think! I love hearing how recipes turn out in your kitchen. And if something doesn’t work, tell me that too—I’m here to help troubleshoot.
Happy baking! And I hope your kitchen smells half as good as mine does right now.
Frequently Asked Questions
Can I use boxed cake mix for this?
You can, but I don’t recommend it. Boxed mix lacks the depth of flavor that homemade batter provides. However, if you’re short on time, you can use two boxes of vanilla cake mix. Divide the batter into three parts. Keep one plain. Add cocoa and hot coffee to the second. Add strawberry jam and coloring to the third. It’s faster but not as rich.
Why did my strawberry buttercream turn out runny?
This usually happens if the strawberry jam had too much water content. Always cook down the jam and strain it to remove excess liquid. Also, make sure your butter is soft but not melted. If it’s melted, the emulsion breaks. If it’s already runny, chill the bowl in the fridge for 15 minutes, then beat it again.
Can I make this ahead of time?
Yes! This is actually the best way to do it. Bake the layers a week ahead and freeze them. Make the buttercreams a day ahead and store in the fridge. Assemble the cake the night before or morning of the party. This takes the stress out of the event day.
Why did my cake layers dome?
Cakes dome because the edges bake faster than the center. To prevent this, you can use cake strips (fabric strips you soak in water and wrap around the pan). Or, after baking, immediately place a warm, damp towel over the hot cake and press down gently. It’s not perfect, but it helps. For this recipe, since we’re stacking layers, a slight dome is okay—you can trim it off with a serrated knife.
Can I use chocolate cake mix for the chocolate layer?
Yes, if you want to save time. Use one box of chocolate cake mix. Prepare it according to the package directions. Add a little extra coffee to enhance the flavor. Just make sure the consistency is similar to the other batters so they bake at the same rate.
How do I store leftover Neapolitan cake?
Store it in an airtight container in the refrigerator for up to 5 days. The frosting will harden, so let it come to room temperature for 20 minutes before eating. Do not freeze the assembled cake.
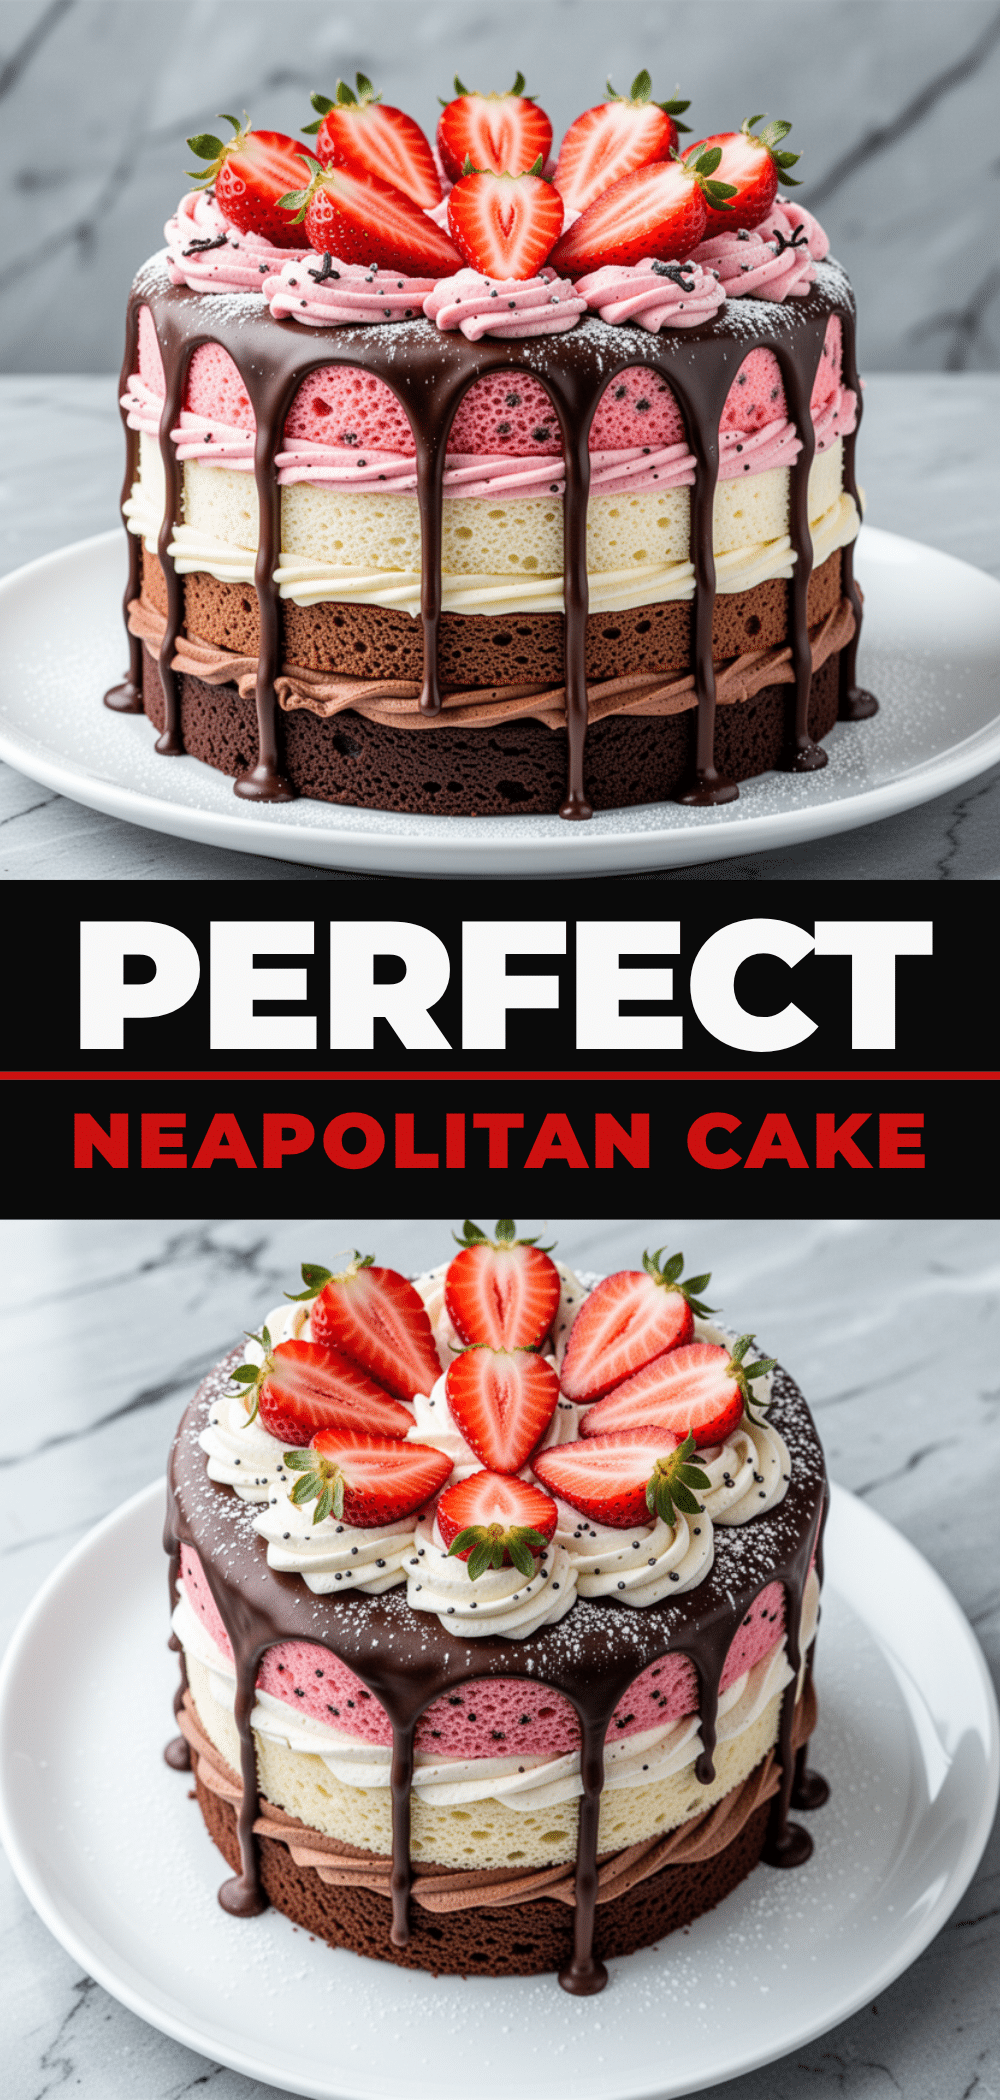
Pin This Recipe!
Neapolitan Layer Cake: 3 Best Birthday Recipe
- Total Time: 75 minutes
- Yield: 12 servings 1x
Description
A nostalgic three-flavor layer cake featuring distinct vanilla, strawberry, and chocolate sponge layers with matching buttercreams, designed to look and taste like Neapolitan ice cream.
Ingredients
- 3 cups (375g) all-purpose flour
- 2 cups (400g) granulated sugar
- 2 teaspoons baking powder
- 1 teaspoon salt
- 1 cup (225g) unsalted butter, softened
- 4 large eggs, room temperature
- 2 teaspoons vanilla extract
- 1.5 cups (360ml) whole milk
- ½ cup (150g) strawberry jam or preserves
- Red gel paste food coloring
- ½ teaspoon strawberry extract (optional)
- ¾ cup (75g) unsweetened cocoa powder
- ½ cup (120ml) hot coffee
- 2 cups (450g) unsalted butter, softened (for frosting)
- 6–7 cups (750g-875g) confectioners’ sugar, sifted
- 4–6 tablespoons heavy cream
- 1 tablespoon vanilla extract (for vanilla buttercream)
- ½ cup strained strawberry jam (for strawberry buttercream)
- ½ cup cocoa powder (for chocolate buttercream)
Instructions
- Preheat oven to 350°F (175°C). Grease three 8-inch round cake pans and line bottoms with parchment paper.
- Whisk together flour, baking powder, and salt in a large bowl.
- In a mixer bowl, beat softened butter and sugar on medium-high speed for 4-5 minutes until pale and fluffy.
- Add eggs one at a time, beating well after each. Mix in vanilla extract.
- Alternately add dry ingredients and milk to the butter mixture, starting and ending with flour. Mix until just combined.
- Divide batter into three equal parts. Keep one part plain for vanilla.
- To the second part, add strawberry jam, strawberry extract, and red gel food coloring. Mix until uniform.
- To the third part, sift in cocoa powder and add hot coffee. Stir until smooth.
- Pour each batter into a prepared pan. Bake for 25-30 minutes or until a toothpick comes out clean.
- Cool cakes in pans for 10 minutes, then turn out onto cooling racks to cool completely.
- Make Vanilla Buttercream: Beat 1 cup butter, gradually add 3 cups powdered sugar, vanilla, salt, and cream. Beat until fluffy.
- Make Strawberry Buttercream: Cook down and strain ½ cup jam to remove water. Beat 1 cup butter, add jam, then 2 cups powdered sugar. Beat until fluffy.
- Make Chocolate Buttercream: Beat 1 cup butter, sift in ½ cup cocoa powder, add 2 cups powdered sugar and a splash of cream. Beat until smooth.
- Assemble cake: Place vanilla layer on plate, spread vanilla buttercream. Add strawberry layer, spread strawberry buttercream. Add chocolate layer, spread chocolate buttercream over top and sides.
- Refrigerate for at least 30 minutes to set frosting before slicing and serving.
Notes
Ensure all ingredients are at room temperature for best emulsion. Strain strawberry jam to remove seeds and excess water to prevent runny frosting. Sift powdered sugar to avoid lumps. Do not rush cooling the cake layers before frosting to prevent melting.
- Prep Time: 45 minutes
- Cook Time: 30 minutes
- Category: Dessert
- Cuisine: American
Nutrition
- Serving Size: 1 slice
- Calories: 650
- Sugar: 60
- Sodium: 350
- Fat: 32
- Saturated Fat: 18
- Carbohydrates: 85
- Fiber: 2
- Protein: 6
Keywords: Neapolitan cake, birthday cake, layer cake, strawberry cake, chocolate cake, vanilla cake, homemade cake, party dessert



