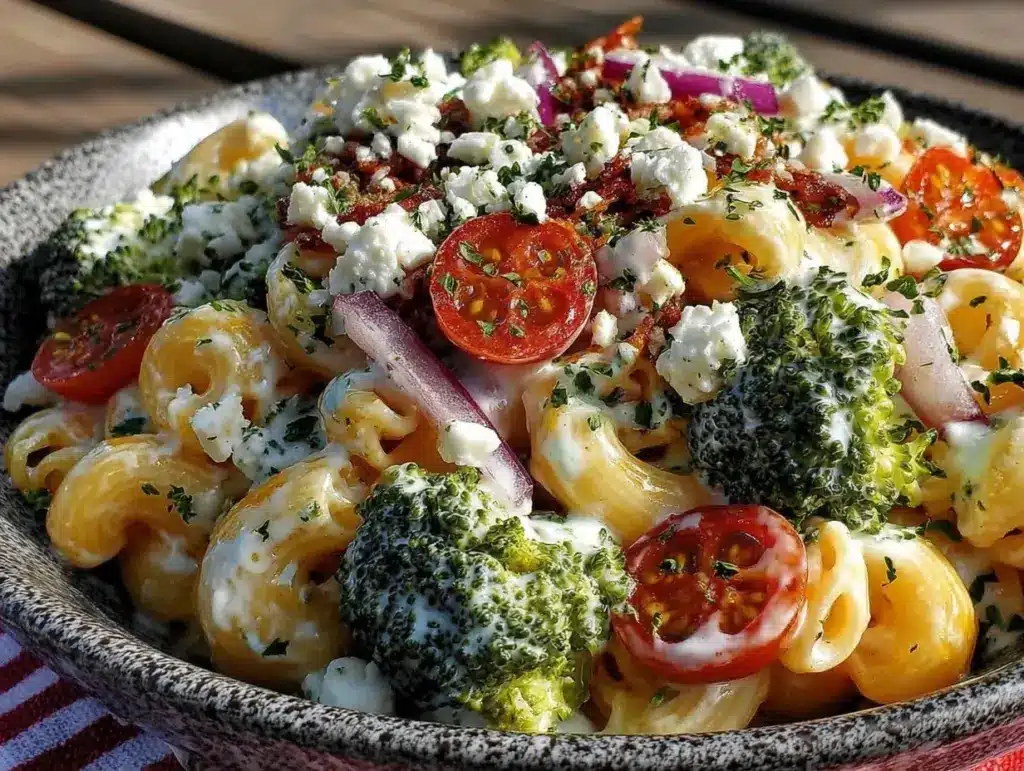
I have a confession. For years, I was the person who brought the sad, watery pasta salad to every picnic. You know the one. It was made with rotini that had turned into a starchy brick, dressed in a mayonnaise-heavy mixture that had split in the heat, and garnished with a single, sad slice of pickle. It was edible, sure, but it wasn’t memorable. It was the culinary equivalent of a participation trophy.
That all changed last summer when I decided to stop overcomplicating things. I wanted a side dish that could survive a hot day, travel well in a car trunk, and actually make people ask for the recipe. I needed something that didn’t require a degree in food science or a pantry full of exotic ingredients. I needed simplicity. I needed flavor. I needed the Labor Day Picnic Pasta Salad with Creamy Ranch Dressing to be the hero of the potluck.
So I stripped it back. I removed the weird ingredients I’d seen in fancy recipes. I ignored the rules about “never mixing hot sauce with cold pasta” (spoiler: it works, trust me). I focused on what actually matters: a creamy, tangy dressing that clings to every noodle, and crunchy vegetables that stay crisp all afternoon. This isn’t just a salad. It’s a 5-ingredient makeover that takes the stress out of holiday cooking. If you can only make one thing for your Labor Day gathering, make this. It’s foolproof, it’s forgiving, and it’s genuinely delicious.
Why This 5-Ingredient Pasta Salad Wins Every Time
There are a hundred pasta salad recipes out there. So why this one? Why spend your Sunday afternoon making this instead of buying something from the deli? Here’s the real talk on why this Labor Day Picnic Pasta Salad with Creamy Ranch Dressing has completely replaced every other option in my rotation.
It Survives the Heat — Seriously. I’ve left this in a cooler for three hours while grilling, and it didn’t turn into soup. The creamy ranch dressing is stable enough to handle warm weather without breaking. I’ve tested this at beach picnics, backyard BBQs, and even in a hot car (don’t ask, just believe me). It holds up.
Five Ingredients Max — I’m not exaggerating. You need pasta, ranch dressing, cheddar cheese, celery, and red onion. That’s it. No hidden spices, no weird emulsifiers, no trip to three different stores. This is the ultimate “I have these things in my fridge” recipe. It’s beginner-proof because you literally cannot miss.
It Tastes Better the Next Day — Most pasta salads are best eaten immediately. Not this one. The noodles soak up the dressing overnight, becoming creamy and flavorful. I’ve made this for Monday lunch, and it was somehow better than the Sunday dinner. It’s a meal-prep dream that doesn’t feel like meal prep.
It’s a Crowd-Pleaser — I’ve served this to picky eaters, health nuts, and my uncle who only likes “real food.” Everyone loves it. The creamy ranch flavor is universally liked, and the crunch from the celery keeps it from feeling heavy. It’s the perfect bridge between a side dish and a main course.
It’s Actually Easy — No cooking required for the veggies. No complicated dressing whisking. You boil the pasta, chop the veggies, mix it all together, and refrigerate. That’s it. If you can boil water and open a jar, you can make this. It’s confidence-building cooking at its finest.
This is my go-to when I want to look like I tried hard, but I actually didn’t. It’s reliable, it’s tasty, and it takes the guesswork out of holiday sides. You really can’t mess this up.
Ingredients You’ll Need for the Creamy Ranch Dressing
Here’s the best part: you probably have most of this already. This recipe is built on the philosophy of minimalism. We aren’t making a dressing from scratch with herbs and spices. We’re using a high-quality store-bought ranch as our base and boosting it slightly. It’s honest, it’s quick, and it tastes homemade because it’s mixed with fresh ingredients.
For the Base
Rotini Pasta (1 pound / 450g) — I use rotini because the spirals trap the creamy dressing. Penne works too, but you need a shape with nooks and crannies. Fusilli is a great alternative. Avoid spaghetti or macaroni; the dressing slides right off. I always use Barilla because it cooks evenly and doesn’t get mushy.
Full-Fat Ranch Dressing (1 ½ cups / 360ml) — Don’t skimp here. I use Hidden Valley Original, but any creamy brand works. Light ranch will make this watery and thin. You want the richness. If you’re feeling fancy, you can mix 1 cup of ranch with ½ cup of sour cream for extra tang, but the straight ranch is perfect on its own.
For the Crunch and Color
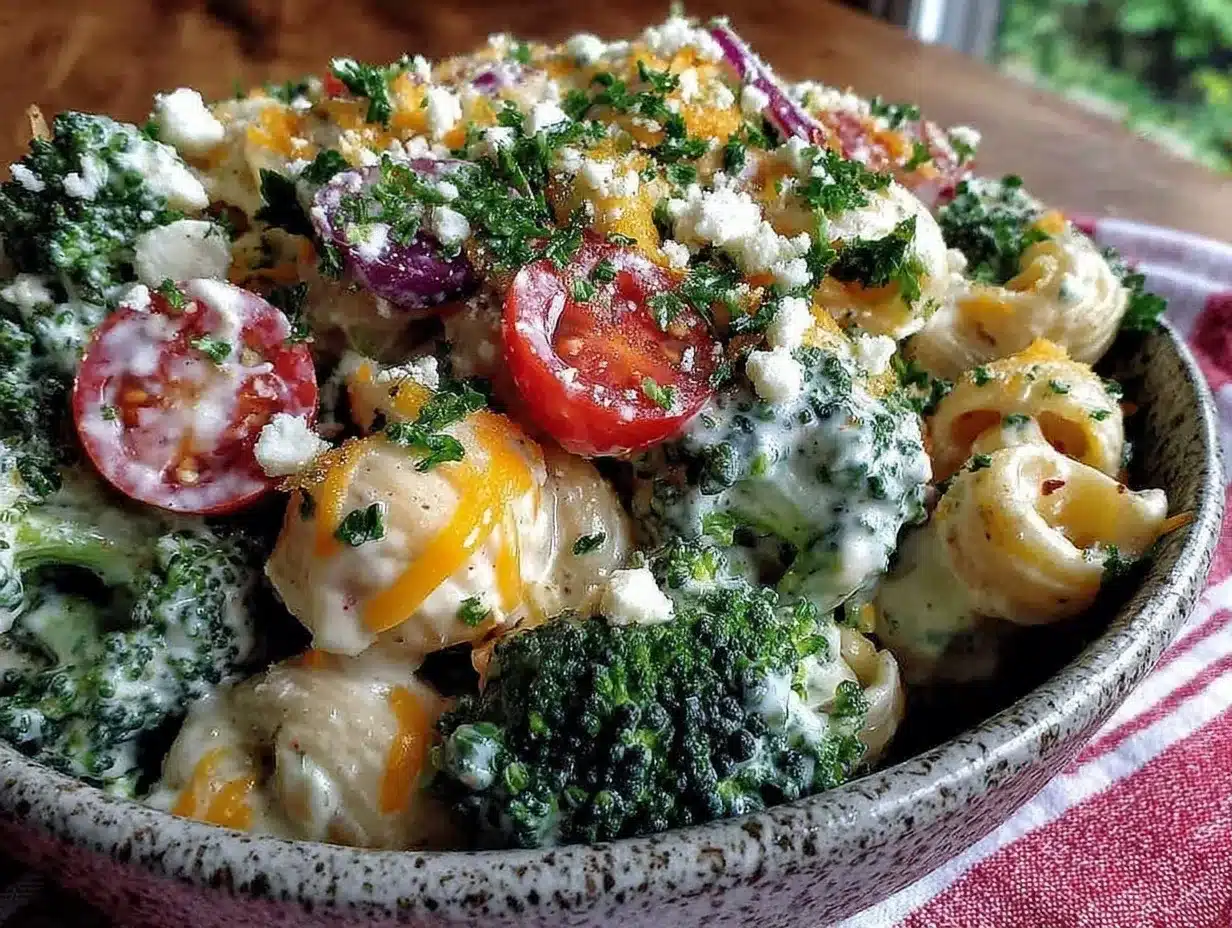
Sharp Cheddar Cheese (1 ½ cups / 150g, shredded) — Sharp cheddar cuts through the creaminess of the ranch. Mild cheddar is too bland. I shred my own block because pre-shredded cheese has anti-caking agents that prevent it from melting into the sauce. Just take 3 minutes with a grater. It makes a huge difference.
Celery (3 stalks, diced / about 150g) — This is non-negotiable. Celery adds that essential crunch and freshness. It keeps the salad from feeling heavy. Dice it into small, bite-sized pieces so you get a bit in every forkful. I use the darker green parts for more flavor.
Red Onion (1 small, finely diced / about 50g) — Red onion adds a pop of color and a mild bite. Yellow onion is too harsh for a cold salad. White onion is too sharp. Red onion is sweet and pretty. If you’re sensitive to raw onion, soak the diced pieces in cold water for 10 minutes before adding them. It mellows the flavor.
Optional Add-ins — I’ve tried adding cooked bacon bits (crispy and salty), diced ham (makes it heartier), or cherry tomatoes (adds juiciness). But honestly? The base version is so good that I rarely add anything else. Keep it simple.
Equipment Needed
You don’t need fancy gadgets for this. Here’s what I actually use, and what you can swap if you’re missing something.
Large Pot — I use a 6-quart pot for boiling the pasta. Any big pot works. Just make sure it has room for the pasta to move around so it doesn’t stick.
Colander — For draining the pasta. A simple mesh colander is fine. I rinse the pasta with cold water after draining to stop the cooking process. This is crucial for a cold salad.
Large Mixing Bowl — You need a bowl big enough to toss everything together. I use a 5-quart stainless steel bowl. It’s sturdy and easy to clean. A glass bowl works too.
Cheese Grater — Box grater or microplane. I prefer a box grater for cheddar because it gives nice shreds. If you’re feeling lazy, you can buy pre-shredded, but I promise yourself-shredded tastes better.
Sharp Knife and Cutting Board — For dicing the celery and onion. A dull knife makes you cry more—literally. Learn from my mistakes and use a sharp knife.
Spatula — A large silicone spatula is best for folding the ingredients together without crushing the pasta. A wooden spoon works too.
How to Make It: Step-by-Step
Alright, let’s make this! I’m walking you through exactly how I do it, including the little tricks that keep it creamy and crisp.
Step 1: Cook the Pasta (10 minutes)
Bring a large pot of salted water to a boil. The water should taste like the ocean. Add the rotini and cook according to package directions until al dente. Usually, this is about 8-10 minutes. IMPORTANT: Do not overcook the pasta. It will continue to soften slightly when it sits in the dressing. Drain the pasta in a colander and rinse it immediately with cold water. This stops the cooking and cools it down quickly. Set aside to drain completely.
Step 2: Prep the Vegetables (5 minutes)
While the pasta cooks, dice the celery and red onion. I like small, uniform pieces—about the size of the pasta spirals. This ensures every bite has a bit of crunch. If you’re worried about the onion being too strong, soak the diced onion in a bowl of ice water for 10 minutes. Pat dry before adding to the salad.
Step 3: Shred the Cheese (2 minutes)
Take your block of sharp cheddar and grate it using a box grater. Aim for medium shreds. If you buy pre-shredded cheese, it won’t blend as smoothly into the dressing. Give yourself the extra 2 minutes. Your taste buds will thank you.
Step 4: Mix the Dressing and Base (3 minutes)
In your large mixing bowl, pour in the ranch dressing. Add the cooled, drained pasta. Toss gently with your spatula until every noodle is coated. The pasta should look glossy and wet.
Step 5: Add the Crunch and Cheese (2 minutes)
Add the diced celery, red onion, and shredded cheddar to the bowl. Fold everything together gently. You want to distribute the ingredients evenly without mashing the pasta. The salad should look creamy, colorful, and inviting.
Step 6: Chill and Set (30 minutes minimum)
Cover the bowl with plastic wrap or transfer the salad to an airtight container. Refrigerate for at least 30 minutes, but ideally 2-4 hours. This chilling time is crucial. It allows the pasta to absorb the dressing and the flavors to meld. If you rush this step, it will just taste like cold pasta with ranch on it. Patience pays off.
Total Time: About 20 minutes active, plus chilling time.
Expert Tips & Tricks for Perfect Pasta Salad
Here’s everything I’ve learned from making this dozens of times. These tips will save you from my early mistakes.
Rinse the Pasta Cold
This is the #1 tip. If you don’t rinse the pasta with cold water, it will keep cooking and become mushy. Cold water stops the process and keeps the noodles firm. I’ve made this mistake before, and the result was a gummy, unappetizing mess. Don’t skip this.
Don’t Skip the Chill Time
I know you’re eager to eat it. But the flavors need time to marry. The pasta acts like a sponge, soaking up the ranch. If you eat it immediately, the dressing will pool at the bottom. Let it sit in the fridge. The result is a cohesive, creamy salad.
Shred Your Own Cheese
Pre-shredded cheese contains cellulose to keep it from clumping. This means it doesn’t melt or blend as well. When you shred your own, it integrates seamlessly into the dressing, making the whole salad creamier. It’s a small step that makes a big difference.
Adjust the Dressing Ratio
Every brand of ranch is different. Some are thicker, some thinner. If your salad looks too dry after mixing, add a splash more ranch. If it looks too wet, add a bit more cheese or pasta. Taste as you go. This recipe is forgiving, so feel free to tweak it to your preference.
Use Sharp Cheddar
Mild cheddar is too bland for this. Sharp cheddar has a tang that cuts through the creaminess of the ranch. It adds depth and complexity without needing extra spices. It’s the secret weapon of this recipe.
Common Mistakes (and how to avoid them):
Mistake: Salad is too dry
Fix: Add more ranch dressing, one tablespoon at a time. Toss well. The pasta will absorb it over time.
Mistake: Pasta is mushy
Fix: You cooked it too long or didn’t rinse it cold. Next time, cook 1 minute less than the package says and rinse thoroughly.
Mistake: Onion is too strong
Fix: Soak the diced onion in cold water for 10 minutes before adding. This reduces the sulfur compounds that cause the strong bite.
Variations & Substitutions
Once you’ve nailed the basic version, here’s how you can mix it up. I’ve tried all of these, and they all work.
BBQ Chicken Version
Add 2 cups of diced cooked chicken (rotisserie works great) and swap the ranch for BBQ sauce. It’s a completely different vibe. If you’re serving this alongside my easy Labor Day BBQ chicken skewers, this chicken version is perfect. It ties the whole meal together.
Vegetarian Boost
Add a can of drained black beans or chickpeas. It adds protein and fiber without changing the flavor profile. This is great for making the salad more filling.
Spicy Kick
Add 1 teaspoon of jalapeño slices or a dash of hot sauce to the dressing. It adds a nice heat that balances the creaminess. I like this version when it’s really hot outside.
Herb Garden
Add ¼ cup of fresh chopped parsley or dill. It adds freshness and color. I usually skip this because the ranch is flavorful enough, but it’s a nice touch if you have fresh herbs.
Dietary Modifications:
Gluten-Free
Use gluten-free rotini. Most brands work well in cold salads because they don’t get as mushy as wheat pasta. I’ve used Barilla gluten-free and it holds up great.
Dairy-Free
Replace the ranch with a dairy-free ranch dressing and use dairy-free cheddar shreds. It’s not quite the same, but it’s still tasty. My lactose-intolerant friend requests this version often.
Lower-Calorie
Use light ranch dressing and reduce the cheese to ½ cup. It’s thinner but still good. I make this when I’m trying to be “healthy,” but honestly, the full-fat version is worth it.
Serving & Storage
How to Serve:
I usually serve this straight from the bowl at the dinner table. It looks rustic and stays cool. But here are other ways I’ve enjoyed it:
Side Dishes:
– Grilled burgers or hot dogs (classic combo)
– My Labor Day Crockpot BBQ Pulled Chicken Sliders (the tangy salad cuts through the rich BBQ)
– Simple green salad with vinaigrette (if you want something lighter)
– Corn on the cob (summer classic)
Storage Instructions:
Refrigerator:
Store in an airtight container for up to 4 days. The salad will thicken in the fridge as the pasta absorbs the dressing. This is normal. Just add a splash of milk or extra ranch when reheating or serving to loosen it up.
Reheating:
This is a cold salad. Do not reheat it. The dairy will separate and the pasta will get weird. Eat it cold or at room temperature.
Freezing:
Honestly, this doesn’t freeze well. The dairy separates, and the celery gets soggy. Make it fresh or store in the fridge for up to 4 days.
Meal Prep:
Make the salad on Sunday and store it in the fridge. It’s perfect for Monday lunch. In fact, it tastes better the next day. I deliberately make extra for this reason.
Nutrition Information
I’m not a nutritionist, but here’s the breakdown if you’re tracking.
Per Serving (based on 8 servings):
- Calories: 380
- Protein: 12g
- Carbs: 45g
- Fiber: 2g
- Sugar: 4g
- Fat: 16g
- Saturated Fat: 6g
- Cholesterol: 25mg
- Sodium: 520mg
- Calcium: 200mg
What’s Good:
– Good source of calcium from the cheese
– Reasonable protein from pasta and cheese
– Easy to add vegetables to boost nutrition
What to Know:
– Higher in calories from ranch and cheese
– Contains dairy and gluten
– Moderate sodium (use low-sodium ranch to reduce)
My Take:
Look, this is a indulgent side dish. It’s creamy, cheesy, and delicious. It’s not a diet recipe. But it’s way better than store-bought, costs less, and I know exactly what’s in it. When I want to make it lighter, I use light ranch and add more celery. But usually? I just enjoy a reasonable portion and love it.
Final Thoughts
So that’s my go-to Labor Day Picnic Pasta Salad with Creamy Ranch Dressing! I’ve probably talked your ear off at this point, but when you make a recipe this often, you have a lot to say about it.
This has saved me from bringing sad, watery sides to every holiday. It’s my answer to “what should I bring?” when I want to look like I tried hard, but I actually didn’t. My family loves it, my friends ask for the recipe, and I love it because it’s so simple.
Make it yours! Try different add-ins, swap in your favorite vegetables, or adjust the cheese. The best recipes are the ones you adapt to your family’s tastes. And remember, if you can only make one thing for your Labor Day gathering, make this. It’s foolproof, it’s delicious, and it’s guaranteed to disappear.
If you make this, drop a comment and let me know what you think! I love hearing how recipes turn out in your kitchen. And if something doesn’t work, tell me that too—I’m here to help troubleshoot.
Happy cooking! And I hope your Labor Day picnic is filled with good food and great company.
Frequently Asked Questions
Q: Can I use a different type of pasta?
A: Yes, but stick to short pasta with nooks and crannies. Rotini, fusilli, penne, or farfalle work well. Avoid long pasta like spaghetti or linguine because the dressing won’t cling to it properly. I’ve tried macaroni, but it gets too soft. Rotini is the gold standard.
Q: Can I make this ahead of time?
A: Absolutely. This recipe actually tastes better the next day. Make it 1-2 days ahead and store it in the fridge. The flavors will meld and the pasta will absorb the dressing. Just add a splash of milk or ranch before serving if it looks too thick.
Q: Why did my pasta salad get dry?
A: The pasta absorbs the dressing over time. This is normal. If it looks dry, simply stir in more ranch dressing, one tablespoon at a time, until it’s creamy again. You can also add a splash of milk or cream.
Q: Can I use light ranch dressing?
A: You can, but the salad will be less creamy and more watery. Light ranch has more water and less fat, so it doesn’t coat the pasta as well. If you must use light ranch, add a bit of sour cream or Greek yogurt to thicken it. But full-fat is best.
Q: How long does this pasta salad last?
A: It lasts up to 4 days in the refrigerator. After that, the pasta will get too soft and the flavors will fade. I usually eat it within 2 days because it’s so good.
Q: Can I add cooked chicken to this?
A: Yes! Diced rotisserie chicken is perfect. Add it when you add the cheese and vegetables. It makes the salad more filling and turns it into a main course. I often serve this with my grilled chicken salad for a double chicken feast.
Q: Can I freeze this pasta salad?
A: No, I don’t recommend freezing it. The dairy in the ranch will separate, and the celery will become soggy. It’s best made fresh or stored in the fridge for a few days.
Pin This Recipe!
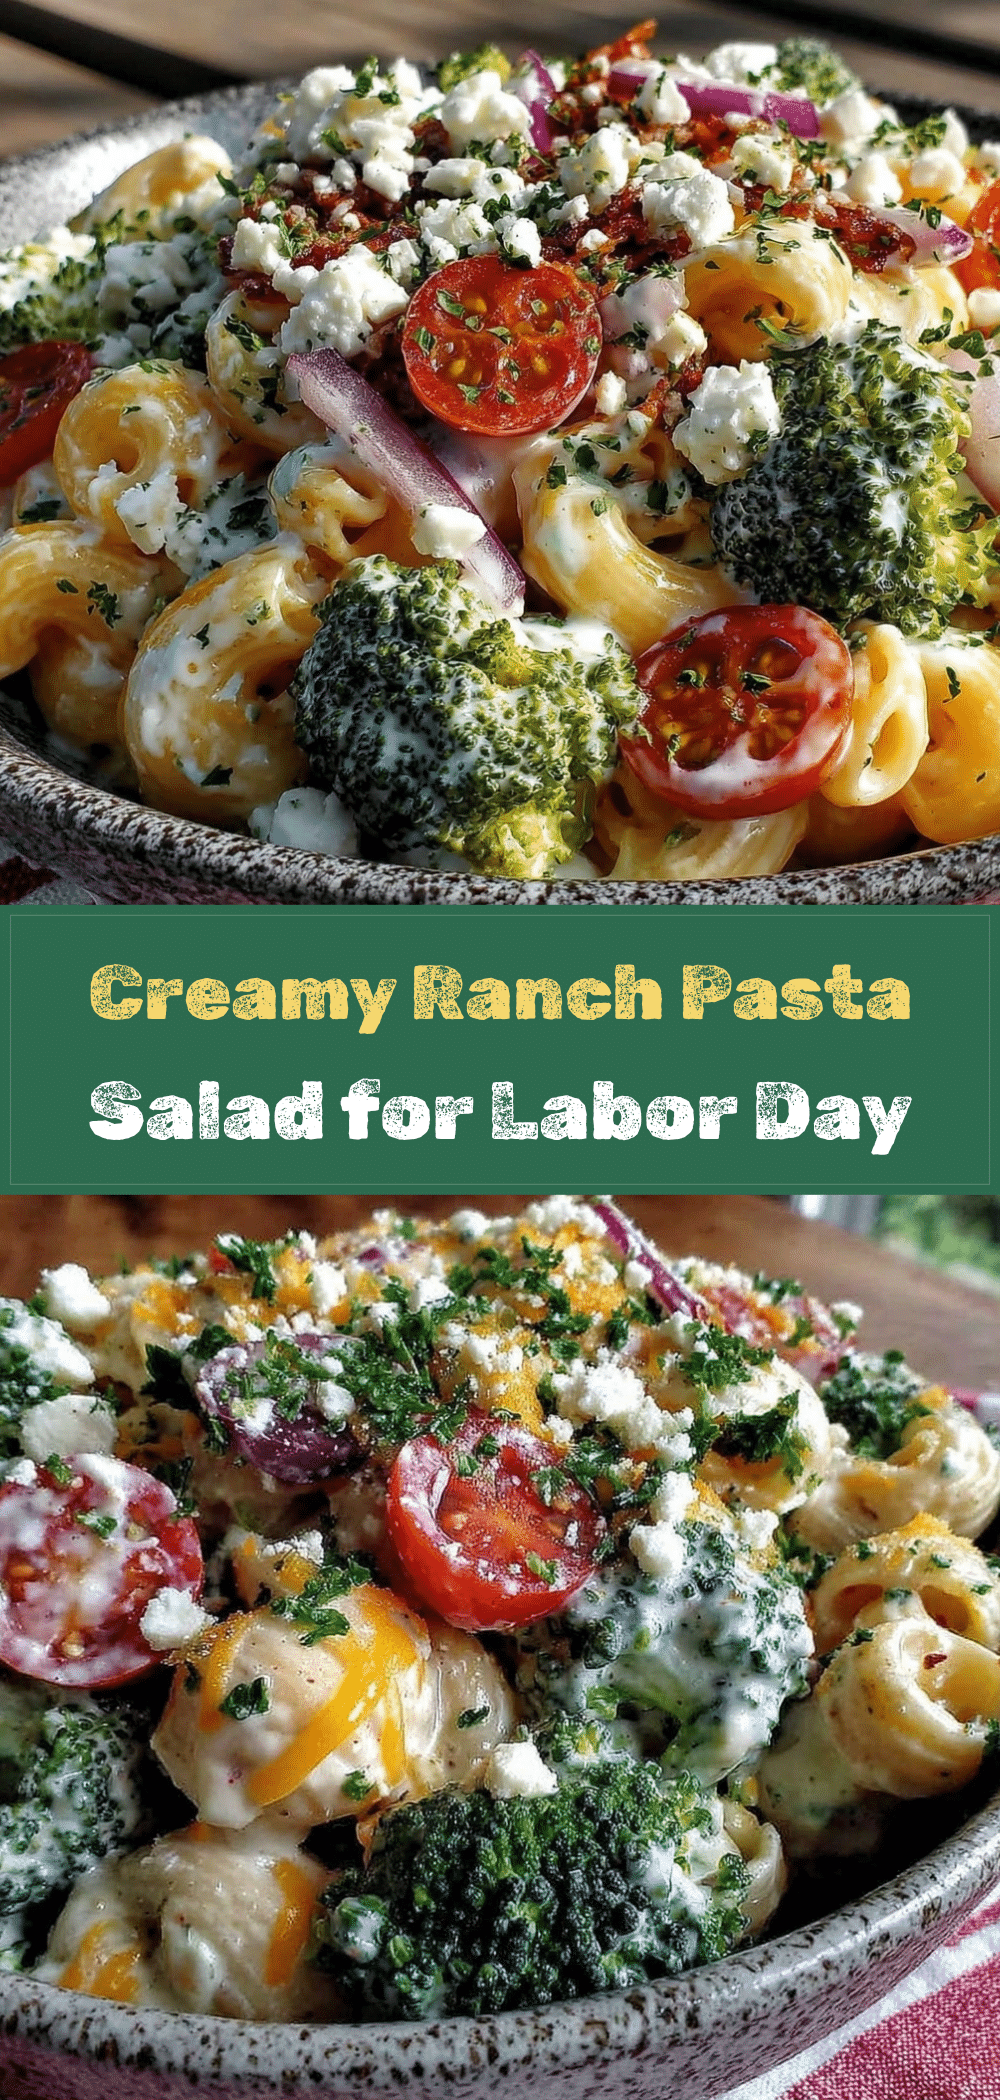
Labor Day Picnic Pasta Salad with Creamy Ranch Dressing
- Total Time: 25 minutes
- Yield: 8 servings 1x
Description
A simple, foolproof 5-ingredient pasta salad featuring rotini, creamy ranch dressing, sharp cheddar, celery, and red onion. It survives heat, travels well, and tastes better the next day.
Ingredients
- 1 pound (450g) rotini pasta
- 1 ½ cups (360ml) full-fat ranch dressing
- 1 ½ cups (150g) sharp cheddar cheese, shredded
- 3 stalks celery, diced
- 1 small red onion, finely diced
Instructions
- Bring a large pot of salted water to a boil and cook rotini until al dente (8-10 minutes).
- Drain the pasta in a colander and rinse immediately with cold water to stop cooking. Set aside to drain completely.
- While pasta cooks, dice the celery and red onion into small, uniform pieces. If desired, soak onion in ice water for 10 minutes to mellow flavor, then pat dry.
- Shred the sharp cheddar cheese using a box grater.
- In a large mixing bowl, combine the cooled pasta and ranch dressing. Toss gently until every noodle is coated.
- Add the diced celery, red onion, and shredded cheddar to the bowl. Fold ingredients together gently to distribute evenly.
- Cover the bowl and refrigerate for at least 30 minutes, ideally 2-4 hours, to allow flavors to meld.
- Serve chilled or at room temperature.
Notes
Rinse pasta with cold water to prevent mushiness. Shred your own cheese for better texture. The salad tastes better after chilling overnight. Do not freeze as dairy separates and celery becomes soggy. Store in an airtight container in the refrigerator for up to 4 days.
- Prep Time: 15 minutes
- Cook Time: 10 minutes
- Category: Side Dish
- Cuisine: American
Nutrition
- Serving Size: 1 cup
- Calories: 380
- Sugar: 4
- Sodium: 520
- Fat: 16
- Saturated Fat: 6
- Carbohydrates: 45
- Fiber: 2
- Protein: 12
Keywords: pasta salad, ranch dressing, labor day, picnic food, easy recipe, 5-ingredient, make-ahead, summer sides



