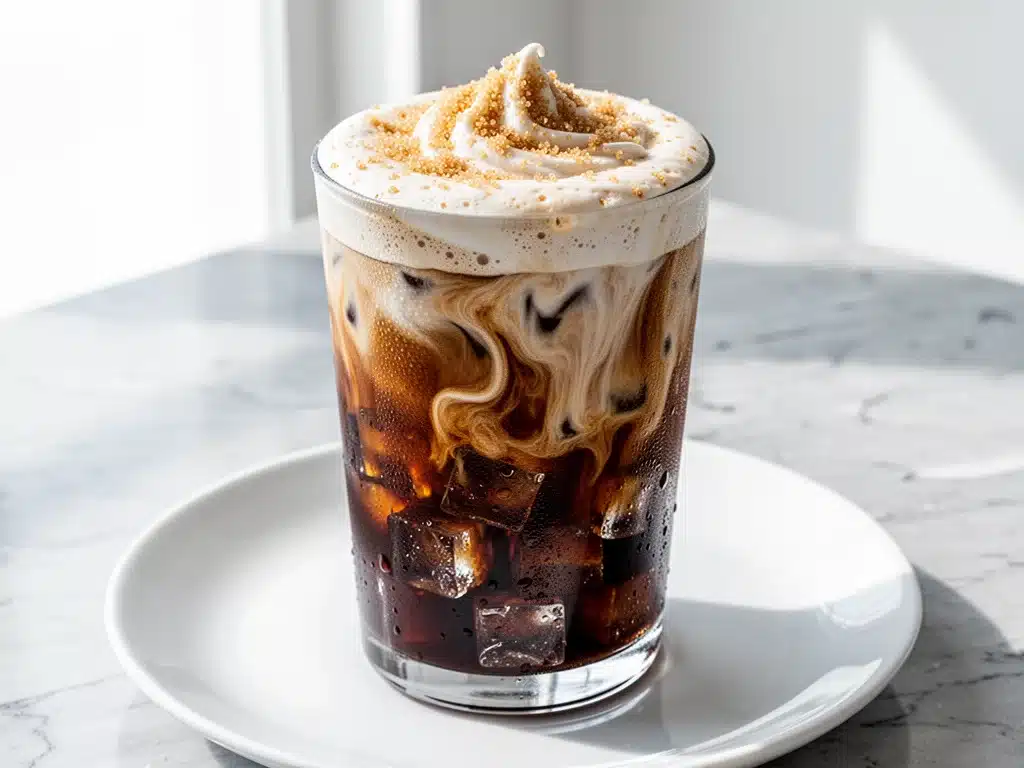
I have a confession to make. Last Tuesday, I stood in line at my favorite local coffee shop for twelve minutes. Twelve. Minutes. To get a drink that takes me exactly four minutes to make at home. And when I finally got it, it was lukewarm, the foam was flat, and the brown sugar syrup tasted suspiciously like high-fructose corn syrup.
I walked out, walked back to my car, and made this Copycat Brown Sugar Shaken Espresso with Oat Milk instead.
It was so good that I almost laughed out loud. It was cold, fizzy, incredibly creamy, and tasted like a caramel dream. The best part? I spent less money, used zero plastic cups, and actually enjoyed my coffee while sitting in the quiet of my kitchen.
Here’s the thing about the shaken espresso trend. It started as a coffee shop gimmick, but somewhere along the way, people realized it’s actually just the perfect way to enjoy iced coffee without it being watery or boring. The shaking creates these tiny, delicious air bubbles that give it a velvety texture you can’t get from just stirring. And when you add that specific caramel-like sweetness of brown sugar syrup and pair it with creamy oat milk? It’s basically dessert for breakfast.
I’ve tested this recipe at least ten times, tweaking the ice-to-coffee ratio and the oat milk brand, until I landed on the perfect balance. It’s rich without being heavy, sweet without being cloying, and it’s ready before you can even finish reading this blog post. If you’re tired of paying $6 for a mediocre iced latte, you need to try this. Trust me.
Why You’ll Love This Brown Sugar Shaken Espresso
This isn’t just another iced coffee recipe. This is my daily ritual, my afternoon pick-me-up, and my weekend treat. There are about a dozen reasons I keep coming back to this drink, but here are the big ones that make it a total game-changer:
It’s Faster Than Takeout — Seriously. From pulling the espresso shot to pouring the drink, it takes about 4 minutes. That’s faster than driving to Starbucks, waiting in line, and driving back. I make this while my toast pops.
The Texture is Unbeatable — The “shaken” part isn’t just for show. Shaking the hot espresso with ice and brown sugar syrup creates a thick, cappuccino-like foam that sits on top of the cold milk. It’s silky, airy, and looks gorgeous in a glass. It’s the kind of presentation that makes you feel fancy, even if you’re in your pajamas.
Oat Milk Makes It Dreamy — I’ve tried this with almond milk (too thin), soy milk (too beany for my taste), and whole milk (too heavy). Oat milk is the winner. It has that natural creaminess and slight sweetness that pairs perfectly with the brown sugar. It froths beautifully and doesn’t separate in the cold espresso.
It’s Actually Sweet, Not Just Sugary — Because we’re using brown sugar syrup (which tastes like caramel and molasses) instead of plain white sugar or artificial syrups, the sweetness feels deeper and more complex. It tastes like a treat, not just a caffeine fix.
Zero Waste — No plastic cups, no lids, no straws. Just my favorite glass mug. I feel good about making this at home, especially on busy mornings when I’m in a rush.
This drink has completely changed my morning routine. I used to dread the coffee shop queue, but now I look forward to making this. It’s my little moment of calm before the chaos starts. And if you’re someone who loves brown sugar cinnamon baked oatmeal, you’re going to love this drink. It’s the liquid version of that same cozy, comforting flavor profile.
Ingredients You’ll Need
Here’s the best part: you probably have most of this already. This isn’t a complex recipe with exotic ingredients you need to order online. It’s simple, accessible, and relies on quality basics.
For the Espresso Base:
Espresso (2 shots, about 2 ounces / 60ml) — This is the heart of the drink. You need strong, hot espresso. If you don’t have an espresso machine, use a Moka pot or even very strong brewed coffee from a French press. But honestly, if you use weak drip coffee, it won’t have that punchy flavor. I use a Moka pot because it gives that intense, rich base I love.
Brown Sugar Syrup (2 tablespoons) — This is the secret weapon. You can buy it, but homemade is so easy and tastes infinitely better. See the recipe below. It’s just brown sugar and water. No weird gums or preservatives.
Ice (1 cup / 150g) — Use large cubes if you have them. They melt slower, which keeps the drink cold without watering it down too quickly. Standard cubes work fine, just don’t skimp on the amount.
For the Milk Layer:
Oat Milk (1 cup / 240ml) — I recommend Oatly Barista Edition or any “barista style” oat milk. These have a bit more fat and protein, which helps them froth better and stay creamy. Regular oat milk works, but the texture will be thinner. I stick with Barista Edition because it makes that nice foam layer.
Optional Garnish:
Extra Brown Sugar (1 teaspoon) — For sprinkling on top. Adds a crunchy, caramelized finish.
Whipped Cream — Optional, but if you’re feeling indulgent, a dollop on top is delicious. I usually skip it, but my partner loves it.
Quick Tip on the Syrup: If you’re in a huge rush, you can use a standard vanilla syrup, but it won’t have that deep caramel note. Or, you can just dissolve 1 tablespoon of brown sugar directly into the hot espresso. It works, but the syrup integrates faster and smoother. I always make a batch of syrup on Sunday because it keeps in the fridge for two weeks.
Equipment Needed
You don’t need fancy gadgets for this. Here’s what I actually use in my kitchen:
Jigger or Measuring Spoons — For the espresso and syrup. A jigger is nice, but a standard tablespoon works perfectly.
Espresso Machine or Moka Pot — To get that strong, hot shot. If you don’t have these, a strong French press is the backup plan.
Cocktail Shaker — This is crucial. You need something sealable to shake the hot espresso with ice. A Boston shaker is ideal, but a simple mason jar with a tight lid works great too. I use a small glass shaker because I can see the foam forming.
Highball Glass or Large Mug — Something tall and clear so you can see the layers. A 12-ounce glass is perfect.
Strainer (Optional) — If you’re using a mason jar, you might need a small mesh strainer to catch ice chunks when pouring. If you’re using a proper shaker with a built-in strainer, you’re good.
Bar Spoon or Long Spoon — For stirring the syrup into the espresso before shaking.
I’m not using anything fancy here. My shaker is from a dollar store, and my moka pot is ten years old. You don’t need to invest in anything special. Just make sure your shaker seals tightly—there’s nothing worse than hot espresso spraying all over your kitchen counter.
How to Make It: Step-by-Step
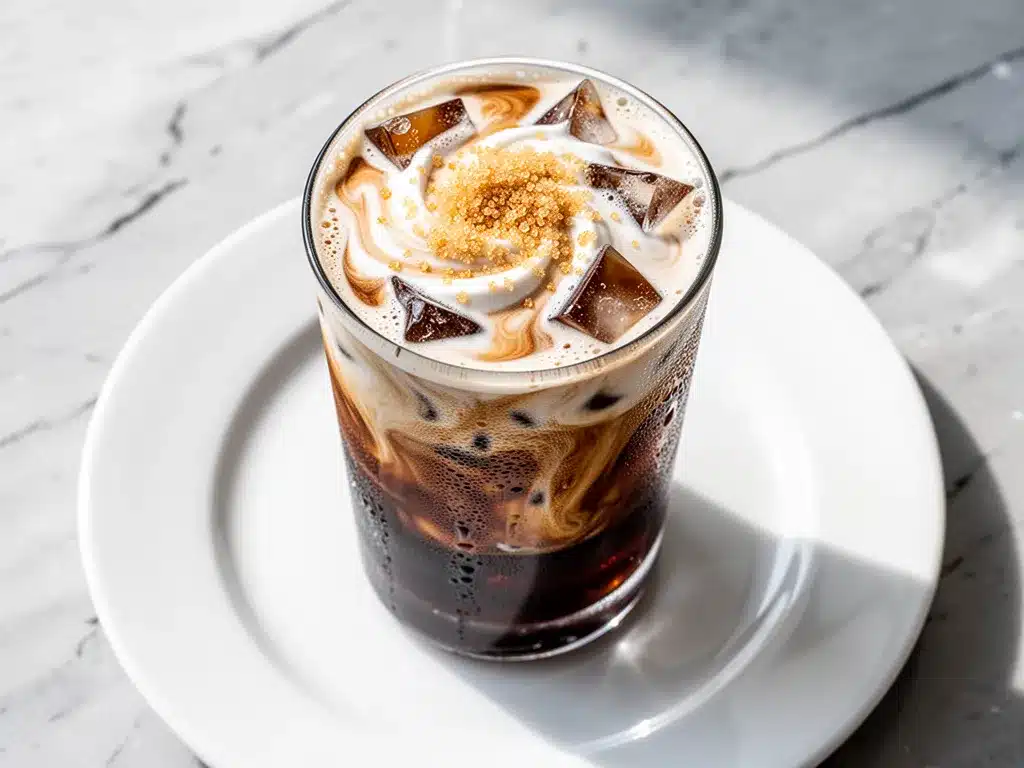
Alright, let’s make this! I’m walking you through exactly how I do it, including the little tricks I’ve picked up to get that perfect foam and balance.
Step 1: Make the Brown Sugar Syrup (If you haven’t already)
If you’re making this from scratch, combine equal parts brown sugar and water in a small saucepan. Heat over medium heat, stirring constantly, until the sugar dissolves completely. It takes about 2-3 minutes. Let it cool slightly. You only need 2 tablespoons for this drink, so don’t make a huge batch unless you plan to use it for other drinks (like my spiced caramel apple cider, which also loves brown sugar syrup).
Step 2: Brew Your Espresso
Pull two shots of espresso. It should be hot—around 180-200°F. If you’re using a Moka pot, wait for the gurgling to stop and then remove it from heat immediately. You want about 2 ounces of liquid. Pour it into your cocktail shaker.
Step 3: Add Syrup and Ice
Add 2 tablespoons of brown sugar syrup to the hot espresso in the shaker. Stir it in quickly so the sugar dissolves fully. Then, add about 1 cup of ice. Don’t overfill the shaker—leave some room for the ice to move around.
Step 4: The Shake
This is the fun part. Seal the shaker tightly. Shake it hard for 15-20 seconds. You’ll hear the ice cracking and the liquid sloshing. The goal is to chill the espresso rapidly and create that airy foam. You’ll notice the liquid turning a lighter, caramel color and becoming frothy. If you don’t hear the ice moving much, you’re shaking too gently. Go for it!
Step 5: Prepare the Glass
While you’re shaking, fill your serving glass with fresh ice. You want a full glass of ice for this drink. It keeps the cold temperature consistent.
Step 6: Pour the Espresso Mix
Open the shaker. If you’re using a mason jar, use a strainer to catch any small ice shards. Pour the shaken espresso over the ice in your glass. You’ll see that beautiful, thick foam rising to the top. This is the “shaken” effect. Don’t skip this step—the foam is what makes it feel like a café drink.
Step 7: Top with Oat Milk
Slowly pour the oat milk over the back of a spoon or directly into the center of the glass. This helps it layer nicely on top of the espresso. You should see a distinct separation between the dark brown espresso and the creamy white oat milk. It looks stunning.
Step 8: Garnish and Serve
Top with a pinch of extra brown sugar or a light dusting of cinnamon if you like. Stir it gently before drinking if you want it fully mixed, or sip it straight for that layered experience. I usually do a few sips of the foamy top, then stir it all together.
Total Time: About 4 minutes (plus syrup prep time if making from scratch).
Troubleshooting: If your foam disappears quickly, your espresso might have cooled down too much before shaking, or your oat milk wasn’t cold enough. Keep everything chilled! If the drink is too sweet, reduce the syrup to 1 tablespoon. If it’s too bitter, add a splash more oat milk.
Expert Tips & Tricks
Here’s everything I’ve learned from making this dozens of times. These tips will save you from my mistakes.
Use Hot Espresso for the Shake
It sounds counterintuitive to shake hot liquid with ice, but it’s essential. The heat helps dissolve the sugar instantly and creates steam, which contributes to the foam. If you use cold espresso, you’ll just get a watery iced coffee. The contrast is what makes it special.
Don’t Skimp on the Ice
I see people using half an inch of ice. Stop. You need a full glass. The ice cools the espresso rapidly, which locks in the foam. If you use too little ice, the drink warms up too fast and the foam collapses. Fill it to the brim.
Chill Your Oat Milk
Take your oat milk out of the fridge 10 minutes before making this, or just keep it very cold. Warm milk will melt the ice faster and make the drink soupy. Cold milk helps maintain that crisp, refreshing finish.
Shake Vigorously
I used to shake gently because I was worried about breaking the shaker. Bad idea. You need to shake with authority. 15-20 seconds of hard shaking is the sweet spot. You’ll feel the resistance of the ice, and you’ll see the foam expand.
Use Barista-Style Oat Milk
Regular oat milk has less fat and protein, which means less foam and a thinner texture. Barista editions are formulated specifically to froth and hold up in coffee. It makes a noticeable difference in the mouthfeel.
Make Syrup in Bulk
Make a cup of brown sugar syrup on Sunday. Store it in a jar in the fridge. It lasts for two weeks. This turns a 4-minute drink into a 2-minute drink on busy mornings. I keep mine in a glass bottle with a pour spout for easy dispensing.
Variations & Substitutions
Once you’ve nailed the basic version, here’s how you can mix it up. I’ve tried all of these.
Cold Brew Shaken Espresso
Use cold brew concentrate instead of hot espresso. Shake it with ice and syrup anyway. It’s smoother and less acidic, but the foam won’t be as thick. It’s a lighter, less intense version.
Vegan Vanilla Version
Add ½ teaspoon of vanilla extract to the oat milk. It adds a nice aromatic note that complements the brown sugar. I do this when I want it to taste more like a dessert.
Spiced Brown Sugar
Add a pinch of cinnamon and a tiny dash of nutmeg to the brown sugar syrup. It gives it a pumpkin spice vibe without the pumpkin. Perfect for fall, similar to the notes in my pumpkin streusel coffee cake muffins.
Coconut Milk Version
Swap oat milk for full-fat coconut milk. It’s richer and has a distinct tropical flavor. I like this when I want something dairy-free and nutty. It doesn’t foam as well as oat milk, but the taste is delicious.
Decaf Version
Use decaf espresso. Everything else stays the same. I make this in the late afternoon when I want the flavor without the jitters. It’s still a treat.
Different Sugars
You can use maple syrup instead of brown sugar syrup, but it will taste more like a maple latte. White sugar syrup works too, but you lose that caramel depth. Brown sugar is the star here.
Serving & Storage
How to Serve:
I usually serve this straight from the shaker into a tall glass. It looks best when layered. Add a straw and a cookie on the side if you’re having a quiet morning with a book. It pairs beautifully with crispy Belgian waffles for a weekend brunch spread.
Storage Instructions:
Espresso: You can brew the espresso ahead and store it in the fridge for up to 24 hours. It will lose some of its crema, but it still works. Reheat it slightly before shaking if you’re making multiple drinks.
Syrup: Store brown sugar syrup in an airtight jar in the fridge for up to 2 weeks. It thickens when cold, so just warm it slightly before using.
Reheating: Don’t reheat this drink. It’s an iced beverage. If you have leftover espresso, use it for cold brew or iced coffee later.
Pro Tip: If you’re meal-prepping for the week, make the syrup and brew the espresso on Sunday. Assemble individual drinks in mason jars with ice on weekday mornings. Just shake them one by one for freshness.
Nutrition Information
I’m not a nutritionist, but here’s the breakdown if you’re tracking. This is a treat, so enjoy it guilt-free!
Per Serving (1 drink):
– Calories: 120
– Protein: 3g
– Carbs: 18g
– Fiber: 0g
– Sugar: 14g
– Fat: 4g
– Caffeine: 150mg
What’s Good:
– Low calorie compared to café drinks (which can be 300+ calories)
– Oat milk has some fiber and vitamins
– No artificial syrups or preservatives
What to Know:
– Higher in sugar from the brown sugar syrup (but natural)
– Contains caffeine
– Dairy-free if using oat milk
My Take:
Look, this is a sweet drink. It’s not a health food. But it’s way better than the sugary syrups at coffee shops, and you control the sweetness. If you want to cut calories, use 1 tablespoon of syrup instead of 2, or use unsweetened oat milk. But usually? I just enjoy it as a little luxury.
Final Thoughts
So that’s my go-to brown sugar shaken espresso! I’ve probably talked your ear off at this point, but when you make a drink this often, you have a lot to say about it.
This has saved my mornings more times than I can count. It’s my answer to “I want a treat” when I don’t want to leave the house. It’s creamy, it’s fizzy, and it tastes like a caramel dream. My partner loves it, my friends ask for the recipe, and I’m happy because I’m not spending $6 every day.
Make it yours! Try different milks, adjust the sweetness, or add a dash of spice. The best drinks are the ones you adapt to your tastes. And if you’re a fan of this, you might also enjoy my fall apple cider doughnut cake—it’s another sweet, cozy treat that pairs perfectly with a strong coffee.
If you make this, drop a comment and let me know what you think! I love hearing how recipes turn out in your kitchen. And if something doesn’t work, tell me that too—I’m here to help troubleshoot.
Happy brewing! And I hope your kitchen smells half as good as mine does right now.
Frequently Asked Questions
Can I use regular milk instead of oat milk?
You can, but the texture will be different. Whole milk will be richer but heavier. Almond milk will be thinner and less foamy. Oat milk is the best for that creamy, café-style texture because of its natural viscosity and fat content. If you’re dairy-free, oat milk is the top choice.
Why did my foam disappear?
This usually happens if the espresso wasn’t hot enough when you shook it, or if you didn’t shake it long enough. The heat helps create the emulsion that forms the foam. Make sure your espresso is fresh and hot, and shake with confidence for at least 15 seconds.
Can I make this with cold brew?
Yes, but the foam won’t be as thick. Cold brew lacks the heat needed to create that airy cappuccino-like top. If you use cold brew, you’ll get a smoother, less fizzy drink. It’s still delicious, just different.
How do I store the brown sugar syrup?
Store it in an airtight glass jar in the refrigerator for up to two weeks. It will thicken when cold, so just microwave it for 10 seconds or let it sit out for a few minutes before using.
Can I use a French press instead of espresso?
You can, but you’ll need to make it very strong. Use a 1:4 coffee-to-water ratio. The flavor won’t be as intense as espresso, so you might want to increase the syrup slightly. It’s a decent backup, but espresso is best.
Is this drink very sweet?
It’s moderately sweet. Two tablespoons of brown sugar syrup is about 24 grams of sugar, but it’s diluted in a large glass of ice and milk. If you prefer less sweet, start with 1 tablespoon and add more to taste. You can always add more syrup, but you can’t take it out.
Can I make this ahead of time?
Not really. The foam collapses if you let it sit. The best method is to prep the espresso and syrup ahead, then assemble and shake right before drinking. It’s that quick, so there’s no need to overcomplicate it.
Pin This Recipe!
Copycat Brown Sugar Shaken Espresso with Oat Milk
- Total Time: 4 minutes
- Yield: 1 serving 1x
Description
A creamy, fizzy, and caramel-like iced espresso drink made by shaking hot espresso with brown sugar syrup and ice, then topped with oat milk for a café-quality treat at home.
Ingredients
- 2 shots espresso (about 2 ounces / 60ml)
- 2 tablespoons brown sugar syrup
- 1 cup ice (large cubes preferred)
- 1 cup oat milk (Barista Edition recommended)
- 1 teaspoon extra brown sugar (optional, for garnish)
- Whipped cream (optional, for garnish)
Instructions
- Make brown sugar syrup by combining equal parts brown sugar and water in a saucepan, heating until dissolved, and cooling slightly.
- Brew two shots of hot espresso (around 180-200°F) and pour into a cocktail shaker.
- Add 2 tablespoons of brown sugar syrup to the hot espresso and stir to dissolve.
- Add 1 cup of ice to the shaker.
- Seal the shaker tightly and shake vigorously for 15-20 seconds until the mixture is chilled and frothy.
- Fill a highball glass or large mug with fresh ice.
- Strain the shaken espresso mixture over the ice in the glass, allowing the foam to rise to the top.
- Slowly pour the cold oat milk over the back of a spoon or directly into the center to create a layered effect.
- Garnish with extra brown sugar or cinnamon if desired, and serve immediately.
Notes
Use hot espresso for shaking to create foam and dissolve sugar instantly. Shake vigorously for 15-20 seconds. Use barista-style oat milk for better frothing and creaminess. Brown sugar syrup can be stored in the fridge for up to two weeks. Do not reheat this drink as it is served cold.
- Prep Time: 2 minutes
- Cook Time: 2 minutes
- Category: Beverage
- Cuisine: American
Nutrition
- Serving Size: 1 drink (approx. 12
- Calories: 120
- Sugar: 14
- Fat: 4
- Carbohydrates: 18
- Protein: 3
Keywords: brown sugar shaken espresso, oat milk coffee, iced espresso, copycat starbucks drink, homemade coffee syrup, vegan coffee, dairy-free drink



