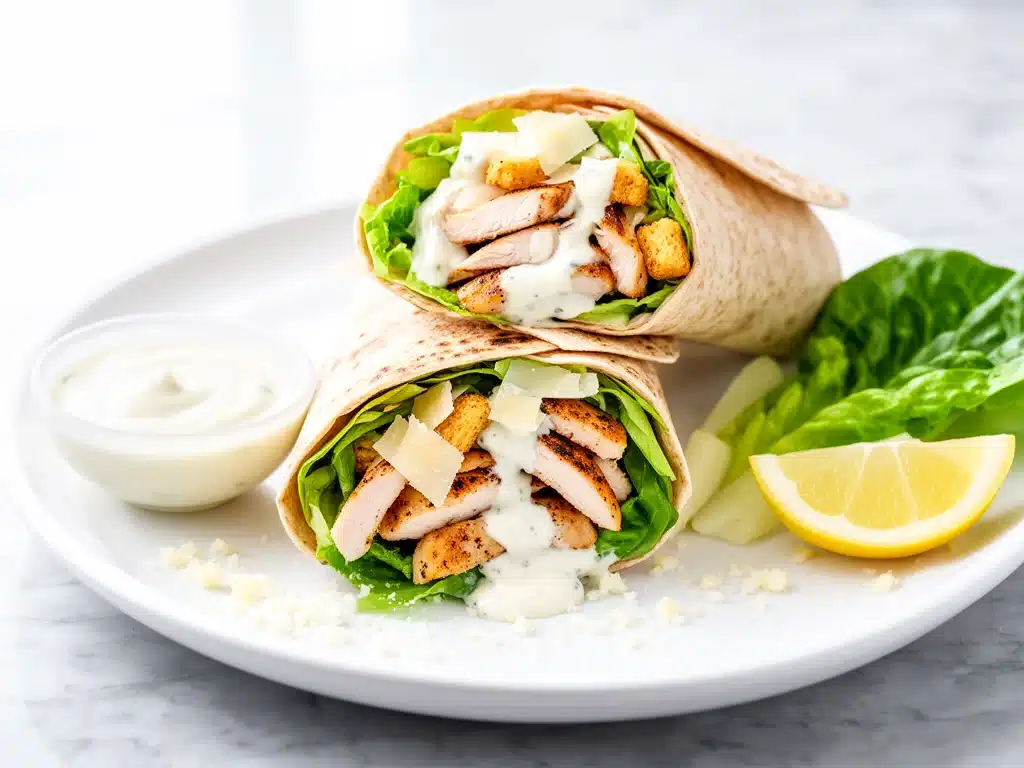
Last September, I found myself staring at the clock while my kids scrambled to finish homework, pack backpacks, and get ready for the bus—all at once. It was chaos, and lunch prep felt like a lost cause. That’s when I stumbled on this lifesaver: Back-to-School Chicken Caesar Wraps with Simple Make-Ahead Prep. I made a batch on Sunday afternoon, and by Tuesday morning, packing lunches was a breeze. No frantic chopping or last-minute scrambling, just quick assembly and off they went.
These wraps quickly became the unofficial champion of our back-to-school season. They’re fresh, satisfying, and the kind of lunch that kids actually ask for again (and again). Plus, the make-ahead element means I get to reclaim precious weekday minutes without sacrificing flavor or nutrition. After testing and tweaking this recipe over several school weeks, I’m confident it’s the easiest, most reliable way to keep lunchboxes happy—and my mornings sane.
Here’s the thing: I’m not a fan of complicated recipes that require a dozen ingredients or endless steps. This chicken Caesar wrap hits the sweet spot. It’s straightforward, uses ingredients you can prep ahead, and tastes like a little lunch upgrade. I’ll walk you through how to get it right every time.
Why You’ll Love This Recipe
This recipe has completely changed our back-to-school lunch routine, and I’m pretty sure it can do the same for you. Here are the big reasons I keep coming back to these chicken Caesar wraps:
- Make-Ahead Magic — You can prep the chicken, dressing, and even chop veggies on Sunday night. Come weekday mornings, it’s just a quick wrap-and-go. I can’t overstate how much time this saves.
- Kid-Approved Flavor — I’ve packed these for my picky younger one and my teenager, and both gobble them up. The creamy Caesar dressing and tender chicken combo is a winner every time.
- Customizable — Whether you want to sneak in extra veggies or swap in gluten-free wraps, this recipe bends to your needs. I’ve even made a vegetarian version with crispy chickpeas.
- Perfectly Portable — Wrapped snug in a tortilla, these hold up well in lunchboxes without getting soggy (bonus points if you wrap them tightly in parchment).
- Balanced and Filling — Protein from the chicken, crunch from the romaine, and carbs from the wrap make a satisfying combo. It keeps my kids energized through those afternoon classes.
Honestly, these wraps have saved me from more than one morning meltdown. If you’re looking for a lunch that’s fuss-free but feels special, this is it.
Ingredients You’ll Need
Here’s the best part: most of these ingredients are pantry or fridge staples, and the rest are simple to prep ahead. I’m picky about a few things, so I’ll share my go-to choices and substitutions.
- Cooked chicken (3 cups / about 450g, diced or shredded) — Use rotisserie chicken to save time or grill breasts yourself. Leftovers work perfectly too.
- Romaine lettuce
- Caesar dressing (½ cup / 120ml) — Homemade or store-bought both work. I prefer a tangy dressing with anchovy paste for authentic flavor, but you can skip if you’re sensitive.
- Parmesan cheese (½ cup / 50g, freshly grated) — Freshly grated melts better and tastes richer. I always keep a wedge in the fridge.
- Flour tortillas (6 large, 10-inch / 25cm) — Choose your favorite brand. Whole wheat or gluten-free tortillas are fine too. I warm them slightly before wrapping.
- Croutons (1 cup / 30g, crushed) — Adds that classic Caesar crunch. Optional, but highly recommended. I crush them just before assembling to keep them crisp.
- Lemon juice (1 tablespoon / 15ml) — Brightens the whole wrap and balances the richness. Fresh squeezed is best.
- Black pepper (to taste) — Freshly cracked makes a difference. I add it at the end for a little kick.
- Optional add-ins:
- Cherry tomatoes (1 cup, halved) — For extra freshness and color.
- Avocado slices — Creamy and nutritious, great for extra richness.
- Bacon bits — If you want a smoky twist, crisp bacon is a game-changer.
If you’re short on time, buying pre-cooked chicken and store-bought dressing is perfectly fine. I’ve done it both ways and it still tastes great. Also, if you want a vegetarian version, swap the chicken for crispy chickpeas or grilled tofu.
Equipment Needed
You don’t need anything fancy for these wraps. Here’s what I use, and alternatives if you don’t have them:
- Sharp knife — For chopping lettuce and slicing chicken. A dull knife slows you down and makes chopping frustrating.
- Cutting board — Any size works. I prefer a plastic one for easier cleanup.
- Mixing bowl — To toss chicken with dressing and lemon juice. A medium bowl works well.
- Measuring spoons — For precise lemon juice and seasoning. Eyeballing is fine if you’re comfortable.
- Non-stick skillet or microwave — To warm tortillas briefly. You can also use a grill pan if you want those nice marks.
- Aluminum foil or parchment paper — For wrapping the finished wraps tightly, so they don’t fall apart in lunchboxes.
That’s really it. If you’re on the go, you can prep everything in just a few bowls and containers.
How to Make It: Step-by-Step
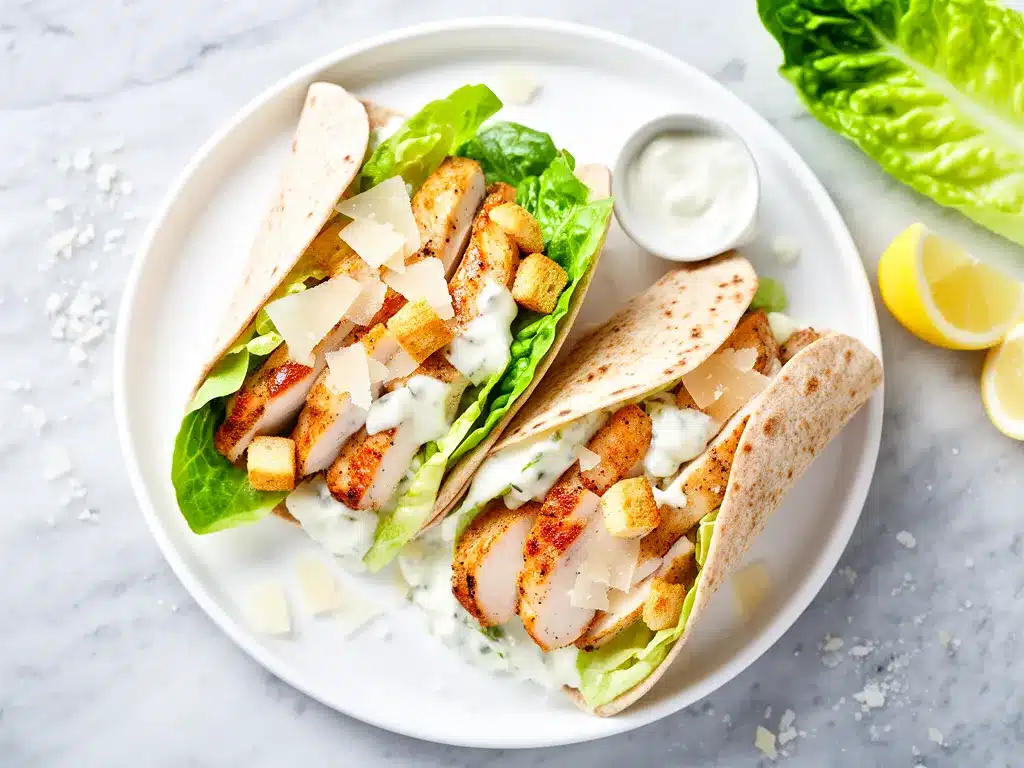
Alright, let’s get these Back-to-School Chicken Caesar Wraps ready. I’m walking you through the prep and assembly so you can nail this every time.
Step 1: Prep Chicken and Dressing (10 minutes)
Start by shredding or dicing your cooked chicken into bite-sized pieces. Toss the chicken in a mixing bowl with about ½ cup Caesar dressing, 1 tablespoon fresh lemon juice, and a few cracks of black pepper. Stir until everything is evenly coated. This step infuses the chicken with flavor and keeps it moist. If you want to add bacon bits or diced avocado, mix them in now.
Step 2: Chop Lettuce and Prep Croutons (5 minutes)
Chop fresh romaine into bite-sized pieces. Keep it crisp by waiting to chop until just before assembly if possible. Crush your croutons lightly—this adds crunch without overpowering the wrap. If you’re adding cherry tomatoes, halve those now.
Step 3: Warm the Tortillas (2 minutes)
Warm tortillas in a dry skillet over medium heat for about 20 seconds per side, or microwave them for 15 seconds wrapped in a damp paper towel. This makes them more pliable and easier to roll without tearing.
Step 4: Assemble the Wraps (5 minutes)
Lay a warm tortilla flat. Add a layer of chopped romaine, then spoon on the Caesar chicken mixture evenly. Sprinkle with grated Parmesan and crushed croutons. Add any extra veggies or toppings you like. Fold in the sides and roll tightly from one end to the other, like a burrito.
Step 5: Wrap and Store
Wrap each assembled wrap tightly in parchment paper or aluminum foil if you’re making these ahead. Store in the fridge until ready to eat. They hold up well for several hours, making them perfect for lunchboxes or picnics.
Pro tip: If you’re packing these for later in the day, keep the croutons separate and add them just before eating to keep them crunchy.
Expert Tips & Tricks
Here’s everything I’ve learned from making these wraps dozens of times. These tips will save you from my early morning scramble mistakes.
- Make the chicken ahead: Cook or buy rotisserie chicken on the weekend, shred it, and toss with dressing. It lasts 3-4 days in the fridge, so you can prep once and use all week.
- Keep lettuce crisp: Store chopped romaine in a sealed container with a paper towel to absorb moisture. I do this the night before and it stays fresh.
- Don’t overdress the chicken: Too much dressing makes the wrap soggy. Use just enough to coat the chicken lightly.
- Warm tortillas just before assembling: Cold tortillas crack when you roll them. Warming makes wrapping smoother.
- Wrap tightly: Rolling firmly and wrapping in parchment or foil keeps everything together and prevents spills in lunchboxes.
- Customize your crunch: Crushed croutons or roasted chickpeas add texture. I sometimes swap croutons for toasted nuts for a twist.
- Storage matters: If making ahead, keep any add-ins like avocado separate until serving to prevent browning.
Variations & Substitutions
Once you’ve nailed the basic chicken Caesar wrap, here’s how you can switch things up without losing the essence of this easy make-ahead lunch.
- Vegetarian Caesar Wrap: Swap the chicken for crispy roasted chickpeas or grilled tofu. Use vegetarian Caesar dressing (many store-bought versions skip anchovies).
- Gluten-Free: Use gluten-free wraps or large lettuce leaves as wraps. Just make sure your croutons or crunchy toppings are gluten-free.
- Protein Boost: Add hard-boiled eggs or extra Parmesan for more staying power.
- Spicy Kick: Add a drizzle of sriracha or a sprinkle of red pepper flakes to the chicken mixture.
- Summer Fresh: Incorporate sliced cucumber and fresh basil leaves for a lighter, herbaceous twist.
- Meal Prep Friendly: Assemble the chicken mixture and store separately from greens and wraps. Assemble fresh each morning for best texture.
I’ve found that these tweaks keep the wraps interesting through the school year. My kids have their favorites, but I like to rotate so lunches never get boring.
Serving & Storage
These wraps are perfectly portable and can be served cold or at room temperature. I usually pack them straight into lunchboxes, wrapped snugly in foil or parchment. Here’s how I make the most of leftovers and keep everything fresh:
- Serving: Add a side of fresh fruit or veggie sticks to round out the meal. A small container of extra dressing on the side is a hit with some kids.
- Lunchbox hack: Pack a small ice pack with the wrap to keep it crisp and fresh until lunchtime.
- Refrigerator storage: Keep wraps wrapped in foil or parchment and stored in an airtight container for up to 3 days.
- Reheating: These wraps are best eaten cold or at room temp. If you want to warm them, unwrap and heat the chicken mixture separately, then reassemble.
- Make-ahead prep: Store chicken mixture, chopped lettuce, and croutons separately, then assemble wraps each morning to keep texture perfect.
Nutrition Information
I’m not a nutritionist, but here’s a rough breakdown per serving (based on 6 wraps):
| Nutrient | Amount |
|---|---|
| Calories | 380 |
| Protein | 28g |
| Carbohydrates | 30g |
| Fiber | 3g |
| Sugar | 2g |
| Fat | 18g |
| Saturated Fat | 6g |
| Cholesterol | 70mg |
| Sodium | 520mg |
| Calcium | 150mg |
This recipe offers a solid protein boost with moderate carbs and fat. You can lighten it up by using less dressing or swapping for a lighter Caesar dressing. Adding more veggies will also bulk it up with fiber and nutrients.
Final Thoughts
So that’s my trusted Back-to-School Chicken Caesar Wraps with Simple Make-Ahead Prep. I’ve probably gone on too long, but that’s what happens when a recipe saves your sanity week after week. These wraps are my answer to hectic mornings, picky eaters, and the eternal “what’s for lunch?” question that echoes through my house.
Don’t be afraid to make this recipe your own. Swap in your favorite veggies, add a little extra garlic in the dressing, or toss in some crispy bacon if you’re feeling indulgent. The best lunches are the ones that fit your family’s tastes and schedule.
If you try this recipe, please drop a comment and tell me how it went! I love hearing your twists and any questions you have. And if something doesn’t work out, I’m here to help troubleshoot.
Happy packing! I hope your mornings feel a little easier and your lunchboxes a little happier.
Frequently Asked Questions
Q: Can I use rotisserie chicken for this recipe?
A: Absolutely! Rotisserie chicken is my favorite shortcut. It’s already cooked and seasoned, which saves tons of time. Just shred or dice and toss with the dressing. I do this all the time on busy weekends.
Q: How far ahead can I prep the chicken mixture?
A: You can prep the chicken and dressing mixture up to 3 days in advance and store it in an airtight container in the fridge. Just keep the lettuce and croutons separate until assembly to avoid sogginess.
Q: Can I make these wraps gluten-free?
A: Yes! Use gluten-free tortillas or large leafy greens like collard greens or romaine leaves as wraps. Just double-check that your croutons or crunchy toppings are gluten-free as well.
Q: What’s the best way to keep the wraps from getting soggy?
A: The biggest trick is to keep the wet ingredients separate until just before eating. If you’re packing these for lunch, store the chicken mixture, lettuce, and croutons in separate containers and assemble right before eating if possible. If that’s not an option, wrap tightly in parchment and keep refrigerated.
Q: Can I use store-bought Caesar dressing?
A: Definitely. I usually use homemade for better flavor, but a good-quality store-bought Caesar dressing works great. Just pick one you like and adjust the amount to avoid overdressing the chicken.
Q: How do I warm the tortillas without drying them out?
A: I warm tortillas in a dry skillet for 15-20 seconds per side or microwave them wrapped in a damp paper towel for about 15 seconds. This softens them and makes rolling easier without drying out the wrap.
Q: Can I freeze these wraps?
A: I don’t recommend freezing fully assembled wraps because the lettuce and croutons get soggy after thawing. You can freeze the chicken mixture separately and thaw it in the fridge before assembling fresh wraps.
Also, if you enjoy simple, crowd-pleasing meals like this, you might love my crispy garlic chicken recipe for dinner or these easy vegetarian pasta dishes perfect for busy nights.
Pin This Recipe!

Back-to-School Chicken Caesar Wraps
- Total Time: 15 minutes
- Yield: 6 servings 1x
Description
Easy make-ahead chicken Caesar wraps perfect for busy school mornings. Fresh, satisfying, and kid-approved, these wraps save time and keep lunchboxes happy.
Ingredients
- 3 cups cooked chicken (about 450g), diced or shredded
- 2 cups romaine lettuce, chopped
- ½ cup Caesar dressing (120ml)
- ½ cup Parmesan cheese, freshly grated (50g)
- 6 large flour tortillas (10-inch / 25cm)
- 1 cup croutons, crushed (30g)
- 1 tablespoon lemon juice (15ml)
- Black pepper, to taste
- Optional add-ins:
- 1 cup cherry tomatoes, halved
- Avocado slices
- Bacon bits
Instructions
- Shred or dice the cooked chicken into bite-sized pieces. Toss the chicken in a mixing bowl with ½ cup Caesar dressing, 1 tablespoon fresh lemon juice, and a few cracks of black pepper. Stir until evenly coated. Add bacon bits or diced avocado if desired.
- Chop fresh romaine lettuce into bite-sized pieces. Crush croutons lightly. Halve cherry tomatoes if using.
- Warm tortillas in a dry skillet over medium heat for about 20 seconds per side or microwave wrapped in a damp paper towel for 15 seconds to make them pliable.
- Lay a warm tortilla flat. Add a layer of chopped romaine, then spoon on the Caesar chicken mixture evenly. Sprinkle with grated Parmesan and crushed croutons. Add any extra veggies or toppings.
- Fold in the sides and roll tightly from one end to the other. Wrap each assembled wrap tightly in parchment paper or aluminum foil if making ahead. Store in the fridge until ready to eat.
Notes
Make the chicken mixture up to 3 days ahead and store separately from lettuce and croutons to avoid sogginess. Warm tortillas just before assembling to prevent cracking. Wrap tightly in parchment or foil for portability. Keep croutons separate if packing for later to maintain crunch.
- Prep Time: 15 minutes
- Cook Time: 0 minutes
- Category: Main Course
- Cuisine: American
Nutrition
- Serving Size: 1 wrap
- Calories: 380
- Sugar: 2
- Sodium: 520
- Fat: 18
- Saturated Fat: 6
- Carbohydrates: 30
- Fiber: 3
- Protein: 28
Keywords: chicken Caesar wrap, back-to-school lunch, make-ahead lunch, easy chicken wrap, kid-friendly lunch, portable lunch, quick lunch recipe



