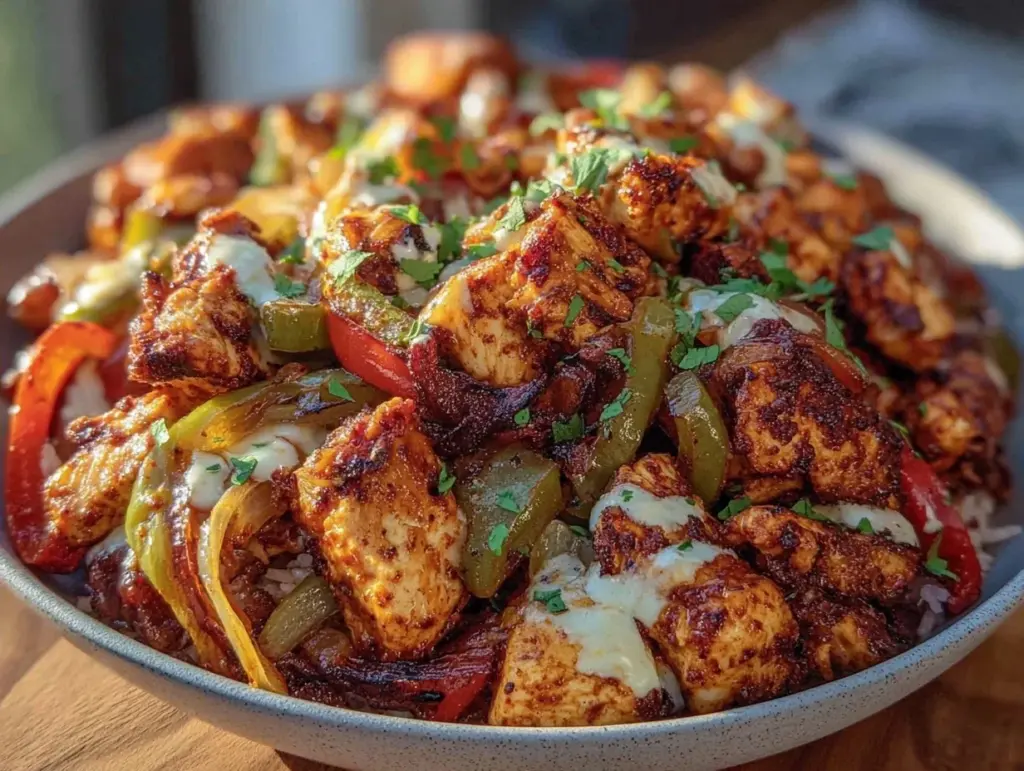
It was 4:30 PM on a Tuesday in mid-November. The kind of Tuesday where the sun is already setting, the house is cold, and the only thing warmer is the takeout menu glowing on my phone screen. I had three options: Thai food ($24), pizza ($18), or that mediocre burrito place down the street ($15). I stared at the screen, feeling that familiar dread of eating the same mediocre lunch four days in a row.
I didn’t want takeout. I wanted something hot, something with flavor, and something that wouldn’t leave me feeling sluggish by 3 PM. So I closed the app, walked to the pantry, and realized I had chicken breasts, bell peppers, onions, and rice. I also had my air fryer, which has become my most-used kitchen appliance since I started meal prepping seriously last year.
I threw together what I thought would be a quick, mediocre dinner. I seasoned the chicken, tossed the veggies in a little oil, and hit “air fry.” Twenty minutes later, my kitchen smelled like a high-end Mexican restaurant, not a sad Tuesday night in the suburbs. I plated it over rice with a dollop of sour cream and some salsa. My husband came home, took one bite, and asked, “Why do we order out when we have this?”
That was the moment I realized I had stumbled onto the perfect meal prep solution. These Air Fryer Chicken Fajita Bowls aren’t just a dinner; they are a system. They are the reason I haven’t ordered takeout in three months. They are the reason I actually look forward to Monday mornings.
Here’s the thing about meal prep: it doesn’t have to be boring. You don’t need to eat gray, boiled chicken and steamed broccoli for five days straight. With the right technique, you can cook once and have four distinct, delicious meals that taste fresh every time. I’ve tested this method dozens of times, tweaking the seasoning ratios and the cooking times until I got it right. And I’m going to share exactly how to do it.
Why You’ll Love This Meal Prep Strategy
I’ve tried every meal prep method under the sun. Sunday batch-cooking. Freezer meal stacking. The “cook everything raw and assemble later” method. This one wins because it balances speed, flavor, and texture perfectly. Here’s why these fajita bowls have become the backbone of my weekly routine:
- Zero Soggy Vegetables — This is the biggest pain point with meal prep. By cooking the chicken and veggies in the air fryer, you get that roasted, slightly charred texture. They don’t get mushy in the container like they do when you boil or steam them. I’ve tested this, and even after four days in the fridge, the peppers still have a bite.
- Protein That Actually Stays Juicy — Chicken breast is notorious for drying out in the fridge. The air fryer’s rapid circulation keeps the outside sealed and the inside moist. I’ve had leftovers from Tuesday that tasted as good as Thursday’s fresh batch. Trust me on this.
- Customizable Bowls — This isn’t just one flavor. You can change the toppings every day. Monday: sour cream and jalapeños. Tuesday: avocado and lime. Wednesday: cheese and salsa. It feels like eating out, but it’s in a Tupperware.
- Freezer-Friendly — Unlike some dishes that turn to mush when frozen, these freeze beautifully. I often double the recipe, freeze half, and save it for a “lazy week” when I just don’t have the energy to cook.
- Under $2 Per Serving — I did the math. Chicken, veggies, rice, spices, and a bit of cheese comes out to about $1.80 per bowl. That’s cheaper than the rice cooker version I used to make, and way healthier.
This is my go-to when I need to get ahead. It’s methodical, it’s efficient, and it tastes incredible. No complicated techniques, no weird ingredients, just reliable, delicious food that makes the whole week easier.
Ingredients You’ll Need for the Batch
Here’s the best part: you probably have most of this already. I’m particular about three ingredients here, and I’ll tell you exactly why. I usually make a double batch, which feeds four people for four days, or six people for three days.
For the Chicken
Chicken breast (1.5 lbs / 680g) — I use boneless, skinless breasts. Cut them into 1-inch cubes. Uniform size is key here so they cook evenly. I buy the family pack and freeze what I don’t use immediately. Look for plump breasts, not the shriveled ones at the back of the fridge.
Avocado oil or olive oil (2 tablespoons) — Avocado oil has a higher smoke point, which is perfect for the air fryer. It helps the spices stick and prevents burning. I keep a bottle in my pantry just for this.
Fajita seasoning (2 tablespoons) — I make my own (recipe below), but a good store-bought blend works too. I avoid the ones with too much salt or anti-caking agents. I want pure flavor.
Garlic powder (1 teaspoon) — Fresh garlic burns in the air fryer. Powder gives you that savory depth without the char. Don’t skip it.
For the Veggies
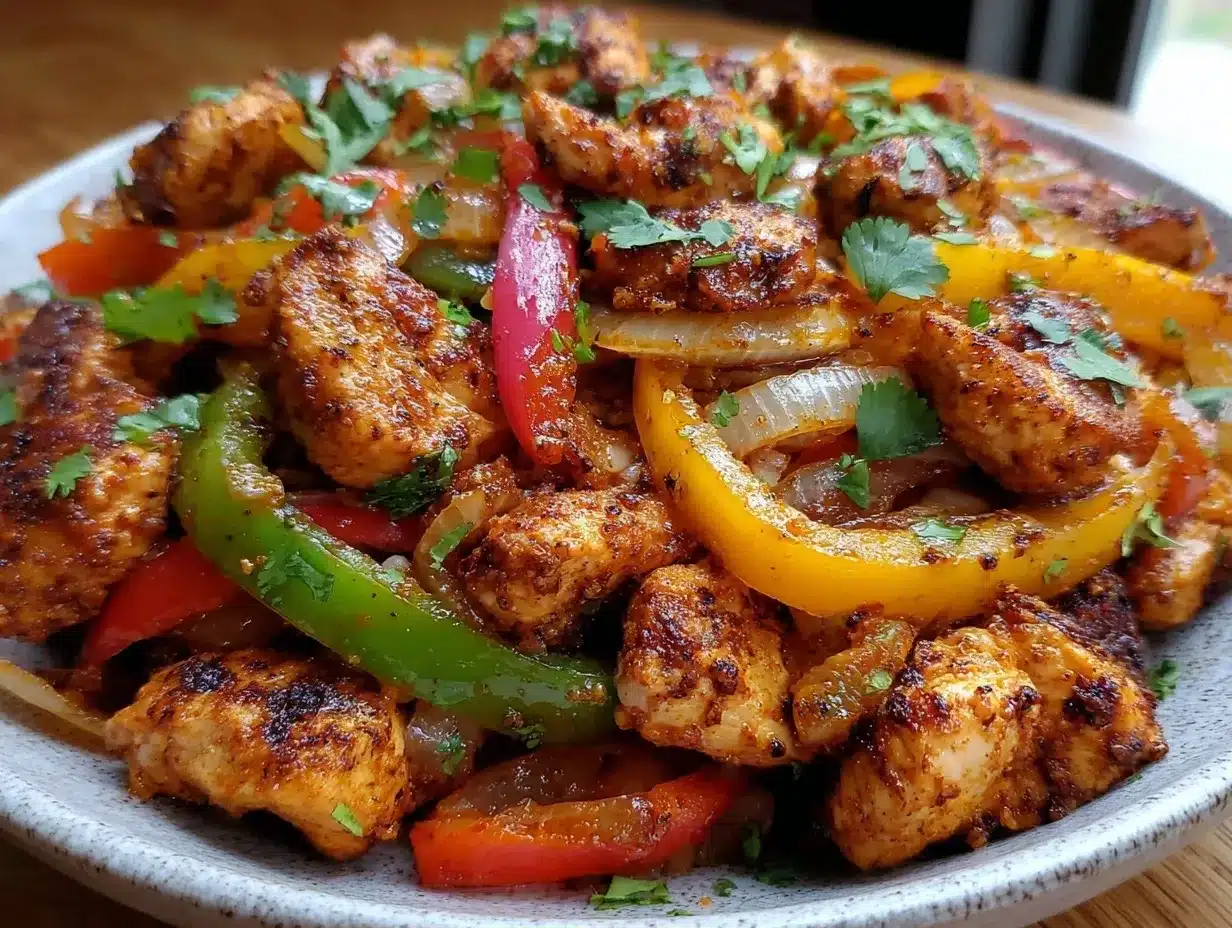
Bell peppers (3 large, mixed colors) — Red, yellow, and green. I like the variety of colors and sweetness. Red peppers are sweeter, green are more bitter. Mix them up for complexity.
Yellow onion (1 large, sliced into half-moons) — This is non-negotiable. Onions add the savory base. Slice them thick enough so they don’t disappear into mush.
Red onion (1 small, sliced) — Adds a nice sharp bite that balances the sweetness of the yellow onion and peppers.
For the Bowls
White or brown rice (2 cups dry) — I use jasmine rice for its fluffy texture. Brown rice works too, but it takes longer to cook and has a chewier bite. Cook it according to package directions, but undercook it by 2 minutes. It’ll finish steaming in the container.
Cheddar cheese (1 cup, shredded) — Sharp cheddar melts better than mild. I shred it myself from a block. Pre-shredded cheese has cellulose that prevents it from melting smoothly.
Sour cream (½ cup) — For dolloping. Greek yogurt works if you want it lighter, but sour cream is the classic choice.
Salsa (1 cup) — I like a medium salsa. Pico de gallo is too wet for meal prep; it makes the rice soggy. A jarred salsa holds up better.
Lime wedges (2 limes) — Fresh lime juice is the secret weapon. It brightens everything up right before you eat. I squeeze it over the bowl, not before storing.
Equipment You’ll Actually Use
You don’t need fancy equipment for this. Here’s what I actually use:
Air Fryer — I use a 5.8-quart basket. This is crucial. You need enough space for the chicken and veggies to circulate air. If your air fryer is tiny, you’ll need to cook in two batches. Don’t overcrowd the basket, or you’ll steam instead of roast.
Large Mixing Bowls — Two of them. One for the chicken, one for the veggies. I use glass bowls because they’re easy to clean and I can see the colors.
Rice Cooker — I use a standard rice cooker. It’s hands-off. I set it and forget it while I prep the other ingredients.
Sharp Knife & Cutting Board — For chopping the chicken and veggies. A dull knife is dangerous and inefficient. I keep a good chef’s knife sharp.
Meal Prep Containers — I use 4-compartment containers. One for rice, one for chicken, one for veggies, and one for toppings. This keeps everything separate until you eat it. It prevents sogginess.
Measuring Spoons — For the spices. Consistency is key in meal prep. You want every container to taste the same.
How to Make It: Step-by-Step
Alright, let’s make this! I’m walking you through exactly how I do it, including the little tricks I’ve picked up from making this for weeks.
Step 1: Cook the Rice (15 minutes)
Start with the rice. It takes the longest, and it’s hands-off. Rinse 2 cups of rice under cold water until the water runs clear. This removes excess starch and prevents clumping. Add it to the rice cooker with 2.5 cups of water. Hit “cook.” While it’s cooking, prep the chicken and veggies.
Step 2: Prep the Chicken (5 minutes)
Cut the chicken breasts into 1-inch cubes. Place them in a large bowl. Add 2 tablespoons of avocado oil, 2 tablespoons of fajita seasoning, and 1 teaspoon of garlic powder. Toss until every piece is coated. Let it sit for 10 minutes while you prep the veggies. This gives the spices time to penetrate the meat.
Step 3: Prep the Veggies (5 minutes)
Slice the bell peppers and onions into half-moons. Place them in a separate bowl. Add 1 tablespoon of avocado oil, 1 teaspoon of fajita seasoning, and a pinch of salt and pepper. Toss to coat. Don’t over-season the veggies; the chicken has most of the flavor.
Step 4: Air Fry the Chicken (12-15 minutes)
Preheat your air fryer to 390°F (200°C). This is important. A hot start ensures good browning. Add the chicken in a single layer. Do not overcrowd. Cook for 12-15 minutes, shaking the basket halfway through. The chicken is done when it’s golden brown and cooked through (165°F internal temp). If your air fryer is small, cook in two batches.
Step 5: Air Fry the Veggies (8-10 minutes)
Without preheating again, add the veggies to the air fryer basket. Cook at 390°F for 8-10 minutes. Shake the basket halfway through. You want them tender-crisp, not mushy. They should have some charred edges. This adds flavor and texture.
Step 6: Assemble the Bowls (10 minutes)
Once everything is cooked, let it cool for 5 minutes. This prevents condensation in the containers. In each container, add ½ cup of rice, then the chicken, then the veggies. Store the toppings (cheese, sour cream, salsa) in separate small containers or on top if you eat them within 3 days. I prefer separate containers for maximum freshness.
Total Time: About 45 minutes (15 minutes active, 30 minutes mostly hands-off)
Expert Tips & Tricks for Perfect Meal Prep
Here’s everything I’ve learned from making this dozens of times. These tips will save you from my mistakes.
Don’t Overcook the Chicken
Chicken breast dries out quickly. Pull it from the air fryer when it’s just done. It’ll continue to cook slightly from residual heat. Overcooked chicken is dry chicken. I’ve learned this the hard way with a batch of leather-like chicken that I couldn’t eat.
Keep the Veggies Crisp-Tender
Veggies continue to soften in the fridge. If you cook them until they’re soft, they’ll be mushy by day 3. Aim for tender-crisp in the air fryer. They’ll finish cooking in the container.
Cool Completely Before Storing
This is the #1 mistake people make. Hot food in a container creates steam, which creates condensation, which creates sogginess and bacteria. Let everything cool to room temperature before putting the lids on. I usually set the containers on the counter while I clean up.
Add Fresh Lime Last
Don’t squeeze lime juice into the container before storing. It makes the rice and veggies soggy. Squeeze fresh lime juice over the bowl right before you eat. It brightens the flavor and makes it taste fresh.
Use Compartmentalized Containers
I swear by 4-compartment containers. It keeps the rice, chicken, and veggies separate. This prevents the flavors from mingling too much and keeps the textures distinct. It’s a small detail that makes a big difference.
Variations & Substitutions
Once you’ve nailed the basic version, here’s how you can mix it up. I’ve tried all of these.
Beef Fajita Bowls
Swap chicken for flank steak. Slice it thin against the grain. Cook it for 8-10 minutes in the air fryer. It’s richer and more flavorful. My husband prefers this version.
Tofu Fajita Bowls
Use extra-firm tofu, pressed and cubed. Marinate it in the same seasoning. Cook for 10-12 minutes. It’s crispy on the outside and soft inside. Great for vegetarian meals.
Cauliflower Rice
Swap white rice for cauliflower rice. It’s lower carb and cooks faster. Just sauté it in a pan while the chicken cooks. It’s not the same texture, but it works if you’re watching carbs.
Quinoa Base
Swap rice for quinoa. It’s higher in protein and has a nuttier flavor. Cook it according to package directions. It holds up well in the fridge.
Spicy Version
Add diced jalapeños to the veggies. Use a spicy salsa. Add a dash of cayenne to the chicken seasoning. For those who like heat.
Dairy-Free
Skip the cheese and sour cream. Use guacamole instead. It adds creaminess without dairy. My lactose-intolerant friend requests this version.
Serving & Storage
How to Serve:
I usually serve this straight from the container at my desk. But here are other ways I’ve enjoyed it:
- Warm it up: Microwave for 2 minutes. The cheese will melt if you add it before heating.
- Eat it cold: Yes, really. The flavors meld together and it tastes like a salad. I do this on days when I don’t want hot food.
- Top with avocado: Fresh avocado slices add a nice creamy texture. Add them right before eating.
Storage Instructions:
Refrigerator:
Store in airtight containers for up to 4 days. The rice will absorb some of the moisture, so it might be slightly drier by day 4. Add a splash of water when reheating if needed.
Freezer:
This freezes well for up to 3 months. Thaw in the fridge overnight. Reheat in the microwave. The veggies might be slightly softer, but the flavor is still great. I often freeze half the batch for a “lazy week.”
Reheating:
Microwave for 2-3 minutes, stirring halfway through. If it’s too dry, add a tablespoon of water or broth. This helps steam the rice and rehydrate the chicken.
Pro tip:
If you’re eating it cold, let it sit out for 10 minutes before eating. It takes the chill off and tastes better.
Nutrition Information
I’m not a nutritionist, but here’s the breakdown if you’re tracking.
Per Serving (based on 4 servings):
Calories: 450
Protein: 35g
Carbs: 40g
Fiber: 4g
Sugar: 6g
Fat: 15g
Saturated Fat: 4g
Cholesterol: 80mg
Sodium: 600mg
Calcium: 200mg
What’s Good:
High in protein from the chicken. Good fiber from the veggies and rice. Calcium from the cheese. Can add vegetables to boost nutrition.
What to Know:
Moderate in calories. Contains dairy and gluten (if using certain seasonings). Sodium can be high if you use store-bought seasoning. Use low-sodium broth and fresh spices to reduce sodium.
My Take:
Look, this is a balanced meal with protein, carbs, and veggies. It’s not a diet recipe, but it’s way better than takeout. When I want to make it lighter, I use less cheese and more veggies. But usually? I just eat a reasonable portion and enjoy it.
Final Thoughts
So that’s my go-to Air Fryer Chicken Fajita Bowls! I’ve probably talked your ear off at this point, but when you make a recipe this often, you have a lot to say about it.
This has saved my weeknight dinners more times than I can count. It’s my answer to “what’s for lunch” when I’m tired, don’t want takeout, and still want something that tastes really good. My kids are happy, my husband’s happy, and I’m happy because I’m not stressed about cooking.
Make it yours! Try different add-ins, swap in your favorite vegetables, adjust the spices to your taste. The best recipes are the ones you adapt to your family’s tastes.
If you make this, drop a comment and let me know what you think! I love hearing how recipes turn out in your kitchen. And if something doesn’t work, tell me that too—I’m here to help troubleshoot.
Happy meal prepping! And I hope your kitchen smells half as good as mine does right now.
Frequently Asked Questions
Can I use chicken thighs instead of breasts?
Yes! Chicken thighs are juicier and more flavorful. They have more fat, so they don’t dry out as easily. Cook them for 12-14 minutes in the air fryer. They’re great for meal prep because they stay moist even after reheating.
Why did my chicken turn out dry?
Overcooking is the most common reason. Chicken breast cooks quickly in the air fryer. Check it at 10 minutes. If it’s done, pull it out. Also, don’t overcrowd the basket. If the chicken is stacked, it steams instead of roasts, which can lead to uneven cooking.
Can I freeze these bowls?
Absolutely. They freeze well for up to 3 months. Thaw in the fridge overnight. Reheat in the microwave. The veggies might be slightly softer, but the flavor is still great. I often freeze half the batch for a “lazy week.”
How long do these last in the fridge?
Up to 4 days. After that, the rice starts to get hard and the veggies lose their texture. I usually make enough for 4 days, so I don’t have to worry about leftovers past that point.
Can I use a different protein?
Yes! Beef, tofu, shrimp, or even chickpeas work well. Just adjust the cooking time accordingly. Shrimp cooks in 5-6 minutes. Chickpeas need 10-12 minutes to get crispy.
Do I need to rinse the rice?
Yes, rinsing removes excess starch and prevents clumping. It’s a small step that makes a big difference in the texture of the final dish. I rinse mine until the water runs clear.
Can I make this ahead of time?
Yes, this is a meal prep recipe! Cook everything on Sunday, store in containers, and eat throughout the week. It saves time during the week and ensures you have healthy meals ready to go.
Pin This Recipe!

Air Fryer Chicken Fajita Bowls: 5 Easy Meal Prep Ideas
- Total Time: 45 minutes
- Yield: 4 servings 1x
Description
A quick and flavorful meal prep solution featuring air-fried chicken and vegetables served over rice, designed to stay fresh and juicy for up to four days.
Ingredients
- 1.5 lbs boneless, skinless chicken breasts, cut into 1-inch cubes
- 3 large bell peppers (mixed colors), sliced into half-moons
- 1 large yellow onion, sliced into half-moons
- 1 small red onion, sliced
- 2 cups white or brown rice (dry)
- 3 tablespoons avocado oil or olive oil (divided)
- 2 tablespoons fajita seasoning (divided)
- 1 teaspoon garlic powder
- 1 cup shredded cheddar cheese
- 1/2 cup sour cream
- 1 cup medium salsa
- 2 limes, cut into wedges
- Salt and pepper to taste
Instructions
- Rinse 2 cups of rice under cold water until clear. Add to a rice cooker with 2.5 cups of water and cook according to package directions, undercooking by 2 minutes.
- In a large bowl, toss chicken cubes with 2 tablespoons avocado oil, 2 tablespoons fajita seasoning, and 1 teaspoon garlic powder. Let sit for 10 minutes.
- In a separate bowl, toss sliced bell peppers and onions with 1 tablespoon avocado oil, 1 teaspoon fajita seasoning, and a pinch of salt and pepper.
- Preheat air fryer to 390°F (200°C). Cook chicken in a single layer for 12-15 minutes, shaking halfway, until internal temperature reaches 165°F.
- Without preheating, cook vegetables in the air fryer at 390°F for 8-10 minutes, shaking halfway, until tender-crisp with charred edges.
- Let all components cool for 5 minutes to prevent condensation.
- Assemble bowls in 4-compartment containers: 1/2 cup rice, chicken, and vegetables. Store toppings separately or on top if consuming within 3 days.
Notes
Do not overcrowd the air fryer basket to ensure proper roasting instead of steaming. Cool food completely before storing to prevent sogginess. Add fresh lime juice right before eating, not before storing. Rice can be undercooked slightly as it will finish steaming in the container.
- Prep Time: 15 minutes
- Cook Time: 30 minutes
- Category: Main Course
- Cuisine: Mexican
Nutrition
- Serving Size: 1 bowl (approx. 1/2
- Calories: 450
- Sugar: 6
- Sodium: 600
- Fat: 15
- Saturated Fat: 4
- Carbohydrates: 40
- Fiber: 4
- Protein: 35
Keywords: air fryer, chicken fajita bowls, meal prep, healthy dinner, quick meals, batch cooking, high protein



