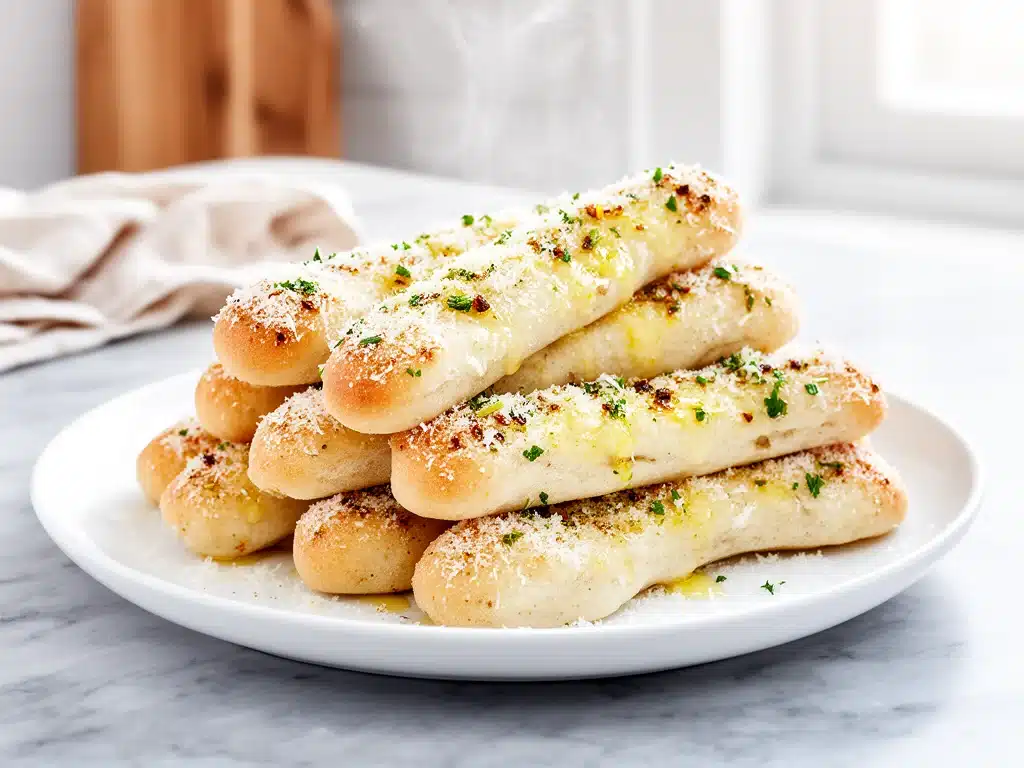
Last Friday, I was staring at my phone, thumb hovering over the delivery app. It was 7:15 PM, I had just walked in the door, and the only thing that sounded good enough to keep me from ordering pizza was a warm, buttery, garlic-drenched breadstick. You know the type. The ones that arrive in a paper bag, slightly limp, tasting like they’ve been sitting under a heat lamp for twenty minutes. I was about to tap “Checkout” when I caught my eye in the hallway mirror. I looked tired. I looked like I was ready to settle for mediocre.
So I did something reckless. I put the phone down, went to the pantry, and decided to make Garlic Parmesan Soft Breadsticks instead. I knew it would take longer than ordering. I knew I’d have to get flour on my counter. I even knew I’d probably burn my fingers reaching into the oven. But I had this sudden, stubborn belief that I could make something better than what arrives on a plastic tray at 7:30 PM.
Twenty minutes later, my kitchen smelled like a high-end Italian restaurant. Not the greasy one down the street, but the kind with white tablecloths and warm lighting. I pulled a tray of Garlic Parmesan Soft Breadsticks out of the oven, golden brown and dripping with that garlic butter mixture that makes your mouth water before you even take a bite. I cut one in half, the steam rising up, the cheese bubbling. I took a bite. And honestly? I forgot about the takeout app entirely.
This isn’t just a breadstick. It’s a game-changer. It’s fluffy, it’s tender, and it has that perfect chew that takes you back to your first date at an Italian place. I’ve made this batch at least a dozen times since that Friday night. Some weeks I make them for dinner because they’re so good. Other weeks, I make them to dip in marinara while I wait for the main course. But every single time, the verdict is the same: homemade is infinitely better. And it’s easier than you think.
Why You’ll Love This Garlic Parmesan Soft Breadsticks Recipe
There are a lot of breadstick recipes out there. Some are too dense, like you’re eating a brick. Some are too dry, lacking that crucial moistness. Some taste like they were made with yeast packets that expired in 2019. But this version? It hits all the right notes. It’s the kind of recipe that makes you feel like a culinary genius without requiring you to be one.
- Stupid Simple Dough — Seriously, if you can mix flour and water, you can make this. I’ve made this dough while holding my toddler and talking on the phone. It’s forgiving. It doesn’t need to be perfect. It just needs to be mixed until it comes together.
- Ready in 45 Minutes — Yes, really. With a fast-rise yeast, you don’t need to wait hours for the dough to double. You get soft, pillowy breadsticks in under an hour. This is my go-to when guests call last minute.
- The Garlic Butter is Life — The topping is what makes or breaks a breadstick. I’ve perfected a garlic butter mixture that is fragrant, salty, and rich. It soaks into the bread just enough to make it tender but not soggy. It’s the best part.
- Crowd-Pleaser Status — I’ve served these to my picky eater nephew, my foodie friend who critiques everything, and my husband’s boss. Everyone asks for the recipe. Even the people who claim they “don’t like bread” come back for seconds.
- Freezer Friendly — Make a double batch. Freeze the extras. Reheat them in the oven, and they taste just as good as fresh. This is my secret weapon for busy weeknights.
- Super Budget-Friendly — Flour, yeast, butter, garlic, cheese. You probably have everything already. This costs pennies compared to the $12 basket of breadsticks at the restaurant.
This is my go-to when I need comfort food that actually tastes homemade. No complicated techniques, no weird ingredients, just reliable, delicious food that makes everyone happy.
Ingredients You’ll Need for Garlic Parmesan Soft Breadsticks
Here’s the best part: you probably have most of this already in your pantry. This isn’t a recipe that requires a trip to a specialty store. It’s simple, honest ingredients that come together to create something magical. I’m particular about a few things here, and I’ll tell you exactly why.
For the Dough
Warm water (1 ½ cups / 360ml) — This needs to be warm to the touch, like a baby’s bottle. Not hot, or you’ll kill the yeast. Not cold, or it won’t rise. I test it on my wrist. If it feels warm, it’s good.
Instant yeast (2 ¼ teaspoons / 1 packet) — I use instant yeast because it’s faster. You don’t need to proof it first, which saves time. Active dry yeast works too, but you’ll need to let it sit in the water for 5 minutes first. Don’t skip the yeast; it’s what makes them soft.
Granulated sugar (1 tablespoon) — Just a little bit. It feeds the yeast and helps with browning. You don’t want them sweet, just golden. I use white sugar, but brown sugar works if you want a deeper flavor.
All-purpose flour (4 to 4 ½ cups / 500-560g) — I use all-purpose because it gives that perfect chew. Bread flour makes them too dense, like a bagel. Cake flour makes them too delicate. All-purpose is the Goldilocks of flour. Spoon it into your measuring cup and level it off. Don’t scoop, or you’ll pack it down and get dry dough.
Salt (1 ½ teaspoons) — Essential for flavor. Don’t skimp. It balances the sweetness and enhances the garlic.
Vegetable oil or melted butter (3 tablespoons) — Oil keeps them softer longer. Butter adds flavor. I use oil for the dough because it’s easier, but if you want extra richness, use melted butter. Either way, it works.
For the Garlic Parmesan Topping
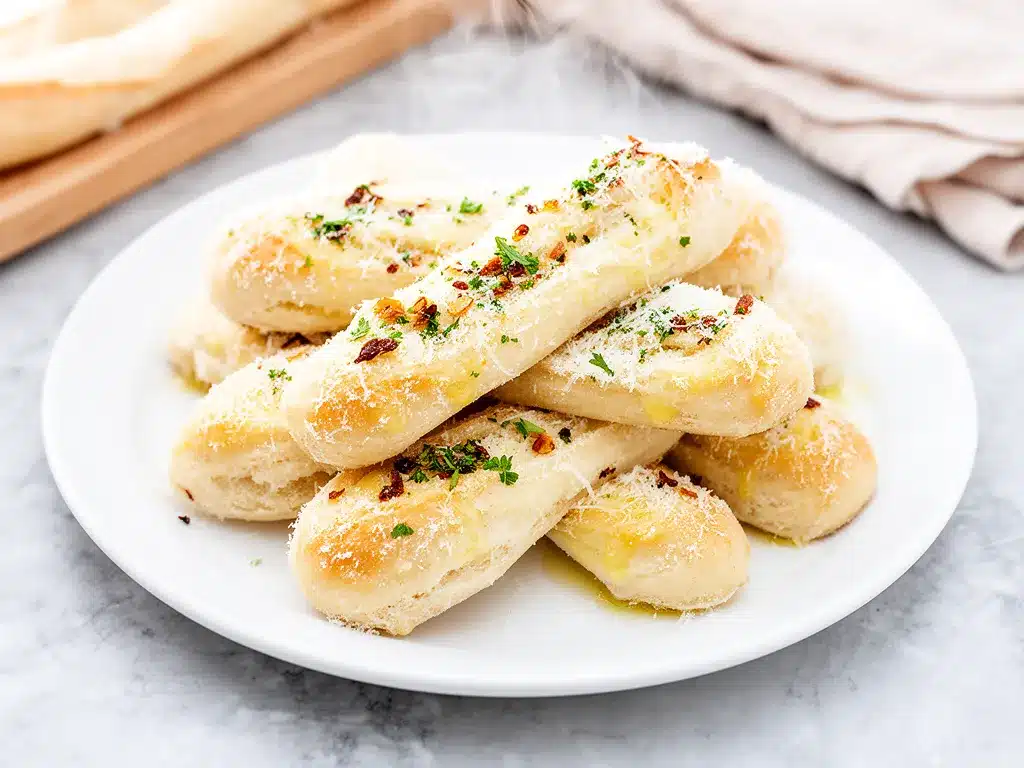
Unsalted butter (½ cup / 113g) — This is the base of the magic. Melt it, but don’t burn it. I like using unsalted so I can control the saltiness.
Garlic (6 cloves, minced / about 2 tablespoons) — Yes, six cloves. Don’t be shy. Fresh only—no jarred garlic in this recipe. It tastes metallic and kills the vibe. Minced fine so you get bits of garlic in every bite.
Italian seasoning (1 teaspoon) — Or a mix of dried basil and oregano. It adds that classic Italian aroma. I keep a jar of it in my cabinet at all times.
Parmesan cheese (½ cup / 50g, freshly grated) — Buy the block and grate it yourself. Pre-grated cheese has anti-caking agents that make it clumpy and hard to melt. Freshly grated melts into the butter and creates that gooey, cheesy goodness. It takes 2 minutes and makes a huge difference.
Parsley (2 tablespoons, fresh chopped) — Adds color and freshness. Dried parsley works in a pinch, but fresh is brighter. I chop it with my fingers, it’s faster.
Red pepper flakes (½ teaspoon) — Optional, but I love a little heat. It cuts through the richness of the butter and cheese. If you’re sensitive to spice, skip it or use less.
Optional Add-ins
Marinara sauce — For dipping. I make my own, but store-bought works fine. Warm it up before serving.
Ranch dressing — Some people prefer ranch for dipping. It’s a valid choice, though less traditional.
Equipment Needed
You don’t need fancy equipment for this. Here’s what I actually use.
Bowl — A large mixing bowl. I use a glass one because I can see how the dough is coming together. Plastic works too.
Measuring cups and spoons — Pretty standard stuff. Dollar store versions work fine. Just make sure they’re accurate.
Standing mixer or hand mixer — Optional. I use a stand mixer with a dough hook because it’s easier on my arms. But you can absolutely do this by hand. It just takes a bit more elbow grease.
Baking sheet — A standard 13×9 inch pan. I line it with parchment paper for easy cleanup. Silicone mats work too.
Small saucepan — For melting the butter for the topping. Or use a microwave-safe bowl.
Pastry brush — For brushing the garlic butter onto the breadsticks. A silicone brush is easy to clean. A regular brush works too.
Sharp knife or pizza cutter — To cut the dough into strips. A pizza cutter is easiest because it doesn’t squish the dough.
Oven — Obviously. Preheat to 375°F (190°C).
How to Make It: Step-by-Step
Alright, let’s make this! I’m walking you through exactly how I do it, including the little tricks I’ve picked up over the years.
Step 1: Activate the Yeast (5 minutes)
In the bowl of your stand mixer (or a large mixing bowl), combine the warm water, sugar, and yeast. Stir it gently with a spoon or the paddle attachment. Let it sit for 5 minutes. You’ll see it get foamy and bubbly on top. If it doesn’t foam, your yeast is dead. Start over. Don’t skip this step; it’s crucial for soft breadsticks.
Step 2: Mix the Dough (5 minutes)
Add the salt and oil (or melted butter) to the yeast mixture. Then, add 3 cups of flour. If using a stand mixer, switch to the dough hook and mix on low speed. If mixing by hand, stir until it becomes too thick to stir, then turn it out onto a floured surface. Gradually add the remaining flour, ½ cup at a time. You want a dough that is soft and slightly sticky, but not wet. It should pull away from the sides of the bowl. This takes about 5 minutes of mixing.
Step 3: Knead the Dough (5-7 minutes)
If using a stand mixer, knead on medium-low speed for 5-7 minutes. The dough should become smooth and elastic. If kneading by hand, turn it out onto a floured surface and knead for 8-10 minutes. Push the dough away with the heel of your hand, fold it over, and repeat. Add a little flour if it’s too sticky, but don’t add too much. The dough should pass the “windowpane test”—stretch a small piece thin; if it stretches without tearing, it’s ready. This develops the gluten, which gives you that chew.
Step 4: First Rise (30 minutes)
Lightly grease a clean bowl with oil. Place the dough in the bowl and turn it once to coat it in oil. Cover with plastic wrap or a damp towel. Let it rise in a warm place for 30 minutes. It should double in size. I usually just leave it on the counter. If your kitchen is cold, put it in the oven with the light on. It speeds things up.
Step 5: Shape the Breadsticks (10 minutes)
Preheat your oven to 375°F (190°C). Line a baking sheet with parchment paper. Punch down the dough gently to release air bubbles. Turn it out onto a lightly floured surface. Roll it into a rectangle, about 12×18 inches. Cut the rectangle into 12 strips. You can leave them long and thin, or cut them into shorter, chunkier sticks. I like them long so I can dip them easily. Place them on the baking sheet, about 2 inches apart. They’ll expand, so give them room.
Step 6: Second Rise (15 minutes)
Cover the shaped breadsticks loosely with a towel. Let them rise for another 15 minutes. They should look puffy and soft. This step is important for getting that soft, pillowy texture. Don’t skip it!
Step 7: Bake (15-18 minutes)
Bake the breadsticks for 15-18 minutes, or until they are golden brown on top. You’ll see them puff up nicely. Rotate the pan halfway through for even baking. They should sound hollow when you tap the bottom. If they sound dull, they need more time.
Step 8: Make the Garlic Butter (5 minutes)
While the breadsticks bake, melt the butter in a small saucepan over low heat. Add the minced garlic, Italian seasoning, and red pepper flakes. Stir constantly for 1-2 minutes until fragrant. Do not let the garlic brown! Brown garlic is bitter. Remove from heat and stir in the grated Parmesan cheese and parsley. Set aside.
Step 9: Finish and Serve
As soon as the breadsticks come out of the oven, brush them generously with the garlic butter mixture. Do this while they’re hot so the butter soaks in. You can brush them once, let them cool for a minute, and brush again for extra flavor. Slice and serve immediately. They are best fresh out of the oven.
Total Time: About 45 minutes (15 minutes active, 30 minutes rising)
Expert Tips & Tricks
Here’s everything I’ve learned from making this dozens of times. These tips will save you from my mistakes.
Don’t Overbake Them
This is the #1 mistake. Breadsticks continue to cook on the pan after they come out of the oven. If they look perfectly golden, they might be done. If they look slightly pale, they might be perfect. I err on the side of underbaking. They’ll be softer and chewier. Overbaked breadsticks are hard and dry. I learned this the hard way with a batch of crunchy, rock-hard sticks that I couldn’t even dip.
Water Temperature is Key
That warm water needs to be just right. Too hot, and you kill the yeast. Too cold, and it won’t rise. If you don’t have a thermometer, test it on your wrist. It should feel warm, like a baby’s bottle. Not hot. If it burns your wrist, it’s too hot.
Use Fresh Garlic
I cannot stress this enough. Jarred garlic tastes metallic and artificial. Fresh garlic, minced fine, gives you that bright, pungent flavor that defines Garlic Parmesan Soft Breadsticks. If you hate chunks of garlic, you can infuse the butter with garlic cloves and then remove them, but most people want those flavorful bits.
Grate Your Own Cheese
Pre-grated Parmesan is coated in cellulose to prevent clumping. This means it doesn’t melt smoothly. It stays grainy. Grate your own from a block. It takes 2 minutes and makes the topping silky and delicious.
Brush Immediately
Don’t let the breadsticks cool before brushing. The heat helps the butter soak into the crust. If you wait, the butter sits on top and gets cold and greasy. Brush them the second they come out of the oven.
Common Mistakes (and how to avoid them)
Mistake: Dough is too sticky
Fix: Add flour 1 tablespoon at a time. Don’t dump in a cup. It’s better to have slightly sticky dough than dry dough. Sticky dough bakes up softer.
Mistake: Breadsticks are flat
Fix: They didn’t rise enough. Make sure your yeast is fresh and your water is warm enough. Let them rise for the full 15 minutes in step 6.
Mistake: Garlic butter is bitter
Fix: You burned the garlic. Melt the butter on low heat and add garlic at the end. Cook for only 30 seconds. Remove from heat immediately.
Variations & Substitutions
Once you’ve nailed the basic version, here’s how you can mix it up. I’ve tried all of these.
Cheese Stuffed Breadsticks
Before rolling the dough, place small cubes of mozzarella cheese in the center of each strip. Roll them up tightly. Bake as directed. When they come out, they’ll be gooey and cheesy inside. My kids love this version.
Honey Butter Breadsticks
Skip the garlic and Parmesan. Mix melted butter with 2 tablespoons of honey and a pinch of cinnamon. Brush it on top. Sweet and savory. Great with apple cider.
Ranch Breadsticks
Skip the garlic and Parmesan. Mix melted butter with 1 packet of ranch seasoning mix and some dried chives. Brush on top. It’s a crowd-pleaser for parties.
Whole Wheat Breadsticks
Substitute 2 cups of all-purpose flour with whole wheat flour. The dough will be denser, but it adds a nutty flavor. I like to add an extra tablespoon of honey to balance the earthiness.
Dietary Modifications
Gluten-Free
Use a 1:1 gluten-free flour blend with xanthan gum. The dough will be stickier, so you may need to shape it with wet hands. It won’t be as chewy, but it’s still good.
Dairy-Free
Use olive oil instead of butter in the dough. Use dairy-free butter for the topping. Use nutritional yeast instead of Parmesan. It’s different, but still tasty.
Vegan
Use olive oil or vegan butter. Use nutritional yeast. Everything else is naturally vegan.
Serving & Storage
How to Serve:
I usually serve these straight from the baking sheet, with a bowl of warm marinara in the center for dipping. It’s rustic and fun. But here are other ways I’ve enjoyed them:
- Appetizer — Serve with a variety of dips: marinara, ranch, buffalo sauce, garlic aioli.
- Side Dish — Perfect with soup, salad, or pasta. They’re better than store-bought every time.
- Dessert — Drizzle with chocolate sauce and add sprinkles. Kids love this.
Storage Instructions:
Room Temperature:
Store in an airtight container for up to 2 days. They will stale quickly, so eat them fast.
Refrigerator:
Store in an airtight container for up to 3 days. Let them come to room temperature before reheating.
Reheating:
Best method: Reheat in the oven at 350°F for 5-7 minutes. This restores the crispness. Microwave works too, but they’ll get chewy and soft. I prefer the oven.
Freezing:
Bake the breadsticks, let them cool completely, then freeze in a freezer-safe bag for up to 3 months. Reheat in the oven from frozen. They taste almost as good as fresh.
Nutrition Information
I’m not a nutritionist, but here’s the breakdown if you’re tracking. This is an estimate based on 12 breadsticks.
| Nutrient | Per Breadstick |
|---|---|
| Calories | 180 |
| Protein | 5g |
| Carbs | 22g |
| Fiber | 1g |
| Sugar | 2g |
| Fat | 8g |
| Sodium | 250mg |
What’s Good:
– Decent protein from the flour and cheese
– Easy to control ingredients
– Can add veggies to the dough for extra nutrition
What to Know:
– Higher in calories from butter and cheese
– Contains gluten and dairy
– Sodium can be reduced by using less salt in the dough
My Take:
Look, these are Garlic Parmesan Soft Breadsticks. They’re indulgent. They’re comfort food. They’re not a diet recipe. But they’re way better than takeout, costs less, and I know exactly what’s in them. When I want to make it lighter, I use less butter and more garlic. But usually? I just enjoy them and move on.
Final Thoughts
So that’s my go-to Garlic Parmesan Soft Breadsticks! I’ve probably talked your ear off at this point, but when you make a recipe this often, you have a lot to say about it.
This has saved weeknight dinners more times than I can count. It’s my answer to “what’s for dinner” when I’m tired, don’t want takeout, and still want something that tastes really good. My kids are happy, my husband’s happy, and I’m happy because I’m not stressed about cooking.
Make it yours! Try different add-ins, swap in your favorite dips, adjust the garlic (though more is always better in my opinion). The best recipes are the ones you adapt to your family’s tastes.
If you make this, drop a comment and let me know what you think! I love hearing how recipes turn out in your kitchen. And if something doesn’t work, tell me that too—I’m here to help troubleshoot.
Happy cooking! And I hope your kitchen smells half as good as mine does right now.
Frequently Asked Questions
Can I use active dry yeast instead of instant yeast?
Yes, you can. But you’ll need to proof it first. Dissolve the yeast and sugar in the warm water and let it sit for 5-10 minutes until it’s foamy. Then add the salt and oil. It adds an extra step, but it works fine.
Why are my breadsticks dense?
This usually happens if you add too much flour. When kneading, only add flour if the dough is sticking to your hands. It should be slightly tacky. Also, make sure your yeast is fresh and the water is warm enough. If the yeast didn’t activate, the breadsticks won’t rise.
Can I make the dough ahead of time?
Yes! After the first rise, punch down the dough, wrap it tightly in plastic, and refrigerate for up to 24 hours. Let it come to room temperature before shaping and baking. This actually improves the flavor.
Can I freeze the unbaked dough?
Not recommended. The yeast will die in the freezer, and the texture will be off. It’s better to bake them first, then freeze. Or let them rise fully, then freeze them unbaked (though the texture may suffer slightly). Baking first is the safest bet.
What’s the best way to reheat leftover breadsticks?
The oven is best. Preheat to 350°F and bake for 5-7 minutes. This restores the crispness. If you microwave them, they’ll get soft and chewy, which some people like, but they won’t be crispy. Avoid the microwave if you want that fresh-baked texture.
Can I use whole wheat flour?
You can, but substitute only half the all-purpose flour. Whole wheat flour absorbs more water and makes denser bread. If you use all whole wheat, the breadsticks will be heavy. Half and half gives you a nice balance of flavor and texture.
How do I get the garlic to stick to the breadsticks?
The key is to brush the garlic butter on immediately after baking. The heat of the bread helps the butter melt into the crust. If you wait, the butter sits on top. Also, make sure the butter isn’t too hot when you add the garlic, or it will separate. Warm butter is best.
Pin This Recipe!
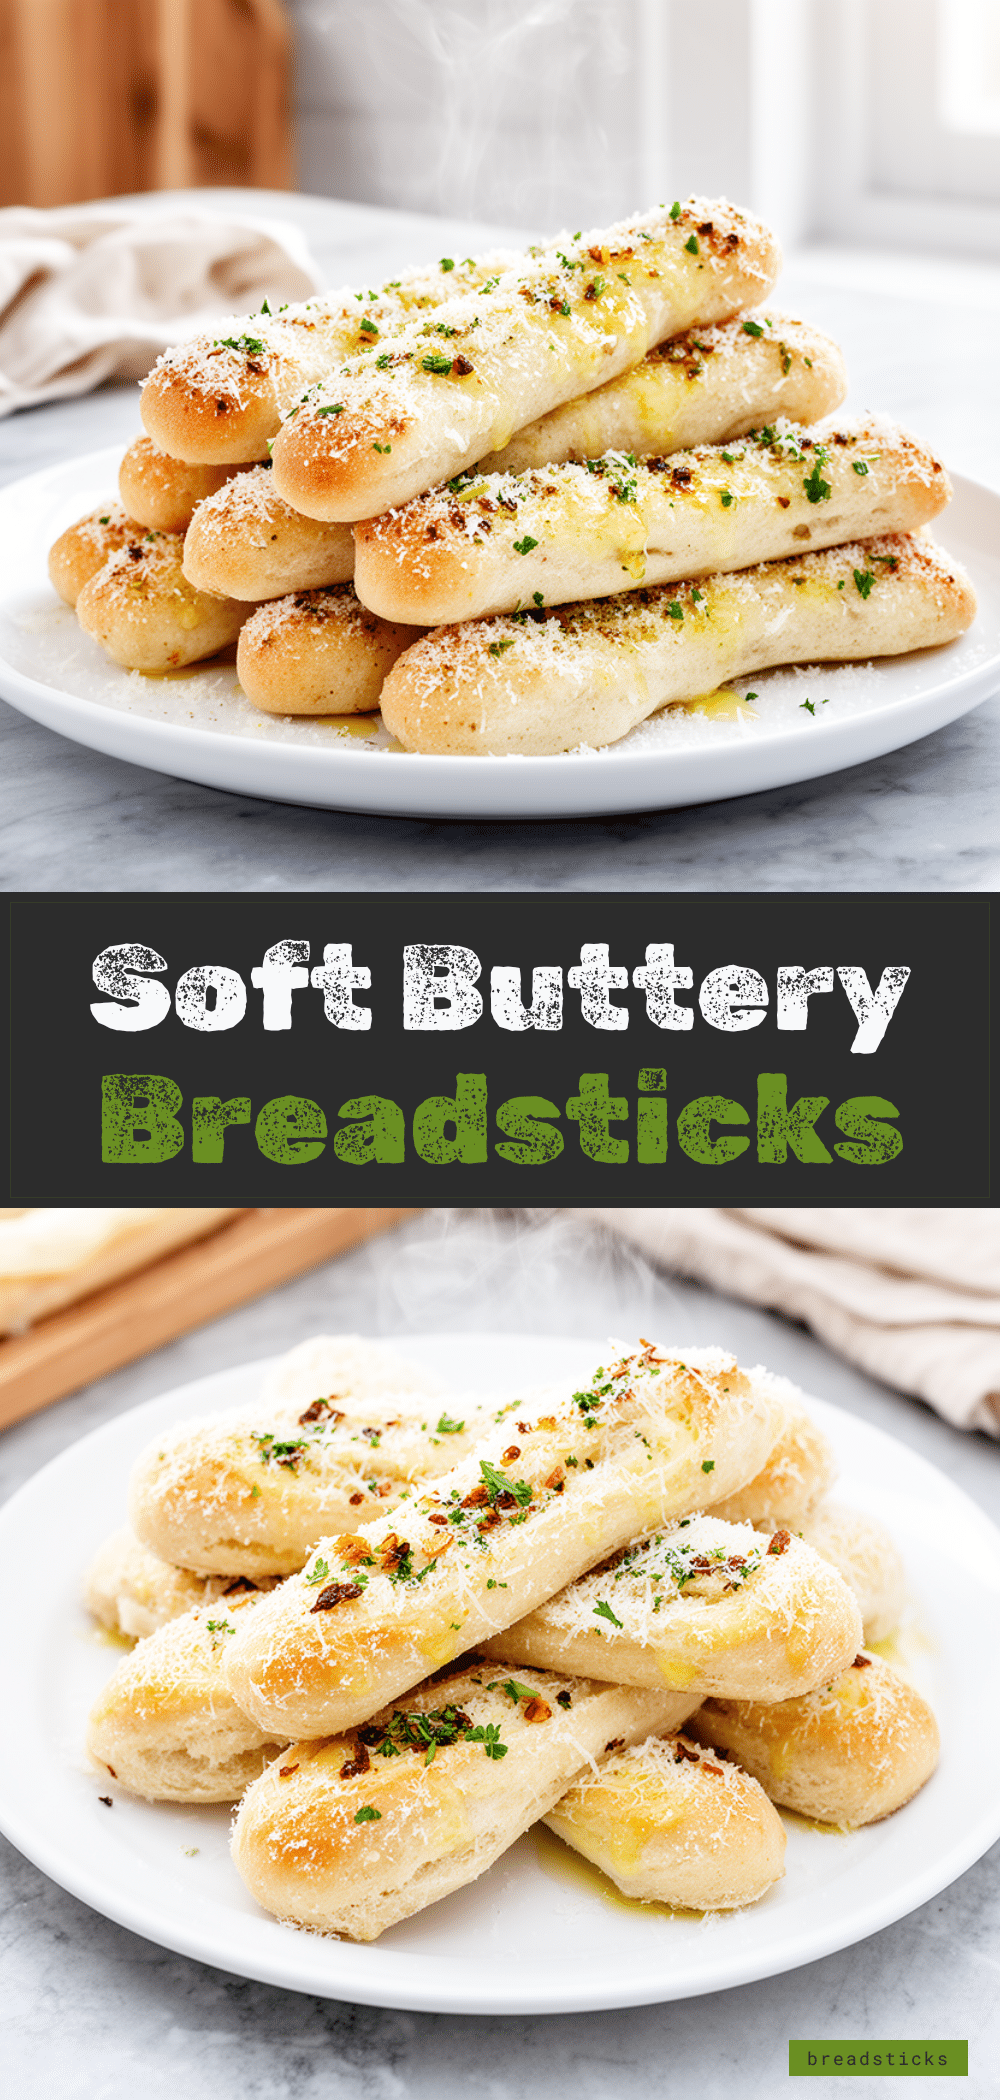
Garlic Parmesan Soft Breadsticks: Best Homemade Recipe
- Total Time: 45 minutes
- Yield: 12 servings 1x
Description
Homemade garlic parmesan soft breadsticks that are fluffy, tender, and ready in under an hour. These budget-friendly breadsticks feature a simple dough and a rich garlic butter topping, making them a perfect side dish or appetizer.
Ingredients
- 1 ½ cups warm water
- 2 ¼ teaspoons instant yeast (1 packet)
- 1 tablespoon granulated sugar
- 4 to 4 ½ cups all-purpose flour
- 1 ½ teaspoons salt
- 3 tablespoons vegetable oil or melted butter
- ½ cup unsalted butter (for topping)
- 6 cloves garlic, minced
- 1 teaspoon Italian seasoning
- ½ cup freshly grated Parmesan cheese
- 2 tablespoons fresh parsley, chopped
- ½ teaspoon red pepper flakes (optional)
Instructions
- In a large mixing bowl or stand mixer, combine warm water, sugar, and yeast. Let sit for 5 minutes until foamy.
- Add salt and oil (or melted butter) to the yeast mixture. Add 3 cups of flour and mix until combined.
- Gradually add remaining flour, ½ cup at a time, until the dough is soft, slightly sticky, and pulls away from the sides of the bowl.
- Knead the dough on medium-low speed for 5-7 minutes (or by hand for 8-10 minutes) until smooth and elastic.
- Place dough in a lightly greased bowl, cover, and let rise in a warm place for 30 minutes until doubled in size.
- Preheat oven to 375°F (190°C). Line a baking sheet with parchment paper.
- Punch down the dough and roll it into a 12×18 inch rectangle on a floured surface.
- Cut the rectangle into 12 strips and place them on the baking sheet, 2 inches apart.
- Cover breadsticks loosely and let rise for another 15 minutes.
- Bake for 15-18 minutes until golden brown, rotating the pan halfway through.
- While baking, melt butter in a saucepan over low heat. Add garlic, Italian seasoning, and red pepper flakes; cook for 1-2 minutes until fragrant without browning.
- Remove from heat and stir in Parmesan cheese and parsley.
- Immediately brush the hot baked breadsticks generously with the garlic butter mixture.
- Serve warm with marinara sauce or other dips.
Notes
Ensure water is warm but not hot to avoid killing the yeast. Use fresh garlic and freshly grated Parmesan for best flavor and texture. Do not overbake to maintain softness. Brush with garlic butter immediately upon removing from oven for best absorption.
- Prep Time: 15 minutes
- Cook Time: 15-18 minutes
- Category: Side Dish
- Cuisine: Italian
Nutrition
- Serving Size: 1 breadstick
- Calories: 180
- Sugar: 2
- Sodium: 250
- Fat: 8
- Saturated Fat: 5
- Carbohydrates: 22
- Fiber: 1
- Protein: 5
Keywords: garlic breadsticks, parmesan breadsticks, homemade breadsticks, soft breadsticks, Italian appetizer, easy bread recipe, garlic butter



