I still remember the morning I nearly cried over my alarm clock. It was a Tuesday in November—dark, cold, and raining sideways. I had a big presentation at work, my kids were already bickering over who got the blue cup, and I had exactly twelve minutes before I needed to leave. My stomach was growling loud enough to be heard through the bedroom wall, but my brain was too foggy to think about cooking. I didn’t want cereal (too boring), and I definitely didn’t want to stand over the stove making pancakes (too much time).
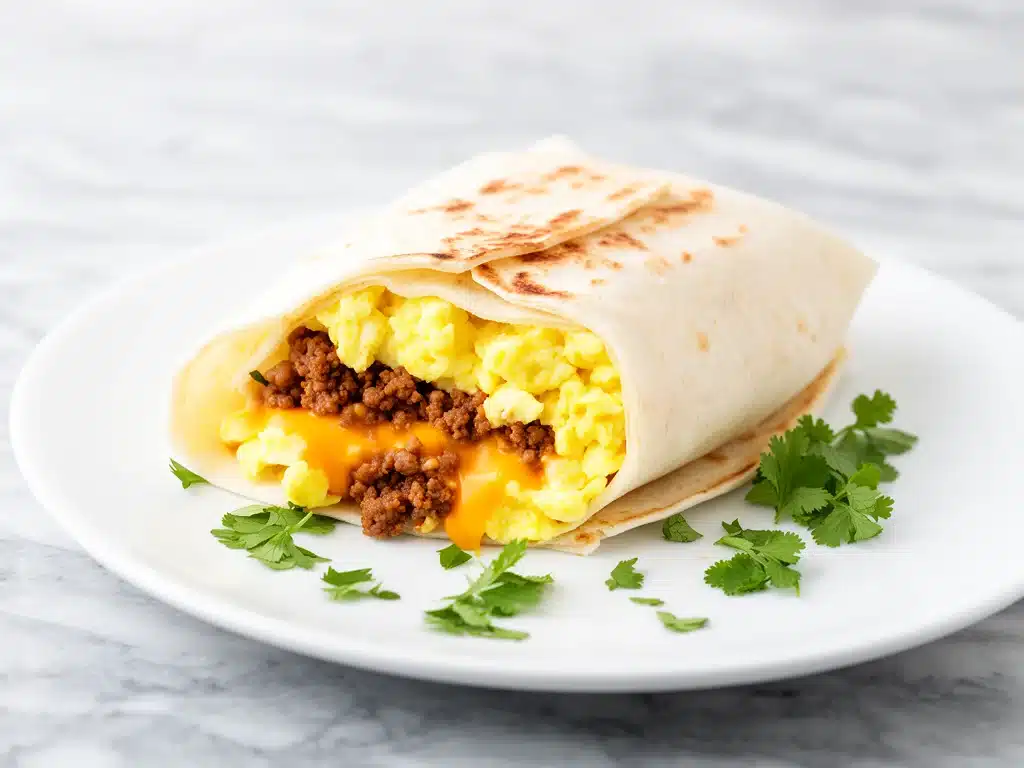
Then I remembered the stack of frozen burritos in the back of my freezer. I pulled one out, wrapped it in a damp paper towel, and microwaved it while throwing socks on. When I took that first bite, it was hot, cheesy, and tasted like a hug. It was basically a warm breakfast burrito, but it tasted like I’d actually cared about my morning instead of just surviving it.
That was the moment I realized I didn’t need to be a morning person. I just needed a better system. Those cheesy sausage breakfast burritos became my secret weapon. Now, they’re the backbone of my Sunday meal prep routine. I make a double batch, wrap them up, and freeze them. They’re the ultimate freezer-friendly meal prep solution for busy families who still want to eat something that tastes homemade.
I’ve tweaked this recipe over the last three years. I started with basic eggs and sausage, but after experimenting with different cheeses and spice blends, I found the perfect ratio. The result? A burrito that holds together, freezes beautifully, and reheats to perfection. No soggy wrappers, no rubbery eggs. Just creamy, savory, breakfast perfection that takes five minutes to reheat. If you’re tired of cold yogurt or stale granola bars, you need this recipe in your life.
Why You’ll Love This Freezer Breakfast Recipe
There are about ten reasons I keep making these breakfast burritos, but let’s be real—you’re here because you need a morning hack that actually works. Here’s why this recipe has earned a permanent spot in my freezer:
Stupid Simple Prep — Seriously, if you can scramble eggs and warm tortillas, you can make these. I’ve walked my teenage son through the assembly line over FaceTime while I was at work. It’s just layering ingredients. No fancy techniques, no sous-vide machines, just good food.
Lightning Fast Reheating — This is the game-changer. From frozen to hot and gooey in the microwave takes exactly 2-3 minutes. That’s it. You can be eating breakfast before your coffee finishes brewing. I make these on weeknights when I get home at 6pm and know I’ll be rushing out the door at 7am.
Freezer-Friendly for Days — These don’t just survive the freezer; they thrive there. I’ve kept these in the freezer for up to three months, and they still taste fresh. The tortilla doesn’t get brittle, and the sausage doesn’t dry out. This is meal prep gold.
Pantry and Fridge Friendly — You probably have most of these ingredients already. Eggs, breakfast sausage, cheese, tortillas, and maybe some peppers or onions. I keep a pack of breakfast sausage in the freezer specifically so I can whip these up on a whim.
Budget-Smart — Feeds 6-8 people for under $20. That’s less than $3 per burrito, which is way cheaper than buying those frozen burritos at the grocery store (which are usually just bread and salt). Plus, you control the quality of the sausage and cheese.
Crowd-Pleaser — I’ve served these to my picky eater kids, my husband who usually hates “soft” breakfast foods, and even my coffee club friends. Everyone loves them. The cheese pull is real.
So basically, if you want to reclaim your mornings, this is the way to do it. It’s reliable, delicious, and stress-free.
Ingredients You’ll Need
Here’s the best part: you don’t need anything exotic for this. I’m particular about a few things, but overall, this is a very forgiving recipe. Here’s exactly what I use and why.
Breakfast Sausage (1 pound / 450g) — I use pork breakfast sausage links or patties. The sage and pepper flavor is key. If you can find a local butcher’s sausage, even better. Avoid the low-fat versions; they’re dry and flavorless. You want that fat to keep the eggs moist.
Eggs (12 large eggs) — I use large, pastured eggs if I can find them. The yolks are richer and yellower, which makes the scramble look and taste better. But honestly, any large eggs work fine. The key is how you cook them.
Heavy Cream or Whole Milk (¼ cup / 60ml) — This is the secret to fluffy eggs. I add this to the eggs before cooking. It makes them creamy, not dry. If you’re watching calories, whole milk works, but heavy cream is better for freezing because it prevents the eggs from getting rubbery.
Shredded Cheddar Cheese (2 cups / 200g) — Sharp cheddar is my go-to. It has more flavor than mild cheddar, which stands up to the sausage well. Crucial tip: Buy a block and shred it yourself. Pre-shredded cheese has cellulose (anti-caking agent) that prevents it from melting properly. You want gooey, not grainy.
Flour Tortillas (8-10 large, 10-inch) — Large flour tortillas are non-negotiable. Corn tortillas are too brittle and will crack when you freeze and reheat them. You need something pliable. I like the ones with a bit of butter in them for extra flavor.
Onion and Bell Pepper (1 medium onion, 1 bell pepper) — Diced finely. I use yellow onion and a mix of red and green peppers for color. Sauté these with the sausage to add sweetness and texture. If you hate peppers, skip them, but I recommend keeping them.
Seasonings — Salt, black pepper, and a pinch of cayenne or paprika. I like a little heat. The sausage usually has salt, so taste before adding more.
Optional Add-ins — I sometimes add diced ham, cooked bacon bits, or even leftover roasted potatoes. But the classic cheese and sausage combo is my favorite.
Equipment Needed
You don’t need fancy equipment for this. Here’s what I actually use in my kitchen:
Large Non-Stick Skillet — I use a 12-inch skillet. It needs to be big enough to cook all the eggs and sausage without crowding. If you crowd the pan, the eggs steam instead of scramble, and you get a weird texture.
Mixing Bowl — For whisking the eggs, cream, and seasonings. Any medium bowl works.
Spatula — A silicone spatula is best for scraping the pan clean and folding the eggs gently.
Cutting Board and Knife — For dicing onions and peppers. Sharp knife helps, but I’m not picky here.
Aluminum Foil and Plastic Wrap — For wrapping the burritos. I use plastic wrap first to seal in moisture, then foil to protect from freezer burn. You can also use freezer bags, but wrapping individually is faster.
Measuring Cups and Spoons — Standard stuff. Dollar store versions work fine.
Microplane or Box Grater — If you’re shredding your own cheese, a box grater is fine. I have a microplane that makes quick work of it.
Freezer-Safe Containers or Bags — If you’re stacking them, you’ll need something sturdy. But I prefer individual wrapping.
How to Make Cheesy Sausage Breakfast Burritos
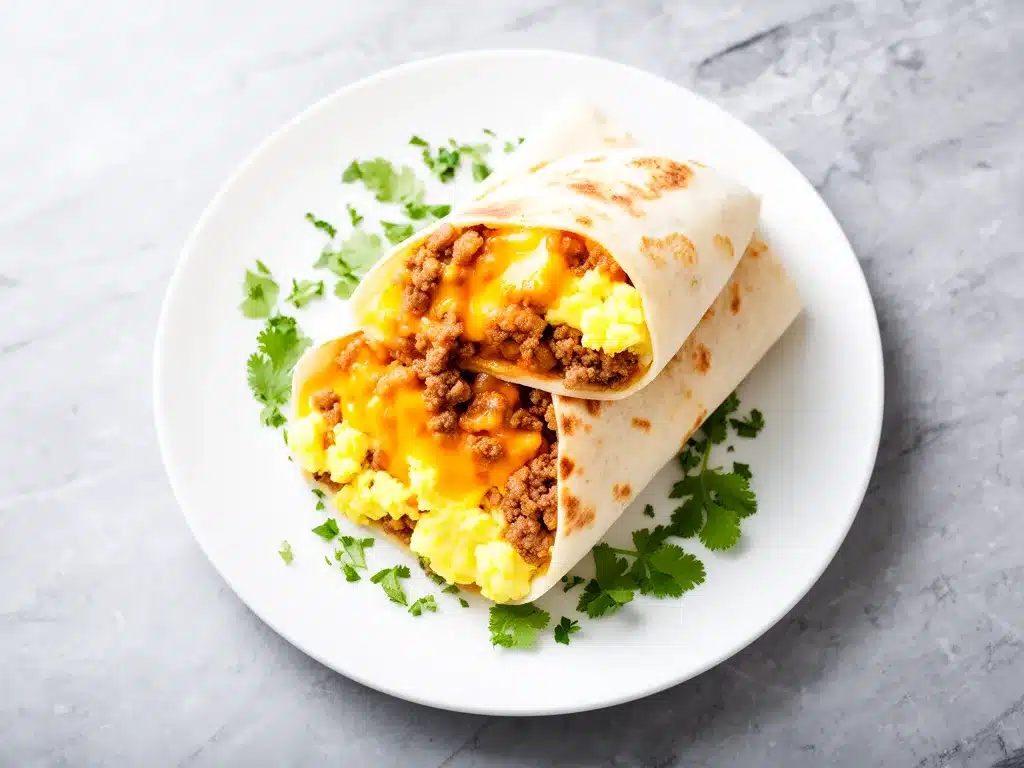
Alright, let’s make this! I’m walking you through exactly how I do it, including the little tricks I’ve picked up over the years. This process takes about 45 minutes total, but only 15 minutes of active work.
Step 1: Cook the Sausage and Vegetables (10 minutes)
Start by browning the breakfast sausage in your large skillet over medium-high heat. Break it up into small crumbles as it cooks. You want it fully cooked and slightly crispy. If you’re using links, slice them into coins after browning. Once the sausage is done, remove it from the pan and set it aside on a plate lined with paper towels to drain excess grease. You don’t want soggy burritos.
In the same pan (don’t clean it! That’s flavor), add the diced onions and peppers. Sauté for 3-4 minutes until they’re soft and translucent. The onions should be sweet, not browned. If the pan is too dry, add a splash of oil. Once cooked, add the sausage back in and mix it all together.
Step 2: Scramble the Eggs (5 minutes)
While the veggies are cooking, crack your eggs into a mixing bowl. Add the heavy cream, salt, pepper, and a pinch of cayenne. Whisk vigorously until the mixture is uniform and slightly frothy. This incorporates air, which makes the eggs fluffy.
Wipe out the skillet quickly with a paper towel if there’s too much grease, or just leave a little for flavor. Pour in the egg mixture. Let it sit for 10 seconds, then gently push the eggs from the edges to the center with your spatula. Keep doing this until the eggs are mostly set but still slightly wet. They will continue cooking from residual heat, so don’t overcook them. You want them creamy, not dry.
Step 3: Warm the Tortillas (2 minutes)
This is a pro tip that saves you broken burritos. Cold tortillas crack. Warm tortillas bend. Take your stack of flour tortillas and wrap them in a damp paper towel. Microwave for 30 seconds. They’ll be soft and pliable. If you don’t have a microwave, you can warm them in a dry skillet for 15 seconds per side.
Step 4: Assemble the Burritos (10 minutes)
Set up an assembly line. Lay out a warm tortilla. Add a layer of shredded cheese first (this acts as glue). Then add a generous scoop of the egg and sausage mixture. Top with a little more cheese. Don’t overstuff! If you pack it too tight, it’ll burst when it expands in the freezer. Leave a 1-inch border at the top.
Now, the folding technique. Fold the sides in toward the center, then roll from the bottom up, tucking it in tightly as you go. It should look like a tight cigar. If it’s loose, it’ll unravel. Practice makes perfect, but honestly, even if they’re a little messy, they still taste great.
Step 5: Wrap for Freezing (10 minutes)
This is the most important step for meal prep success. Wrap each burrito tightly in plastic wrap. Press out as much air as possible. Then, wrap it again in aluminum foil. The double layer protects against freezer burn and keeps them fresh for months. Label each burrito with a marker: date and contents. I usually write “Breakfast Burrito – Nov 2023” on the foil.
Stack them in a large freezer bag or container. They’ll take up less space than you think because they’re compact. You can fit 8-10 burritos in a standard gallon-sized freezer bag if you’re efficient.
Total Time: About 45 minutes. Active Time: 15 minutes. Yields: 8-10 burritos.
Expert Tips & Tricks for Perfect Freezer Burritos
Here’s everything I’ve learned from making these dozens of times. These tips will save you from my mistakes.
Don’t Overcook the Eggs
The #1 mistake people make is overcooking the eggs. They continue to cook when you wrap them and when you reheat them. If they’re dry before freezing, they’ll be rubbery after. Aim for “just set” when you take them off the heat.
Use Hot Fillings
I know it sounds counterintuitive to put hot filling into a tortilla, but it helps seal the burrito. The heat softens the tortilla slightly, making it more pliable and less likely to crack. Just let the filling cool for 2 minutes so it’s not piping hot.
Shred Your Own Cheese
I cannot stress this enough. Pre-shredded cheese will not melt properly. It will stay in little clumps. When you reheat the burrito, you’ll get pockets of cold, un-melted cheese. Block cheese melts into a gooey blanket. It takes 3 minutes to grate, and it’s worth it.
Double Wrap for Freezer Burn Protection
Freezer burn is the enemy. It turns your delicious burrito into a cardboard-tasting brick. The plastic wrap creates an airtight seal, and the foil adds a physical barrier against cold air. If you’re freezing them for more than a month, double wrap. If you’re eating them within a week, single wrap is fine.
Cool Completely Before Freezing
If you put warm burritos directly into the freezer, condensation will form. That moisture turns to ice crystals, which makes the tortilla soggy. Let them cool to room temperature on a wire rack before wrapping and freezing.
Pro Trick: The Cheese Glue
Putting a thin layer of cheese at the bottom and top of the filling helps bind the burrito together. It acts like edible glue, keeping the sausage and eggs from falling out when you bite in.
Variations & Substitutions
Once you’ve nailed the basic version, here’s how you can mix it up. I’ve tried all of these, and they’re all winners.
Spicy Jalapeño Version
Add diced jalapeños to the sausage mix. Use pepper jack cheese instead of cheddar. This is great for people who like a kick. My neighbor’s kids request this version specifically.
Ham and Swiss
Swap the sausage for diced ham and use Swiss cheese. Add a little Dijon mustard to the eggs. This feels more like a café breakfast. Very fancy for a Tuesday morning.
Veggie-Loaded
Skip the sausage and add spinach, mushrooms, and tomatoes. Use a little feta cheese. It’s lighter but still filling. I make this when I want to eat lighter without sacrificing flavor.
Breakfast Potato Burritos
Add diced, cooked potatoes to the mix. Use hash browns if you’re in a rush. This is very filling and great for hungry teenagers.
Gluten-Free
Use gluten-free flour tortillas. They can be brittle, so warm them well and don’t overstuff. I’ve used Siete brand and it works great. The rest of the recipe is naturally gluten-free.
Dairy-Free
Use a dairy-free egg substitute or just skip the cheese. Use a dairy-free butter in the eggs. It’s not the same, but it works if you’re allergic. My lactose-intolerant friend uses coconut cream in the eggs.
Lean Protein
Use turkey breakfast sausage or chicken sausage. It’s leaner but drier. Add a little extra olive oil to the eggs to compensate.
Serving & Storage
How to Reheat
I usually microwave the burrito while I’m getting dressed. It’s that fast. Remove the foil, keep the plastic wrap on (or transfer to a plate), and microwave on high for 2-3 minutes. Flip halfway through. If you’re in a hurry, 90 seconds per side works. The center should be hot and bubbly.
Air Fryer Method
If you want a crispy exterior, air fry the burrito at 375°F for 10-12 minutes. No plastic wrap needed! Remove the foil first. This makes the tortilla crispy like a taqueria burrito. It takes longer, but the texture is amazing.
Stovetop Method
For the best texture, reheat in a skillet with a little butter. Medium-low heat, covered, for 3-4 minutes per side. This takes more effort but tastes the best. I do this on weekends when I have time.
Storage Instructions
Refrigerator: Store wrapped burritos for up to 3 days. Reheat as above.
Freezer: Store for up to 3 months. They’re safe after that, but the quality declines. The tortilla might get a bit dry after 3 months.
Meal Prep Strategy
I make these every other Sunday. It takes about an hour total, but it saves me so much stress during the week. I keep a stack in the front of the freezer for this week, and push the older ones to the back.
Pro Tip: If leftovers are drying out, stir in a teaspoon of butter or a splash of milk when reheating. Brings back that creamy texture.
Nutrition Information
I’m not a nutritionist, but here’s the breakdown if you’re tracking. This is per burrito (based on 10 servings, using lean sausage and whole eggs).
Calories: 380
Protein: 22g
Carbs: 32g
Fiber: 2g
Sugar: 1g
Fat: 18g
Saturated Fat: 7g
Cholesterol: 220mg
Sodium: 650mg
What’s Good:
High protein from eggs and sausage. Keeps you full for hours. Good source of calcium from cheese.
What to Know:
Higher in calories and fat due to cheese and sausage. Sodium can be high depending on the sausage brand. Use low-sodium sausage if you’re watching salt.
My Take:
Look, this is comfort food. It’s not a diet recipe. But it’s way better than a pastry or a donut. It’s real food. When I want to make it lighter, I use turkey sausage and less cheese. But usually? I just eat one and enjoy it. It fuels me for the morning.
Final Thoughts
So that’s my go-to cheesy sausage breakfast burrito! I’ve probably talked your ear off at this point, but when you make a recipe this often, you have a lot to say about it.
This has saved my mornings more times than I can count. It’s my answer to “what’s for breakfast” when I’m tired, don’t want to cook, and still want something that tastes really good. My kids are happy, my husband’s happy, and I’m happy because I’m not stressed about cooking.
Make it yours! Try different cheeses, swap in your favorite veggies, adjust the spice level. The best recipes are the ones you adapt to your family’s tastes. If you make this, drop a comment and let me know what you think! I love hearing how recipes turn out in your kitchen. And if something doesn’t work, tell me that too—I’m here to help troubleshoot.
Happy cooking! And I hope your kitchen smells half as good as mine does right now.
Frequently Asked Questions
Can I freeze these burritos without plastic wrap?
You can, but I don’t recommend it. Plastic wrap creates an airtight seal that prevents freezer burn. Without it, the burritos will dry out and develop ice crystals. If you’re trying to reduce plastic use, you can use reusable silicone bags, but make sure they’re sealed tightly. Foil alone isn’t enough to stop freezer burn.
Why did my tortillas crack when I wrapped them?
This happens when the tortillas are cold or dry. Always warm them before wrapping! A quick 30 seconds in the microwave with a damp paper towel makes them pliable. If they’re still cracking, they might be old tortillas. Buy fresh ones, or store them in the fridge to keep them soft.
Can I make these ahead and refrigerate instead of freezing?
Yes! Store them in the fridge for up to 3 days. Reheat them in the microwave for 1-2 minutes. They’ll be slightly softer than frozen ones, but still delicious. This is good for meal prep if you’re eating them within a few days.
Can I use corn tortillas?
I don’t recommend it. Corn tortillas are brittle and will crack when you freeze and reheat them. Flour tortillas are more elastic and can handle the expansion and contraction of freezing. If you must use corn, warm them well and don’t overstuff, but expect some breakage.
How do I reheat these without making them soggy?
The microwave is the easiest, but it can make them soggy. To avoid this, microwave on medium power instead of high. This heats them more gently. Or, use the air fryer or skillet method for a crispy exterior. If you use the microwave, let them sit for 30 seconds after heating to let the heat distribute evenly.
Can I double this recipe?
Absolutely! Double everything and use your biggest skillet. The cooking times stay the same. I do this when I’m meal-prepping for a big week. Just make sure you have enough freezer space. These take up less space than you think!
Pin This Recipe!
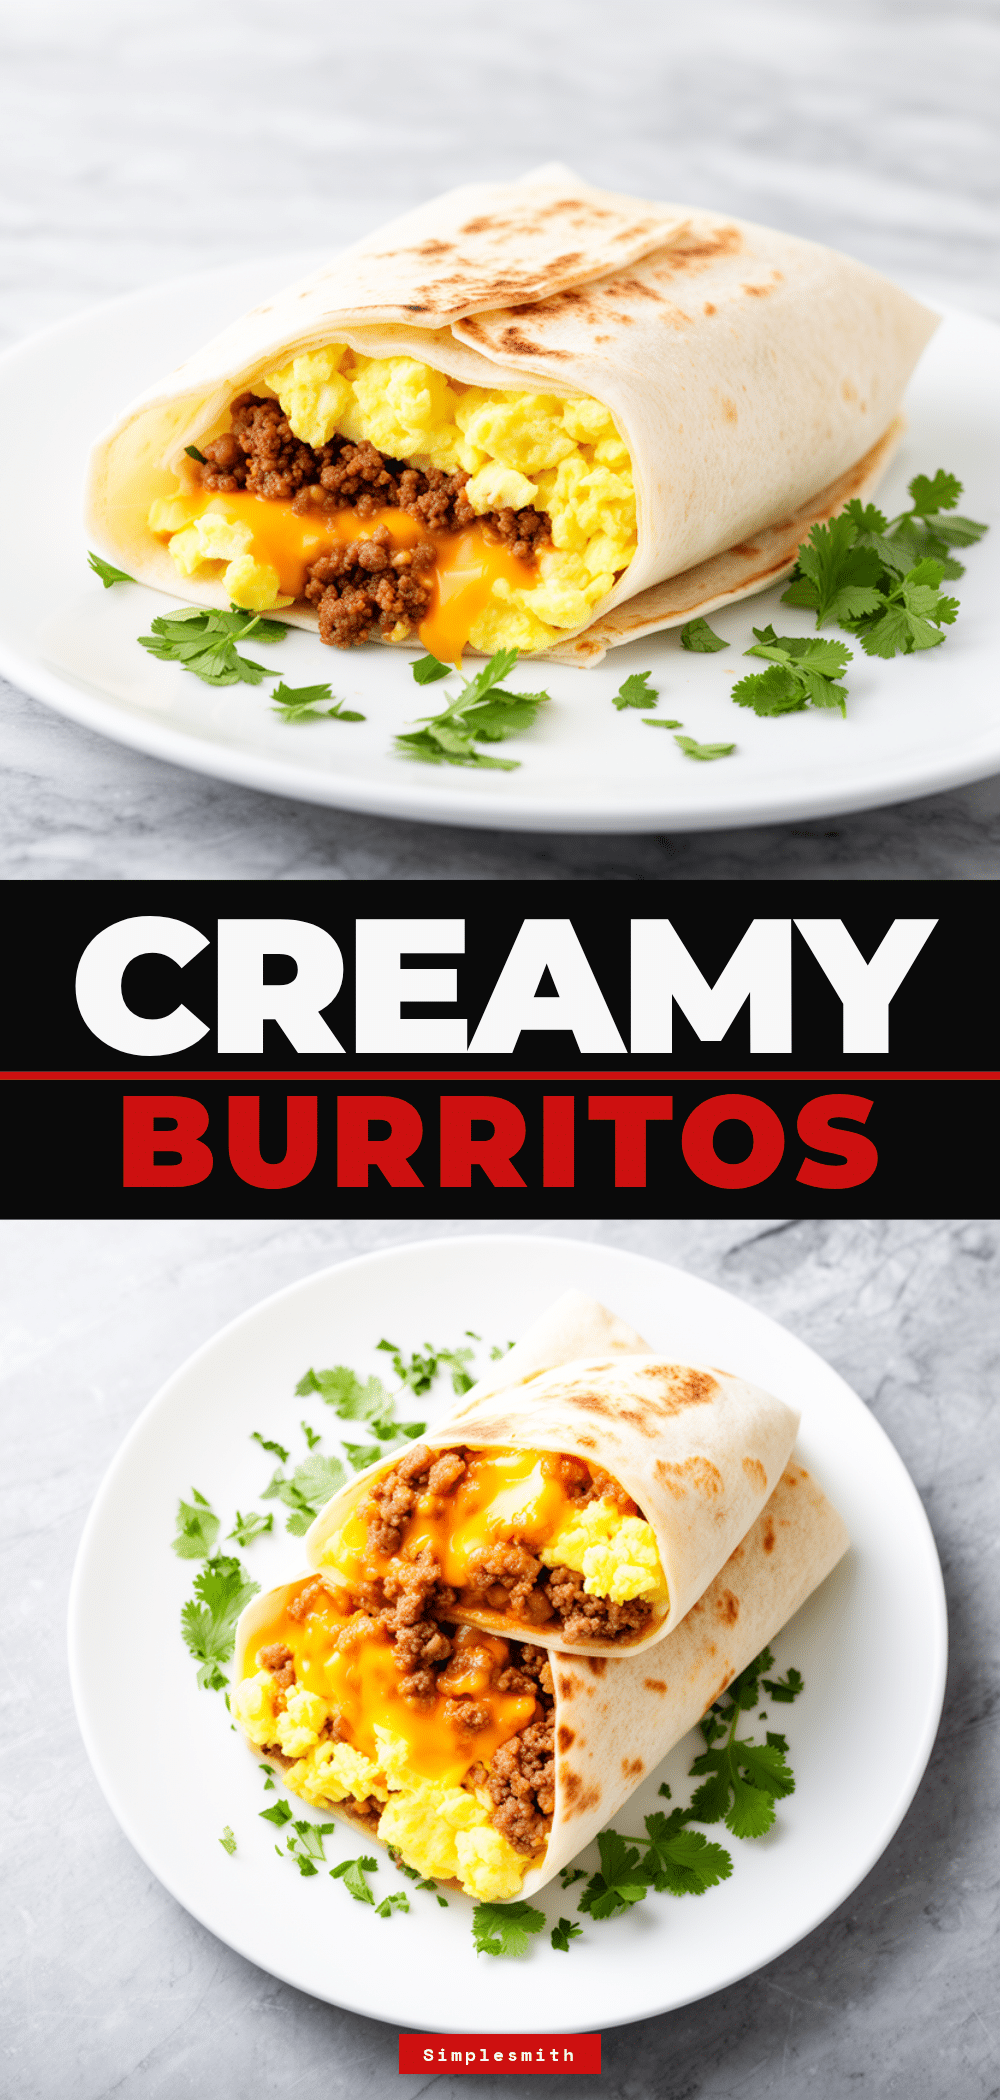
Cheesy Sausage Breakfast Burritos: Best Freezer Meal Prep
- Total Time: 45 minutes
- Yield: 8-10 servings 1x
Description
These freezer-friendly cheesy sausage breakfast burritos are the ultimate morning hack for busy families. Made with fluffy scrambled eggs, savory sausage, and gooey cheddar cheese, they can be prepped in 45 minutes and reheated in just 2-3 minutes for a hot, homemade breakfast on demand.
Ingredients
- 1 pound (450g) breakfast sausage (pork links or patties)
- 12 large eggs
- 1/4 cup (60ml) heavy cream or whole milk
- 2 cups (200g) shredded sharp cheddar cheese
- 8–10 large (10-inch) flour tortillas
- 1 medium yellow onion, diced
- 1 bell pepper (red or green), diced
- Salt and black pepper to taste
- Pinch of cayenne or paprika (optional)
Instructions
- Brown the breakfast sausage in a large non-stick skillet over medium-high heat, breaking it into crumbles. Remove and drain on paper towels.
- In the same skillet, sauté the diced onion and bell pepper for 3-4 minutes until soft. Return the sausage to the pan and mix.
- Whisk the eggs, heavy cream, salt, pepper, and cayenne in a mixing bowl until frothy.
- Pour the egg mixture into the skillet with the sausage and veggies. Gently push eggs from edges to center until mostly set but still slightly wet.
- Warm the flour tortillas in the microwave (wrapped in a damp paper towel) for 30 seconds to make them pliable.
- Assemble each burrito by laying down a tortilla, adding a layer of cheese, a generous scoop of the egg mixture, and more cheese on top.
- Fold the sides in and roll tightly from the bottom up.
- Wrap each burrito tightly in plastic wrap, then again in aluminum foil to prevent freezer burn.
- Label with the date and store in the freezer for up to 3 months.
Notes
Do not overcook the eggs as they will continue to cook when reheated. Shred your own cheese for better melting. Warm tortillas before wrapping to prevent cracking. Double wrap for freezer burn protection. Cool burritos completely before freezing to prevent condensation.
- Prep Time: 15 minutes
- Cook Time: 30 minutes
- Category: Breakfast
- Cuisine: American
Nutrition
- Serving Size: 1 burrito
- Calories: 380
- Sugar: 1
- Sodium: 650
- Fat: 18
- Saturated Fat: 7
- Carbohydrates: 32
- Fiber: 2
- Protein: 22
Keywords: breakfast burritos, freezer meal prep, sausage and egg burritos, meal prep breakfast, cheesy breakfast burritos, quick breakfast, family breakfast