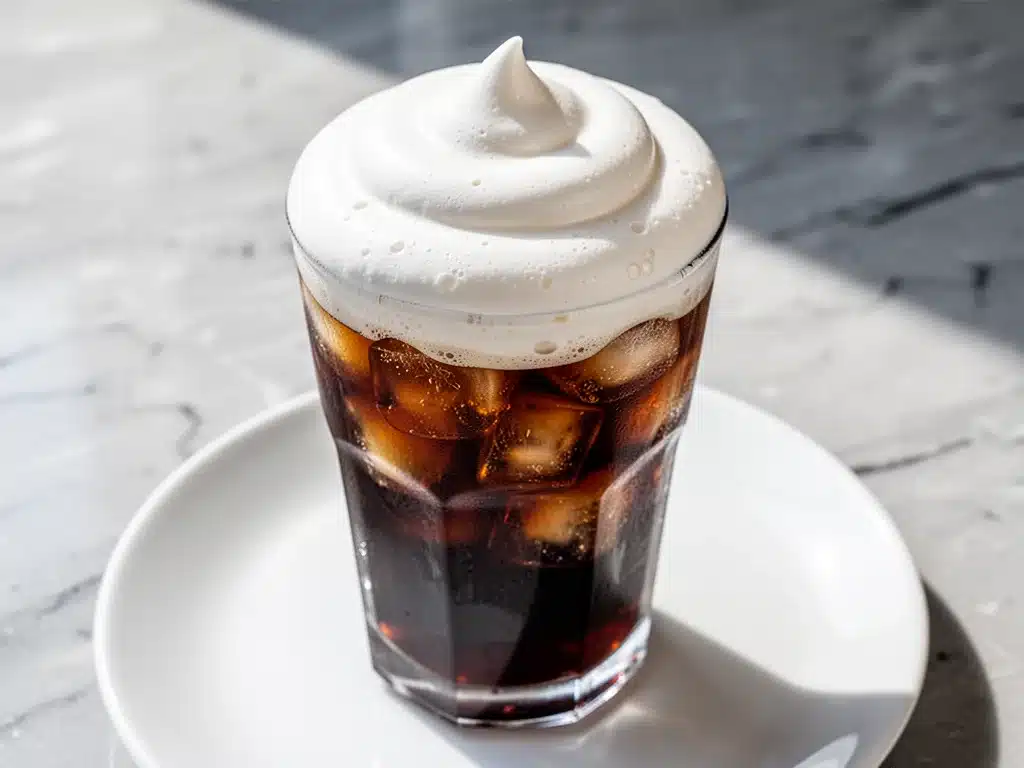
Last Tuesday, I stood in line at my local coffee shop, watching the barista drizzle that thick, white, sweet cream foam over a simple iced coffee. It looked dreamy. It smelled like heaven. And then I watched the receipt print out: $6.75. For coffee and a little bit of whipped cream.
I almost walked out. But then I remembered the can of heavy cream sitting in my fridge at home, the vanilla extract I bought on sale last month, and the simple fact that I was tired of paying $7 for a drink I could make in three minutes.
That was the moment I decided to try making homemade vanilla sweet cream cold foam for the first time. I expected it to be complicated. I thought I’d need a fancy frother, some exotic ingredients, or a degree in pastry arts. Instead, I dumped three ingredients into a small jar, shook it like my life depended on it, and poured it over my iced coffee. The result? It was better than the coffee shop version. Richer. Sweeter. And it cost me about 40 cents to make.
I’ve made this foam for every iced coffee I’ve had since that Tuesday. I’ve experimented with ratios, tested different vanilla extracts, and even tried adding a pinch of salt to balance the sweetness. Now, this simple topping has become my favorite part of the morning ritual. It turns a basic black coffee into a luxurious treat without the luxury price tag.
If you’re tired of spending a fortune on cafe-style drinks or struggling to get that perfect fluffy texture at home, you’re in the right place. This is the easiest, most reliable recipe for vanilla sweet cream cold foam. It’s sweet, it’s creamy, and it floats beautifully on top of your favorite cold brew or iced latte. Let’s get into how to make it.
Why You’ll Love This 3-Ingredient Recipe
There are about ten reasons I keep coming back to this simple foam, but let’s be real—you’re here because you want something that tastes amazing and doesn’t require a degree to make. Here’s why this homemade vanilla sweet cream cold foam has completely changed my iced coffee game:
Stupid Simple
I mean it. If you can open a can of heavy cream and pour it into a jar, you can make this. I’ve made it while half-asleep on weekend mornings. I’ve made it while my kids are running around the kitchen. There are no special techniques, no heating, no cooling overnight. Just shake and pour.
Lightning Fast
From grabbing the ingredients to pouring it over your coffee takes about two minutes. If you’re running late for work, this is your new best friend. It’s faster than waiting for the drive-thru line, and you don’t even have to leave your house.
Pantry-Friendly
You probably already have two of the three ingredients. Heavy cream, milk, and vanilla extract. These aren’t weird specialty items you need to hunt down at a gourmet store. They’re staples. I keep heavy cream in the fridge specifically so I can whip up this foam on a whim.
Infinitely Customizable
This is the blank canvas of coffee toppings. Want it sweeter? Add more vanilla. Want it richer? Use more cream. Want to switch it up for the holidays? Swap the vanilla for pumpkin spice or peppermint extract. I’ve used this base for everything from fall caramel apple crisp inspired flavors to classic vanilla. Once you master the base, you can make a different foam every week.
Makes Amazing Leftovers (For You)
I usually make a double batch because my husband and I both love it. The leftover foam keeps in the fridge for up to three days in a sealed jar. It actually thickens slightly as it chills, which is perfect if you like a denser topping. I’ll scoop a spoonful over my morning oatmeal or pumpkin spice overnight oats for a sweet breakfast treat.
Budget-Smart
Let’s talk numbers. A single pump of vanilla syrup at a big coffee chain costs you maybe 30-50 cents. This foam costs pennies. If you buy a quart of heavy cream and a small bottle of vanilla, you can make dozens of servings. That’s less than a dollar per drink. I’ve done the math, and I’ve saved enough in two months to buy a new coffee mug. And honestly? It tastes better.
This is my go-to when I want to feel fancy without the fuss. No complicated gadgets, no weird ingredients, just reliable, delicious cream that makes your iced coffee feel like a vacation.
Ingredients You’ll Need
Here’s the best part: you probably have most of this already. This recipe relies on high-quality, simple ingredients because there are only three of them. If you use bad cream, it’ll taste like bad cream. So let’s talk about what to buy.
For the Base
Heavy whipping cream (½ cup / 120ml) — This is the star of the show. You need the high fat content to create those stiff peaks and that luxurious mouthfeel. Do not use half-and-half or light cream; they don’t have enough fat to hold the air. Look for “heavy whipping cream” or “heavy cream” at the dairy counter. I prefer organic brands because the flavor is richer, but regular works fine too.
Whole milk (2 tablespoons / 30ml) — This thins the cream just enough so it’s pourable but still fluffy. Whole milk is essential here. Low-fat milk will make the foam watery and it’ll sink to the bottom of your coffee too quickly. If you’re lactose-intolerant, you can use oat milk or almond milk, but the texture will be lighter and less stable. I’ve tested it, and dairy-free milk doesn’t whip up quite the same way.
Vanilla extract (½ teaspoon / 2.5ml) — Yes, just half a teaspoon. You want a subtle vanilla note, not a vanilla bomb that overpowers the coffee. Use pure vanilla extract, not imitation. The difference is huge. I like to use a good-quality bourbon vanilla for its warm, deep notes. If you don’t have vanilla, you can skip it, but it really ties the sweetness together.
Optional Add-ins
Simple syrup or sugar (1-2 teaspoons) — Most people don’t need this because the vanilla adds enough sweetness, but if you like your foam noticeably sweet, a little simple syrup helps. I usually skip it because I can taste the coffee better without extra sugar. If you use granulated sugar, make sure it’s super fine, or it won’t dissolve in the cold cream.
Salt (a tiny pinch) — This is my secret weapon. A pinch of sea salt enhances the vanilla and cuts the richness slightly. It makes the foam taste more complex, like the fancy stuff from the cafe. I always add a pinch now.
Flavor extracts — Swap the vanilla for almond, coconut, or peppermint extract for seasonal twists. Almond is amazing with dark roast coffee. Peppermint is great in December.
Shopping Tips
Buy the smallest carton of heavy cream you can find if you don’t use it often. Once opened, it lasts about a week in the fridge. I usually split it into smaller containers to keep it fresh. And don’t skimp on the vanilla. Cheap imitation vanilla tastes chemical and sharp. A little bit of good vanilla goes a long way.
Equipment Needed
You don’t need fancy equipment for this. Here’s what I actually use.
Small mason jar or shaker bottle — I use a 4-ounce mason jar with a tight lid. It’s the perfect size for a single serving of foam. Any small jar with a screw-top lid works. I’ve also used the travel lids for my water bottles, but a mason jar is easier to clean.
Measuring spoons — Pretty standard stuff. You only need a ½ teaspoon and a tablespoon. Dollar store versions work fine.
Cold coffee — Obviously, you need iced coffee or cold brew to pour the foam over. I like to use a tall glass so there’s room for the foam to sit on top without spilling over.
Optional but nice:
Electric milk frother — If you hate shaking by hand, a handheld frother works great. Just whisk the ingredients for 20-30 seconds. But honestly? Shaking by hand is faster and gives you more control over the texture.
Piping bag — If you want to make it look pretty, you can pipe the foam into rosettes on top of your coffee. It’s fun for guests, but not necessary for everyday drinking.
How to Make It: Step-by-Step
Alright, let’s make this! I’m walking you through exactly how I do it, including the little tricks I’ve picked up over months of testing.
Step 1: Chill Your Ingredients (Optional but Helpful)
Take your heavy cream and milk out of the fridge. If they’re already cold, great. If not, put them in the fridge for 10 minutes. Cold cream whips better than room temperature cream. It’s a basic rule of whipping. I usually just grab them straight from the fridge since they’ve been sitting there for days.
Step 2: Combine the Ingredients
Add the heavy cream, milk, and vanilla extract to your small jar. If you’re adding sugar or salt, add those now. Screw the lid on tight. Make sure it’s secure, or you’ll end up with cream all over your kitchen counter. I learned this the hard way on a busy Tuesday morning.
Step 3: Shake It Up
Hold the jar with both hands and shake it vigorously for 15-20 seconds. You want to feel the cream getting thicker against the lid. It should start to resist your shaking. If you’re using an electric frother, whisk for 20-30 seconds until stiff peaks form. The goal is to incorporate air without turning it into butter. Stop shaking as soon as it looks fluffy and holds its shape.
Step 4: Pour Over Iced Coffee
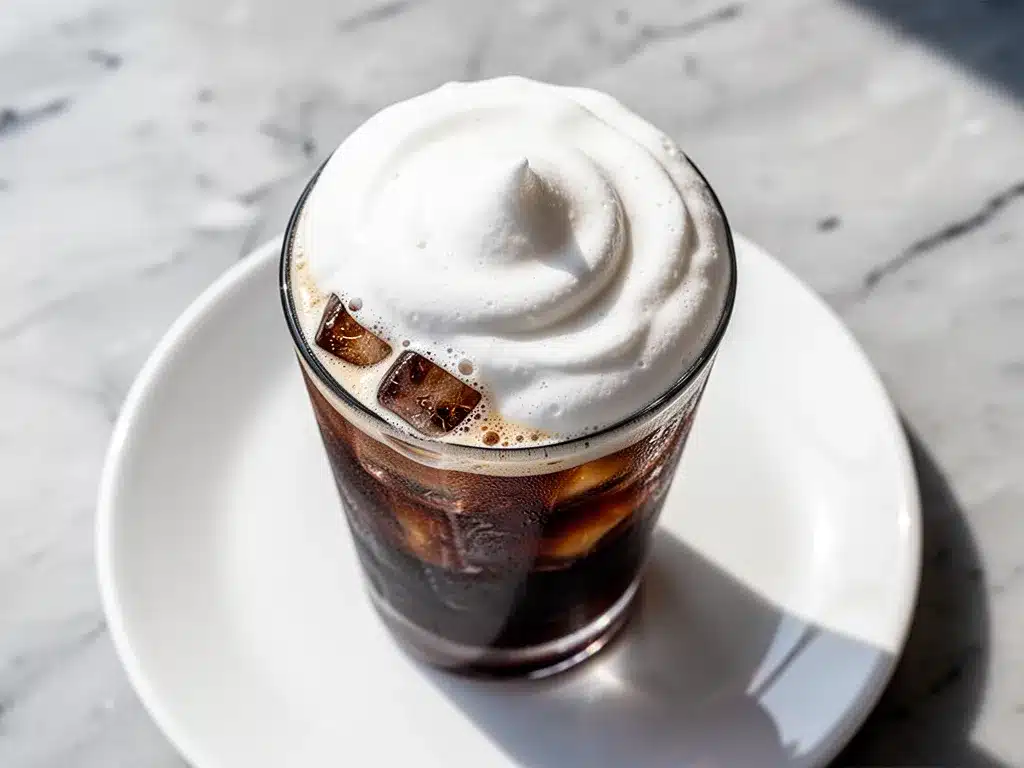
Fill a tall glass with ice and your favorite cold brew or iced coffee. Slowly pour the foam over the back of a spoon or directly into the glass. It should float on top, creating a distinct white layer over the dark coffee. This is the “look” everyone loves. If it sinks immediately, you shook it too much or the cream wasn’t cold enough.
Step 5: Enjoy
Drink it as is for the full experience, or stir it in if you prefer a sweet, creamy coffee throughout. I usually take a few sips with the foam intact, then stir the rest for a sweeter finish. It’s like having two drinks in one.
Total Time: About 2 minutes (1 minute prep, 1 minute shaking)
Built-in Troubleshooting
Foam is too thin: You didn’t shake it long enough, or the cream wasn’t cold. Try shaking for another 10 seconds. Next time, make sure your cream is very cold.
Foam is too thick/buttery: You shook it too long. Once the cream separates into solids and liquid, you’ve gone too far. Use the solids as a spread on toast (it’s basically unsalted butter) and discard the liquid.
Foam sinks quickly: Use less milk. The 2 tablespoons is a guideline. If you use 3 tablespoons, it might be too thin to float. Stick to the ratio for best results.
Expert Tips & Tricks
Here’s everything I’ve learned from making this dozens of times. These tips will save you from my mistakes.
Cold is Key
I cannot stress this enough. The colder your cream and milk are, the better the foam will hold. If your kitchen is hot, put your jar in the freezer for 5 minutes before shaking. I keep my heavy cream in the coldest part of the fridge, near the back, to ensure it’s as cold as possible.
Don’t Over-Shake
This is the most common mistake. You’re looking for a light, airy foam, not whipped butter. Shake for 15-20 seconds, then check. If it’s fluffy, stop. If you keep shaking, it will turn into butter. I’ve wasted a lot of cream this way. Listen to your jar—it will get heavier and more resistant as you shake.
Use Pure Vanilla
Imitation vanilla tastes artificial and sharp in cold foam. Pure vanilla extract has a smoother, more complex flavor that pairs beautifully with dairy. If you don’t have vanilla extract, you can use a tiny bit of vanilla bean paste, but skip the powder unless you want specks in your foam.
Balance the Sweetness
Start with less sugar or syrup. You can always add more, but you can’t take it away. The vanilla extract adds a bit of sweetness, so taste your foam before pouring. If it’s not sweet enough for you, add a drop more vanilla or a tiny bit of syrup.
Make It Ahead
You can make the foam up to 3 days in advance. Store it in a sealed jar in the fridge. It will thicken slightly as it chills. Before using, give it a quick shake or whisk to loosen it up. It’s perfect for meal prepping your morning coffee routine.
Variations & Substitutions
Once you’ve nailed the basic version, here’s how you can mix it up. I’ve tried all of these, and they’re all winners.
Pumpkin Spice Sweet Cream Foam
Add ½ teaspoon pumpkin pie spice and 1 teaspoon pumpkin puree (make sure it’s pure pumpkin, not pie filling) to the jar. Shake well. It’s like a pumpkin spice latte in foam form. Perfect for autumn, especially when paired with a pumpkin streusel coffee cake muffin.
Peppermint Cold Foam
Swap the vanilla for ½ teaspoon peppermint extract. Add a few crushed candy canes on top for crunch. This is a holiday favorite that tastes like a candy cane latte.
Coconut Cream Foam
Use full-fat coconut cream instead of heavy cream. Add ½ teaspoon coconut extract. This is naturally dairy-free and vegan. It has a tropical vibe that’s great with cold brew.
Salted Caramel Foam
Add 1 tablespoon caramel sauce and a pinch of sea salt. Shake well. It’s rich, sweet, and salty. I love this with dark roast coffee.
Matcha Cold Foam
Add ½ teaspoon matcha powder to the jar. Whisk well to dissolve any clumps before shaking. It creates a beautiful green layer on top of your coffee. Earthy and sweet.
Dietary Modifications
Vegan: Use full-fat coconut cream or oat cream. The texture will be slightly different but still delicious. I’ve used oat cream from major brands, and it whips up surprisingly well.
Lactose-Free: Use lactose-free heavy cream or coconut cream. The flavor will change slightly, but the texture is similar.
Serving & Storage
How to Serve
I usually serve this straight over my morning iced coffee. But here are other ways I’ve enjoyed it:
Over Cold Brew: The best partner for this foam. Cold brew is smooth and less acidic, letting the foam shine.
Over Iced Latte: Creates a layered effect that looks beautiful. The milk in the latte mixes with the foam for a creamy drink.
On Top of Iced Tea: Try it over sweet tea or iced matcha. It’s a nice twist on a classic.
With Dessert: Spoon it over tres leches cake or no-bake pumpkin pie for an extra creamy topping.
Storage Instructions
Refrigerator: Store in an airtight jar for up to 3 days. It will thicken in the fridge. Give it a good shake or whisk before using.
Freezing: I don’t recommend freezing this. The texture changes when thawed, and it can become grainy. Make it fresh for best results.
Pro Tip: If you’re making this for guests, put out small jars with the ingredients and let them make their own foam. It’s a fun interactive touch for brunch or coffee parties.
Nutrition Information
I’m not a nutritionist, but here’s the breakdown if you’re tracking. Keep in mind this is just the foam, not the coffee.
Per Serving (½ cup foam):
- Calories: 180
- Protein: 1g
- Carbs: 2g
- Fiber: 0g
- Sugar: 2g
- Fat: 19g
- Saturated Fat: 12g
What’s Good:
It’s low in carbs and sugar, which is great for keto or low-sugar diets. The fat content keeps you full and satisfies sweet cravings.
What to Know:
It’s high in calories and saturated fat because of the heavy cream. It’s a treat, not a health food. Enjoy it in moderation. If you’re watching your intake, use less cream and more milk, or try the coconut cream version.
Final Thoughts
So that’s my go-to homemade vanilla sweet cream cold foam! I’ve probably talked your ear off at this point, but when you find a recipe this simple and this good, you want to share it.
This has saved my mornings more times than I can count. It’s my answer to “I want something sweet and fancy” when I’m at home. My kids love it, my husband loves it, and I love it because it’s easy, cheap, and tastes better than the cafe version.
Make it yours! Try different extracts, adjust the sweetness, or experiment with dairy-free options. The best recipes are the ones you adapt to your tastes. If you make this, drop a comment and let me know what you think! I love hearing how recipes turn out in your kitchen. And if something doesn’t work, tell me that too—I’m here to help troubleshoot.
Happy brewing! And I hope your kitchen smells half as good as mine does right now.
Frequently Asked Questions
Can I use half-and-half instead of heavy cream?
You can, but the foam won’t be as thick or fluffy. Half-and-half has less fat, so it won’t hold air as well. If you must use it, add a little cornstarch to thicken it, but it won’t be the same as the real thing. Heavy cream is best for that cafe-style texture.
Why did my foam turn into butter?
You shook it too long! Once the cream separates into solids (butter) and liquid (buttermilk), you’ve over-whipped it. Next time, stop shaking as soon as it looks fluffy. It only takes 15-20 seconds.
Can I make this ahead of time?
Yes! Store it in a sealed jar in the fridge for up to 3 days. It will thicken as it chills. Give it a good shake or whisk before pouring to loosen it up.
Do I need a special frother?
No. A simple mason jar and your arms work perfectly. If you hate shaking, a handheld electric frother works too, but it’s not necessary. I prefer shaking because it’s faster and I can feel the texture.
Can I use artificial vanilla extract?
You can, but pure vanilla tastes so much better. Artificial vanilla has a sharp, chemical taste that shows up in cold foam. If you’re on a budget, look for sales on pure vanilla extract. It lasts a long time.
How long does the foam last on my coffee?
It will float on top for about 10-15 minutes before it starts to sink and mix into the coffee. This is normal. Drink it while it’s fluffy for the best experience, or stir it in for a sweeter drink.
Can I sweeten this with sugar instead of syrup?
Granulated sugar doesn’t dissolve well in cold cream. If you want to sweeten it, use simple syrup (equal parts sugar and water, heated until dissolved) or a liquid sweetener like honey or maple syrup. Granulated sugar will make your foam gritty.
Pin This Recipe!
Homemade Vanilla Sweet Cream Cold Foam
- Total Time: 2 minutes
- Yield: 1 serving 1x
Description
A simple, 3-ingredient recipe for rich and fluffy vanilla sweet cream cold foam that costs pennies to make and tastes better than coffee shop versions.
Ingredients
- 1/2 cup heavy whipping cream
- 2 tablespoons whole milk
- 1/2 teaspoon pure vanilla extract
- 1–2 teaspoons simple syrup or sugar (optional)
- A tiny pinch of sea salt (optional)
Instructions
- Chill the heavy cream and milk in the refrigerator for at least 10 minutes to ensure they are very cold.
- Combine the heavy cream, milk, vanilla extract, and optional sweeteners/salt in a small mason jar or shaker bottle with a tight lid.
- Secure the lid tightly to prevent leaks.
- Shake the jar vigorously for 15-20 seconds until the mixture thickens and holds its shape, or use an electric frother for 20-30 seconds.
- Fill a tall glass with ice and your favorite cold brew or iced coffee.
- Slowly pour the foam over the back of a spoon or directly into the glass to create a distinct layer on top.
- Enjoy immediately, either sipping the foam intact or stirring it into the coffee.
Notes
Ensure ingredients are very cold for best results. Do not over-shake or the cream will turn into butter. The foam can be stored in the fridge for up to 3 days in a sealed jar, though it will thicken and should be shaken before use. For dairy-free options, use full-fat coconut cream.
- Prep Time: 1 minute
- Cook Time: 0 minutes
- Category: Beverage
- Cuisine: American
Nutrition
- Serving Size: 1/2 cup foam
- Calories: 180
- Sugar: 2
- Fat: 19
- Saturated Fat: 12
- Carbohydrates: 2
- Protein: 1
Keywords: cold foam, vanilla sweet cream, iced coffee topping, homemade coffee shop drink, 3 ingredient recipe, keto coffee



