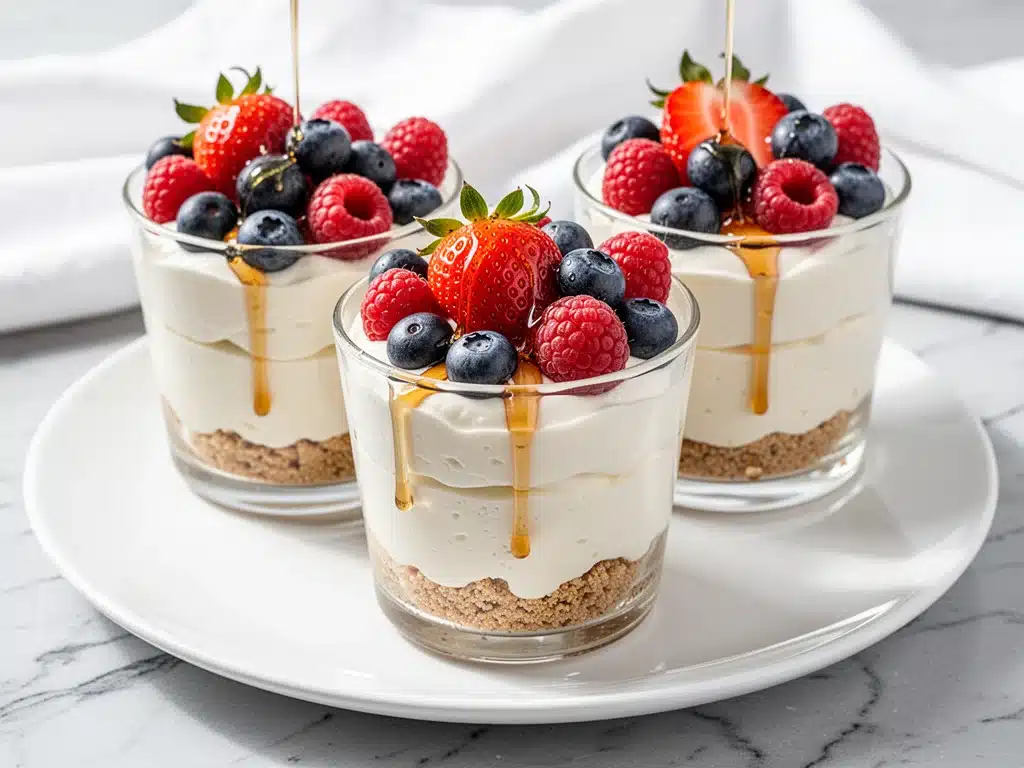
Last week, I was standing in my kitchen at 10 PM, staring into the open fridge like it held the secrets to the universe. The light was flickering slightly, and there was nothing but half a carton of Greek yogurt, a wilting container of strawberries, and a package of graham crackers that had seen better days. I was hungry, I wanted something sweet, but I definitely didn’t want to heat up the oven or turn on the blender. I also didn’t want to eat a bowl of plain yogurt—it felt like punishment, not dessert.
So I did what any desperate home cook would do: I threw it all together. I crushed the crackers with my hands (messy, yes, but effective), mixed the yogurt with a splash of vanilla and a spoonful of honey, and layered it with the berries. I ate it straight from the mixing bowl while watching TV. It was creamy, tangy, sweet, and satisfying. It tasted like a dessert, but it felt like a snack. That’s when I realized I had accidentally invented what has now become my absolute favorite weeknight treat.
These High-Protein Greek Yogurt Berry Cheesecake Cups are exactly what they sound like: a no-bake, no-fuss, 3-ingredient dessert that hits all the right notes. I’ve made them at least twenty times since that random Tuesday night. They’re perfect for when you need a sweet fix but are watching your protein intake, or when you just want something lighter than a slice of Mexican tres leches cake but still indulgent. The best part? You don’t need any special equipment, you don’t need to wait for an oven to preheat, and you can make them in the time it takes to scroll through social media.
I know what you’re thinking. Three ingredients? Really? Can it actually taste good? Yes. Yes, it can. I was skeptical too. I’ve tried those “healthy” desserts that taste like cardboard and regret. But this is different. The Greek yogurt provides that thick, rich mouthfeel that mimics cream cheese, the graham crackers give you the crunch and nostalgia of traditional cheesecake, and the berries add that fresh, bright pop of flavor. It’s not just a snack; it’s a legitimate dessert experience.
If you’re looking for a quick breakfast or a post-workout snack, these cups are your new best friend. They’re portable, they’re filling, and they don’t leave you feeling sluggish like a heavy pastry would. Think of them as the lighter, protein-packed cousin to those no-bake pumpkin pie cups you might have seen floating around Pinterest, but with a tangier, fresher profile. Once you try this, you’ll probably start keeping these ingredients stocked just so you can throw one together on a whim.
Why You’ll Love This Recipe
There are about ten reasons I keep making these, but here are the big ones. This recipe has completely changed my relationship with late-night snacking. I used to feel guilty eating dessert, but these feel like a win-win. Here’s why they work so well:
- Stupid Simple — Seriously, if you can crush a cracker and spoon yogurt, you can make this. I’ve made these for my kids, and even they can handle the assembly. No baking, no melting chocolate, no tempering eggs. Just layering. It’s the ultimate low-effort, high-reward recipe.
- High Protein Win — One cup of this packs about 15-20 grams of protein, depending on the yogurt you use. That’s huge for a dessert. It keeps you full, helps with muscle recovery if you’ve just worked out, and stops the 3 PM sugar crash. It’s basically cheating on your diet without actually cheating.
- Customizable Forever — The base is simple, but the toppings are endless. I switch up the berries every week. Sometimes it’s strawberries, sometimes blueberries, sometimes a mix of both. You can add granola, nuts, or even a drizzle of nut butter. It’s a blank canvas for your creativity.
- Ready in 5 Minutes — I’m talking five minutes. Prep time is basically non-existent. I usually make a batch on Sunday night so I have four cups ready for the week. It’s the perfect grab-and-go breakfast or afternoon snack.
- No Baking Required — In the summer, I don’t want to turn on the oven. In the winter, I don’t want to spend hours in the kitchen. This recipe works in any season, any weather, any mood. It’s the culinary equivalent of a hug.
- Gluten-Free Friendly — If you swap the graham crackers for a gluten-free version (or use crushed almond flour), this becomes naturally gluten-free. I use this version when I have friends with sensitivities over, and nobody can tell the difference.
This is my go-to when I need a sweet treat that actually fuels my body. No complicated techniques, no weird ingredients, just reliable, delicious food that makes everyone happy. It’s proof that you don’t need a lot to make something great.
Ingredients You’ll Need
Here’s the best part: you probably have most of this already. I’m not asking you to go to three different stores for obscure items. This is pantry-friendly, fridge-staple cooking. I’m particular about three ingredients here, and I’ll tell you exactly why.
For the Base
Graham Crackers (1 sleeve / about 12 crackers) — This is your crunch. I prefer the classic honey graham crackers because they’re slightly sweet and buttery. If you’re gluten-free, use GF graham crackers or even crushed shortbread cookies. Avoid the super-sweet “s’mores” flavored ones unless you want it to be cloying. You’ll need about 1 ½ cups of crumbs. I just put them in a ziplock bag and smash them with a rolling pin (or a heavy can of soup if you’re feeling dramatic).
Butter (2 tablespoons, melted) — You need a little fat to bind the crumbs together so they stick. Unsalted butter is best so you can control the salt. If you’re vegan or dairy-free, use melted coconut oil or vegan butter. The flavor is slightly different, but it still works. Don’t skip this, or you’ll just have a pile of dry crumbs.
For the Filling
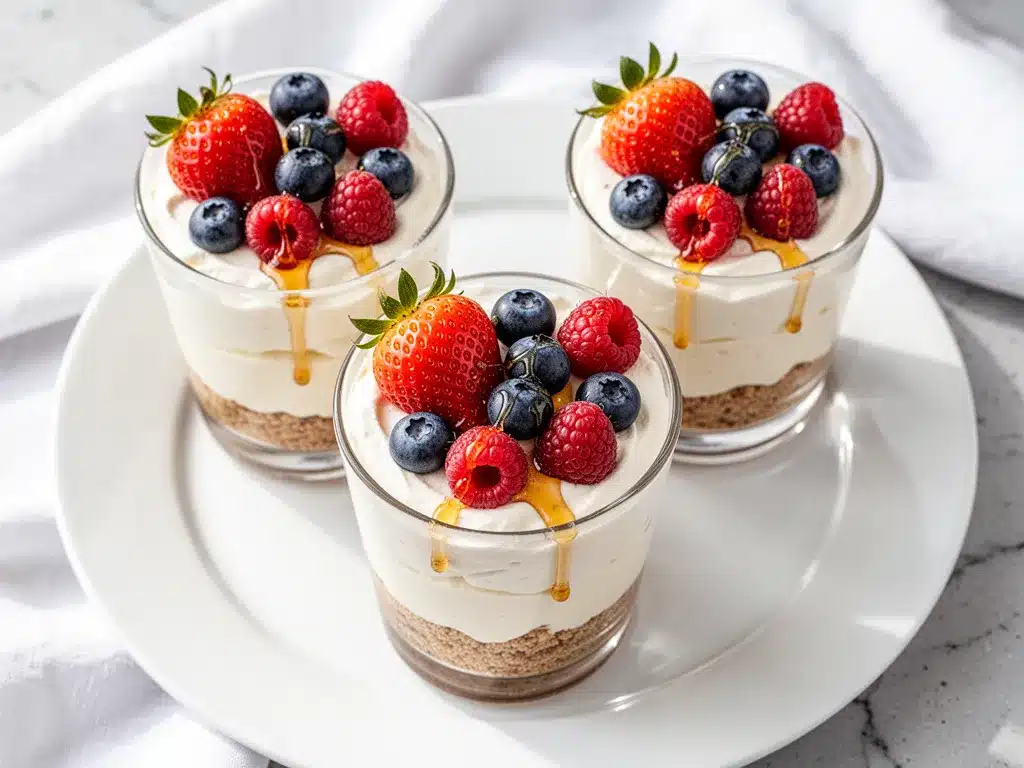
Greek Yogurt (2 cups / 500g) — This is the star. I use plain, non-fat or 2% Greek yogurt. The thicker the yogurt, the better the texture. I like brands like Fage or Chobani because they have that dense, creamy consistency. If you use regular yogurt, it will be too runny and your cups will fall apart. Plain is essential because the berries will add the sweetness. Sweetened yogurt will make it cloying.
Honey or Maple Syrup (2 tablespoons) — This is the sweetener. I prefer honey because it blends seamlessly into the yogurt. Maple syrup works too if you want a deeper, earthier sweetness. You can skip this if you’re using sweetened yogurt, but I recommend adding a little anyway for flavor depth. Adjust to taste—some yogurts are tart, some are mild.
Vanilla Extract (1 teaspoon) — This is the secret weapon. It makes the yogurt taste like cheesecake filling. Use real vanilla extract, not imitation. The flavor difference is night and day. It’s a small amount, but it transforms the whole cup.
For the Topping
Fresh Berries (1 cup total) — I use a mix of strawberries and blueberries. Strawberries are classic, but blueberries add little bursts of tartness. You can use frozen berries, but thaw them first and pat them dry, otherwise your cups will get watery. Fresh is best, though. The color contrast against the white yogurt and brown crust is just gorgeous for photos, too.
Optional Add-ins — I sometimes add a sprinkle of chia seeds or hemp hearts for extra crunch and omega-3s. A drizzle of almond butter or peanut butter is also amazing if you’re craving something nutty. But honestly? The three main ingredients are so good that I rarely add anything else.
Equipment Needed
You don’t need fancy equipment for this. Here’s what I actually use. If you don’t have these specific items, you can definitely improvise.
Mixing Bowls — Two medium bowls. One for crushing the crackers (or use a bag) and one for mixing the yogurt. I use glass bowls because I can see how well everything is incorporated.
Measuring Cups and Spoons — Standard stuff. Dollar store versions work fine. You don’t need to be perfect here, but having a rough idea helps.
Mortar and Pestle or Rolling Pin — For crushing the graham crackers. I prefer a rolling pin because it’s less messy than a mortar and pestle for dry crackers. Just put the crackers in a bag and roll until they’re fine crumbs.
Whisk or Fork — To mix the yogurt, honey, and vanilla. A whisk is easier, but a fork works perfectly fine. You just want it smooth.
Serving Vessels — This is where it gets fun. I use small glass jars (like mason jars or baby food jars), ramekins, or even large wine glasses if I’m feeling fancy. Clear glass is best because you want to see the layers. If you don’t have small jars, you can just make one big bowl and serve it family-style.
Measuring Spoon — For the honey and vanilla. A small spoon is helpful for drizzling.
Optional but nice — A small spatula to help scrape the yogurt into the jars. And a knife to slice the strawberries if you want them in neat slices rather than chunks.
How to Make It: Step-by-Step
Alright, let’s make this! I’m walking you through exactly how I do it, including the little tricks I’ve picked up. It’s so easy you’ll wonder why you ever bought pre-made desserts.
Step 1: Crush the Crackers (2 minutes)
Start by crushing your graham crackers into fine crumbs. If you have a food processor, pulse them a few times. If not, put them in a ziplock bag and use a rolling pin to smash them. You want them to look like coarse sand, not huge chunks. The finer the crumbs, the better the crust holds together. Once they’re crushed, you should have about 1 ½ cups. Don’t worry if it’s a little uneven.
Step 2: Mix the Crust (1 minute)
In a medium bowl, combine the graham cracker crumbs and the melted butter. Stir until the crumbs are evenly coated and look like wet sand. This is crucial—if the crumbs aren’t moist enough, the crust will crumble apart when you eat it. Press this mixture firmly into the bottom of your serving jars or ramekins. Use the back of a spoon to flatten it out. You want a thin, even layer. Set aside.
Step 3: Make the Filling (2 minutes)
In a separate bowl, add the Greek yogurt, honey, and vanilla extract. Whisk them together until smooth and well combined. The mixture should be creamy and uniform. If it looks too thick, you can add a splash of milk, but usually, it’s perfect as is. Taste it! If you want it sweeter, add a little more honey. If you want it tangier, add a squeeze of lemon juice. This is your chance to customize.
Step 4: Layer the Cups (3 minutes)
Now for the fun part. Spoon or pipe the yogurt mixture on top of the crust. Fill each jar about halfway or two-thirds full. You can use a spoon, but if you want it to look pretty, use a piping bag. If you don’t have one, just spoon it gently. Smooth the top with the back of the spoon. It should look neat and creamy.
Step 5: Add the Berries (2 minutes)
Wash and dry your berries. Slice the strawberries into thin pieces or leave them whole if they’re small. Tuck the berries on top of the yogurt. You can arrange them in a pattern or just pile them on like I do. The contrast of the red and blue against the white yogurt is beautiful. If you’re using blueberries, just drop them on top. If you want extra flair, add a mint leaf or a drizzle of honey.
Step 6: Chill and Serve (10 minutes)
Let the cups sit in the fridge for at least 10 minutes. This helps the crust set slightly and gives the flavors time to meld. You can eat them right away, but they taste even better after chilling. Serve cold. These are best enjoyed within 24 hours, but they’ll last in the fridge for up to 3 days.
Total Time: About 10 minutes (including chilling).
Expert Tips & Tricks
Here’s everything I’ve learned from making these dozens of times. These tips will save you from my mistakes.
Use Thick Yogurt
This is the #1 tip. The yogurt must be thick. If you use runny yogurt, your cups will be soupy and the crust will get soggy. Greek yogurt is key here. If you only have regular yogurt, strain it through a cheesecloth for an hour to remove excess liquid. I’ve learned this the hard way with a runny mess that looked awful.
Don’t Skimp on the Butter
The butter binds the crust. If you use too little, the crumbs will fall apart. If you use too much, it’ll be greasy. 2 tablespoons is the sweet spot. Melt it completely so it mixes evenly. I’ve made this mistake before with semi-melted butter, and the crust ended up clumpy.
Chill Before Serving
Letting the cups chill helps the crust set and the flavors meld. It’s tempting to eat them immediately, but give them 10 minutes. The texture improves dramatically. I usually make them in the morning so they’re ready for my afternoon snack.
Customize the Sweetness
Yogurts vary in tartness. Taste your yogurt before adding honey. If it’s already sweet, you might not need any. If it’s very tart, you might need more. Start with 1 tablespoon and add more to taste. You can also use stevia or monk fruit if you’re avoiding sugar.
Make-Ahead Strategy
These are perfect for meal prep. Make 4-6 cups on Sunday and store them in the fridge. They’ll last for 3-4 days. Just add the fresh berries right before eating if you want them to stay crisp. If you leave them on overnight, they’ll get a little soft, but still tasty.
Pro Trick: Toast the Crumbs
For extra flavor, you can toast the graham cracker crumbs in a dry skillet for 2-3 minutes before mixing with butter. It brings out a nutty, caramelized flavor. It’s a small step but adds a lot of depth.
Variations & Substitutions
Once you’ve nailed the basic version, here’s how you can mix it up. I’ve tried all of these, and they’re all delicious.
Chocolate Lover’s Version
Add 1 tablespoon of cocoa powder to the yogurt mixture. It makes it taste like a chocolate cheesecake. You can also add mini chocolate chips on top. My kids love this version.
Matcha Green Tea
Whisk 1 teaspoon of matcha powder into the yogurt. It adds a beautiful green color and a subtle earthy flavor. Pair it with white chocolate chips or red bean paste for an Asian-inspired twist.
Coconut Paradise
Swap the graham crackers for crushed macadamia nuts or coconut flakes. Use coconut yogurt instead of dairy yogurt. Top with toasted coconut and mango chunks. It’s dairy-free and tropical.
Banana Nut
Swap the berries for sliced bananas and walnuts. Add a drizzle of peanut butter to the yogurt. It tastes like a banana split in a cup. Great for breakfast.
Dietary Modifications:
Gluten-Free — Use GF graham crackers or almond flour for the crust. Everything else is naturally gluten-free.
Dairy-Free — Use coconut yogurt and coconut oil. It’s slightly different in flavor but still creamy and delicious.
Vegan — Combine dairy-free yogurt, maple syrup, and GF crackers. Add a splash of cashew cream for extra richness.
Lower Sugar — Use unsweetened Greek yogurt and no added honey. Top with fresh berries, which are naturally sweet. You can add a drop of vanilla extract for flavor.
Serving & Storage
I usually serve these straight from the fridge at the dinner table or as a snack. They look rustic and stay cold. But here are other ways I’ve enjoyed them:
Side Dishes — These are standalone desserts, but they pair well with a cup of tea or coffee. If you’re serving them at a party, add a charcuterie board with cheeses and crackers. They’re light enough to not overpower the other foods.
Toppings Bar — When I have guests, I put out: extra berries, granola, nuts, chocolate chips, and a small jar of honey. Everyone customizes their cup. It’s interactive and fun.
Wine Pairing — I’m not a wine expert, but a crisp Riesling or a light Pinot Grigio works great with this. The acidity cuts through the creaminess.
Storage Instructions:
Refrigerator: Store in airtight containers for up to 4 days. The crust will soften slightly over time, but it’s still good. Keep them in the coldest part of the fridge.
Freezing: Honestly, these don’t freeze well because of the yogurt texture. The yogurt can become grainy when thawed. Make them fresh or store in the fridge for up to 4 days.
Meal Prep: Make the crust and yogurt base on Sunday. Store them separately. Assemble with fresh berries right before eating. This keeps the crust crisp and the berries fresh. It takes 5 minutes to assemble.
Pro tip: If you’re packing these for lunch, put the berries on top last minute. If you pack them together, the berries will release juice and make the yogurt wet. Use a small separate container for the berries if possible.
Nutrition Information
I’m not a nutritionist, but here’s the breakdown if you’re tracking. This is per serving (based on 4 cups).
- Calories: 220
- Protein: 18g
- Carbs: 28g
- Fiber: 3g
- Sugar: 18g
- Fat: 6g
- Saturated Fat: 3g
- Cholesterol: 15mg
- Sodium: 150mg
What’s Good:
High protein from the yogurt, which helps keep you full. Good fiber from the graham crackers and berries. Calcium from the yogurt. It’s a balanced snack that satisfies sweet cravings without a sugar crash.
What to Know:
Contains dairy and gluten (unless substituted). Moderate sugar from the honey and berries. You can reduce sugar by using unsweetened yogurt and less honey.
My Take:
Look, this is a dessert. It has sugar and carbs. But it’s also packed with protein and nutrients. It’s way better than a candy bar or a cookie, and I know exactly what’s in it. When I want to make it lighter, I use non-fat yogurt and skip the honey. But usually? I just enjoy a reasonable portion and feel good about it.
Final Thoughts
So that’s my go-to High-Protein Greek Yogurt Berry Cheesecake Cups! I’ve probably talked your ear off at this point, but when you make a recipe this often, you have a lot to say about it.
This has saved weeknight snacks more times than I can count. It’s my answer to “what’s for dessert” when I’m tired, don’t want to bake, and still want something that tastes really good. My kids are happy, my husband’s happy, and I’m happy because I’m not stressed about cooking.
Make it yours! Try different berries, swap in your favorite nut butter, or add chocolate chips. The best recipes are the ones you adapt to your family’s tastes. If you make this, drop a comment and let me know what you think! I love hearing how recipes turn out in your kitchen. And if something doesn’t work, tell me that too—I’m here to help troubleshoot.
Happy cooking! And I hope your kitchen smells half as good as mine does right now.
Frequently Asked Questions
Q: Can I use regular yogurt instead of Greek yogurt?
A: You can, but the texture will be much thinner and runnier. If you want to try it, use plain yogurt and strain it through a cheesecloth for an hour to remove excess liquid. I’ve done this when I ran out of Greek yogurt—it works okay, just not as good as the real thing. Greek yogurt is thicker and creamier, which is why it’s the best choice.
Q: Why did my crust fall apart?
A: Usually means you didn’t add enough butter, or you didn’t press it down firmly enough. The butter acts as a binder. Make sure the crumbs are evenly coated and press the crust firmly into the bottom of the jar. If it’s still crumbly, you can add a little more melted butter next time.
Q: Can I make this ahead for a party?
A: Absolutely! Make the crust and yogurt base up to 2 days ahead and store in the fridge. Add the fresh berries right before serving to keep them crisp. I do this all the time for dinner parties. It saves so much stress.
Q: Can I use frozen berries?
A: Yes, but you must thaw them first and pat them dry with a paper towel. Frozen berries release a lot of water, which can make your cups watery. Fresh berries are best, but frozen works in a pinch. Just make sure they’re dry before adding them.
Q: How do I store leftovers?
A: Store in an airtight container in the fridge for up to 4 days. The crust will soften over time, but it’s still good. Don’t freeze them, as the yogurt texture will change. Eat them within a few days for the best quality.
Q: Can I double this recipe?
A: Yes! Double everything and use larger jars or ramekins. The cooking times stay the same. I do this when I’m meal-prepping for the week. Just make sure you have enough space in the fridge for the extra cups.
Pin This Recipe!
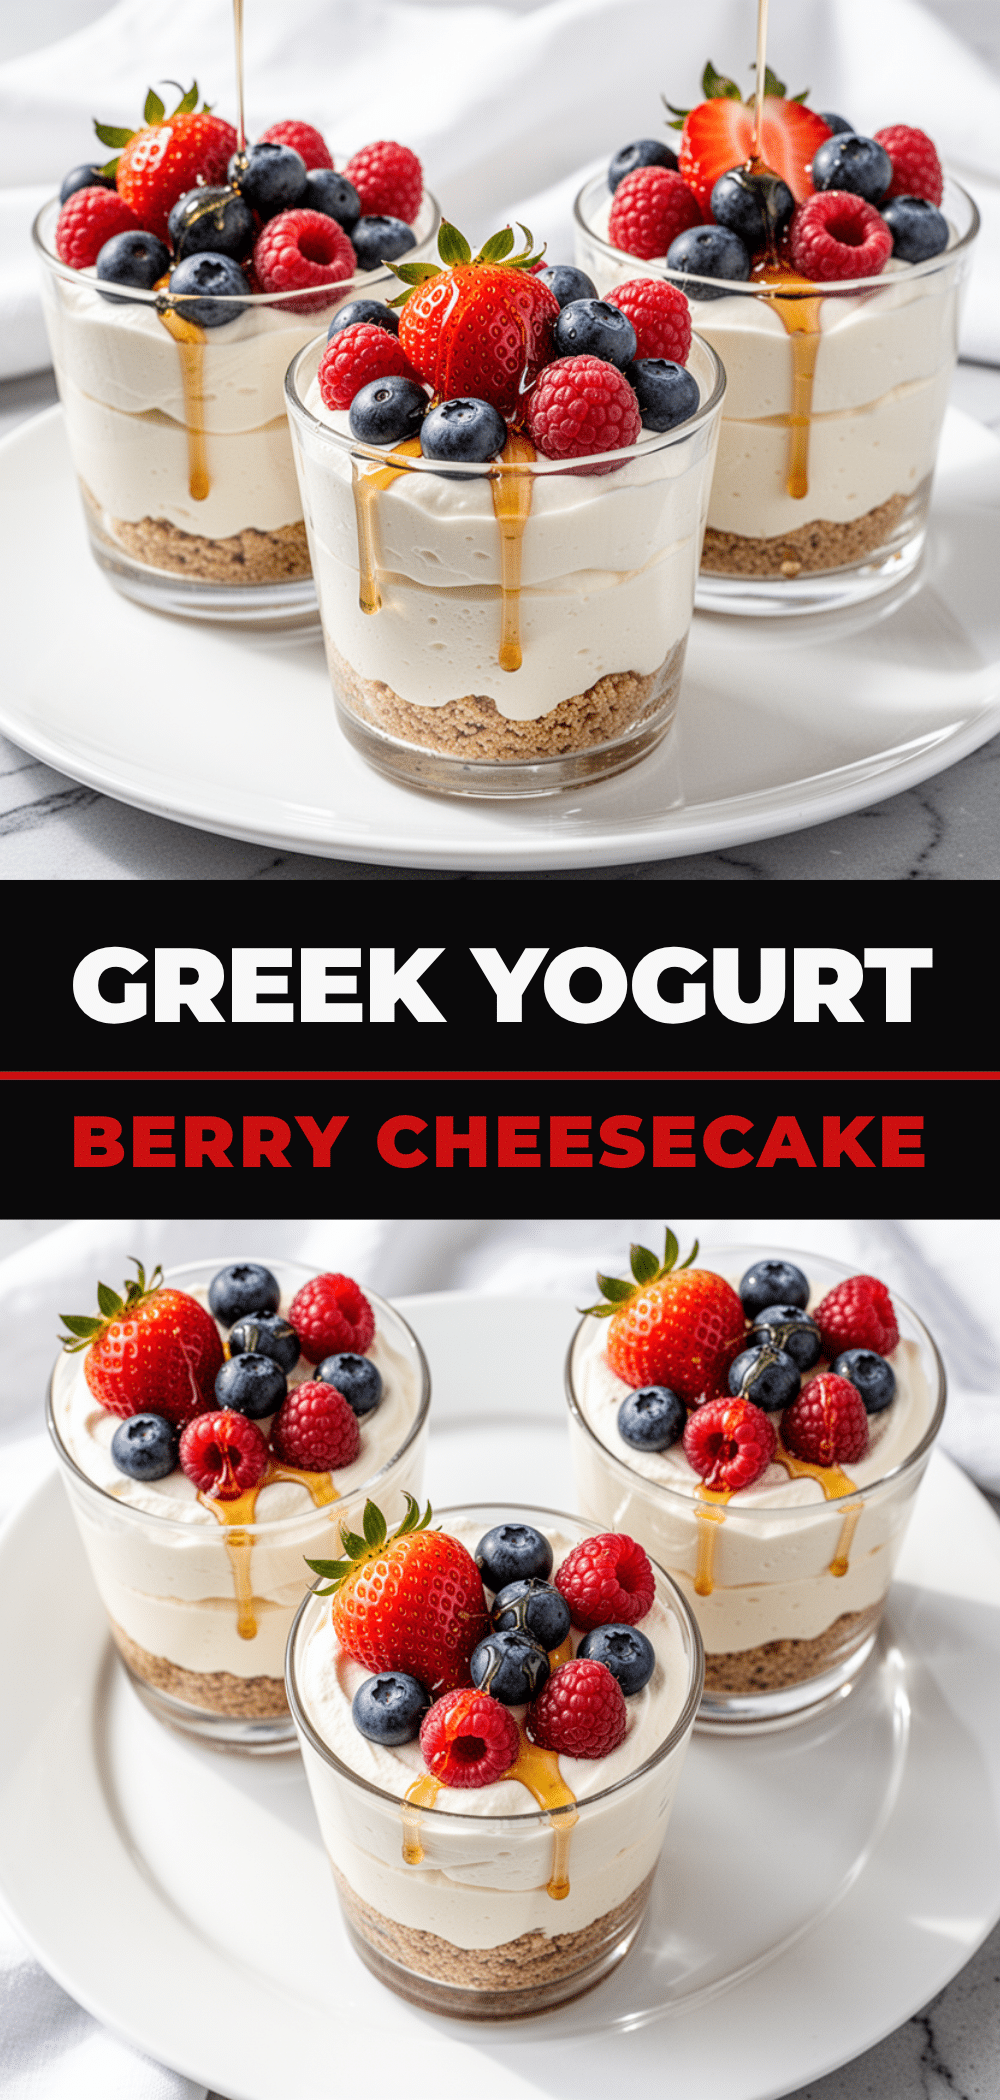
High-Protein Greek Yogurt Berry Cheesecake Cups
- Total Time: 10 minutes
- Yield: 4 servings 1x
Description
A no-bake, 3-ingredient dessert that combines crushed graham crackers, thick Greek yogurt, and fresh berries for a creamy, high-protein treat ready in minutes.
Ingredients
- 1 sleeve (about 12) graham crackers
- 2 tablespoons unsalted butter, melted
- 2 cups (500g) plain Greek yogurt
- 2 tablespoons honey or maple syrup
- 1 teaspoon vanilla extract
- 1 cup fresh berries (strawberries and/or blueberries)
Instructions
- Crush the graham crackers into fine crumbs using a food processor or by placing them in a ziplock bag and smashing with a rolling pin.
- In a medium bowl, combine the cracker crumbs and melted butter until the mixture resembles wet sand.
- Press the crumb mixture firmly into the bottom of serving jars or ramekins to form the crust. Set aside.
- In a separate bowl, whisk together the Greek yogurt, honey (or maple syrup), and vanilla extract until smooth.
- Spoon or pipe the yogurt mixture on top of the crust, filling jars about two-thirds full.
- Wash and slice the berries, then arrange them on top of the yogurt layer.
- Chill in the refrigerator for at least 10 minutes to allow the crust to set and flavors to meld before serving.
Notes
Use thick Greek yogurt to prevent a runny texture. If using regular yogurt, strain it through cheesecloth. The cups can be stored in the fridge for up to 4 days, but add fresh berries just before serving to maintain crispness. Do not freeze as the yogurt texture may become grainy.
- Prep Time: 10 minutes
- Cook Time: 0 minutes
- Category: Dessert
- Cuisine: American
Nutrition
- Serving Size: 1 cup
- Calories: 220
- Sugar: 18
- Sodium: 150
- Fat: 6
- Saturated Fat: 3
- Carbohydrates: 28
- Fiber: 3
- Protein: 18
Keywords: high protein, greek yogurt, no bake, healthy dessert, berry cheesecake, quick snack, gluten-free option



