I remember the exact afternoon I realized that baking was ruining my backyard parties.
It was late August, the air was still thick and humid, and I had decided to make a complex layer cake for my neighbor’s BBQ. I spent three hours in a kitchen that felt like a sauna, sweating over buttercream, only to have the whole thing collapse because the humidity was too high. I showed up with a lopsided, slightly melting disaster while everyone else was grilling burgers and drinking cold drinks. I felt like a fool. And honestly? The cake tasted fine, but nobody cared about the cake. They cared about the fact that I was stressed, sweaty, and hovering over the grill instead of actually hanging out with my friends.
That was the year I made a pact with myself: if I’m going to bring a dessert to an outdoor gathering, it needs to be made before I leave the house, it needs to survive the heat, and it needs to require zero oven time. No baking. No stress. No melting.
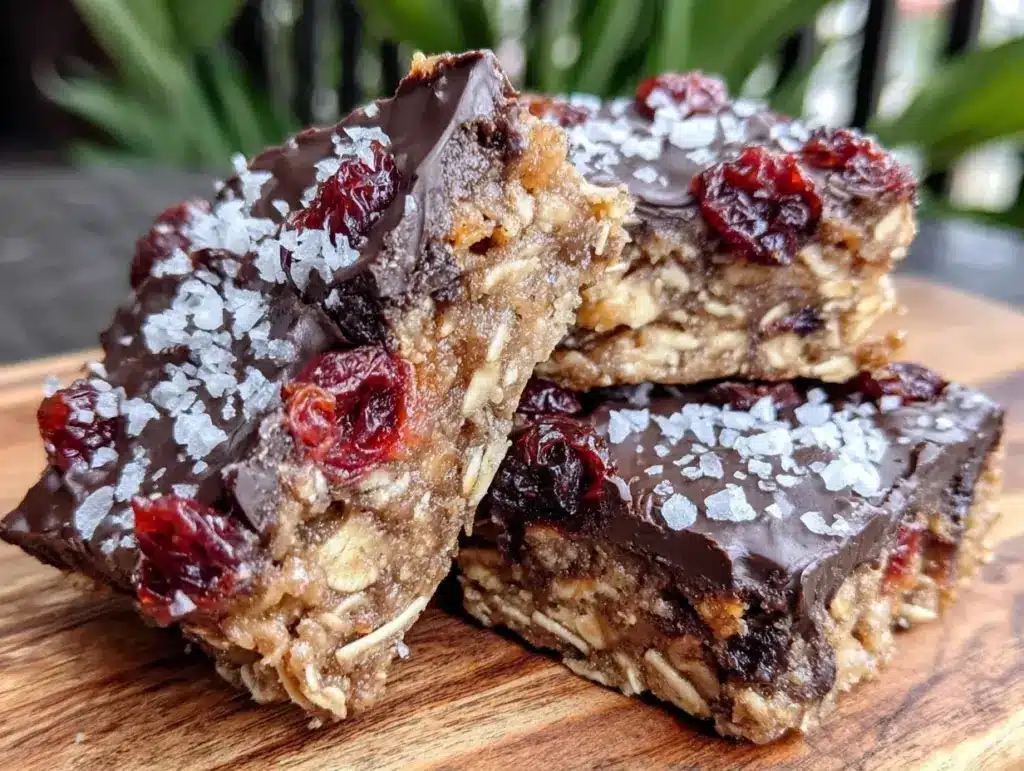
That’s how these End of Summer No-Bake Cookie Bars were born. They’re basically the edible equivalent of a sunset—warm, nostalgic, and ridiculously easy to make. I’ve made these for everything from block parties to last-minute dinner guests, and they have never, ever failed me. The best part? You don’t need to be a baker to make them. You just need to melt some butter, mix some stuff, and wait for it to set. If you can stir a bowl, you can make these.
I’ve tweaked this recipe over the last few years to get the texture just right—chewy but not sticky, sweet but not cloying. They taste like classic no-bake cookies but in a bar form that’s way easier to serve to a crowd. Plus, they hold up beautifully on a picnic table in the sun. No fridge required until serving time. Let’s get into why these are going to become your new go-to for any outdoor gathering.
Why You’ll Love This Recipe
There are about ten reasons I keep making these, but here are the big ones. This isn’t just a cookie; it’s a strategy for stress-free hosting.
Zero Oven, Zero Heat — Seriously. This is the ultimate summer hack. While everyone else is sweating over a hot oven or a grill, you’re just standing at the counter mixing. It keeps your kitchen cool and your sanity intact. I love bringing these to summer gatherings because I can make them on a lazy Saturday morning and not worry about the weather ruining them.
Survives the Heat — Unlike ice cream or custard-based desserts, these bars don’t melt into a puddle if you leave them on a table for an hour. They’re sturdy, chewy, and stable. I’ve left them out in direct sun for 30 minutes (oops) and they were still perfect. This makes them ideal for picnics, beach days, or outdoor BBQs.
Minimal Ingredients — You probably have everything you need in your pantry right now. Oats, peanut butter, chocolate chips, brown sugar, butter, and milk. That’s it. No weird flours, no fancy extracts, no hard-to-find ingredients. It’s simple, honest food.
Make-Ahead Friendly — These actually taste better the next day. The flavors meld together, and the texture firms up. I usually make these the night before a party, which means I’m not frantically baking the morning of. It’s the ultimate “set it and forget it” dessert.
Crowd-Pleasing Texture — There’s something about the combination of chewy oats, salty peanut butter, and sweet chocolate that just works. It’s comforting. It’s familiar. My picky eater nephew who usually only eats chicken nuggets devours these. That’s a win in my book.
This is my go-to when I need a dessert that just works. No complicated techniques, no weird ingredients, just reliable, delicious food that makes everyone happy. If you’re looking for a chocolate peanut butter no-bake bar recipe that’s slightly more structured, this is that, but with a bit more oatiness.
Ingredients You’ll Need
Here’s the best part: you probably have most of this already. This is a pantry-friendly recipe that relies on staples. I’m particular about the quality of the peanut butter and chocolate chips, but for everything else, standard grocery store brands work fine.
Unsalted Butter (1 cup / 226g) — This is your base. It adds richness and helps bind everything together. Don’t use margarine; it changes the texture and taste. Stick with real butter. I use salted butter if I’m out of unsalted, but you might want to reduce any added salt if you’re adding extras.
Packed Brown Sugar (1 cup / 200g) — Light or dark brown sugar both work. Dark brown has a deeper molasses flavor, which I prefer for these bars. It adds that chewy, caramel-like quality. Make sure it’s packed when you measure it.
Whole Milk (½ cup / 120ml) — Just regular milk. Whole milk is best for richness, but 2% works too. Don’t use skim; you’ll lose some of that creamy mouthfeel.
Old-Fashioned Rolled Oats (3 cups / 270g) — This is crucial. Do not use quick oats or instant oats. They’ll turn into mush. You need the hearty, chewy texture of old-fashioned oats. If you only have quick oats, you can use them, but the texture will be softer and less distinct. I always buy the big canisters of Quaker oats because they’re consistent.
Peanut Butter (½ cup / 128g) — Use creamy, natural peanut butter. I love Skippy or Jif for consistency, but if you’re using natural peanut butter (the kind that separates), make sure to stir it well so it’s smooth before measuring. Avoid “no-stir” varieties with hydrogenated oils if you can help it; they can make the bars greasy. You want that smooth, salty-sweet flavor.
Vanilla Extract (1 teaspoon) — Pure vanilla. Not imitation. It adds a subtle warmth that ties the peanut butter and chocolate together. If you don’t have vanilla, it’s okay, but you’ll miss a little depth.
Semi-Sweet Chocolate Chips (1 ½ cups / 255g) — I use Ghirardelli or Nestlé Toll House. You can use milk chocolate if you prefer sweeter bars, or dark chocolate if you like it less sweet. Semi-sweet is the perfect balance. Don’t use baking chocolate bars; the chips melt more evenly and give you those little pockets of chocolate in every bite.
Optional: Mini Marshmallows (½ cup) — I like to add these for a s’mores vibe. They melt slightly into the bars, adding a gooey texture. If you’re not a fan of marshmallows, skip them. They’re not necessary, but they are fun.
Optional: Sea Salt Flakes — A light sprinkle on top right after you press the mixture into the pan. It elevates the flavor and makes it taste more sophisticated. I always do this now. It’s a tiny step that makes a big difference.
I’m particular about the oats and peanut butter here. If you skimp on quality, you’ll taste it. But for everything else, grab whatever is on sale. This is a forgiving recipe.
Equipment Needed
You don’t need fancy equipment for this. Here’s what I actually use.
Large Saucepan — I use a 3-quart or 4-quart heavy-bottomed saucepan. You need something with a thick bottom to prevent the sugar mixture from burning. My old stainless steel pot works perfectly. Avoid thin aluminum pans; they heat unevenly.
Wooden Spoon or Heat-Resistant Spatula — For stirring. You’ll be stirring constantly while the sugar mixture boils, so you need something sturdy. Silicone spatulas work great because they scrape the bottom of the pan.
9×13 Inch Baking Dish — Glass or metal. I prefer glass because I can see the edges, but metal works too. Make sure it’s clean and dry.
Parchment Paper — Line your baking dish with parchment paper, leaving an overhang on the sides. This is the secret to easy removal. You don’t need to grease it if you use parchment. Just lift the bars out by the paper and cut them on a cutting board. Saves on cleanup.
Measuring Cups and Spoons — Standard stuff. Dollar store versions work fine.
Knife or Pizza Cutter — For cutting the bars. A sharp knife works, but a pizza cutter is surprisingly effective for clean cuts without squishing the bars.
Optional: Candy Thermometer — I don’t usually use one, but if you’re worried about the sugar mixture temperature, a candy thermometer can help. The mixture should reach a soft-ball stage (240°F). But honestly, if you follow the timing, you don’t really need it.
How to Make It: Step-by-Step
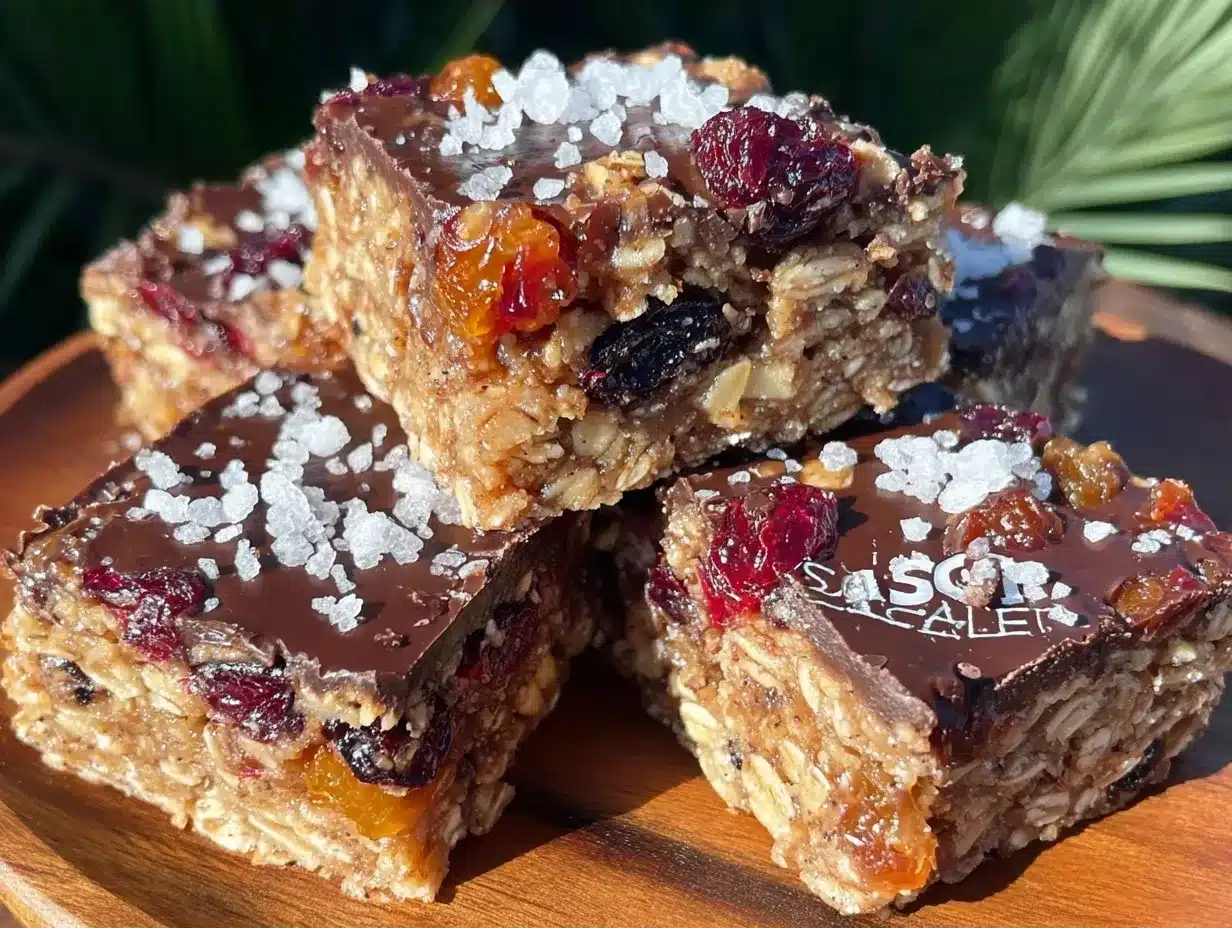
Alright, let’s make this! I’m walking you through exactly how I do it, including the little tricks I’ve picked up. It’s straightforward, but there are a few key moments where you need to pay attention.
Step 1: Prep Your Pan
Line a 9×13 inch baking dish with parchment paper. Leave a little overhang on the long sides so you can lift the bars out later. I usually spray the parchment with a little non-stick spray just to be safe, though it’s not strictly necessary. Set it aside.
Step 2: Boil the Sugar Mixture
In your large saucepan, combine the butter, brown sugar, and milk. Place it over medium-high heat. Stir constantly until the butter melts and the mixture comes to a rolling boil. A rolling boil means big bubbles that don’t pop when you stir. Once it hits that rolling boil, start your timer. Boil for exactly 1 minute. Do not skip this step, and do not boil for longer. If you boil too long, the bars will be hard. If you boil too short, they’ll be too soft. One minute is the sweet spot.
Step 3: Remove from Heat and Add Peanut Butter
Take the pan off the heat immediately. Add the peanut butter and vanilla extract. Stir vigorously until the peanut butter is completely melted and incorporated. It might look a little lumpy at first, but keep stirring. The residual heat will melt it. This mixture should be smooth and glossy. If it’s still chunky, you can put it back on low heat for 10 seconds, but usually, it’s fine off the heat.
Step 4: Fold in the Oats
Add the oats to the peanut butter mixture. Stir until every single oat is coated. It’s going to look like a thick, sticky mass. This is normal. Make sure there are no dry clumps of oats left. If you’re adding mini marshmallows, fold them in now. They’ll get warm and slightly melty.
Step 5: Press into the Pan
Pour the mixture into your prepared baking dish. Here’s the tricky part: it’s hot and sticky. Wet your hands with water or use a piece of parchment paper to press the mixture down evenly. You want it flat and compact. Don’t worry if it looks a little rough on top; that’s where the chocolate goes. Press it firmly so the bars hold together when cut.
Step 6: Melt the Chocolate
While the base is cooling slightly, melt the chocolate chips. You can do this in the microwave in 30-second intervals, stirring in between, or in a double boiler. I prefer the microwave because it’s faster. Just be careful not to burn it. Chocolate burns easily. Stop microwaving when there are still a few small chips left and stir them in with the residual heat. You want it smooth and pourable.
Step 7: Top and Set
Pour the melted chocolate over the oat mixture. Use a spatula to spread it evenly to the edges. If you’re adding sea salt flakes, sprinkle them on now. Let the bars cool at room temperature for at least 1 hour, or until the chocolate is completely set. You can put them in the fridge to speed this up, but it’s not necessary. Once the chocolate is firm, lift the bars out of the pan using the parchment overhang. Cut into squares or rectangles. I usually cut them into 24 bars.
Total Time: About 45 minutes (15 minutes active, 30 minutes cooling)
Expert Tips & Tricks
Here’s everything I’ve learned from making these dozens of times. These tips will save you from my mistakes.
Don’t Overboil
This is the #1 mistake people make. If you boil the sugar mixture for more than 1 minute, the bars will be hard and crumbly. Set a timer. If you’re unsure, err on the side of under-boiling rather than over-boiling. You can always let them set longer.
Use Room Temperature Peanut Butter
If your peanut butter is cold straight from the fridge, it might not melt as easily. Take it out 15 minutes before you start. Or, just stir it really well after adding it to the hot sugar mixture. The heat will do the work.
Wet Hands for Pressing
The oat mixture is sticky. Wet your hands with water before pressing it into the pan. It prevents sticking and makes it much easier to get an even layer. Alternatively, use a piece of parchment paper or plastic wrap to press it down.
Don’t Skip the Chocolate
I know you can make these without chocolate, but the chocolate adds structure and flavor. It helps bind the oats together and adds a nice contrast to the peanut butter. If you’re out of chocolate chips, you can use chopped chocolate bars, but chips melt more evenly.
Cool Completely Before Cutting
If you cut the bars while the chocolate is still soft, they’ll be messy. Wait until the chocolate is fully set. This usually takes about an hour at room temperature. If you’re in a hurry, put them in the fridge for 20 minutes.
Common Mistakes (and how to avoid them):
Mistake: Bars are too hard. Fix: You boiled the sugar mixture too long. Next time, reduce the boiling time to 45 seconds.
Mistake: Bars are too soft. Fix: You didn’t boil long enough, or you used too much milk. Next time, ensure a rolling boil for a full minute.
Mistake: Chocolate is streaky. Fix: The chocolate wasn’t melted enough before pouring. Make sure it’s completely smooth and liquid.
Variations & Substitutions
Once you’ve nailed the basic version, here’s how you can mix it up. I’ve tried all of these.
S’mores Version
Add 1 cup of mini marshmallows to the oat mixture. Top with a layer of melted white chocolate instead of semi-sweet. Sprinkle with graham cracker crumbs. It’s basically a s’mores bar in disguise.
Chocolate Chip Cookie Dough
Replace the peanut butter with ½ cup of softened cream cheese. Fold in 1 cup of chocolate chips and ½ cup of chopped nuts. It’s like a raw cookie dough bar. Richer and creamier.
Almond Joy
Use almond butter instead of peanut butter. Top with shredded coconut and dark chocolate chips. It’s a tropical twist on the classic.
Snickerdoodle
Add 1 teaspoon of cinnamon to the sugar mixture. Top with a cinnamon sugar sprinkle after pressing. No chocolate needed. It’s warm and spiced.
Gluten-Free
Use certified gluten-free oats. Everything else is naturally gluten-free. I’ve used Bob’s Red Mill gluten-free oats and they work great. Just make sure your chocolate chips are also gluten-free.
Vegan
Use vegan butter, vegan peanut butter, and vegan chocolate chips. The method is the same. I use Daiya or LGY chocolate chips for melting. They melt smoothly and don’t seize up.
Lower-Sugar
Use a sugar substitute like Swerve or Lakanto. It works, but the texture might be slightly different. The bars might be a bit more crumbly. I haven’t tested this extensively, so proceed with caution.
Serving & Storage
These bars are incredibly versatile when it comes to serving. I usually cut them into small squares because they’re rich and sweet. People tend to eat more than one, so plan accordingly.
How to Serve:
I serve these straight from the pan at parties. They look rustic and homemade. But here are other ways I’ve enjoyed them:
- With Ice Cream: A scoop of vanilla ice cream on top of a warm bar is heavenly. It’s like a deconstructed s’mores dessert.
- With Coffee: The coffee flavor pairs perfectly with the peanut butter and chocolate. It’s a great afternoon snack.
- With Milk: Classic. Dip it in cold milk for a soft, chewy bite.
Toppings Bar:
If I’m making these for a group, I sometimes let people add their own toppings. Extra chocolate drizzle, crushed nuts, or a sprinkle of sea salt. It’s fun and interactive.
Storage Instructions:
Room Temperature: Store in an airtight container at room temperature for up to 5 days. They stay fresh and chewy. If it’s very hot, you might want to refrigerate them to keep the chocolate from softening.
Refrigerator: Store in the fridge for up to 2 weeks. They’ll be firmer and chewier. Let them come to room temperature before serving for the best texture.
Freezer: Yes, you can freeze these! Wrap them individually in plastic wrap and store in a freezer bag for up to 3 months. Thaw at room temperature before eating. They freeze surprisingly well.
Pro tip: If you’re bringing them to a party, keep them in the cooler or a shaded area if it’s hot outside. Chocolate melts, and you don’t want a puddle on your picnic table.
Nutrition Information
I’m not a nutritionist, but here’s the breakdown if you’re tracking. These are rich bars, so portion control is key.
Per Serving (based on 24 bars):
- Calories: 180
- Protein: 4g
- Carbs: 22g
- Fiber: 2g
- Sugar: 14g
- Fat: 10g
- Saturated Fat: 4g
- Cholesterol: 10mg
- Sodium: 80mg
What’s Good:
- Oats provide some fiber and sustained energy.
- Peanut butter adds protein and healthy fats.
- It’s a homemade treat, so you know exactly what’s in it.
What to Know:
- Higher in sugar and fat from the chocolate and butter.
- Contains gluten (unless using GF oats) and dairy.
- Calorie-dense, so a little goes a long way.
My Take:
Look, these are a treat. They’re sweet, rich, and delicious. They’re not a health food. But they’re way better than store-bought cookies, and you can control the ingredients. When I make these for parties, I cut them small so everyone can have a taste without overdoing it. Enjoy them as a special indulgence.
Final Thoughts
So that’s my go-to End of Summer No-Bake Cookie Bars! I’ve probably talked your ear off at this point, but when you make a recipe this often, you have a lot to say about it.
This has saved me from so many hosting disasters. It’s my answer to “what should I bring to the party” when I don’t want to stress about baking in the heat. My friends are happy, my family is happy, and I’m happy because I’m not sweating over an oven.
Make it yours! Try different nut butters, add different chocolates, or play with the toppings. The best recipes are the ones you adapt to your tastes. If you’re looking for another easy no-bake option, check out my chewy no-bake monster cookie bars for a peanut butter and oat variation.
If you make these, drop a comment and let me know what you think! I love hearing how recipes turn out in your kitchen. And if something doesn’t work, tell me that too—I’m here to help troubleshoot.
Happy cooking! And I hope your backyard parties are filled with good food and good friends.
Frequently Asked Questions
Can I use quick oats instead of old-fashioned oats?
You can, but the texture will be different. Quick oats are thinner and will result in a softer, mushier bar. Old-fashioned oats give you that chewy, substantial texture that I love. If you only have quick oats, you can use them, but expect a softer result. I wouldn’t recommend instant oats at all.
Why did my bars turn out hard?
This usually happens if you boil the sugar mixture for too long. If you boil it for more than 1 minute, the sugar crystallizes and becomes hard. Next time, reduce the boiling time to 45 seconds. Also, make sure you’re using a heavy-bottomed pan so the heat is even. Thin pans can cause hot spots and uneven boiling.
Can I make these ahead of time?
Absolutely! These bars actually taste better the next day. The flavors meld together, and the texture firms up. I usually make them the night before a party. Store them in an airtight container at room temperature. They’ll stay fresh for up to 5 days.
Can I freeze these bars?
Yes! Wrap them individually in plastic wrap and store them in a freezer bag or airtight container. They’ll keep for up to 3 months. Thaw them at room temperature before eating. They freeze surprisingly well and don’t lose their texture.
Can I use natural peanut butter?
Yes, but make sure it’s well-stirred. Natural peanut butter separates, so you need to stir it until it’s smooth and creamy before measuring. If it’s too oily, the bars might be greasy. I prefer regular peanut butter for consistency, but natural works if you’re careful.
What if I don’t have vanilla extract?
You can skip it. The vanilla is subtle and adds depth, but it’s not essential. If you have almond extract, you can use that instead for a different flavor profile. It pairs well with the peanut butter and chocolate.
How do I cut the bars cleanly?
Use a sharp knife or a pizza cutter. If the chocolate is too soft, put the bars in the fridge for 10 minutes to firm up. Wipe the knife between cuts for clean edges. I also like to use parchment paper to lift the bars out of the pan, then cut them on a cutting board.
Pin This Recipe!
End of Summer No-Bake Cookie Bars
- Total Time: 45 minutes
- Yield: 24 servings 1x
Description
These easy, no-bake cookie bars are the perfect stress-free dessert for summer parties. They require zero oven time, survive the heat, and combine chewy oats, salty peanut butter, and sweet chocolate for a crowd-pleasing treat.
Ingredients
- 1 cup (226g) unsalted butter
- 1 cup (200g) packed brown sugar
- ½ cup (120ml) whole milk
- 3 cups (270g) old-fashioned rolled oats
- ½ cup (128g) creamy peanut butter
- 1 teaspoon vanilla extract
- 1 ½ cups (255g) semi-sweet chocolate chips
- ½ cup mini marshmallows (optional)
- Sea salt flakes (optional)
Instructions
- Line a 9×13 inch baking dish with parchment paper, leaving an overhang on the sides for easy removal.
- In a large heavy-bottomed saucepan, combine the butter, brown sugar, and milk. Place over medium-high heat and stir constantly until the butter melts and the mixture comes to a rolling boil.
- Once at a rolling boil, start a timer and boil for exactly 1 minute. Do not overboil.
- Remove the pan from heat immediately. Add the peanut butter and vanilla extract, stirring vigorously until the peanut butter is completely melted and the mixture is smooth and glossy.
- Add the oats to the peanut butter mixture and stir until every oat is coated. If using, fold in the mini marshmallows.
- Pour the mixture into the prepared baking dish. Wet your hands with water or use parchment paper to press the mixture down evenly and firmly into the pan.
- Melt the chocolate chips in the microwave in 30-second intervals, stirring between intervals, until smooth. Pour the melted chocolate over the oat mixture and spread evenly to the edges.
- If using, sprinkle sea salt flakes on top. Let the bars cool at room temperature for at least 1 hour, or until the chocolate is completely set.
- Lift the bars out of the pan using the parchment overhang and cut into 24 squares or rectangles.
Notes
Do not boil the sugar mixture for more than 1 minute, or the bars will become hard. Use old-fashioned rolled oats, not quick oats, for the best texture. If using natural peanut butter, ensure it is well-stirred before measuring. These bars can be stored at room temperature for up to 5 days or frozen for up to 3 months.
- Prep Time: 15 minutes
- Cook Time: 5 minutes
- Category: Dessert
- Cuisine: American
Nutrition
- Serving Size: 1 bar
- Calories: 180
- Sugar: 14
- Sodium: 80
- Fat: 10
- Saturated Fat: 4
- Carbohydrates: 22
- Fiber: 2
- Protein: 4
Keywords: no-bake cookies, summer dessert, backyard party recipe, peanut butter bars, chocolate oat bars, easy dessert, make-ahead dessert



