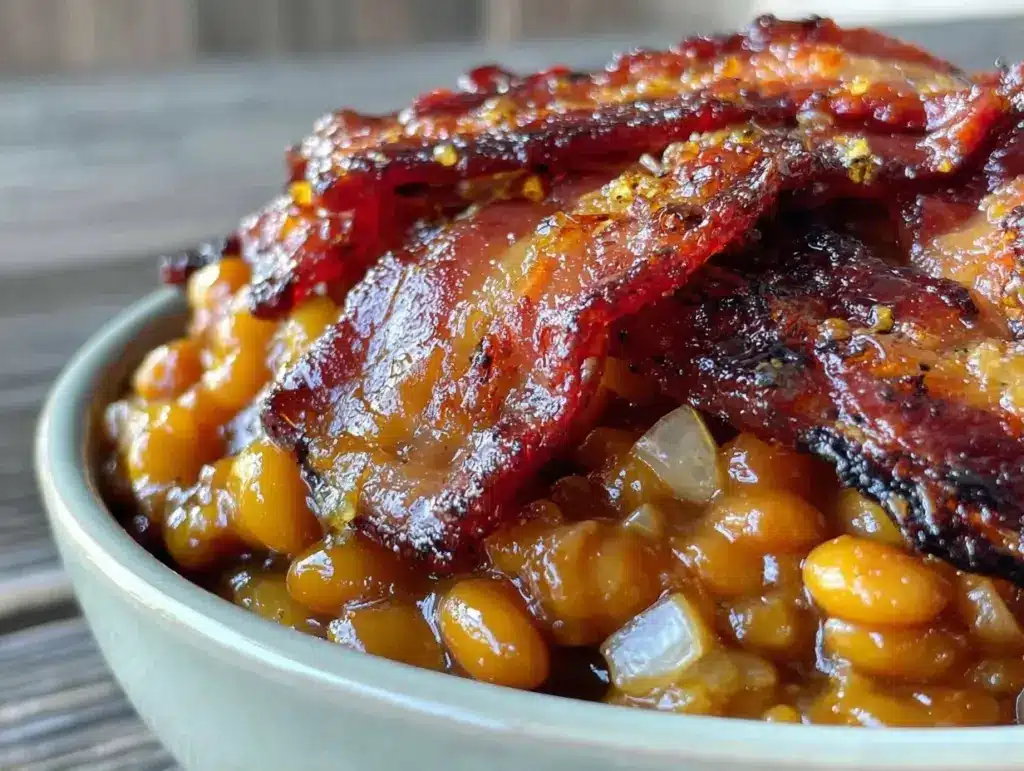
There is a specific kind of panic that sets in about forty minutes before guests arrive. The grill is roaring, the burgers are flipping, and suddenly you realize the table is missing that one dish everyone actually goes back for. You know the one. It’s not the fancy salad with the expensive cheese, and it’s definitely not the store-bought potato salad that’s been sitting out since noon. It’s the beans. The sweet, smoky, sticky beans that taste like summer.
For years, I bought the canned kind. You know the box—the one with the red and white label that promises “homestyle flavor.” But here’s the honest truth: canned beans taste like they’ve been sitting in a tin can for three years, even if they’re fresh. They’re mushy, the sauce is thin, and the flavor is… polite. It’s safe. But Labor Day isn’t about safe. It’s about big flavors, messy fingers, and that perfect balance of sweet and smoky that makes people forget they’re eating vegetables.
So, I stopped buying cans. I started making this smoky bacon baked beans recipe from scratch, and honestly? It’s the easiest thing I’ve ever made in my kitchen. There are no complicated techniques, no simmering for hours while you stress over the grill, and no fancy ingredients you need to drive to three different stores for. It’s just beans, bacon, a few pantry staples, and an oven. You really can’t mess this up. If you can only make one side dish for your next gathering, make this. It’s forgiving, it’s delicious, and it smells like heaven while it bakes.
Why You’ll Love This Recipe
I’ve made this smoky bacon baked beans recipe for more Labor Days than I can count. It’s become the anchor of my summer BBQs, and here’s why it keeps coming back to the menu:
- Zero Stress Cooking — Seriously, if you can boil water and chop a few strips of bacon, you can make this. I’ve had my teenagers make it while helping me prep the main course. It’s that simple.
- Set It and Forget It — Once you throw it in the oven, you’re done. No stirring, no watching the pot, no standing over the stove sweating while your guests are already drinking beer. It cooks itself.
- Flavor That Actually Tastes Homemade — The slow baking process transforms cheap beans into something rich and complex. The bacon renders into the sauce, making every bean coated in savory, smoky goodness.
- Makes Amazing Leftovers — And I mean this literally. The beans taste better the next day. The flavors meld together overnight, making them thicker and more intense. I deliberately make extra for lunch on Monday.
- Feeds a Crowd for Pennies — Beans are cheap. Bacon is the only pricey item, and you don’t need much. This feeds 6-8 people for under $10. That’s a steal for a dish that looks so homemade and thoughtful.
This is my go-to when I want to look like I planned everything perfectly, but actually just threw it together twenty minutes before the party. It’s reliable, it’s crowd-pleasing, and it’s the kind of dish that disappears first.
Ingredients You’ll Need
Here’s the best part: you probably have most of this already in your pantry. I’m particular about three things here, but otherwise, this is simple stuff.
For the Base
Beans (4 cans / approx. 32 oz total) — I use Navy beans or Great Northern beans. They hold their shape better than kidney beans and have that creamy texture we want. Rinse them well! I know some people say don’t rinse canned beans, but for a sweet sauce, rinsing removes that metallic tin taste. Drain them thoroughly.
Apple Cider Vinegar (1 tablespoon) — This is the secret weapon. It cuts through the sweetness and the fat from the bacon. It adds a bright tang that keeps the beans from tasting like candy. Don’t skip it. If you don’t have apple cider vinegar, white vinegar works, but apple cider has a better flavor profile here.
Yellow Onion (1 medium, finely diced / about 150g) — Sweet onions are too mild, and red onions get too purple and weird in the sauce. Yellow onions caramelize beautifully and give that savory base note. Dice them small so they melt into the sauce.
For the Flavor
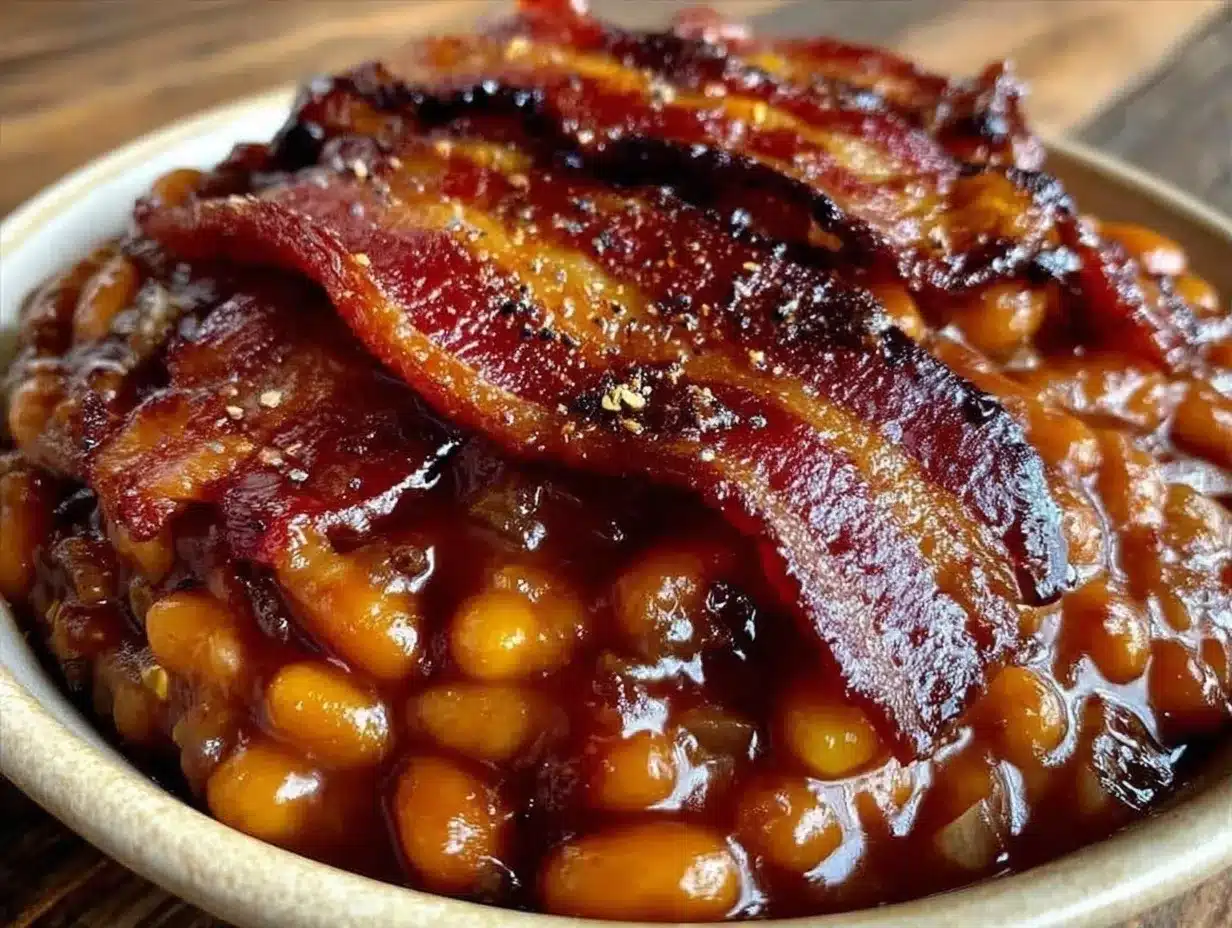
Smoked Bacon (6-8 slices / about 120g) — This is non-negotiable. You need the smokiness. Thick-cut bacon is nicer because it stays crispy, but regular bacon works too. Chop it into small bits. You’ll cook it first to render the fat, which becomes your cooking liquid. That’s where the magic happens.
Brown Sugar (½ cup / 100g) — Dark brown sugar is better because it has more molasses, which adds depth. But light brown works if that’s all you have. This gives the sticky, caramelized coating that makes people reach for seconds.
Worcestershire Sauce (1 tablespoon) — Adds umami and savory depth. It’s that “secret ingredient” that makes homemade taste better than boxed. If you’re vegan, you can skip this or use a vegan version, but it’s hard to replace the savory punch.
Mustard (1 tablespoon, yellow or Dijon) — Yellow mustard is classic here. It adds a little tang and spice without making it taste like a sandwich. It balances the sugar.
Black Pepper (1 teaspoon, freshly cracked) — Freshly cracked is better. Pre-ground pepper loses its punch. Don’t be shy with the pepper; it needs some heat to balance the sweet.
Salt (½ teaspoon, or to taste) — Go easy on the salt initially. The bacon and Worcestershire sauce are salty. Taste before adding more.
Equipment Needed
You don’t need fancy equipment for this. Here’s what I actually use.
Large Skillet (10-12 inch) — I use a cast iron skillet because it gets hot and stays hot, but any large skillet works. You need this to cook the bacon and onions. A non-stick pan is fine if you’re worried about cleanup.
Baking Dish (9×13 inch or similar) — A ceramic or glass baking dish is traditional. It heats evenly and looks nice when you bring it to the table. A Dutch oven works too if you want to cook everything in one pot, but a baking dish gives you that nice browned top.
Colander — For draining the beans. Or just use the lid to drain—I do this when I’m lazy.
Wooden Spoon — For stirring. Silicone works too. Don’t use metal on non-stick.
Sharp Knife & Cutting Board — For chopping bacon and onions. Dull knives make you cry more—learned this the hard way.
How to Make It: Step-by-Step
Alright, let’s make this! I’m walking you through exactly how I do it, including the little tricks I’ve picked up.
Step 1: Prep Your Ingredients (5 minutes)
Before you start cooking, dice your onion and chop your bacon. I like to chop the bacon into small, bite-sized pieces. Not too small—they should still be recognizable bits of bacon—but small enough to distribute evenly. Measure out your brown sugar, vinegar, mustard, and Worcestershire sauce into a small bowl. Having everything ready makes the assembly super fast.
Step 2: Cook the Bacon (5-7 minutes)
Heat your large skillet over medium heat. Add the chopped bacon. You don’t need to add oil—the bacon will release its own fat. Cook it, stirring occasionally, until it’s crispy and browned. This takes about 5-7 minutes. Once it’s crispy, use a slotted spoon to remove the bacon bits and set them aside on a paper towel. Leave all that delicious rendered bacon fat in the pan.
Step 3: Sauté the Onions (3-4 minutes)
Reduce the heat to medium-low. Add the diced onion to the hot bacon fat. Cook for 3-4 minutes, stirring frequently, until the onions are soft and translucent. They should smell sweet and savory. Don’t rush this step—if the onions are raw, they’ll taste harsh in the final dish. If the pan looks too dry, add a splash of water, but usually, the bacon fat is plenty.
Step 4: Make the Sauce (2 minutes)
While the onions are cooking, grab your small bowl of pre-measured ingredients. Add the brown sugar, apple cider vinegar, Worcestershire sauce, mustard, and black pepper to the skillet with the onions. Stir it all together over the heat. The sugar will melt into the bacon fat and onions, creating a thick, glossy sauce. This only takes about 2 minutes. It should look bubbly and combined.
Step 5: Combine Everything (3 minutes)
Take your drained beans and add them to the skillet. Gently fold them into the sauce. Be gentle—don’t mash the beans. You want them whole. Stir in half of the crispy bacon bits, reserving the rest for topping. Taste the sauce. Does it need more salt? Add a pinch if needed. Does it need more tang? Add a splash more vinegar. Now it’s ready for the oven.
Step 6: Bake (45-60 minutes)
Preheat your oven to 350°F (175°C). Pour the bean mixture into your 9×13 baking dish. Spread it out evenly. Sprinkle the remaining crispy bacon bits on top. Place it in the oven and bake for 45-60 minutes. You’ll know it’s done when the sauce has thickened significantly and the edges are bubbling and slightly caramelized. The beans should be tender and coated in a sticky sauce.
Step 7: Rest and Serve
Take it out of the oven and let it rest for 10 minutes. This is crucial—it allows the sauce to thicken up more. If you serve it immediately, it might be a bit soupy. After resting, give it a gentle stir and serve warm. It’s perfect alongside grilled meats.
Total Time: About 75 minutes (15 minutes active, 60 minutes hands-off)
Expert Tips & Tricks
Here’s everything I’ve learned from making this dozens of times. These tips will save you from my mistakes.
Don’t Skip the Rinsing
Canned beans come in a starchy, metallic-tasting liquid. Rinsing them under cold water removes that taste. It makes a huge difference in the final flavor. Drain them well, too—excess water makes the sauce thin.
Crispy Bacon is Key
If your bacon is chewy, it won’t add the right texture. Cook it until it’s crisp. The contrast between the soft beans and the crunchy bacon bits is what makes this recipe addictive.
Let It Rest
I know you’re excited to eat it, but let those beans rest for 10 minutes after baking. The sauce will absorb and thicken. If you skip this, you’ll have soupier beans. Patience pays off.
Adjust the Sweetness
Everyone’s sweet tooth is different. If you like it sweeter, add an extra tablespoon of brown sugar. If you like it tangier, add a splash more vinegar. Taste the sauce before baking and adjust then.
For Extra Smokiness
If you can’t find smoked bacon, or you want even more smoke flavor, add ½ teaspoon of smoked paprika to the sauce. It mimics that hickory flavor without needing special ingredients.
Variations & Substitutions
Once you’ve nailed the basic version, here’s how you can mix it up. I’ve tried all of these.
BBQ Sauce Version
Swap half the brown sugar for ½ cup of your favorite BBQ sauce. This makes the beans tangier and more “classic BBQ.” This goes perfectly with my Labor Day Crockpot BBQ Pulled Chicken Sliders.
Spicy Kick
Add ½ teaspoon of cayenne pepper or a diced jalapeño with the onions. If you like heat, this adds a nice background warmth that pairs well with Easy Labor Day BBQ Chicken Skewers.
Vegetarian Option
Use vegan bacon bits or just skip the bacon and use olive oil instead of bacon fat. Add a tablespoon of liquid smoke to mimic the smoky flavor. It’s still delicious, just different.
Slow Cooker Method
You can make this in a slow cooker. Cook the bacon and onions in a skillet, then add everything to the slow cooker. Cook on low for 4-6 hours. It’s even more tender, but you lose that nice caramelized top. I prefer the oven method for the texture.
Gluten-Free
This recipe is naturally gluten-free, but check your Worcestershire sauce and BBQ sauce labels to be sure. Most are GF, but some brands use malt vinegar.
Serving & Storage
How to Serve:
I usually serve this straight from the baking dish at the dinner table—it looks rustic and stays warm. But here are other ways I’ve enjoyed it:
Side Dishes:
– Grilled burgers or hot dogs (obviously)
– Sticky Honey BBQ Chicken Thighs
– Simple green salad with balsamic vinaigrette
– Corn on the cob with butter
Toppings Bar:
When I have guests, I put out: extra crispy bacon bits, chopped green onions, and a little extra black pepper. Everyone customizes their bowl.
Storage Instructions:
Refrigerator:
Store in an airtight container for up to 5 days. The sauce will thicken in the fridge—totally normal. Actually, it tastes even better on day two.
Reheating:
Best method: Add to a skillet with a splash of water or broth over low heat. Stir until heated through and creamy again.
Microwave method: Heat in 1-minute intervals, stirring between. Add a splash of water if it’s too thick.
Never works: Trying to reheat in the oven without adding liquid. It will burn on the bottom. Ask me how I know.
Freezing:
Honestly, this doesn’t freeze well because the beans can get mushy when thawed. The texture changes. Make it fresh or store in the fridge for up to 5 days.
Meal Prep:
You can prep the sauce and beans up to 2 days ahead. Store them in the fridge in a covered bowl. When you’re ready, just pour into the baking dish and bake. This is great for Labor Day because you can prep everything the night before.
Nutrition Information
I’m not a nutritionist, but here’s the breakdown if you’re tracking. Keep in mind this is a side dish, so portions matter.
Per Serving (based on 8 servings):
- Calories: 280
- Protein: 10g
- Carbs: 42g
- Fiber: 8g
- Sugar: 18g
- Fat: 8g
- Saturated Fat: 3g
- Cholesterol: 15mg
- Sodium: 520mg
What’s Good:
– High in fiber from the beans
– Good source of protein
– No artificial preservatives
What to Know:
– Higher in sugar from the brown sugar
– Contains sodium from bacon and sauce
– Moderate calories, but filling
My Take:
Look, this is comfort food with sugar and bacon. It’s not a diet recipe. But it’s way better than takeout, costs less, and I know exactly what’s in it. When I want to make it lighter, I reduce the sugar by half and use turkey bacon. But usually? I just eat a reasonable portion and enjoy it.
Final Thoughts
So that’s my go-to smoky bacon baked beans! I’ve probably talked your ear off at this point, but when you make a recipe this often, you have a lot to say about it.
This has saved weeknight dinners and holiday gatherings more times than I can count. It’s my answer to “what’s for dinner” or “what’s for the party” when I’m tired, don’t want takeout, and still want something that tastes really good. My kids are happy, my husband’s happy, and I’m happy because I’m not stressed about cooking.
Make it yours! Try different add-ins, swap in your favorite vegetables, adjust the garlic (though more is always better in my opinion). The best recipes are the ones you adapt to your family’s tastes.
If you make this, drop a comment and let me know what you think! I love hearing how recipes turn out in your kitchen. And if something doesn’t work, tell me that too—I’m here to help troubleshoot.
Happy cooking! And I hope your kitchen smells half as good as mine does right now.
Frequently Asked Questions
Q: Can I use dry beans instead of canned?
A: You can, but it takes way longer. You’d need to soak them overnight and boil them for an hour before baking. For a quick, easy recipe, canned is the way to go. If you use dry beans, make sure they’re fully cooked before adding the sauce.
Q: My sauce came out watery—what happened?
A: Usually means you didn’t bake it long enough, or you didn’t drain the beans well enough. Let the beans bake for a full 60 minutes. Also, make sure you’re not adding too much liquid. The beans release some water as they cook, so you don’t need extra liquid in the recipe.
Q: Can I make this ahead for a dinner party?
A: Absolutely! Make the sauce and beans up to 2 days ahead and store in the fridge. When you’re ready to serve, just pour into the baking dish and bake. It might take a few extra minutes in the oven if it’s cold from the fridge, but it’s close to perfect. I do this all the time.
Q: Why did my beans taste too sweet?
A: You might have used too much brown sugar or not enough vinegar. Next time, add a splash more apple cider vinegar or a teaspoon of mustard to balance the sweetness. Taste the sauce before baking and adjust then.
Q: Can I use maple syrup instead of brown sugar?
A: You can, but it will be thinner and less caramelized. Brown sugar has molasses, which gives that classic baked bean flavor. If you use maple syrup, reduce the amount slightly and add a tablespoon of flour to thicken it.
Q: How do I reheat leftovers without it getting dry?
A: Add a splash of water or broth to a skillet, add your leftover beans, and heat gently over low heat, stirring frequently. The extra liquid brings back the creamy texture. Microwave sort of works but tends to dry it out. If you do microwave, definitely add a splash of water first and heat in short bursts, stirring between.
Q: Can I double this recipe?
A: Absolutely! Double everything and use your biggest baking dish. The cooking times stay the same. I do this when I’m feeding a crowd. Just make sure your baking dish is large enough—you might need to use a 9×13 instead of a smaller dish.
Pin This Recipe!
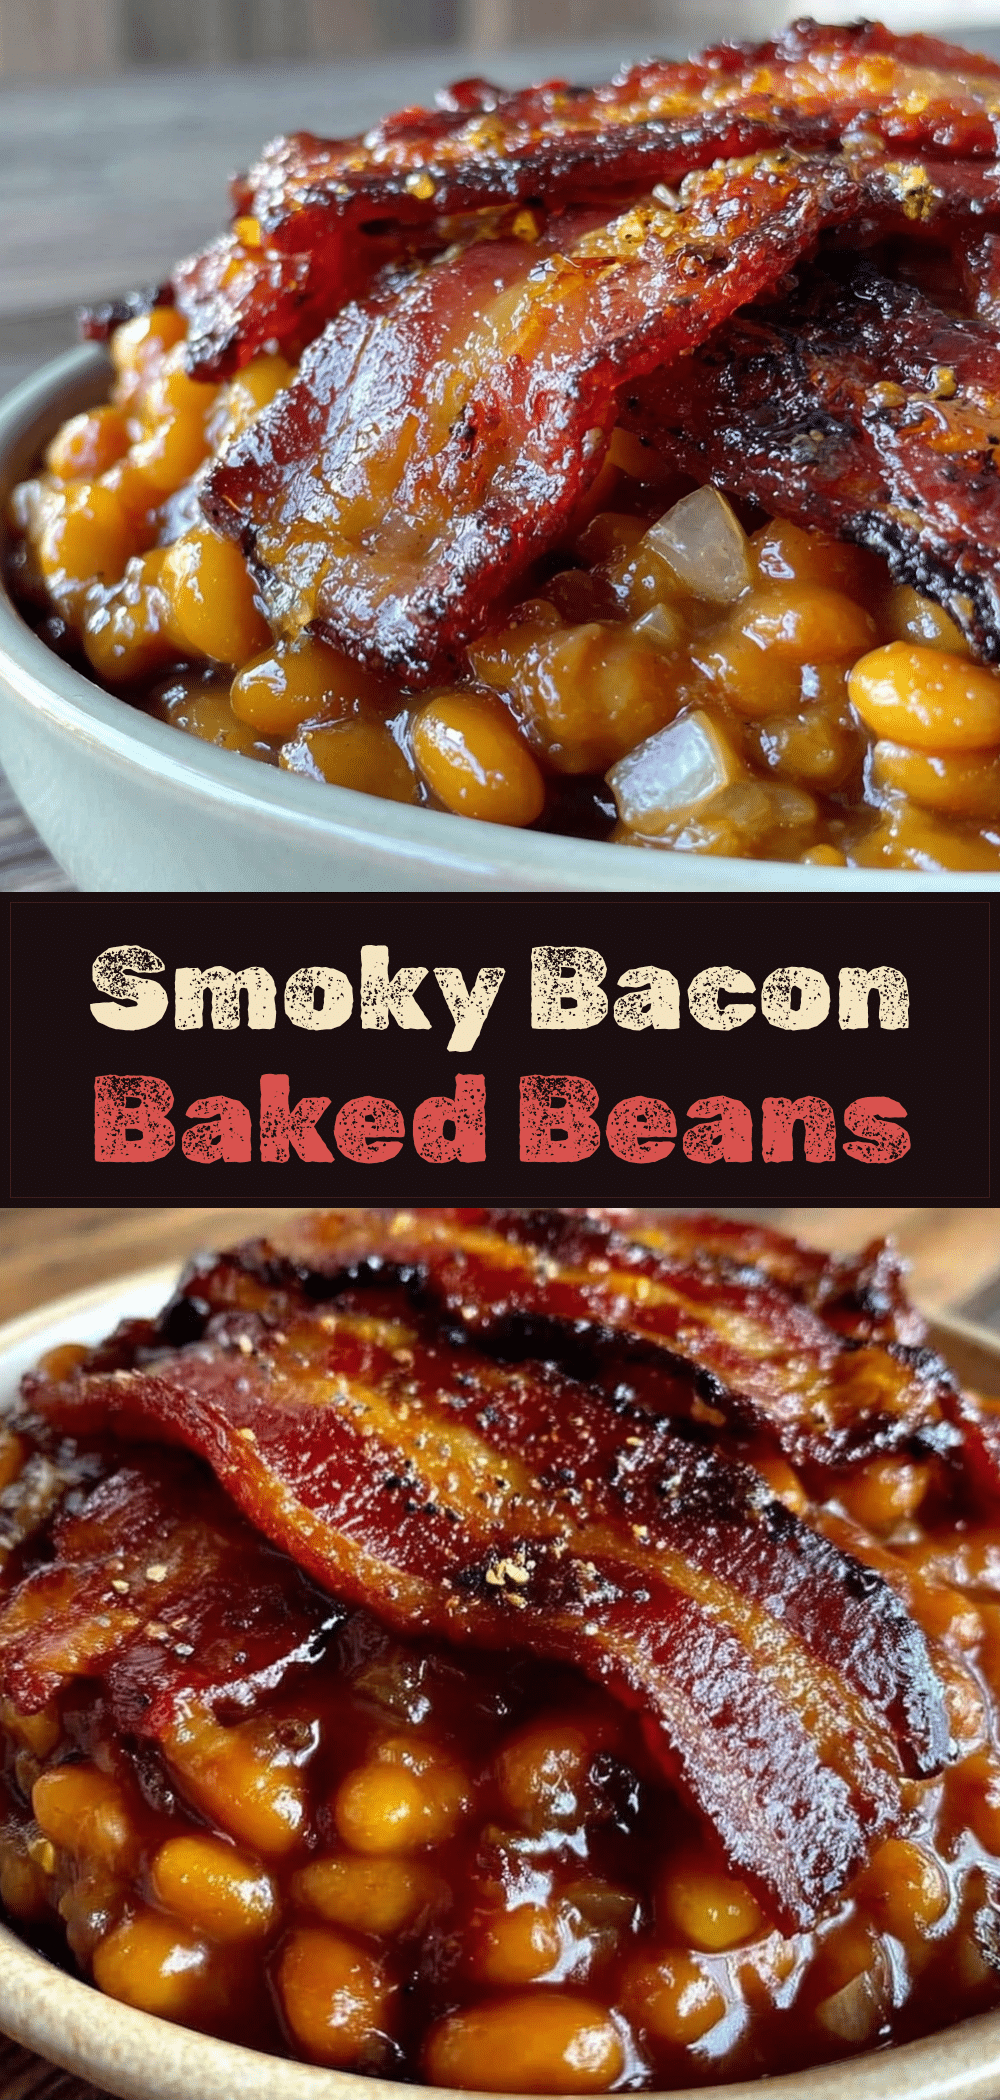
Smoky Bacon Baked Beans: Easiest No-Fail Side Dish
- Total Time: 75 minutes
- Yield: 8 servings 1x
Description
A stress-free, oven-baked side dish featuring sweet, smoky, and sticky beans made with bacon, brown sugar, and pantry staples. Perfect for BBQs and gatherings.
Ingredients
- 4 cans (approx. 32 oz total) Navy beans or Great Northern beans, rinsed and drained
- 6–8 slices Smoked Bacon, chopped into small bits
- 1 medium Yellow Onion, finely diced
- 1 tablespoon Apple Cider Vinegar
- ½ cup Brown Sugar
- 1 tablespoon Worcestershire Sauce
- 1 tablespoon Mustard (yellow or Dijon)
- 1 teaspoon Black Pepper, freshly cracked
- ½ teaspoon Salt, or to taste
Instructions
- Preheat oven to 350°F (175°C). Dice the onion and chop the bacon into bite-sized pieces.
- Heat a large skillet over medium heat. Add the chopped bacon and cook for 5-7 minutes until crispy. Remove bacon with a slotted spoon, leaving the rendered fat in the pan.
- Reduce heat to medium-low. Add the diced onion to the bacon fat and sauté for 3-4 minutes until soft and translucent.
- Add brown sugar, apple cider vinegar, Worcestershire sauce, mustard, and black pepper to the skillet. Stir over heat for 2 minutes until the sugar melts and forms a glossy sauce.
- Add the drained beans to the skillet and gently fold them into the sauce. Stir in half of the crispy bacon bits. Taste and adjust salt if needed.
- Pour the mixture into a 9×13 inch baking dish. Spread evenly and sprinkle the remaining bacon bits on top.
- Bake for 45-60 minutes until the sauce has thickened and the edges are bubbling.
- Remove from oven and let rest for 10 minutes before serving to allow the sauce to thicken further.
Notes
Rinsing the canned beans is crucial to remove the metallic tin taste. Let the beans rest for 10 minutes after baking to thicken the sauce. For extra smokiness, add ½ teaspoon of smoked paprika. This recipe is naturally gluten-free, but check Worcestershire sauce labels. Leftovers taste better the next day.
- Prep Time: 15 minutes
- Cook Time: 60 minutes
- Category: Side Dish
- Cuisine: American
Nutrition
- Serving Size: 1 cup
- Calories: 280
- Sugar: 18
- Sodium: 520
- Fat: 8
- Saturated Fat: 3
- Carbohydrates: 42
- Fiber: 8
- Protein: 10
Keywords: baked beans, bacon beans, bbq side dish, labor day recipe, easy side dish, smoky beans, oven baked beans



