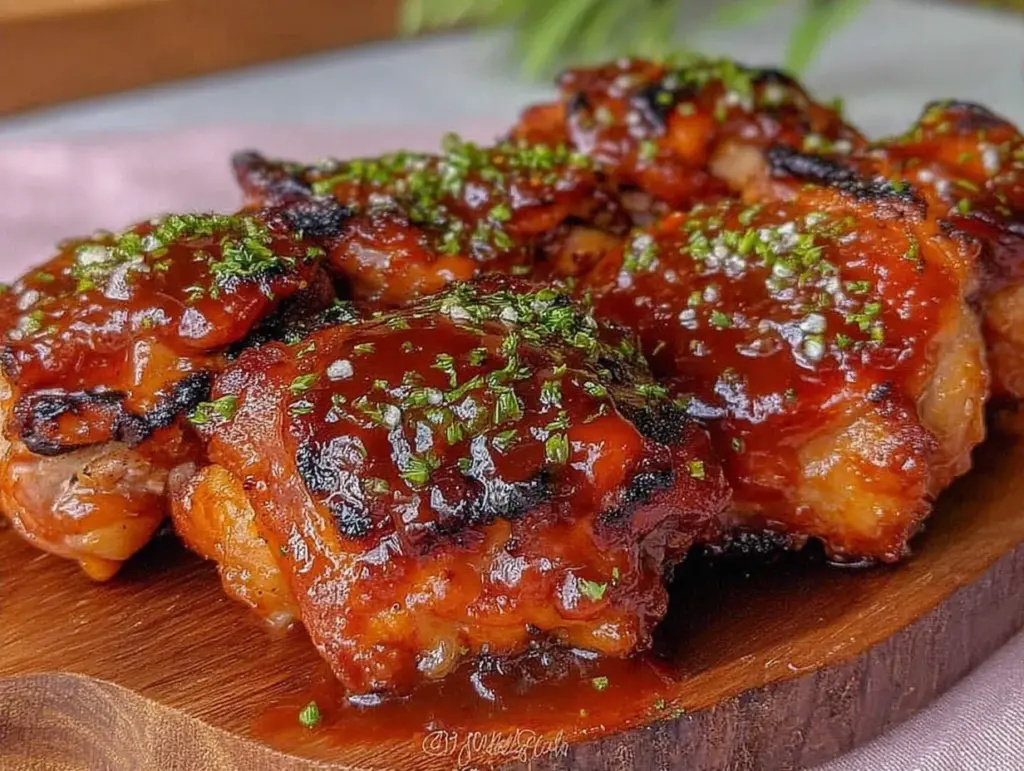
I have a confession to make. For years, I was terrified of chicken thighs. I thought they were too greasy, too tricky to cook evenly, and that they always ended up dry or rubbery. I stuck to breast meat because it was “lean” and “safe,” even though I knew it was boring. Then, about three years ago, I made a mistake. I grabbed a package of thighs instead of breasts, threw them in the oven with some bottled sauce, and walked away. When I came back, the kitchen smelled like heaven, and the meat was falling off the bone.
That was the day I stopped buying chicken breasts and started buying thighs exclusively. And that was the day I discovered that Sticky Honey BBQ Chicken Thighs are basically magic. They are forgiving, they are flavorful, and they are impossible to mess up. If you can only make one dinner this week that requires zero stress and guarantees everyone at the table is happy, make this.
I’ve tested this recipe so many times—sometimes with store-bought sauce, sometimes with homemade blends, sometimes with honey, sometimes with maple syrup. The truth is, the method doesn’t change much. You just toss everything in a pan, bake it until it’s bubbling and caramelized, and serve. It’s the ultimate beginner-proof meal. No fancy techniques, no precise temperature checks (though a thermometer helps), just pure, sticky, savory-sweet comfort food.
Why You’ll Love This Recipe
There are about ten reasons I keep coming back to this one-pan wonder, but here are the big ones that actually matter in the kitchen.
- Stupid Simple — Seriously, if you can pour a bottle and press a button on your oven, you can make this. I’ve walked my teenage son through it over FaceTime while he was at college. He didn’t burn a single thing.
- Minimal Cleanup — One pan. That’s it. You’re not juggling a stove, a pot, and a side dish. You bake, you scoop, you wash one dish. It’s the kind of cooking that lets you actually relax while dinner is happening.
- Flavor Bomb — Chicken thighs have more fat than breasts, which means they stay juicy and absorb flavor better. When you coat them in that sticky honey BBQ glaze, the edges get crispy and caramelized. It’s sweet, salty, smoky, and tangy all at once.
- Crowd-Pleaser — I’ve served this to my meat-loving husband, my vegetarian sister (who asks for extra sauce), and my neighbor’s picky kids. Even the kids who usually refuse “brown food” dig into these because they look like glazed wings. Trust me on this.
- Makes Amazing Leftovers — The next day, the flavors have melded even more. I deliberately make extra for lunch. It’s cold, it’s still sticky, and it’s delicious on top of a salad or in a sandwich. I won’t lie, sometimes the leftovers are better than the fresh batch.
- Budget-Smart — Chicken thighs are usually cheaper than breasts. You’re using pantry staples like honey and BBQ sauce. This feeds 4-6 people for under $15. That’s less than one order of takeout wings.
This is my go-to when I need dinner to just work. No complicated techniques, no weird ingredients, just reliable, delicious food that makes everyone happy. It’s the kind of meal that feels like a treat but costs pennies compared to restaurant food.
Ingredients You’ll Need
Here’s the best part: you probably have most of this already. This recipe relies on a few key items that work together to create that perfect sticky glaze. I’m particular about three ingredients here, and I’ll tell you exactly why.
For the Chicken
Chicken thighs (3-4 pounds / 1.5-2 kg) — Bone-in, skin-on thighs are my absolute favorite for this. The skin crisps up in the oven, and the bone keeps the meat juicy. You can use boneless, skinless thighs if you prefer easier eating, but the skin adds incredible texture. If you use breasts, reduce the cooking time by 10 minutes so they don’t dry out.
Kosher salt (1 tablespoon) — Don’t skip the salt. It seasons the meat from the inside out. I use kosher salt because it’s easier to grip and control. If you use table salt, reduce the amount by half because it’s finer and saltier.
Black pepper (1 teaspoon) — Freshly cracked is best. Just a simple seasoning to start.
For the Sticky Honey BBQ Glaze
BBQ sauce (1 ½ cups / 360ml) — This is your base. I use a classic sweet and smoky style, like Sweet Baby Ray’s or a local craft brand. Avoid the “vinegar-based” Carolina style for this one, as it won’t get that sticky, caramelized texture we want. Look for a sauce that is thick and dark.
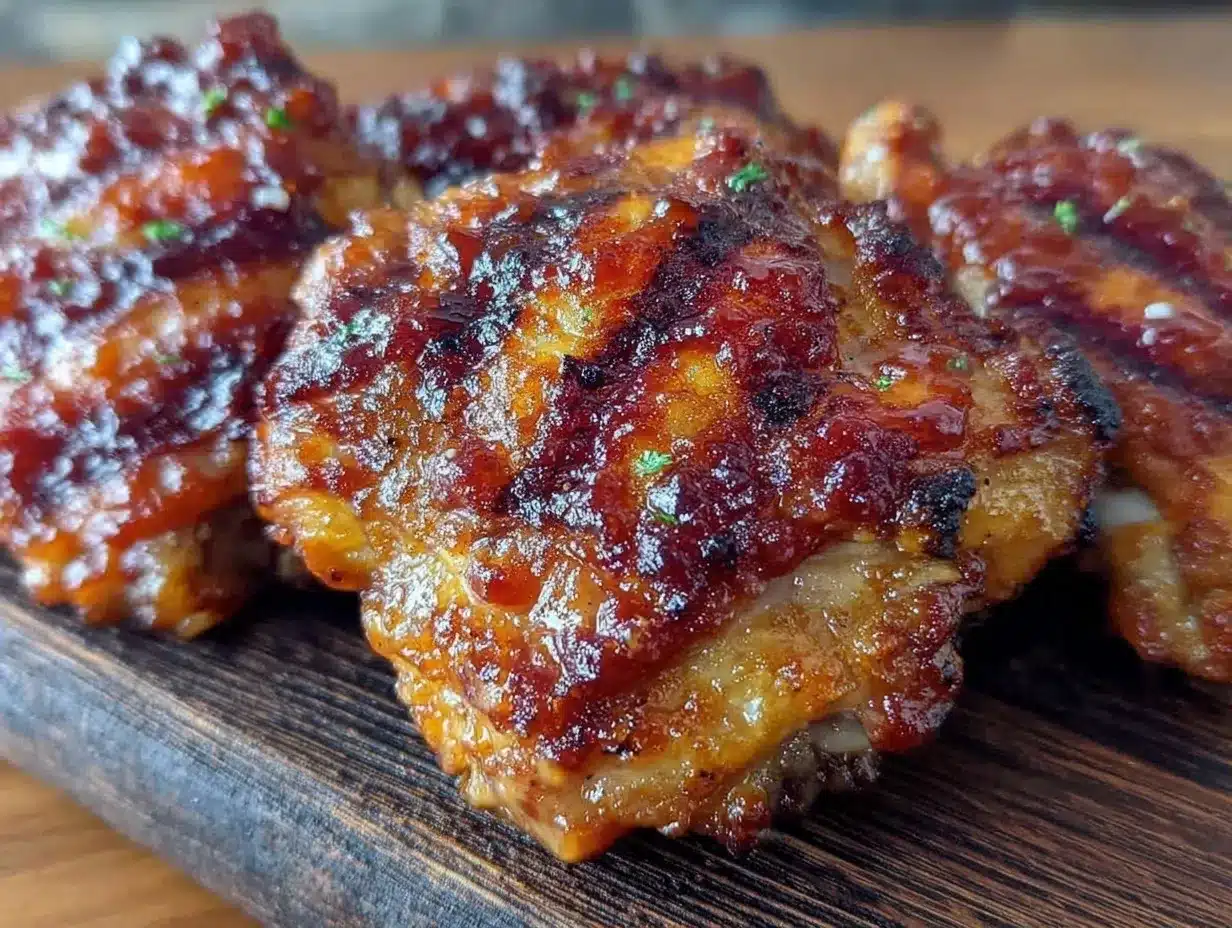
Honey (½ cup / 120ml) — This is the secret weapon. Honey adds viscosity, which creates that sticky, pull-apart texture. It also helps the sauce caramelize and brown in the oven. Raw honey is great, but regular jarred honey works perfectly fine. Don’t skimp on the honey; it’s what makes it “Sticky Honey BBQ.”
Apple cider vinegar (1 tablespoon) — A little acidity cuts through the sweetness of the honey and BBQ sauce. It balances the flavor so it’s not cloying. If you don’t have apple cider vinegar, white vinegar works too.
Worcestershire sauce (1 teaspoon) — This is the umami booster. It adds depth and savory notes that make the sauce taste homemade rather than just like bottled sauce. It’s a small amount, but it makes a big difference.
Garlic powder (1 teaspoon) — I use powder here instead of fresh garlic because fresh garlic can burn in the high heat of the oven. Powder gives you that garlic flavor without the risk of bitter, charred bits.
Onion powder (1 teaspoon) — Similar to the garlic, this adds savory depth without burning. It complements the sweetness beautifully.
Smoked paprika (1 teaspoon) — This gives you that BBQ smokiness. If you don’t have smoked paprika, regular paprika works, but you’ll miss out on that subtle smoky flavor. Don’t use cayenne unless you want it spicy; this is sweet and savory, not hot.
Optional Garnishes
Chopped fresh parsley or cilantro — Adds a pop of color and freshness to cut the richness.
Sesame seeds — For a little crunch and visual appeal. I sprinkle these on right before serving.
Lime wedges — A squeeze of lime over the finished dish brightens everything up. It’s a game-changer if you’re feeling fancy.
Equipment Needed
You don’t need fancy equipment for this. Here’s what I actually use.
Large baking sheet or roasting pan — I use a half-sheet pan (18×13 inches). It needs to fit all the chicken thighs in a single layer with a little space between them. If you crowd the pan, the chicken steams instead of roasts, and you won’t get those crispy edges. A roasting pan works too if you have a smaller oven.
Parchment paper or aluminum foil — I line my baking sheet with parchment paper. It makes cleanup effortless. The sticky glaze can caramelize and stick, so lining the pan saves you from scrubbing later. Foil works too, but parchment is easier.
Medium mixing bowl — For whisking the sauce ingredients together. Any bowl will do.
Whisk — To emulsify the honey, vinegar, and spices into the BBQ sauce. A fork works in a pinch, but a whisk mixes it smoother.
Tongs — For turning the chicken. Tongs give you better control than a fork, which can poke holes and let juices escape.
Measuring cups and spoons — Standard stuff. Dollar store versions work fine.
Instant-read thermometer (optional but recommended) — While I usually cook by eye, a thermometer ensures the chicken is safe to eat. You’re looking for 165°F (74°C) in the thickest part, avoiding the bone.
How to Make It: Step-by-Step
Alright, let’s make this! I’m walking you through exactly how I do it, including the little tricks I’ve picked up.
Step 1: Prep Your Chicken (5 minutes)
Preheat your oven to 400°F (200°C). This temperature is key. It’s hot enough to crisp the skin and caramelize the sauce, but not so hot that it burns before the chicken is cooked. Pat the chicken thighs dry with paper towels. I know it’s annoying, but removing excess moisture helps the skin crisp up. Season the chicken generously with salt and pepper on both sides. Don’t be shy with the salt; it’s the foundation of flavor.
Step 2: Make the Glaze (3 minutes)
In your medium mixing bowl, combine the BBQ sauce, honey, apple cider vinegar, Worcestershire sauce, garlic powder, onion powder, and smoked paprika. Whisk until smooth and well combined. The mixture should look thick and glossy. Taste it if you want—if it’s too sweet, add a splash more vinegar. If it’s too tangy, add a little more honey. But honestly, the default ratio works great.
Step 3: Arrange the Chicken (2 minutes)
Line your baking sheet with parchment paper. Place the chicken thighs on the sheet in a single layer. Make sure they aren’t touching each other. If they’re crowded, they’ll steam. You want hot air circulating around each piece. If you have a small oven, you might need two pans.
Step 4: First Bake (20 minutes)
Place the chicken in the preheated oven. Bake for 20 minutes. This cooks the chicken through and starts to render the fat from the skin. The edges should start to look golden.
Step 5: Add the Glaze (2 minutes)
Remove the pan from the oven. Carefully pour or brush half of the honey BBQ glaze over the chicken thighs. Use tongs to flip each thigh over so the other side is exposed. This ensures both sides get coated and caramelized.
Step 6: Second Bake (15-20 minutes)
Return the pan to the oven. Bake for another 15-20 minutes. Watch it closely during the last 5 minutes. You want the sauce to bubble and turn a deep, sticky amber color. The edges of the chicken should be crispy and slightly charred. If your oven runs hot, check it at 15 minutes to prevent burning.
Step 7: Final Coat and Rest (5 minutes)
Remove the pan from the oven. Brush the remaining glaze over the chicken. This final coat gives it that extra sticky shine. Let the chicken rest on the pan for 5 minutes. This allows the juices to redistribute and the sauce to thicken slightly. If you cut into it immediately, the juices will run out and the meat will be drier.
Total Time: About 45 minutes (10 minutes active, 35 minutes hands-off).
Expert Tips & Tricks
Here’s everything I’ve learned from making this dozens of times. These tips will save you from my mistakes.
Don’t Crowd the Pan — This is the #1 mistake people make. If the chicken is touching, it steams. Steam is the enemy of crispy skin. Give your chicken space. If you have too much chicken, use two pans or cook in batches. I’ve ruined batches by cramming them in, and the texture was soggy. Now I always use a large sheet pan.
Pat the Chicken Dry — I know it’s tedious, but drying the skin before seasoning is crucial. Wet skin = steamed skin. Dry skin = crispy, crackling skin. It’s physics, really. I use paper towels and press firmly. Don’t just dab; press.
Watch the Last 5 Minutes — Honey burns easily. Once the sauce is bubbling and caramelized, it’s done. If you see dark smoke or black spots, take it out immediately. I learned this the hard way with a batch of blackened chicken that tasted bitter. Now I keep the oven door cracked slightly during the last few minutes to let steam escape and monitor closely.
Save the Pan Sauce — After you remove the chicken, there’s usually some delicious, caramelized sauce left in the pan. Don’t throw it away! Scrape it up with a spatula and drizzle it over the chicken when serving. It’s liquid gold. I call it “pan jus” and everyone fights over it.
Use Bone-In, Skin-On — I know boneless is easier to eat, but bone-in thighs cook more evenly and stay juicier. The bone acts as an insulator. And the skin? It’s flavor. If you must use boneless, reduce the cooking time by 5-10 minutes and watch them like a hawk.
Customize the Heat — If you like spice, add a pinch of cayenne pepper or a dash of hot sauce to the glaze. I add a little red pepper flakes for a subtle kick. But keep it mild if you’re serving kids or spice-averse guests.
Variations & Substitutions
Once you’ve nailed the basic version, here’s how you can mix it up. I’ve tried all of these.
Spicy Honey BBQ — Add 1 teaspoon cayenne pepper or 2 tablespoons hot sauce to the glaze. This is my favorite version when I want a little kick. It pairs well with cold beer.
Teriyaki Style — Swap the BBQ sauce for teriyaki sauce and use soy sauce instead of Worcestershire. Add fresh grated ginger. It’s a different vibe but equally sticky and delicious.
Pineapple Glaze — Add ½ cup crushed pineapple (drained) to the glaze. It adds a tropical sweetness and enzymes that tenderize the meat. Great for summer.
Chicken Breast Version — You can use boneless, skinless chicken breasts. Reduce the total baking time to 30-35 minutes total. Check the temperature early so they don’t dry out. They won’t be as juicy, but they’re still good.
Dairy-Free/Gluten-Free — This recipe is naturally dairy-free. Just check your BBQ sauce label to ensure it’s gluten-free (some contain wheat-based thickeners). Most major brands are GF now. Serve with rice or roasted veggies.
Vegan Option — This is tricky because the base is chicken. But you can use this same glaze technique on firm tofu or seitan. Press the tofu, cube it, and bake it following the same steps. It absorbs the sauce beautifully.
Serving & Storage
How to Serve: I usually serve this straight from the baking sheet at the dinner table—it looks rustic and stays warm. But here are other ways I’ve enjoyed it:
Side Dishes:
- Cole slaw (the crunch and creaminess balance the sticky chicken)
- Corn on the cob with butter
- Simple green salad with ranch dressing
- Roasted broccoli or green beans
- Mac and cheese (if you’re feeling indulgent)
Toppings Bar: When I have guests, I put out: chopped green onions, sesame seeds, extra chili flakes, lime wedges. Everyone customizes their bowl.
Storage Instructions:
Refrigerator: Store leftovers in an airtight container for up to 4 days. The sauce will thicken in the fridge—totally normal.
Reheating: Best method: Add to a skillet with a splash of water or broth over low heat. Stir until heated through and creamy again. Microwave method: Heat in 30-second intervals, stirring between. Add a splash of water if it’s too thick. Never works: Trying to reheat in the oven at high heat—it’ll dry out the chicken.
Freezing: Honestly, this doesn’t freeze well because the sauce can separate and the chicken texture changes. Make it fresh or store in the fridge for up to 4 days.
Meal Prep: Make the chicken on Sunday, store in the fridge. Reheat gently each night. It’s great for lunches, especially over rice or in wraps.
Nutrition Information
I’m not a nutritionist, but here’s the breakdown if you’re tracking.
Per Serving (based on 6 servings, with skin and sauce):
- Calories: 450
- Protein: 35g
- Carbs: 28g
- Fiber: 0g
- Sugar: 24g
- Fat: 22g
- Saturated Fat: 5g
- Cholesterol: 140mg
- Sodium: 680mg
What’s Good: High protein, satisfying fats.
What to Know: Higher in sugar from the honey and BBQ sauce. Moderate sodium.
My Take: Look, this is comfort food with honey and BBQ sauce. It’s not a diet recipe. But it’s way better than takeout, costs less, and I know exactly what’s in it. When I want to make it lighter, I remove the skin and use less sauce. But usually? I just eat a reasonable portion and enjoy it.
Final Thoughts
So that’s my go-to Sticky Honey BBQ Chicken Thighs! I’ve probably talked your ear off at this point, but when you make a recipe this often, you have a lot to say about it.
This has saved weeknight dinners more times than I can count. It’s my answer to “what’s for dinner” when I’m tired, don’t want takeout, and still want something that tastes really good. My kids are happy, my husband’s happy, and I’m happy because I’m not stressed about cooking. It’s one of those meals that feels like a treat but requires zero effort.
Make it yours! Try different add-ins, swap in your favorite vegetables, adjust the honey. The best recipes are the ones you adapt to your family’s tastes. If you make this, drop a comment and let me know what you think! I love hearing how recipes turn out in your kitchen. And if something doesn’t work, tell me that too—I’m here to help troubleshoot.
Happy cooking! And I hope your kitchen smells half as good as mine does right now.
Frequently Asked Questions
Can I use chicken breasts instead of thighs?
Yes, but they will be less juicy. Use boneless, skinless breasts and reduce the cooking time by 10-15 minutes. Check the temperature frequently so they don’t dry out. Thighs are recommended for this recipe because they handle the high heat and sticky sauce better.
Why did my sauce burn?
Honey caramelizes quickly. If your oven runs hot or you left the chicken in too long, the sugar in the honey and BBQ sauce can burn. Keep a close eye on the last 5-10 minutes of cooking. If you see dark smoke, take it out immediately. Lower the oven temperature to 375°F if you’re worried about burning.
Can I make this ahead for a dinner party?
Sort of. You can prep the chicken and mix the sauce ahead of time. Store them separately in the fridge. When you’re ready, assemble and bake. It’s better to bake it fresh so the skin stays crispy. If you bake it early, the skin will soften in the leftovers.
How do I reheat leftovers without it getting dry?
Add a splash of water or chicken broth to a skillet, add your leftover chicken, and heat gently over low heat, stirring frequently. The extra liquid brings back the sticky texture. Microwave sort of works but tends to dry it out. If you do microwave, definitely add a splash of liquid first and heat in short bursts, stirring between.
Can I double this recipe?
Absolutely! Double everything and use two baking sheets. The cooking times stay the same. I do this when I’m meal-prepping or feeding a crowd. Just make sure your oven has enough space for two pans, or rotate them halfway through.
What kind of BBQ sauce should I use?
Use a thick, sweet, and smoky BBQ sauce. Avoid vinegar-based sauces (like Carolina style) or thin sauces (like Kansas City style might be too thin). Sweet Baby Ray’s, Stubb’s, or a local craft brand with a syrupy consistency work best. You want something that will cling to the chicken and caramelize.
Is this recipe spicy?
No, it’s not spicy by default. It’s sweet and savory. If you like heat, add cayenne pepper, red pepper flakes, or hot sauce to the glaze. Start with a little and taste as you go.
Can I grill these instead of baking?
Yes! Grill the chicken over medium heat, basting with the glaze frequently. Cook for about 20-25 minutes, flipping occasionally. The glaze might drip and flare up, so keep an eye on it. Grilling adds a nice smoky flavor, but baking is easier and more consistent for beginners.
What side dishes go well with this?
Classic BBQ sides work best. Corn on the cob, coleslaw, baked beans, roasted potatoes, or a simple green salad. I also like serving it with rice or naan bread to soak up the extra sauce.
Can I use maple syrup instead of honey?
Yes, maple syrup works well. It has a stronger flavor, so you might want to use a little less or balance it with a bit more vinegar. The texture will be slightly thinner, but it still creates a nice glaze.
Why is my chicken not crispy?
If the chicken wasn’t patted dry before seasoning, the skin will steam. Also, if the pan was crowded, the chicken steamed instead of roasted. Make sure to use a large pan and dry the skin thoroughly. High heat (400°F) is also key for crispiness.
How do I know when the chicken is done?
The internal temperature should reach 165°F (74°C) in the thickest part, avoiding the bone. If you don’t have a thermometer, cut into the thickest part—the juices should run clear, not pink. The meat should pull away from the bone easily.
Can I freeze the sauce?
Yes, you can freeze the BBQ glaze for up to 3 months. Thaw it in the fridge before using. It might separate slightly, but whisking it back together will fix it.
Is this recipe kid-friendly?
Yes! Kids usually love the sweet and sticky flavor. It’s similar to chicken wings but easier to eat. If your kids are sensitive to spice, omit the pepper flakes or cayenne. Serve with fries or mac and cheese, and they’ll be happy.
Can I make this in an air fryer?
Yes! Cook at 380°F for 15-18 minutes, flipping halfway and brushing with sauce. Don’t overcrowd the basket. The skin will get crispy, but it might not be as caramelized as oven-baking. It’s a great quick option.
What if I don’t have smoked paprika?
Use regular paprika. You’ll miss the smoky flavor, but the dish will still be delicious. You can add a tiny pinch of liquid smoke if you have it, but it’s not necessary.
Can I use boneless, skinless thighs?
Yes, but reduce the cooking time by 5-10 minutes. They cook faster and can dry out if overcooked. Watch them closely.
How long does the sauce last in the fridge?
The sauce can be stored in an airtight container for up to 1 week. Use it for marinating chicken or as a dipping sauce.
Can I add vegetables to the pan?
Yes! Add potatoes, carrots, or onions to the pan with the chicken. They’ll roast in the sauce and absorb the flavor. Just make sure they’re cut into small pieces so they cook in the same time as the chicken.
Is this recipe healthy?
It’s a moderate meal. Chicken thighs provide protein and healthy fats, but the sauce is high in sugar. You can lighten it by using less honey or sugar-free BBQ sauce. But honestly, it’s meant to be a treat, not a diet food.
Can I make this in a slow cooker?
Yes! Place chicken in the slow cooker, pour the sauce over, and cook on low for 4-6 hours. The skin won’t be crispy, but the meat will be tender and flavorful. Great for set-it-and-forget-it cooking.
What if my chicken is frozen?
Thaw it completely before cooking. Cooking frozen chicken in the oven can lead to uneven cooking and food safety issues. Use the microwave defrost setting or thaw in the fridge overnight.
Can I use a different sweetener?
Yes, brown sugar or maple syrup work. Brown sugar adds a caramel note, while maple syrup adds a distinct flavor. Adjust the amount to taste.
How do I make the sauce thicker?
Simmer the sauce on the stove for 5-10 minutes before brushing it on the chicken. This reduces the liquid and thickens the glaze. It will be stickier and more flavorful.
Can I add bacon to this?
Yes! Crumble cooked bacon and sprinkle it on top before serving. It adds a smoky, salty crunch that complements the sweet sauce perfectly.
What if I don’t have Worcestershire sauce?
Use soy sauce or fish sauce. Soy sauce adds saltiness and umami, while fish sauce adds a deeper savory note. Use half the amount of fish sauce because it’s stronger.
Can I make this gluten-free?
Yes, just ensure your BBQ sauce and Worcestershire sauce are gluten-free. Most major brands offer GF versions. Serve with GF sides like rice or roasted veggies.
How do I store the leftovers?
Store in an airtight container in the fridge for up to 4 days. Reheat gently in a skillet or microwave with a splash of water.
Can I freeze the cooked chicken?
It’s not recommended. The texture of the chicken and sauce can change when frozen and reheated. It’s best enjoyed fresh or stored in the fridge for a few days.
What if my sauce is too thin?
Simmer it on the stove to reduce it, or add a cornstarch slurry (1 teaspoon cornstarch mixed with 1 tablespoon water) to the sauce. Cook for 1-2 minutes until thickened.
Can I add jalapeños?
Yes! Slice fresh jalapeños and add them to the pan with the chicken. They’ll roast and add a fresh, spicy kick. Great for a spicy variation.
How do I get the sauce to stick?
Pat the chicken dry, use a thick sauce, and bake at a high temperature. The heat caramelizes the sugars, making the sauce stick to the skin. Brushing multiple times also helps build up layers of glaze.
Can I use chicken wings?
Yes! Chicken wings work great with this sauce. Cook them at 400°F for 40-45 minutes, flipping halfway. They’ll get crispy and sticky. A great appetizer or finger food.
What if my oven doesn’t have a convection setting?
Use the regular bake setting. Convection can dry out the chicken faster, so if you use it, reduce the temperature by 25°F and check earlier.
Can I make this in a toaster oven?
Yes, but you’ll need to cook in batches. The smaller space might cause the sauce to burn faster. Keep a close eye on it.
How do I prevent the sauce from dripping?
Use a baking sheet with a rim (like a half-sheet pan) or place a wire rack on top of the pan. This allows air circulation and catches drips, preventing smoke.
Can I add pineapple chunks?
Yes! Add pineapple chunks to the pan in the last 10 minutes of cooking. They’ll caramelize and add a tropical sweetness. Great with the teriyaki variation.
What if I don’t have apple cider vinegar?
Use white vinegar or lemon juice. They add the necessary acidity to balance the sweetness. Lemon juice adds a citrus note, which is also delicious.
Can I make this in a Dutch oven?
Yes! Sear the chicken in the Dutch oven, then add the sauce and bake in the oven. It’s a great method for a crispy skin and tender meat.
How do I know if the chicken is overcooked?
If the meat is tough, dry, or shriveled, it’s overcooked. Thighs are more forgiving than breasts, but they can still dry out if cooked too long. Use a thermometer to avoid this.
Can I add garlic cloves?
Yes, but add them in the last 5 minutes of cooking. Fresh garlic can burn in the oven. Minced garlic or garlic powder is safer for the full cooking time.
What if my sauce is too sweet?
Add more vinegar or a dash of hot sauce to balance the sweetness. Taste as you go and adjust before brushing it on the chicken.
Can I make this in a pressure cooker?
Yes, but you won’t get the crispy skin. Pressure cook the chicken with the sauce, then broil it in the oven for 2-3 minutes to crisp the skin and caramelize the sauce.
How do I serve this for a party?
Serve on a platter with toothpicks for easy eating. Add extra sauce on the side for dipping. It’s a great finger food for gatherings.
Can I add cheese?
Yes! Sprinkle cheddar or Monterey Jack cheese on top in the last 2 minutes of cooking. It melts beautifully and adds a creamy contrast to the sticky sauce.
What if I don’t have a baking sheet?
Use a roasting pan or a cake pan. Just make sure it’s large enough to fit the chicken in a single layer. Line it with foil for easy cleanup.
Can I make this in a grill pan?
Yes! Grill the chicken over medium heat, basting with the glaze. It adds a nice char and smoky flavor. Cook for 20-25 minutes, flipping occasionally.
How do I prevent the chicken from sticking to the pan?
Line the pan with parchment paper or foil. Lightly grease it with oil if needed. This ensures easy removal and cleanup.
Can I add herbs?
Yes! Fresh thyme or rosemary add a nice aromatic flavor. Add them to the pan with the chicken or sprinkle on top after cooking.
What if my sauce is too salty?
Add a little honey or sugar to balance the saltiness. Taste as you go and adjust before brushing it on the chicken.
Can I make this in a skillet?
Yes! Sear the chicken in a skillet, then transfer to the oven to finish cooking. Add the sauce in the last 10 minutes to caramelize.
How do I know if the chicken is undercooked?
If the meat is pink or the juices are cloudy, it’s undercooked. Cook until the internal temperature reaches 165°F (74°C).
Can I add mustard?
Yes! Add a teaspoon of Dijon mustard to the sauce for a tangy, savory note. It complements the sweetness well.
What if I don’t have smoked paprika?
Use regular paprika. You’ll miss the smoky flavor, but the dish will still be delicious. You can add a tiny pinch of liquid smoke if you have it.
Can I make this in a microwave?
No, microwaving won’t give you the crispy skin or caramelized sauce. Use the oven or grill for best results.
How do I store the sauce?
Store in an airtight container in the fridge for up to 1 week. Use it for marinating chicken or as a dipping sauce.
Can I freeze the sauce?
Yes, you can freeze the BBQ glaze for up to 3 months. Thaw it in the fridge before using. It might separate slightly, but whisking it back together will fix it.
What if my chicken
Pin This Recipe!
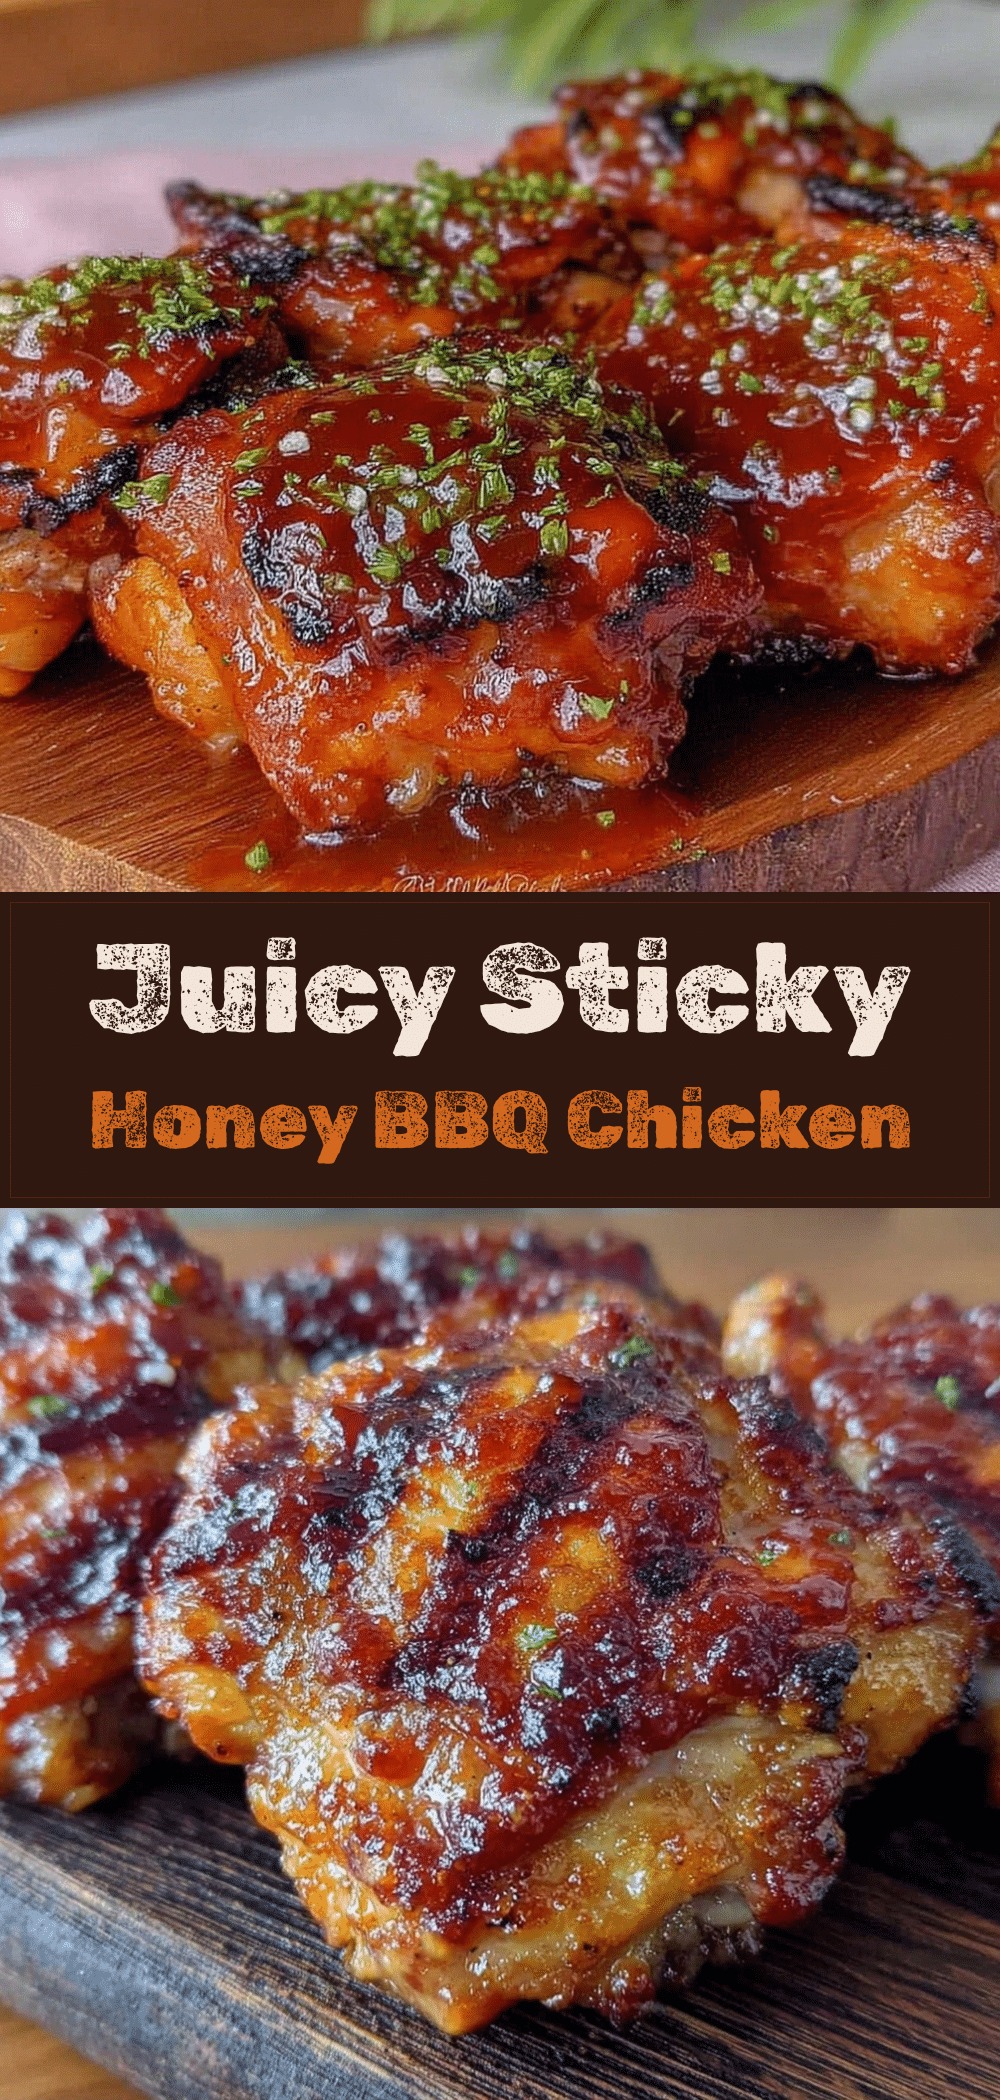
Sticky Honey BBQ Chicken Thighs: The Easy One-Pan Dinner
- Total Time: 45 minutes
- Yield: 4-6 servings 1x
Description
A forgiving, flavorful, and easy one-pan dinner featuring bone-in, skin-on chicken thighs coated in a sticky, sweet, and savory honey BBQ glaze. This beginner-proof meal is perfect for weeknights and guarantees juicy, caramelized results.
Ingredients
- 3–4 pounds bone-in, skin-on chicken thighs
- 1 tablespoon kosher salt
- 1 teaspoon black pepper
- 1 ½ cups BBQ sauce (thick, sweet, and smoky style)
- ½ cup honey
- 1 tablespoon apple cider vinegar
- 1 teaspoon Worcestershire sauce
- 1 teaspoon garlic powder
- 1 teaspoon onion powder
- 1 teaspoon smoked paprika
- Optional: Chopped fresh parsley or cilantro
- Optional: Sesame seeds
- Optional: Lime wedges
Instructions
- Preheat oven to 400°F (200°C). Pat chicken thighs dry with paper towels and season generously with salt and pepper on both sides.
- In a medium mixing bowl, whisk together BBQ sauce, honey, apple cider vinegar, Worcestershire sauce, garlic powder, onion powder, and smoked paprika until smooth.
- Line a large baking sheet with parchment paper. Arrange chicken thighs in a single layer, ensuring they are not touching.
- Bake chicken for 20 minutes to cook through and render fat.
- Remove pan from oven. Pour or brush half of the glaze over the chicken. Flip each thigh over to expose the other side.
- Return to oven and bake for another 15-20 minutes, watching closely during the last 5 minutes until sauce is bubbling, caramelized, and edges are crispy.
- Remove from oven and brush remaining glaze over chicken. Let rest for 5 minutes before serving.
- Serve with optional garnishes like parsley, sesame seeds, or lime wedges.
Notes
Do not crowd the pan to ensure crispy skin rather than steaming. Patting the chicken dry is crucial for crispiness. Honey burns easily, so monitor the last 5 minutes of cooking. Bone-in, skin-on thighs are recommended for juiciness and texture. If using chicken breasts, reduce cooking time by 10 minutes.
- Prep Time: 10 minutes
- Cook Time: 35 minutes
- Category: Main Course
- Cuisine: American
Nutrition
- Serving Size: 1-2 chicken thighs p
- Calories: 450
- Sugar: 24
- Sodium: 680
- Fat: 22
- Saturated Fat: 5
- Carbohydrates: 28
- Protein: 35
Keywords: chicken thighs, honey BBQ, one-pan dinner, easy chicken recipe, sticky chicken, weeknight dinner, comfort food, gluten-free option



