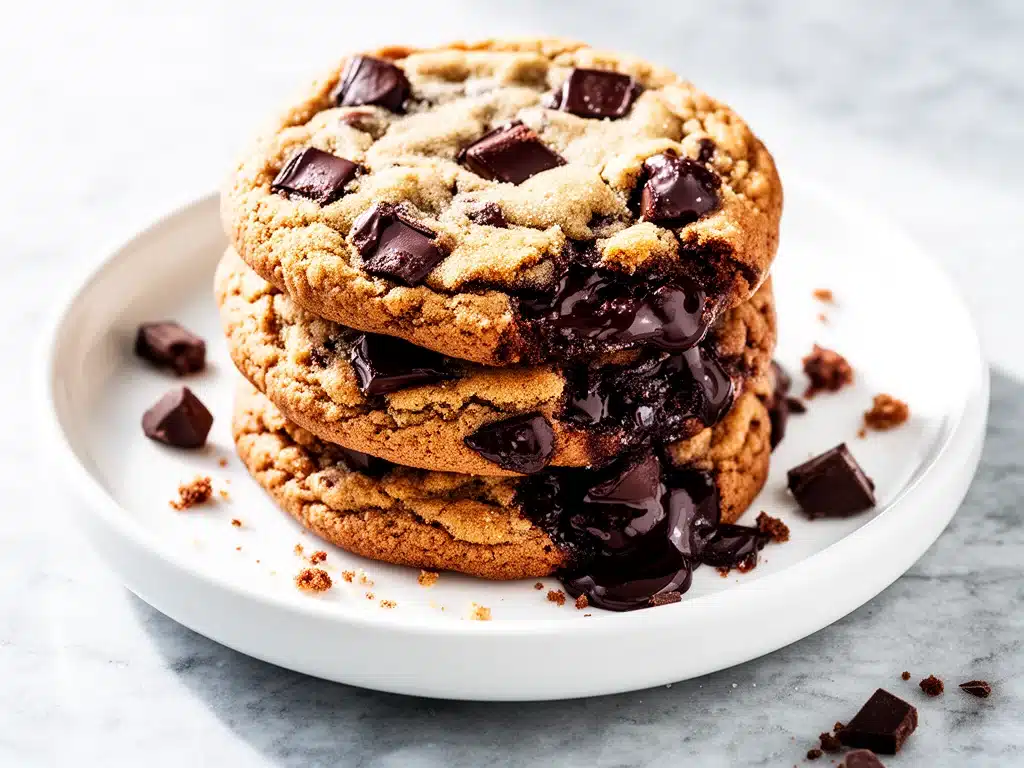
One rainy Saturday afternoon, I found myself craving something warm, chocolatey, and utterly comforting. I wanted that bakery-style cookie experience—the kind that’s thick enough to hold gooey chocolate pockets but tender enough to melt in your mouth. After burning two batches and tweaking the dough a dozen times, I finally nailed these bakery-style chocolate chunk cookies with thick gooey centers. They’re seriously the kind of cookies that make you pause everything else just to savor that first bite.
These cookies aren’t your typical thin, crispy kind. Nope. They’re tall, soft, and loaded with chunks of chocolate that ooze out like little molten treasures. I’ve tested this recipe more than 15 times, and every time my family and friends begged me to stop experimenting and just make them again as-is. That’s how I know this recipe works. Trust me, if you love cookies that feel like they belong in a cozy bakery window, you’re going to want to bookmark this one.
Why You’ll Love This Recipe
This recipe has become my secret weapon whenever I want to impress without fuss. Here’s why it’s a winner:
- Thick & Gooey Centers — The chunks of chocolate don’t just melt; they stay luxuriously gooey. My husband swears by these and calls them his ‘chocolate therapy.’
- Simple Ingredients — No weird add-ins or expensive stuff. Just pantry staples and good quality chocolate.
- Perfect Texture — Crispy edges with a soft, almost cakey middle. I’ve baked these for picky kids and foodies alike, and everyone’s obsessed.
- Easy to Make — No special equipment or complicated steps. If you can mix, scoop, and bake, you’ve got this.
- Great for Sharing — These cookies hold their shape well, making them ideal for cookie swaps, gifts, or just stashing in your freezer for emergencies.
Honestly, there are a dozen reasons I keep making these cookies, but the best one is how they make me feel: like I’m treating myself to something truly indulgent without the guilt of a bakery price tag.
Ingredients You’ll Need
Here’s the best part: you probably have most of these already. I’m picky about the chocolate and butter here, so I’ll explain why.
- Unsalted butter (1 cup / 227g) — Use real butter, not margarine. I like it slightly softened but still cool. This gives the cookies that tender crumb.
- Brown sugar
- Granulated sugar (1/4 cup / 50g) — Adds balance and helps with the crisp edges.
- Egg (1 large) — Brings everything together and adds richness. Room temperature works best.
- Vanilla extract (2 teaspoons) — Fresh vanilla is key here. I avoid imitation for this recipe.
- All-purpose flour (2 1/4 cups / 280g) — Use sifted flour for even mixing.
- Baking soda (1 teaspoon) — The leavening agent that helps with that perfect rise.
- Salt (1 teaspoon) — Enhances flavor. Don’t skip it.
- Chocolate chunks (12 oz / 340g) — I prefer a mix of bittersweet and milk chocolate chunks. Chop a quality chocolate bar yourself if you can—trust me, it makes a difference.
Optional: A sprinkle of flaky sea salt on top before baking adds a gourmet touch.
Equipment Needed
You don’t need fancy gear for these cookies. Here’s what I use:
- Mixing bowl — A large one for mixing your dough.
- Hand mixer or stand mixer — Makes creaming butter and sugars a breeze, but you can do it by hand if you’re up for a workout.
- Baking sheets — I like heavy-duty, rimmed sheets. They help with even baking and prevent spreading.
- Parchment paper or silicone baking mat — Keeps cookies from sticking and helps with cleanup.
- Measuring cups and spoons — Accuracy matters here, especially for flour.
- Large spoon or cookie scoop — For evenly sized cookies. I use a 2-tablespoon scoop to get those perfect thick rounds.
How to Make It: Step-by-Step
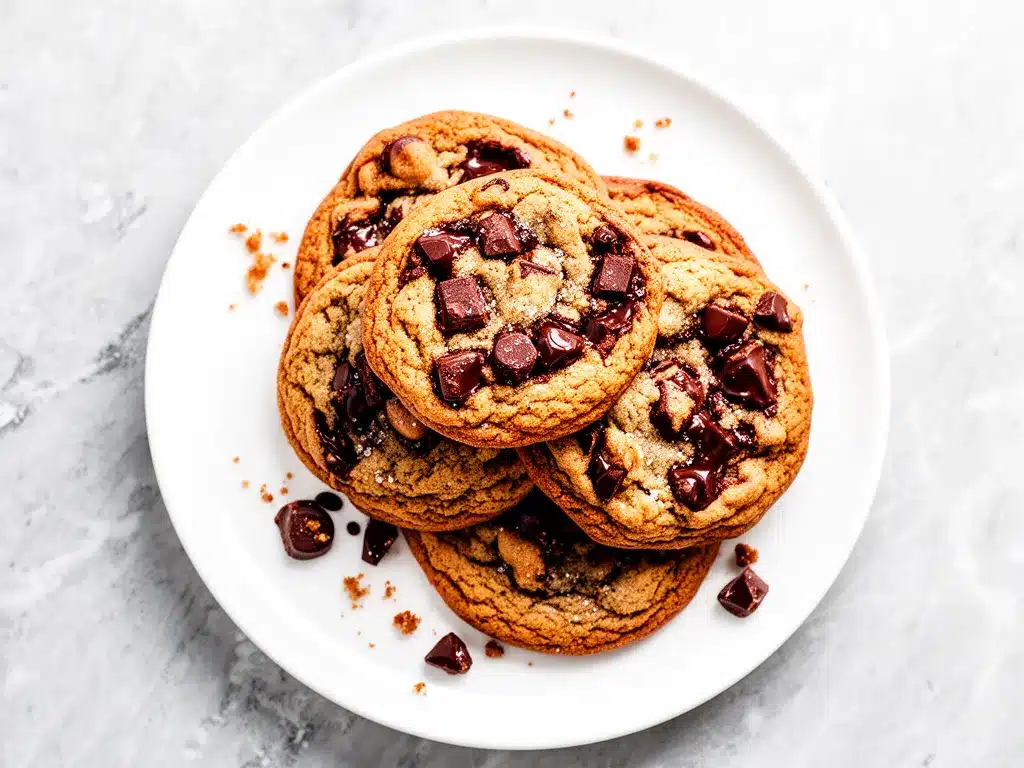
Alright, let’s get baking. I’m walking you through exactly how I make these bakery-style chocolate chunk cookies with thick gooey centers—including the little tricks I’ve learned.
Step 1: Cream the Butter and Sugars (5 minutes)
Start by beating the softened butter with the brown and granulated sugars until light and fluffy. This usually takes about 3-5 minutes with a mixer on medium speed. The mixture should look pale and airy—this is what gives the cookies their tender crumb and slight chewiness. I’ve burnt batches here by not creaming long enough, so don’t rush.
Step 2: Add Egg and Vanilla (2 minutes)
Crack in the egg and pour in the vanilla extract, then beat until fully combined. The batter will look shiny and well mixed. If you’re using room temperature egg, it blends better and helps the dough come together smoothly.
Step 3: Mix Dry Ingredients Separately (2 minutes)
In another bowl, whisk together the all-purpose flour, baking soda, and salt. This ensures the leavening agent and salt are evenly distributed. Sifting the flour here helps avoid clumps.
Step 4: Combine Wet and Dry Ingredients (2-3 minutes)
Slowly add the dry ingredients to the wet mixture, mixing just until you don’t see any flour. Be careful not to overmix—overworking the dough can lead to tough cookies. The dough will be thick and slightly sticky.
Step 5: Fold in Chocolate Chunks (1-2 minutes)
Gently fold in the chocolate chunks with a spatula. You want to keep those big pockets of chocolate intact because they melt into gooey centers. If you chop your own chocolate, aim for irregular chunks for a rustic effect.
Step 6: Chill the Dough (30 minutes to 1 hour)
This step is a game-changer. I know it’s tempting to skip, but chilling the dough helps control spreading and deepens the flavor. I usually cover the bowl with plastic wrap and let it rest in the fridge. If you’re short on time, 30 minutes is good; for even thicker cookies, go for an hour.
Step 7: Scoop and Bake (12-14 minutes)
Preheat your oven to 350°F (175°C). Line your baking sheets with parchment paper or silicone mats. Use a 2-tablespoon cookie scoop to portion the dough onto the sheets, spacing them about 2 inches apart. I like to gently press extra chocolate chunks on top of the dough balls for that bakery look.
Bake for 12-14 minutes. The edges should be golden brown, but the centers will still look soft and slightly underbaked. This is exactly what you want for those thick, gooey centers.
Step 8: Cool and Enjoy (10 minutes)
Let the cookies cool on the baking sheet for 5 minutes before transferring to a wire rack. They continue to set but stay soft and luscious inside. Resist the urge to eat them too hot or you’ll burn your tongue—but honestly, who can wait?
Expert Tips & Tricks
- Use Chilled Dough — I learned this the hard way. Cookies spread too much without chilling.
- Don’t Overmix — Once you add flour, mix just until combined. Overmixing makes them cakey instead of chewy.
- Chunky Chocolate > Chips — Chunks melt better and create gooey pockets. I often chop up a 70% dark chocolate bar.
- Flaky Sea Salt on Top — Adds a surprising salty crunch that makes the chocolate pop.
- Watch the Baking Time — Pull out the cookies just when edges are golden but centers look soft. They’ll firm up as they cool.
- Storage — Store in an airtight container at room temperature for up to 4 days. I like adding a slice of bread inside the container to keep them soft.
Variations & Substitutions
Once you’ve nailed the classic version, here are some fun ways to mix it up:
- Nutty Twist — Add 1 cup chopped toasted pecans or walnuts for crunch.
- Double Chocolate — Add ¼ cup unsweetened cocoa powder to the dry ingredients for a chocolate cookie base.
- Sea Salt & Caramel — Drizzle caramel sauce over warm cookies and sprinkle with flaky salt.
- Peanut Butter Chocolate Chunk — Swap ½ cup of butter for peanut butter for a nutty flavor.
- Gluten-Free — Use a 1:1 gluten-free flour blend. I’ve used Bob’s Red Mill with good results.
- Dairy-Free — Use vegan butter and dairy-free chocolate chunks. The texture changes slightly but still delicious.
Serving & Storage
I usually serve these cookies warm with a glass of cold milk—classic combo. But they’re also fantastic alongside coffee or a scoop of vanilla ice cream for dessert.
Storage: Keep cookies in an airtight container at room temperature for up to 4 days. If they start to dry out, pop them in the microwave for 10 seconds to revive that gooey goodness.
Freezing: You can freeze the dough balls on a baking sheet, then transfer to a freezer bag. Bake from frozen, adding 2-3 extra minutes to the baking time. Fresh-baked cookies whenever you want!
Nutrition Information
| Nutrient | Per Serving (1 cookie, makes about 24) |
|---|---|
| Calories | 220 |
| Protein | 3g |
| Carbohydrates | 27g |
| Fat | 11g |
| Saturated Fat | 6g |
| Sugar | 17g |
| Fiber | 1g |
| Sodium | 120mg |
This isn’t a diet cookie, but it’s made with real ingredients and no preservatives. Plus, a homemade cookie always feels better than store-bought.
Final Thoughts
So that’s my tried-and-true recipe for bakery-style chocolate chunk cookies with thick gooey centers. I’ve probably told you more than you wanted to know, but when you bake these, you’ll understand why I’m so passionate. They’ve saved my sweet tooth and impressed every guest who’s tried them.
Remember, the best part about this recipe is making it your own. Add more chocolate, mix in nuts, or sprinkle sea salt if you want. Just don’t forget to chill the dough—it’s the secret to those perfect thick cookies.
If you give this recipe a go, leave a comment below and tell me how it turned out! Or if you ran into any hiccups, I’m here to help troubleshoot. Happy baking, and I hope your kitchen smells just as amazing as mine does right now.
Frequently Asked Questions
Can I use chocolate chips instead of chunks?
You can, but chocolate chunks melt more irregularly and create those gooey pockets I love. Chips tend to keep their shape and don’t offer quite the same melty texture. That said, chips still make delicious cookies if that’s what you have on hand.
Why are my cookies spreading too much?
Most likely, your dough wasn’t chilled long enough or your oven temperature is too low. Chilling firms up the dough and helps cookies hold their shape. Also, make sure your baking soda is fresh and your oven is fully preheated.
Can I make the dough ahead and freeze it?
Yes! Scoop the dough onto a baking sheet, freeze until solid, then transfer to a freezer bag. When you want cookies, bake straight from frozen, adding a couple of minutes to the bake time. Fresh cookies whenever you want—game changer.
How do I keep the centers gooey without underbaking?
Look for golden edges but soft, slightly underdone centers. The cookies continue to cook on the hot baking sheet after you take them out. If you bake until the center is firm, the gooey texture disappears.
Can I substitute butter with margarine or oil?
Butter is key here for texture and flavor. Margarine or oil can make cookies greasy or flat. If you must substitute, use a high-quality margarine and expect a slightly different texture.
My cookies came out cakey, not chewy. What happened?
Overmixing the dough after adding flour can develop gluten and lead to cakey cookies. Mix just until combined. Also, too much baking soda or baking powder can cause cakey texture. Stick to the recipe measurements.
Can I add nuts or other mix-ins?
Absolutely! Chopped walnuts, pecans, or even dried cherries work great. Just fold them in with the chocolate chunks before chilling the dough.
Pin This Recipe!
Bakery-Style Chocolate Chunk Cookies Recipe Easy Thick Gooey Centers
- Total Time: 45-55 minutes
- Yield: About 24 cookies 1x
Description
These bakery-style chocolate chunk cookies feature thick, gooey centers with crispy edges and a soft, cakey middle. Made with simple pantry staples and quality chocolate chunks, they deliver a cozy, indulgent treat perfect for sharing.
Ingredients
- 1 cup (227g) unsalted butter, slightly softened but still cool
- 3/4 cup packed (150g) light brown sugar
- 1/4 cup (50g) granulated sugar
- 1 large egg, room temperature
- 2 teaspoons vanilla extract
- 2 1/4 cups (280g) all-purpose flour, sifted
- 1 teaspoon baking soda
- 1 teaspoon salt
- 12 oz (340g) chocolate chunks (mix of bittersweet and milk chocolate preferred)
- Optional: flaky sea salt for sprinkling on top before baking
Instructions
- Cream the softened butter with brown and granulated sugars until light and fluffy, about 3-5 minutes using a mixer on medium speed.
- Add the egg and vanilla extract, then beat until fully combined and shiny.
- In a separate bowl, whisk together the sifted all-purpose flour, baking soda, and salt.
- Slowly add the dry ingredients to the wet mixture, mixing just until no flour is visible. Avoid overmixing.
- Gently fold in the chocolate chunks with a spatula, keeping the chunks intact.
- Cover the dough and chill in the refrigerator for 30 minutes to 1 hour to control spreading and deepen flavor.
- Preheat oven to 350°F (175°C). Line baking sheets with parchment paper or silicone mats.
- Use a 2-tablespoon cookie scoop to portion dough onto sheets, spacing about 2 inches apart. Optionally press extra chocolate chunks on top.
- Bake for 12-14 minutes until edges are golden brown but centers look soft and slightly underbaked.
- Let cookies cool on the baking sheet for 5 minutes before transferring to a wire rack to finish setting.
Notes
Chilling the dough is essential to prevent spreading and to deepen flavor. Avoid overmixing after adding flour to keep cookies tender and chewy. Use chocolate chunks instead of chips for gooey pockets. Optionally sprinkle flaky sea salt on top before baking for a gourmet touch. Store cookies in an airtight container at room temperature for up to 4 days; add a slice of bread to keep them soft. Dough can be frozen and baked from frozen with an additional 2-3 minutes baking time.
- Prep Time: 15 minutes
- Cook Time: 12-14 minutes
- Category: Dessert
- Cuisine: American
Nutrition
- Serving Size: 1 cookie
- Calories: 220
- Sugar: 17
- Sodium: 120
- Fat: 11
- Saturated Fat: 6
- Carbohydrates: 27
- Fiber: 1
- Protein: 3
Keywords: chocolate chunk cookies, bakery-style cookies, thick cookies, gooey cookies, chocolate cookies, easy cookie recipe, homemade cookies



