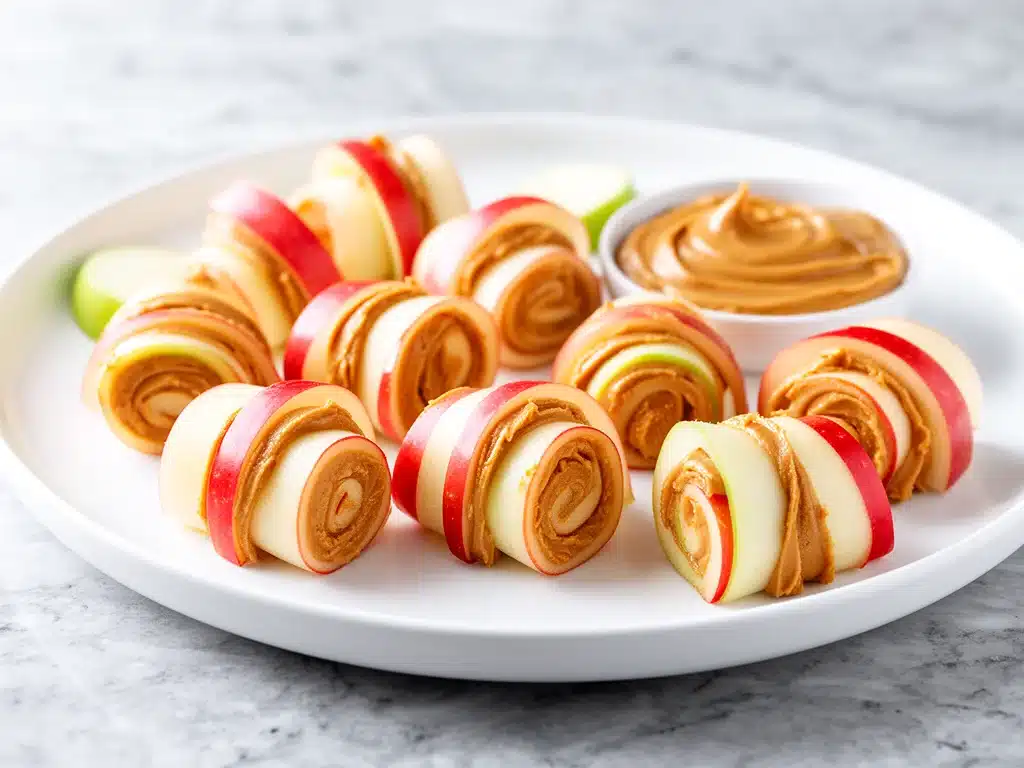
Last September, right when the school buzz started, I found myself scrambling for quick, fun lunch ideas that didn’t involve the usual peanut butter and jelly sandwich my kids were already tired of. One evening, while prepping snacks, I realized my daughter had been eyeing my sushi rolls more than her homework. That’s when I decided to get creative and turned her favorite peanut butter sandwich into a playful, bite-sized sushi roll—yes, sushi made with apples and peanut butter!
This Back-to-School Apple Peanut Butter Sandwich Sushi has since become a staple in our lunchbox rotation. It’s quick, a little bit unexpected, and surprisingly fun to make. Plus, it’s one of those rare recipes that even my pickiest eater asks for again and again. After testing this recipe multiple times (and yes, occasionally dropping a few rolls on the floor), I’ve nailed the perfect balance of sweet, crunchy, and creamy that makes this snack irresistible.
The best part? It uses simple ingredients you probably already have at home, and it’s a fantastic way to sneak some fruit into lunches without the usual boring apple slices. If you’re hunting for a fresh spin on school lunches or an after-school snack that actually feels special, keep reading. This recipe is about to become your secret weapon.
Why You’ll Love This Recipe
This Back-to-School Apple Peanut Butter Sandwich Sushi isn’t just cute—it’s genuinely delicious and practical. Here’s why it’s won a permanent spot in our kitchen:
- Kid-Approved Fun — My daughter’s friends have tried this and begged their parents to make it. If that’s not a seal of approval, I don’t know what is.
- Nutritious Twist — You get protein from the peanut butter and fiber plus crunch from the apples. It’s a snack that feels indulgent but actually fuels energy.
- Super Simple Prep — No fancy tools or ingredients. If you can slice an apple and spread peanut butter, you’re halfway there.
- Customizable — Allergic to peanuts? Swap in sunflower seed butter. Want more texture? Add granola or raisins inside. I’ll share all my favorite variations below.
- Perfect for On-the-Go — I pack these in my kids’ lunchboxes all the time. They hold up well and don’t get soggy like traditional sandwiches.
- Eye-Catching — Let’s be real: the sushi roll shape makes it way more exciting to eat than a boring sandwich. And it’s an easy conversation starter around the lunch table.
Honestly, this recipe has saved me on countless rushed mornings and kept snack time fun through the chaos of back-to-school season. If you’re looking to surprise your kids (and yourself) with something fresh and crave-worthy, this is it.
Ingredients You’ll Need
Here’s the cool part: you probably have most of these ingredients already sitting in your pantry or fridge. I’m picky about a few things, like the apples and the peanut butter, so I’ll explain my favorites below.
- Apples (2 large, medium-firm like Fuji or Honeycrisp) — I prefer these because they’re sweet, crunchy, and hold up well when sliced thin. Granny Smiths are great if you like a tart kick.
- Peanut butter
- Honey
- Granola
- Raisins or dried cranberries
- Chia seeds
- Cinnamon
- Lemon juice
Pro tip: Choose apples that feel dense and heavy for their size. That means they’re juicy and fresh, perfect for this recipe.
Equipment Needed
You don’t need fancy kitchen gadgets for this. Here’s what I actually use every time:
- Sharp knife — A must for thin, even apple slices. Dull knives make this harder (and more dangerous!).
- Cutting board — Any size works; I use a medium wooden one for grip.
- Spoon or small spatula — For spreading peanut butter evenly.
- Mixing bowl — To toss apple slices with lemon juice and cinnamon.
- Plastic wrap or parchment paper — Helps roll the sushi tightly and keeps it together.
- Optional: Mandoline slicer — If you want perfect thin apple slices fast, but a sharp knife works just fine.
If you don’t have a mandoline, just take your time with the knife. I’ve made this hundreds of times with nothing but a trusty chef’s knife and patience.
How to Make It: Step-by-Step
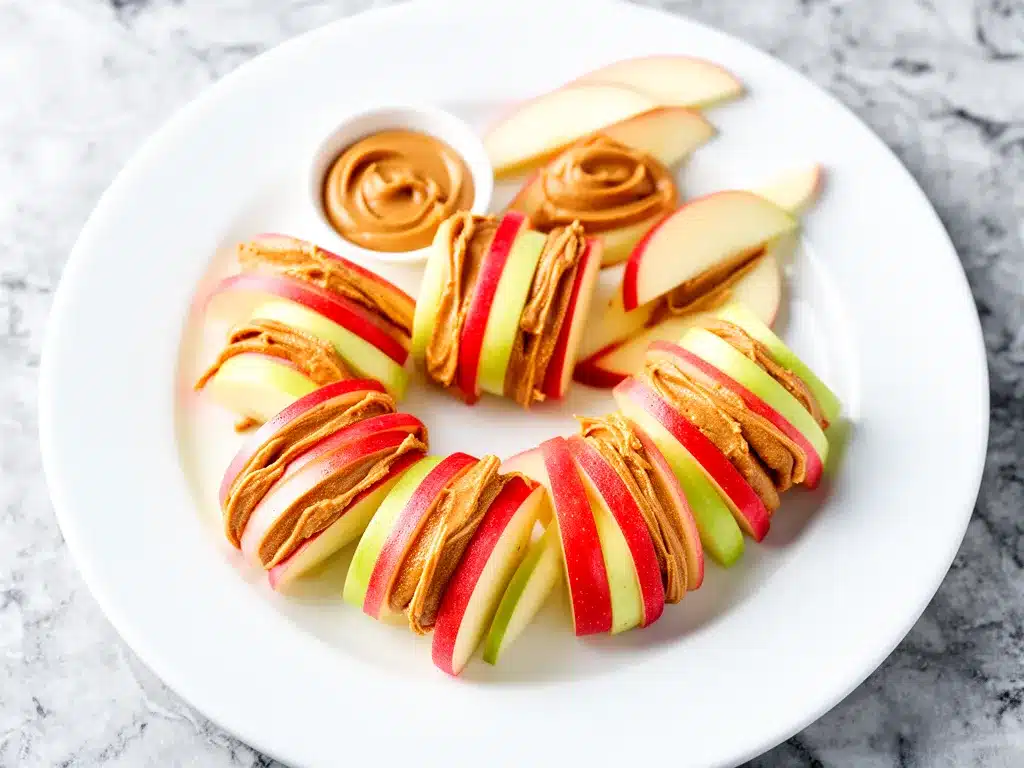
Alright, let’s make this! I’m walking you through exactly how I do it, including little tricks I’ve picked up to keep the rolls neat and tasty.
Step 1: Prep the Apples (5 minutes)
Core your apples and slice them lengthwise into thin, even pieces—about ⅛ inch thick. Toss the slices in a bowl with lemon juice and a sprinkle of cinnamon to keep them fresh and add flavor. Set aside.
Step 2: Lay Out Your Rolling Surface (2 minutes)
Place a large sheet of plastic wrap or parchment paper on your countertop. This will help you roll the sushi tightly and keep it from sticking.
Step 3: Build Your Peanut Butter Base (3 minutes)
Spread a thin, even layer of peanut butter across the plastic wrap, roughly in a 6×8 inch rectangle. The peanut butter acts like the “rice” in sushi, holding everything together.
Step 4: Add Your Crunch and Sweetness (2 minutes)
Sprinkle granola evenly over the peanut butter, then scatter raisins or dried cranberries and chia seeds if using. Drizzle with honey for a touch of extra sweetness.
Step 5: Layer the Apple Slices (3 minutes)
Arrange the apple slices in a single layer on top of the granola and peanut butter. Slightly overlap the slices so they create a continuous surface. This will be the “seaweed” wrap of your sushi.
Step 6: Roll It Up (3 minutes)
Starting from one short end, carefully roll the plastic wrap and apple slices over the peanut butter and granola, keeping it tight but gentle so the apples don’t break. Use the plastic wrap to help compress and shape the roll.
Step 7: Chill and Slice (10 minutes)
Place the roll in the fridge for 10 minutes to firm up. Then, unwrap and use a sharp knife to slice the roll into bite-sized sushi pieces, about 1-inch thick. Wipe your knife clean between cuts to keep the slices neat.
Step 8: Serve and Enjoy!
Arrange the sushi rolls on a plate and watch them disappear. They’re perfect for lunchboxes, snacks, or a fun brunch addition.
Expert Tips & Tricks
- Use crisp apples: Softer apples get mushy when rolled. I learned this the hard way with a batch that turned into a sticky mess.
- Don’t overfill the peanut butter: A thin layer is enough. Too much makes rolling tricky and the sushi falls apart.
- Chill before slicing: This step is crucial. Cold rolls slice cleanly and don’t squish.
- Keep your knife wet: Dip your knife in warm water and wipe between cuts for cleaner slices.
- Customize the filling: Swap granola for crushed nuts or seeds. Add shredded coconut for a tropical twist.
- Make it nut-free: Use sunflower seed or soy nut butter to avoid peanuts entirely.
Common mistake: Trying to slice the roll immediately after rolling. It’s tempting, but waiting those 10 minutes in the fridge makes a world of difference.
Variations & Substitutions
Once you’ve nailed the basic Apple Peanut Butter Sandwich Sushi, feel free to get creative. I’ve tried these variations with great success:
- Banana and Nut Butter: Swap apples for thin banana slices. Use almond butter for a different flavor.
- Apple and Cream Cheese: Spread cream cheese under the peanut butter layer for a tangy surprise.
- Chocolate Drizzle: Drizzle melted dark chocolate over the sushi slices for dessert-style fun.
- Vegan Version: Use maple syrup instead of honey and sunflower seed butter in place of peanut butter.
- Extra Crunch: Add crushed pretzels or toasted coconut flakes inside for texture.
- Spiced Up: Add a pinch of cayenne pepper inside the peanut butter for a subtle kick.
These variations keep the snack fresh and let you tailor it to your family’s tastes or dietary needs.
Serving & Storage
This recipe is best enjoyed fresh but also keeps well for lunchboxes or snacks:
- Serving: Arrange on a small platter or pack in individual containers for grab-and-go lunches. They pair beautifully with a crisp green salad or a handful of baby carrots.
- Storage: Store leftovers in an airtight container in the fridge for up to 2 days. The apples stay crisp longer than you’d expect because of the lemon juice.
- Reheating: These are best cold or at room temperature. Heating makes the apples mushy and the peanut butter runny.
Pro tip: If packing for school, wrap each sushi roll tightly in plastic wrap to keep them fresh and prevent sticking.
Nutrition Information
I’m not a nutritionist, but here’s a rough idea per serving (makes about 12 sushi pieces):
| Calories | 150 |
|---|---|
| Protein | 5g |
| Carbohydrates | 20g |
| Fiber | 3g |
| Sugar | 12g |
| Fat | 7g |
| Saturated Fat | 1g |
| Cholesterol | 0mg |
| Sodium | 80mg |
| Calcium | 20mg |
This snack offers a nice balance of protein and fiber to keep kids energized through the school day. The natural sugars come from fruit and honey, so it’s a sweet treat without refined sugars.
Final Thoughts
So that’s my go-to Back-to-School Apple Peanut Butter Sandwich Sushi recipe! I’ve probably talked your ear off by now, but when you find a snack that makes mornings less chaotic and lunches more fun, you kind of have to share all the details.
This recipe has saved me on those frantic school mornings more times than I can count. It’s quick enough to whip up in under 20 minutes, healthy enough to feel good about, and creative enough to get the kids excited about eating their fruit. Plus, it’s a little bit fancy without being complicated—just the way I like it.
Make it yours! Add your favorite nuts, try different fruits, or sneak in extra seeds. And hey, if you want to switch things up, pair it with a refreshing smoothie or pack it alongside some crunchy veggies for a balanced meal.
If you make this, please drop a comment and let me know how it turned out! I love hearing what tweaks people make or what surprised them about this fun little sushi twist. And if something doesn’t go as planned, tell me that too—I’m here to help you troubleshoot.
Happy rolling! I hope your kitchen smells as sweet and nutty as mine does right now.
Frequently Asked Questions
Q: Can I use other fruits instead of apples?
A: Absolutely! Pears, mangoes, or even thinly sliced strawberries can work. Just make sure the slices aren’t too soft or juicy, or the roll might get soggy.
Q: What if my kids are allergic to peanuts?
A: No problem. Sunflower seed butter or soy nut butter make great substitutes. They have a similar texture and taste but are allergy-friendly.
Q: How do I keep the apple slices from browning?
A: Tossing them in a little lemon juice right after slicing does the trick. It also adds a subtle brightness that complements the peanut butter.
Q: Can I make the sushi rolls ahead of time?
A: You can prepare them up to a day ahead and store in an airtight container in the fridge. Just slice them before serving to keep the edges fresh.
Q: My roll fell apart when I sliced it. What did I do wrong?
A: Most likely, you didn’t chill it long enough before slicing or used too much peanut butter. Make sure to refrigerate for at least 10 minutes and keep the peanut butter layer thin.
Q: Can I use crunchy peanut butter?
A: Yes! Crunchy peanut butter adds extra texture, which some people love. Just spread it gently so you don’t tear the apple slices.
Q: What’s the best way to slice the roll evenly?
A: Use a sharp knife dipped in warm water and wiped clean between cuts. This helps you get smooth, clean slices without dragging or squishing the roll.
Pin This Recipe!

Back-to-School Apple Peanut Butter Sandwich Sushi
- Total Time: 25 minutes
- Yield: 12 sushi pieces 1x
Description
A fun and nutritious twist on the classic peanut butter sandwich, made with thin apple slices rolled with peanut butter and crunchy granola, perfect for quick lunches or snacks.
Ingredients
- 2 large medium-firm apples (Fuji or Honeycrisp preferred)
- ½ cup (about 120g) peanut butter (smooth or chunky, natural preferred)
- 1 tablespoon (15ml) honey (optional)
- ½ cup (50g) granola
- ¼ cup (40g) raisins or dried cranberries (optional)
- 1 tablespoon (10g) chia seeds (optional)
- ½ teaspoon cinnamon
- 1 teaspoon (5ml) lemon juice
Instructions
- Core the apples and slice them lengthwise into thin, even pieces about 1/8 inch thick.
- Toss the apple slices in a mixing bowl with lemon juice and cinnamon to keep them fresh and flavorful.
- Lay a large sheet of plastic wrap or parchment paper on your countertop for rolling.
- Spread a thin, even layer of peanut butter across the plastic wrap in a 6×8 inch rectangle.
- Sprinkle granola evenly over the peanut butter, then scatter raisins or dried cranberries and chia seeds if using. Drizzle with honey if desired.
- Arrange the apple slices in a single overlapping layer on top of the granola and peanut butter.
- Starting from one short end, carefully roll the plastic wrap and apple slices over the peanut butter and granola, keeping it tight but gentle.
- Place the roll in the fridge for 10 minutes to firm up.
- Unwrap and use a sharp knife dipped in warm water to slice the roll into 1-inch thick bite-sized sushi pieces, wiping the knife clean between cuts.
- Arrange the sushi rolls on a plate and serve.
Notes
Use crisp apples like Fuji or Honeycrisp to avoid mushy rolls. Keep the peanut butter layer thin to make rolling easier. Chill the roll before slicing for clean cuts. Dip your knife in warm water and wipe between cuts to prevent squishing. Substitute sunflower seed butter for nut-free option.
- Prep Time: 15 minutes
- Cook Time: 0 minutes
- Category: Snack
- Cuisine: American
Nutrition
- Serving Size: 1 sushi piece
- Calories: 150
- Sugar: 12
- Sodium: 80
- Fat: 7
- Saturated Fat: 1
- Carbohydrates: 20
- Fiber: 3
- Protein: 5
Keywords: apple peanut butter sandwich, sushi snack, back to school lunch, healthy kids snack, peanut butter sushi, apple snack, easy lunch ideas



