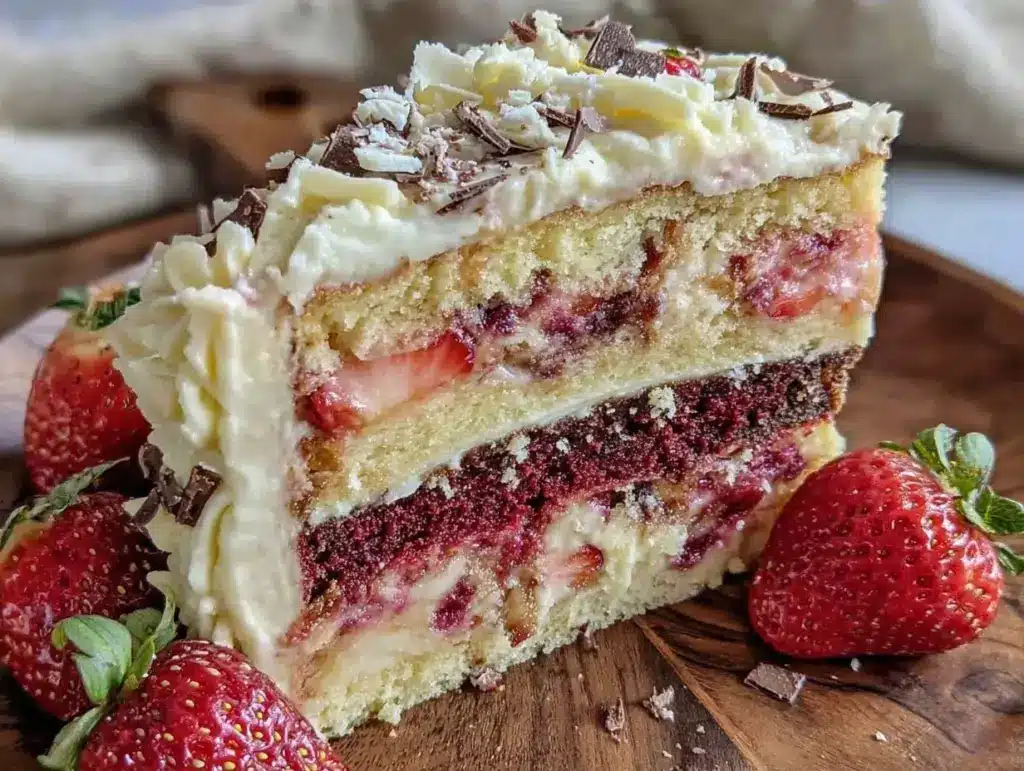
I still remember the first time I truly understood what “neapolitan” meant. It wasn’t about the ice cream bars—though those were a staple in our freezer. It was about that singular, magical moment in third grade when my teacher handed out little slices of a layered cake at a birthday party. Three distinct colors. Three distinct flavors. All sitting on one plate, waiting to be mixed together.
That cake was dry. The frosting was too sweet. The layers were thin and uneven. But the *idea* of it? The idea that you could have vanilla, strawberry, and chocolate in one bite? It stuck with me. It’s one of those childhood memories that lives in your bones, right alongside the smell of crayons and the sound of recess bells.
Fast forward twenty years, and I’m standing in my kitchen, flour on my nose, staring at three separate cake pans. I’ve spent the last month tweaking this Neapolitan Layer Cake recipe. I wanted to capture that nostalgic magic but fix everything that was wrong with that third-grade slice. I wanted moist, tender crumb. I wanted a buttercream that wasn’t cloyingly sweet, but creamy and balanced. I wanted the strawberry to taste like actual strawberries, not red dye #4.
After about eight failed attempts (yes, eight. My husband started hiding the cake scraps in the neighbor’s trash can), I finally nailed it. This is the recipe I make for birthdays, for holidays, and honestly, just because I crave that tri-color perfection. It’s a showstopper, sure. But it’s also just really, really good cake.
So, let’s talk about why this Neapolitan Layer Cake is about to become your new favorite baking project. And don’t worry if you’ve never baked a layered cake before. I’ll walk you through every step. I’ve even included some tricks I learned the hard way so you don’t have to.
Why You’ll Love This Neapolitan Layer Cake
There are a million cake recipes out there. Why this one? Because it hits all the right notes. It’s nostalgic without being boring. It’s complex enough to impress, but simple enough to make on a Saturday afternoon. Here’s why I keep coming back to this Neapolitan Layer Cake:
- Three Flavors, One Cake — You get the comfort of vanilla, the tart brightness of strawberry, and the rich depth of chocolate. It’s like getting three desserts for the price of one. I love that everyone at the table gets their favorite flavor, but you can also mix them for the ultimate experience.
- Stunning Visuals — Let’s be real. We eat with our eyes first. A three-layer cake with distinct stripes of pink, white, and brown? It’s gorgeous. I’ve served this at potlucks and watched people do a double-take before they even take a bite. It looks like you spent hours on it, but it’s actually pretty straightforward.
- Customizable Frosting — The buttercream is the glue that holds this whole thing together (literally and figuratively). You can make it all one color, or you can split it up to match the layers. I usually keep it white or light pink so the cake layers shine. It’s rich, creamy, and not overly sweet.
- Perfect for Celebrations — Whether it’s a birthday, an anniversary, or just a Tuesday, this cake feels special. It’s versatile enough for a formal dinner party but fun enough for a backyard BBQ. It pairs beautifully with a simple afternoon tea or a glass of cold milk.
- Make-Ahead Friendly — Here’s the secret to stress-free baking: you can make the layers a day ahead. Wrap them tightly and freeze them. Then, when it’s time to assemble, you just thaw and frost. It actually tastes better after resting overnight, as the flavors meld together.
This isn’t just a cake; it’s a memory maker. It’s the kind of dessert that gets people talking. “How did you make this?” “Is that real strawberry?” “Can I have another slice?” (Yes, you can.)
Ingredients You’ll Need
Before we get to the mixing bowls, let’s talk about what you need. I’m keeping this list relatively standard, but the quality of your ingredients matters, especially for something as delicate as a layered cake. You want fresh, good-quality stuff.
For the Vanilla, Strawberry, and Chocolate Cake Layers:
All-purpose flour (3 cups / 375g) — This is your base. Don’t use cake flour unless you want to adjust the liquid. All-purpose gives that perfect tender crumb. Sift it if it’s lumpy.
Granulated sugar (1 ½ cups / 300g) — Yes, that’s a lot. But sugar isn’t just for sweetness; it keeps the cake moist. Don’t reduce it too much or the cake will be dry. I use regular white sugar here.
Unsalted butter (1 cup / 226g, softened) — This is crucial. Softened means room temperature. If you press your finger into it, it should leave an indent. Cold butter won’t cream properly with the sugar. I always use salted butter if I’m in a hurry, but unsalted lets you control the salt level.
Large eggs (4 large, room temperature) — Room temp eggs emulsify better. If you forget, just drop them in a bowl of warm water for 5 minutes. Cold eggs can cause your batter to curdle.
Vanilla extract (2 teaspoons) — Use real vanilla, not imitation. It makes a huge difference in the vanilla layer. For the chocolate and strawberry layers, you’ll adjust this.
Baking powder (1 ½ teaspoons) and baking soda (½ teaspoon) — These are your leavening agents. Make sure they’re not expired. Old baking powder = flat cake. I check mine every few months.
Salt (1 teaspoon) — Enhances all the flavors. Don’t skip it.
Whole milk (1 ½ cups / 360ml) — Room temperature is best again. Buttermilk works too and adds tang, but whole milk keeps it classic.
For the Strawberry Layer:
Strawberry jam or preserves (¼ cup) — I use a high-quality strawberry jam with real fruit pieces. It gives a more intense flavor than extract. If you can’t find good jam, you can use freeze-dried strawberries ground into a powder, but jam is easier.
Red food coloring (gel preferred) — Gel coloring is more potent and doesn’t add extra liquid. Liquid coloring can throw off your batter consistency. Just a few drops is usually enough.
For the Chocolate Layer:
Unsweetened cocoa powder (⅓ cup) — Use good quality cocoa. Hershey’s is fine, but Dutch-process cocoa gives a deeper, darker color and richer flavor. I prefer Dutch-process for this.
Hot coffee or hot water (½ cup) — This is the secret weapon. Hot liquid “blooms” the cocoa powder, intensifying the chocolate flavor. You won’t taste the coffee; it just makes the chocolate taste more like chocolate. If you’re avoiding caffeine, hot water works too.
For the Vanilla Strawberry Chocolate Buttercream:
Unsalted butter (2 cups / 454g, softened) — Again, room temperature is key. Soft, pliable butter.
Confectioners’ sugar (6-7 cups / 750g-875g) — Sift this! Lumpy sugar in frosting is a nightmare. You’ll need about 6 cups for a standard consistency, 7 cups if you want it stiffer for piping.
Heavy cream (3-4 tablespoons) — Helps thin the frosting to a pipeable consistency.
Vanilla extract (2 teaspoons) — For the base flavor.
Powdered milk or strawberry powder (optional) — For extra flavor boost in the colored frostings.
Food coloring (gel) — Pink for the strawberry, brown/black for chocolate.
Equipment Needed
You don’t need a fancy kitchen, but you do need the right tools. Here’s what I use:
Three 8-inch round cake pans — I use metal pans. Glass or dark pans can over-bake the edges. Grease and line the bottoms with parchment paper. This is non-negotiable if you want clean layers.
Electric mixer — Hand mixer or stand mixer. Creaming butter and sugar by hand is possible, but it’s an arm workout. I use my stand mixer on medium speed.
Measuring cups and spoons — For dry and wet ingredients. I prefer scooping and leveling for flour.
Sifting tool — A fine-mesh sieve or a sifter. Sifting flour and cocoa powder removes lumps and aerates them.
Offset spatula — Essential for spreading frosting evenly. A regular spatula works in a pinch, but an offset gives you better control.
Cake turntable — Optional but highly recommended. It makes frosting a multi-layer cake so much easier. If you don’t have one, just rotate the cake plate with your hands.
Wire rack — For cooling the cakes. You don’t want to frost warm cake; the buttercream will melt.
Parchment paper — For lining the pans. Trust me on this.
How to Make It: Step-by-Step
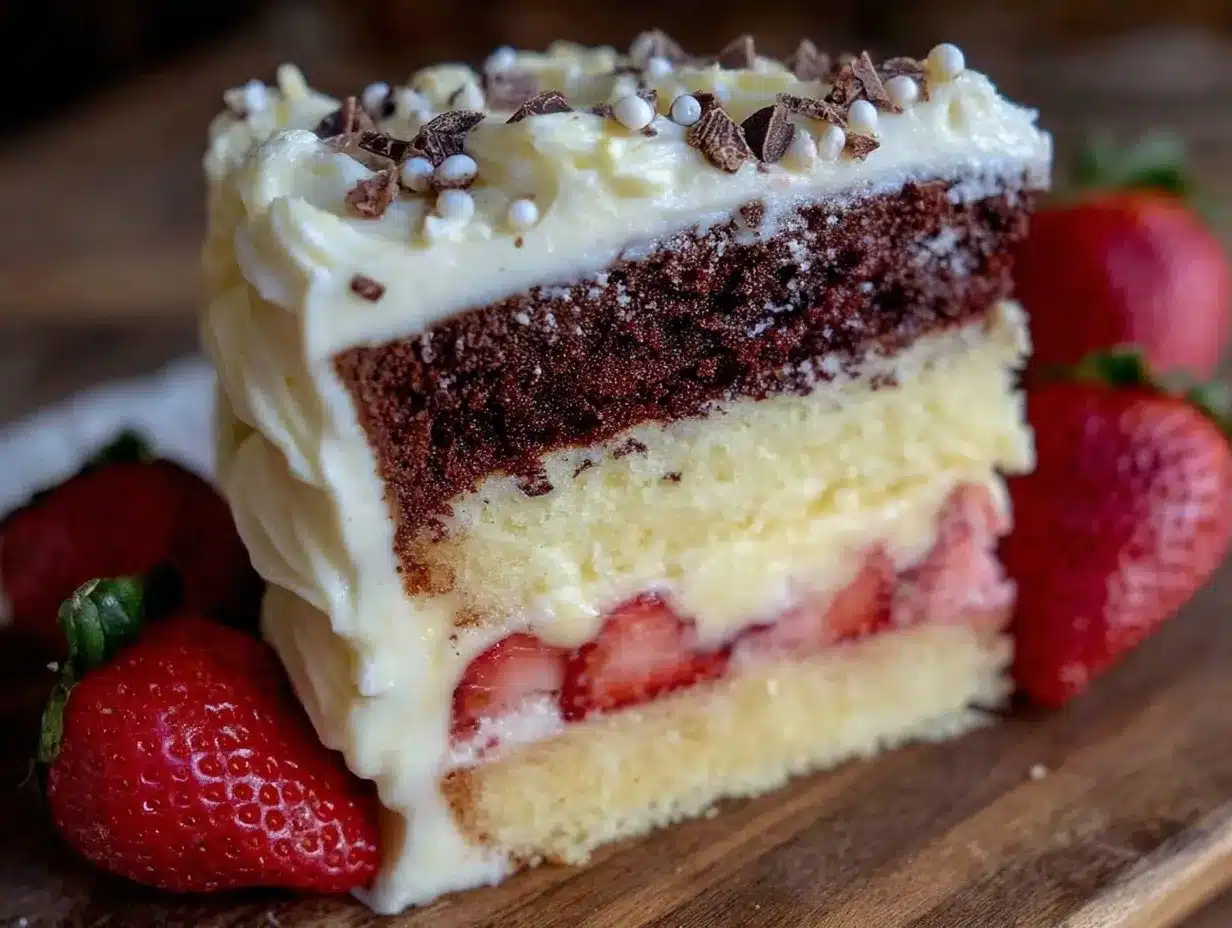
Alright, let’s bake! This process might seem long, but it’s mostly waiting time. Here’s how I do it.
Step 1: Prep Your Pans and Oven (10 minutes)
Preheat your oven to 350°F (175°C). Grease your three 8-inch cake pans with butter or non-stick spray. Line the bottoms with parchment circles. This ensures your cakes release easily. Dust with flour and tap out the excess. Set aside.
Step 2: Make the Vanilla Batter (10 minutes)
In a medium bowl, whisk together the flour, baking powder, baking soda, and salt. Set aside. In your mixer, beat the softened butter and sugar on medium-high speed for 3-4 minutes until light and fluffy. This is called “creaming,” and it’s crucial for texture. Scrape down the sides of the bowl. Add eggs one at a time, mixing well after each. Add vanilla. On low speed, alternate adding the dry ingredients and milk, beginning and ending with the dry ingredients. Mix until *just* combined. Do not overmix! Divide this batter evenly among three bowls? No, we’ll keep this plain vanilla for now.
Step 3: Create the Strawberry and Chocolate Batters (5 minutes)
Take one-third of the vanilla batter. Add the strawberry jam and a few drops of red gel food coloring. Mix until uniform. This is your strawberry batter. Take another third of the vanilla batter. Add the cocoa powder and hot coffee/water. Mix until smooth. This is your chocolate batter. You now have three distinct batters: vanilla, strawberry, and chocolate.
Step 4: Bake the Layers (25-30 minutes)
Divide each batter into one of your prepared pans. They should be roughly equal in volume. Bake for 25-30 minutes, or until a toothpick inserted into the center comes out clean. The cakes should spring back when lightly touched. Rotate pans halfway through for even baking.
Step 5: Cool Completely (1 hour)
Let the cakes cool in the pans for 10 minutes, then turn them out onto a wire rack to cool completely. This is the hardest part. If you try to frost warm cake, it will be a mess. Patience pays off.
Step 6: Make the Buttercream (15 minutes)
Beat the softened butter on medium-high speed until creamy and pale, about 3 minutes. Gradually add the sifted confectioners’ sugar, one cup at a time. Add vanilla and heavy cream. Beat on high for 3 minutes until fluffy. Divide the frosting into three bowls. Leave one white (vanilla). Add pink gel coloring to one. Add brown/black gel coloring to the third. Mix well.
Step 7: Assemble the Cake (20 minutes)
Place one cake layer on your serving plate. Spread a layer of frosting on top. Add the second layer. Spread frosting. Add the third layer. Apply a thin “crumb coat” of frosting over the entire cake to seal in crumbs. Chill for 15 minutes. Then, apply the final layer of frosting. You can smooth it out or leave it rustic. Decorate with fresh strawberries or chocolate shavings if you like.
Expert Tips & Tricks
Here’s everything I’ve learned from making this dozens of times. These tips will save you from my mistakes.
Room Temperature Ingredients — I can’t stress this enough. Cold eggs and butter won’t emulsify. Your batter will look curdled, and your cake will be dense. Take your ingredients out 1-2 hours before baking.
Don’t Overmix — Once you add the flour, mix until *just* combined. Overmixing develops gluten, which makes cake tough, not tender. It’s better to have a few small lumps than to mix it into submission.
Use Gel Food Coloring — Liquid food coloring adds too much water to your batter and frosting. Gel coloring is concentrated and keeps the texture perfect. It also gives more vibrant colors.
Level Your Cakes — Baked cakes often dome in the middle. Use a serrated knife to slice off the dome so your layers are flat. This makes assembly much easier and the cake look more professional.
Chill Between Layers — If your kitchen is warm, chill the cake layers in the fridge for 15 minutes before frosting. Cold cake is easier to handle and doesn’t crumble.
Variations & Substitutions
Once you’ve nailed the basic version, here’s how you can mix it up. I’ve tried all of these.
Gluten-Free — Use a 1:1 gluten-free flour blend. The texture might be slightly denser, but it still works. I’ve used Bob’s Red Mill and it’s fine.
Dairy-Free — Swap butter for vegan butter sticks (not tubs). Use almond or oat milk. The frosting might be slightly less stable, but it’s still delicious.
Strawberry Fresh — Instead of jam, fold in finely chopped fresh strawberries to the batter. Be careful, though; the extra moisture can affect the bake time. You might need to add 2-3 minutes to the baking time.
Chocolate Chip — Add semi-sweet chocolate chips to the chocolate batter for extra gooeyness.
Red Velvet Twist — Swap the cocoa powder for cocoa powder plus a bit more red coloring and a splash of vinegar/buttermilk for a red velvet vibe.
Serving & Storage
How to Serve: I usually serve this straight from the fridge, but let it sit at room temperature for 20 minutes before slicing. Cold frosting is hard; room temp frosting is creamy. Pair with a simple black tea or coffee.
Storage: Store leftovers in an airtight container at room temperature for up to 2 days. In the fridge for up to 5 days. The cake stays moist in the fridge.
Freezing: You can freeze the unfrosted cake layers for up to 3 months. Wrap tightly in plastic wrap and then foil. Thaw overnight in the fridge before frosting.
Nutrition Information
I’m not a nutritionist, but here’s the breakdown if you’re tracking. Per slice (based on 12 servings):
- Calories: 520
- Protein: 5g
- Carbs: 65g
- Fat: 28g
- Sugar: 45g
Look, this is a rich, indulgent cake. It’s not a health food. But it’s homemade, so you know what’s in it. When I want to make it lighter, I reduce the sugar in the frosting by half a cup and use less butter. But usually? I just enjoy a reasonable slice and savor the moment.
Final Thoughts
So that’s my go-to Neapolitan Layer Cake! I’ve probably talked your ear off at this point, but when you make a recipe this often, you have a lot to say about it. This cake has saved birthdays, celebrations, and random Tuesday cravings. It’s my answer to “I want something special” without the stress.
Make it yours! Try different frostings, add sprinkles, or serve it with fresh fruit. The best recipes are the ones you adapt. If you make this, drop a comment and let me know what you think! I love hearing how recipes turn out in your kitchen.
Frequently Asked Questions
Q: Can I use boxed cake mix for this?
A: You can, but the flavor won’t be as good. Boxed mixes often lack depth. If you’re short on time, you can use a high-quality boxed mix and enhance it with an extra egg and some sour cream, but from scratch is definitely better.
Q: Why did my cake layers dome so much?
A: Your oven might be too hot, or you filled the pans too full. Try using cake strips around the pans to insulate the edges, or reduce the oven temp by 25°F. Also, don’t fill pans more than 2/3 full.
Q: Can I make this a sheet cake?
A: Yes! Bake the batters in 9×13 pans and layer them. It’s easier for large gatherings. Just adjust the baking time slightly.
Q: Why is my frosting runny?
A: The butter was too warm. Put the frosting bowl in the fridge for 10 minutes, then beat it again. Or add more powdered sugar.
Q: Can I freeze the assembled cake?
A: It’s possible, but the texture of the frosting might change. It’s better to freeze the layers and frost after thawing.
Pin This Recipe!
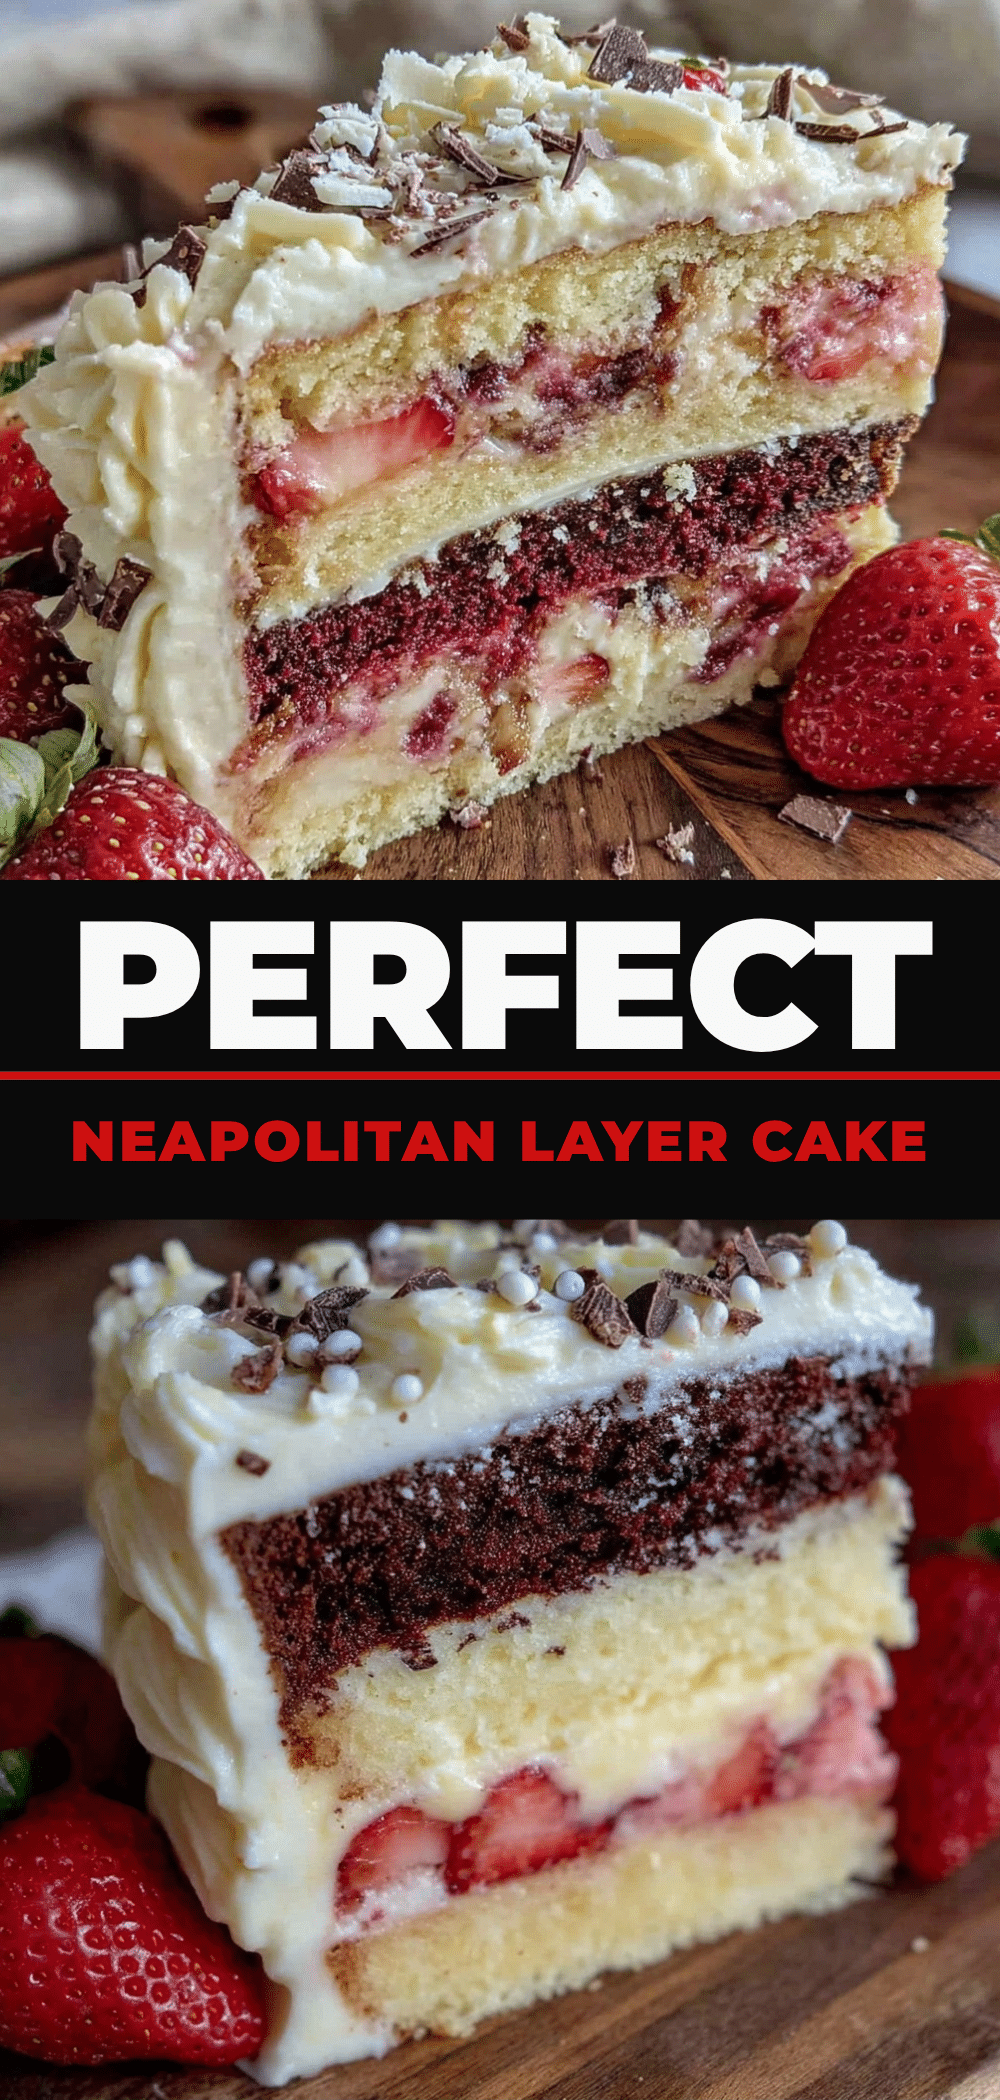
Neapolitan Layer Cake: 3-Flavor Vanilla Strawberry Chocolate Perfection
- Total Time: 1 hour 15 minutes
- Yield: 12 servings 1x
Description
A nostalgic three-layer cake featuring distinct vanilla, strawberry, and chocolate flavors with a creamy, balanced buttercream. This recipe fixes common issues like dryness and overly sweet frosting for a moist, tender crumb.
Ingredients
- 3 cups (375g) all-purpose flour
- 1 ½ cups (300g) granulated sugar
- 1 cup (226g) unsalted butter, softened
- 4 large eggs, room temperature
- 2 teaspoons vanilla extract
- 1 ½ teaspoons baking powder
- ½ teaspoon baking soda
- 1 teaspoon salt
- 1 ½ cups (360ml) whole milk, room temperature
- ¼ cup strawberry jam or preserves
- Red gel food coloring
- ⅓ cup unsweetened cocoa powder
- ½ cup hot coffee or hot water
- 2 cups (454g) unsalted butter, softened (for frosting)
- 6–7 cups (750g-875g) confectioners’ sugar, sifted
- 3–4 tablespoons heavy cream
- 2 teaspoons vanilla extract (for frosting)
- Pink and brown/black gel food coloring (for frosting)
Instructions
- Preheat oven to 350°F (175°C). Grease three 8-inch round cake pans and line bottoms with parchment paper.
- Whisk together flour, baking powder, baking soda, and salt in a medium bowl.
- In a mixer, beat softened butter and sugar on medium-high speed for 3-4 minutes until light and fluffy. Scrape down sides.
- Add eggs one at a time, mixing well after each. Add vanilla extract.
- On low speed, alternate adding dry ingredients and milk, beginning and ending with dry ingredients. Mix until just combined.
- Divide batter into three portions. Add strawberry jam and red gel coloring to one portion for the strawberry layer. Add cocoa powder and hot coffee/water to another portion for the chocolate layer. Keep the third portion plain vanilla.
- Divide each batter into a prepared pan. Bake for 25-30 minutes or until a toothpick comes out clean. Rotate pans halfway through.
- Let cakes cool in pans for 10 minutes, then turn out onto a wire rack to cool completely.
- For frosting, beat softened butter until creamy. Gradually add sifted confectioners’ sugar, vanilla, and heavy cream. Beat on high until fluffy.
- Divide frosting into three bowls. Leave one white, add pink coloring to one, and brown/black coloring to the third.
- Assemble cake by placing one layer on a plate, spreading frosting, adding the next layer, and repeating. Apply a thin crumb coat and chill for 15 minutes.
- Apply final layer of frosting and decorate as desired.
Notes
Ensure all ingredients are at room temperature for proper emulsification. Do not overmix the batter to avoid a tough texture. Use gel food coloring for vibrant colors without altering batter consistency. Cakes can be made ahead and frozen for up to 3 months.
- Prep Time: 45 minutes
- Cook Time: 30 minutes
- Category: Dessert
- Cuisine: American
Nutrition
- Serving Size: 1 slice
- Calories: 520
- Sugar: 45
- Sodium: 350
- Fat: 28
- Saturated Fat: 17
- Carbohydrates: 65
- Fiber: 2
- Protein: 5
Keywords: Neapolitan cake, layered cake, vanilla strawberry chocolate cake, birthday cake, homemade cake, three flavor cake



