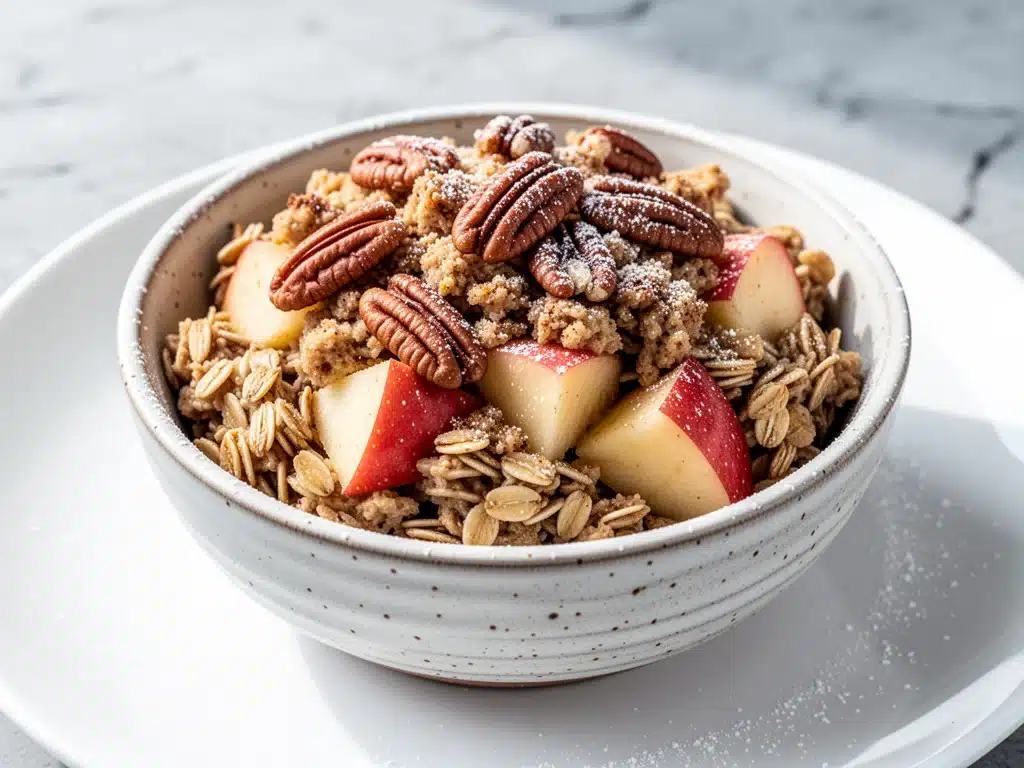
It’s 6:45 AM. The house is quiet, except for the aggressive ticking of the clock on the microwave. I’m standing in my pajamas, one hand clutching a cold cup of coffee, the other frantically digging through the pantry for something—anything—that isn’t a granola bar or stale cereal. My kids are still asleep, but I know the clock is ticking. If I don’t have breakfast on the table by 7:15, we’re rushing out the door, eating toast in the car, and starting the day with that familiar, low-grade panic.
This was my reality for about three years. I loved the idea of a slow, cozy morning. I wanted cinnamon rolls in bed. I wanted steaming mugs of tea. But reality usually looked like me burning my tongue on coffee and shoving a banana into my mouth while putting on my shoes.
Then came the Sunday before a particularly brutal week. I was exhausted. I didn’t want to cook, but I also didn’t want to feed my family processed garbage. So, I did what any desperate, sleep-deprived parent does: I threw oats, apples, cinnamon, and a little maple syrup into a baking dish and put it in the oven. I told myself, “If this works, I’m never rushing breakfast again. If it fails, we’re ordering pizza.”
At 7:00 AM, the smell woke me up. Not the smell of burnt toast or anxiety. It smelled like my grandmother’s kitchen. It smelled like October. I walked into the kitchen and saw this golden, bubbling dish sitting on the counter, steam rising off it. I cut a square. It was warm, soft, and tasted like dessert but felt like fuel. My kids devoured it. I didn’t have to rush. I had time to sit. I had time to actually see them before school.
That one lazy Sunday baking dish changed our mornings. It became my Fall Apple Cinnamon Baked Oatmeal. And honestly? It’s saved my sanity more times than I can count. It’s not just a recipe; it’s my secret weapon for turning chaotic mornings into peaceful ones. I’ve made this at least fifty times in the last two years, tweaking it until it’s perfect. And today, I’m sharing exactly how to make it so you can stop rushing and start enjoying your mornings.
Why You’ll Love This Make-Ahead Breakfast
Look, I get it. You’re busy. You have a million things on your plate. Adding “cook breakfast” to the list sounds exhausting. But here’s the thing about this baked oatmeal: it does the work for you. Mostly.
I’ve tested this recipe with everything from tart Granny Smith apples to sweet Fuji, and it always works. It’s reliable. It’s forgiving. And it tastes better than anything you’d buy at a cafe. Here’s why this Fall Apple Cinnamon Baked Oatmeal has earned a permanent spot in our weekly routine:
Zero Morning Stress — Seriously. The night before, you mix everything in a bowl. Ten minutes of active work. Then you let it sit in the fridge overnight. In the morning, you just pop it in the oven. While it bakes, you get the kids dressed, pack lunches, and maybe even read the news. It’s the ultimate low-effort, high-reward breakfast.
Tastes Like Comfort Food — This isn’t that dry, chalky oatmeal you might remember from college. This is soft, chewy, and incredibly moist. The apples soften into the oats, creating this natural sweetness. It’s like eating a deconstructed apple pie, but it’s actually good for you. My husband calls it “healthy apple crumble.” I don’t argue.
Perfect for Meal Prep — I make this on Sunday nights. It keeps in the fridge for up to five days. I just grab a slice, microwave it for 60 seconds, and go. It reheats beautifully. No more soggy leftovers or weird textures. It stays moist and flavorful all week long. It’s basically my answer to “what’s for breakfast?” when I’m tired.
Freezer-Friendly — Here’s a pro tip: I often double the recipe and freeze half. If I’m having a particularly rough week, I just pull a frozen square out, microwave it, and it’s like fresh. This recipe is my emergency backup plan. It’s always there when I need it.
Kid-Approved — My picky eater, who usually refuses anything with “oats” in the name, asks for this every morning. The cinnamon and apple flavor masks the healthy bits. If I can get my kids to eat breakfast without a fight, I consider it a victory. This recipe is a guaranteed win.
This is my go-to when I need dinner to just work. No complicated techniques, no weird ingredients, just reliable, delicious food that makes everyone happy.
Ingredients You’ll Need
Here’s the best part: you probably have most of this already. This isn’t a fancy recipe that requires a trip to three different specialty stores. It’s pantry staples and fresh fruit. I’m particular about three things here, and I’ll tell you exactly why.
Rolled Oats (3 cups / 270g) — Do not use instant oats. Do not use steel-cut oats. You need old-fashioned rolled oats. They have the right texture—they’ll soften but still hold their shape. If you use instant, you’ll get mush. If you use steel-cut, they’ll stay hard. Rolled oats are the sweet spot. I use Quaker brand because it’s consistent.
Milk (2 cups / 480ml) — I use whole milk for richness, but almond milk or oat milk works just fine if you’re dairy-free. The key is that it needs to be liquid enough to hydrate the oats overnight. If you’re using a thinner milk, you might want to add a splash more.
Eggs (2 large) — These are the binder. They hold everything together so you can cut squares and eat them with your hands. Don’t skip them. Two large eggs are perfect for this amount of oats.
Maple Syrup (½ cup / 120ml) — Real maple syrup, please. Not pancake syrup. The real stuff has that deep, caramel-like flavor that makes this taste like fall. If you’re out, honey works, but maple is traditional and tastes better here. I keep a bottle in the fridge just for this.
Apples (3 medium, peeled and diced) — This is the star. I love a mix of apples. Granny Smith for tartness, Honeycrisp for sweetness. If you only have one type, that’s fine. Just make sure they’re firm. Soft, mealy apples will turn into applesauce, which is delicious but changes the texture. I like distinct chunks of apple in every bite.
Cinnamon (2 teaspoons) — Don’t be shy. Cinnamon is what makes this smell amazing. If your cinnamon is old and dusty, toss it and buy new. Fresh cinnamon makes a huge difference. I use ground cinnamon, not sticks.
Baking Powder (1 teaspoon) — Just a little bit to help it rise slightly. You want it dense and chewy, not fluffy like a cake. This amount is perfect.
Salt (½ teaspoon) — Essential. It balances the sweetness. I always add a pinch, even if the recipe seems sweet. Trust me on this.
Optional: Pecans or Walnuts (½ cup / 60g) — I add chopped pecans for crunch. It adds a nice texture contrast to the soft oats. If you’re allergic to nuts, skip it. It’s still delicious without them.
Brown Sugar (¼ cup / 50g) — Optional, but I like it. It adds a deeper molasses flavor. If your apples are sweet enough, you can skip it. I usually use it because I like the extra richness.
Vanilla Extract (1 teaspoon) — Just a splash to round out the flavors. It makes it taste more like a dessert.
Equipment Needed
You don’t need fancy equipment for this. Here’s what I actually use.
9×13 Inch Baking Dish — This is the standard size for this recipe. A ceramic or glass dish works best because it heats evenly. I use my trusted Pyrex dish. It’s scratched up, but it works perfectly.
Large Mixing Bowl — You need something big enough to mix the oats, milk, eggs, and apples together comfortably. A 4-quart bowl is ideal. If you don’t have one, use your biggest pot or bowl.
Measuring Cups and Spoons — Standard stuff. Dollar store versions work fine for this. You don’t need precision like you would for baking bread, but accuracy helps.
Knife and Cutting Board — For peeling and dicing the apples. A serrated knife is nice for apples, but any sharp knife works. Dull knives make you cry more—learned this the hard way.
Spatula — For stirring everything together and scraping the bowl. Silicone spatulas are great because they get into the corners.
Wire Rack — For cooling the oatmeal after baking. It prevents the bottom from getting soggy. If you don’t have one, just let it sit on the counter for 10 minutes.
Optional: Aluminum Foil — If you’re baking it in the morning and it’s browning too fast on top, you can tent it with foil. I rarely need to, but it’s good to have.
How to Make It: Step-by-Step
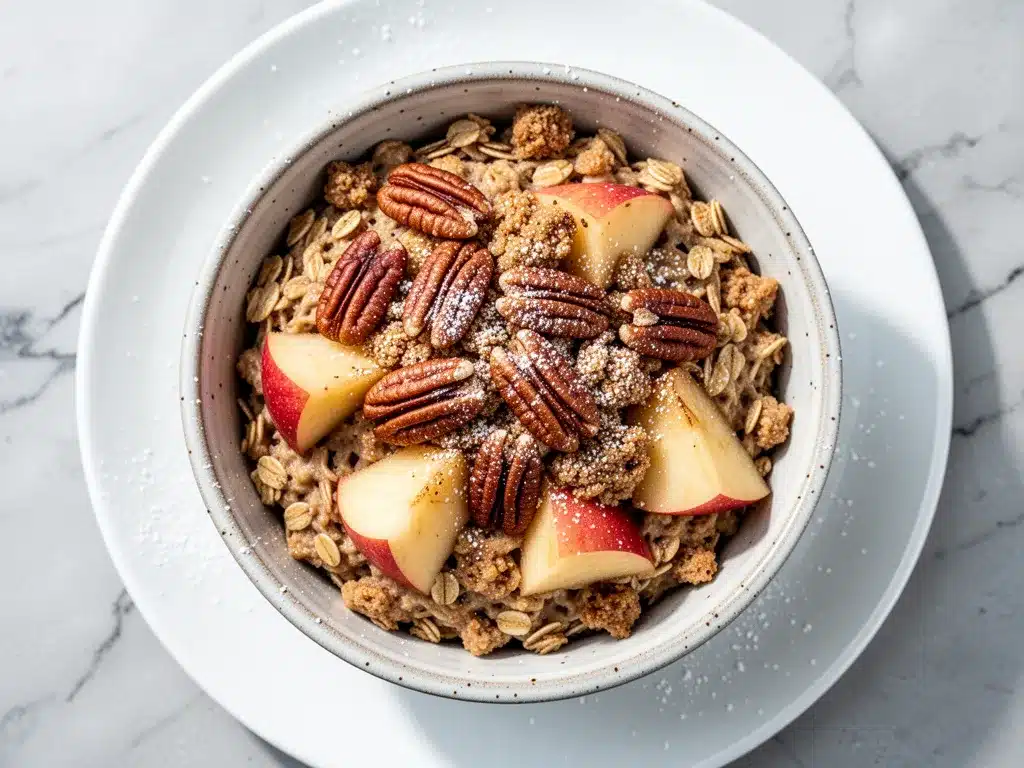
Alright, let’s make this! I’m walking you through exactly how I do it, including the little tricks I’ve picked up. This is so simple, you might feel like you’re cheating. But that’s the beauty of it.
Step 1: Prep Your Apples (5 minutes)
Peel your apples and dice them into small cubes. I like them about half an inch in size—small enough to eat easily, big enough to get a bite of apple in every spoonful. If you’re using a lot of apples, do this first. It’s easier to get it done while the oven is still cold. Toss them in a little lemon juice if you’re not using them immediately, so they don’t brown. But since we’re mixing them right in, it’s not strictly necessary.
Step 2: Mix the Wet Ingredients (3 minutes)
In your large mixing bowl, whisk together the milk, eggs, maple syrup, brown sugar (if using), vanilla extract, and salt. Whisk until the sugar is mostly dissolved. You don’t need to be perfect here, but getting the sugar dissolved helps it blend evenly. The mixture should look like a thin, beige liquid.
Step 3: Combine Everything (2 minutes)
Add the rolled oats, diced apples, cinnamon, baking powder, and nuts (if using) to the wet mixture. Stir everything together with your spatula until the oats are fully submerged. This is crucial. The oats need to soak up the liquid. If there are dry patches, give it a good stir. Scrape the bottom and sides of the bowl to make sure everything is incorporated.
Step 4: The Overnight Soak (The Secret Step)
This is where the magic happens. Cover the bowl tightly with plastic wrap or transfer the mixture to your greased 9×13 baking dish and cover with foil. Put it in the fridge. Let it sit for at least 4 hours, but ideally overnight. This soaking time softens the oats so they cook evenly and create that tender, cake-like texture. I know you’re tempted to skip this, but please don’t. Baked oatmeal made without soaking can be chewy in a weird way. Soaking makes it perfect.
Step 5: Bake It (35-40 minutes)
When you’re ready to bake, preheat your oven to 350°F (175°C). If you stored the mixture in the bowl, pour it into your greased 9×13 dish. Sprinkle a little extra cinnamon on top for that pretty crust. Bake for 35-40 minutes. You’ll know it’s done when the top is golden brown and the edges are bubbling. The center should be set, not jiggly. If you’re worried, insert a knife in the center—it should come out clean or with just a few moist crumbs.
Step 6: Cool and Serve (10 minutes)
Let the oatmeal cool in the pan for at least 10 minutes. This allows it to set so you can cut clean squares. If you try to cut it hot, it’ll fall apart. Once it’s cool enough to touch, slice it into squares. Serve warm with a dollop of Greek yogurt, a drizzle of extra maple syrup, or just plain. It’s delicious either way.
Total Time: About 45 minutes active (including prep), plus overnight soaking. But honestly, you’re asleep for most of that!
Expert Tips & Tricks
Here’s everything I’ve learned from making this dozens of times. These tips will save you from my mistakes.
Grease Your Pan Well — Use butter or coconut oil to grease the pan. Oatmeal can stick if you’re not careful. I usually butter the pan and then dust it with a little flour or cinnamon sugar for a nice crust. It makes cleanup easier and prevents sticking.
Don’t Overmix — Once you add the oats, mix until just combined. Overmixing can make the oats gummy. You want them tender, not gluey. A gentle fold is best.
Adjust for Apple Size — If your apples are very juicy, you might want to reduce the milk by a tablespoon. If they’re dry, add a splash more. It depends on the apple. I usually eyeball it, but if you’re precise, taste the mixture before baking. It should be soupy, like pancake batter.
Storage is Key — Let the oatmeal cool completely before covering it. If you cover it while it’s warm, condensation will make it soggy. Once cool, cover with plastic wrap or transfer to an airtight container. It will last in the fridge for up to 5 days.
Freezing Tips — If you’re freezing, cut the oatmeal into squares first. Wrap each square individually in plastic wrap, then put them in a freezer bag. They’ll last for up to 3 months. To reheat, microwave for 1-2 minutes. No need to thaw.
Common Mistakes (and how to avoid them):
Mistake: Oatmeal is dry — Fix: You didn’t use enough liquid. Next time, add an extra ¼ cup of milk. Or, when reheating, add a splash of milk to the microwave.
Mistake: Oatmeal is mushy — Fix: You used instant oats or overcooked it. Stick to rolled oats and check the oven at 35 minutes. It should still have a slight chew.
Mistake: Top is burnt — Fix: Your oven runs hot. Tent the pan with foil after 20 minutes. Or, lower the temperature to 325°F and bake for 45 minutes.
Variations & Substitutions
Once you’ve nailed the basic version, here’s how you can mix it up. I’ve tried all of these.
Pumpkin Spice Version — Swap the apples for ½ cup pumpkin puree. Add 1 teaspoon pumpkin pie spice instead of cinnamon. This is my favorite for November. It’s like eating pumpkin pie for breakfast.
Blueberry Lemon — Skip the apples. Add 1 cup fresh or frozen blueberries and the zest of one lemon. Add 1 tablespoon lemon juice to the milk. Bright and tangy. Great for spring.
Chocolate Chip — Add ½ cup chocolate chips to the mix. It’s basically oatmeal cookie batter. My kids love this version. It’s like a treat, but it’s still breakfast.
Protein Boost — Add ½ cup protein powder (vanilla or unflavored) to the dry ingredients. You might need to add an extra ¼ cup of milk because protein powder absorbs liquid. It keeps you full longer.
Dairy-Free — Use almond milk or oat milk instead of dairy milk. Use maple syrup instead of honey (if using). Everything else is naturally dairy-free.
Gluten-Free — Use certified gluten-free rolled oats. Everything else is naturally gluten-free. Just make sure your baking powder is GF.
Nut-Free — Skip the pecans or walnuts. It’s still delicious. Or add sunflower seeds for crunch.
Serving & Storage
How to Serve: I usually serve this straight from the pan at the breakfast table. It looks rustic and cozy. But here are other ways I’ve enjoyed it:
Side Dishes: A side of fresh fruit (berries or more apple slices) adds freshness. A cup of coffee or tea is mandatory. If you want something savory, pair it with bacon or sausage.
Toppings Bar: When I have guests, I put out: extra maple syrup, Greek yogurt, chopped nuts, fresh berries, and a little extra cinnamon. Everyone customizes their bowl.
Storage Instructions:
Refrigerator: Store in an airtight container for up to 5 days. The flavor actually gets better on day 2 as the oats fully absorb the flavors.
Reheating: Best method: Microwave a square for 60-90 seconds. Add a splash of milk if it looks dry. It will be soft and warm. Oven method: Reheat at 350°F for 10-15 minutes if you want it crispy on the edges.
Freezing: Freeze individual squares for up to 3 months. Thaw in the fridge overnight or microwave from frozen.
Nutrition Information
I’m not a nutritionist, but here’s the breakdown if you’re tracking.
Per Serving (based on 9 servings):
– Calories: 220
– Protein: 6g
– Carbs: 42g
– Fiber: 4g
– Sugar: 18g
– Fat: 4g
– Saturated Fat: 1g
– Cholesterol: 35mg
– Sodium: 150mg
What’s Good: High in fiber, good source of complex carbs, no refined flour. It’s a balanced breakfast that keeps you full.
What to Know: Higher in sugar from the maple syrup and apples. Use less syrup if you’re watching sugar. Contains gluten (unless using GF oats) and dairy (unless using plant milk).
My Take: Look, this is comfort food. It’s sweet, but it’s real food. It’s way better than a donut or a pastry. When I want to make it lighter, I use less syrup and more apples. But usually? I just enjoy it.
Final Thoughts
So that’s my go-to Fall Apple Cinnamon Baked Oatmeal! I’ve probably talked your ear off at this point, but when you make a recipe this often, you have a lot to say about it.
This has saved my mornings more times than I can count. It’s my answer to “what’s for breakfast?” when I’m tired, don’t want takeout, and still want something that tastes really good. My kids are happy, my husband’s happy, and I’m happy because I’m not stressed about cooking.
Make it yours! Try different add-ins, swap in your favorite apples, adjust the cinnamon. The best recipes are the ones you adapt to your family’s tastes. If you make this, drop a comment and let me know what you think! I love hearing how recipes turn out in your kitchen. And if something doesn’t work, tell me that too—I’m here to help troubleshoot.
Happy cooking! And I hope your kitchen smells half as good as mine does right now.
Frequently Asked Questions
Can I use steel-cut oats instead of rolled oats?
No, I don’t recommend it. Steel-cut oats don’t soften enough in the soaking time and will stay hard even after baking. They’re too chewy for this recipe. Stick to old-fashioned rolled oats.
Can I make this in a muffin tin?
Yes! Grease a 12-cup muffin tin and divide the mixture evenly. Bake for 20-25 minutes instead of 35-40. They make great individual portions for lunchboxes or quick breakfasts on the go.
Why did my oatmeal turn out dry?
Usually means you didn’t use enough liquid or you used instant oats which absorb less. Next time, add an extra ¼ cup of milk. Also, make sure you’re letting it soak overnight. That hydration is key.
Can I prep this the night before and bake it in the morning?
Absolutely! That’s the whole point. Mix it, cover it, and put it in the fridge. In the morning, just pop it in the oven. It’s ready in 35 minutes. This is why it’s perfect for busy mornings.
How do I reheat leftovers without it getting dry?
Add a splash of milk to the oatmeal square before microwaving. Heat in 30-second intervals, stirring in between. The milk brings back the creaminess. If you’re using an oven, cover it with foil to keep it moist.
Can I use canned apples?
You can, but they’re usually very soft and sweet. Drain them well and pat them dry with a paper towel so they don’t make the oatmeal too soggy. Fresh apples are better for texture, but canned works in a pinch.
Is this recipe gluten-free?
Yes, if you use certified gluten-free rolled oats. Oats are naturally gluten-free, but they’re often processed in facilities with wheat. So look for the GF label on the package. Everything else is naturally GF.
Fall Apple Cinnamon Baked Oatmeal
- Total Time: 50 minutes (plus overnight soaking)
- Yield: 9 servings 1x
Description
A make-ahead breakfast that turns chaotic mornings into peaceful ones. This soft, chewy baked oatmeal features tender apples and warm cinnamon, tasting like a healthy apple crumble.
Ingredients
- 3 cups old-fashioned rolled oats
- 2 cups milk (whole, almond, or oat)
- 2 large eggs
- 1/2 cup real maple syrup
- 3 medium apples, peeled and diced
- 2 teaspoons ground cinnamon
- 1 teaspoon baking powder
- 1/2 teaspoon salt
- 1/4 cup brown sugar (optional)
- 1 teaspoon vanilla extract
- 1/2 cup chopped pecans or walnuts (optional)
Instructions
- Preheat oven to 350°F (175°C).
- Peel and dice apples into half-inch cubes.
- In a large mixing bowl, whisk together milk, eggs, maple syrup, brown sugar (if using), vanilla extract, and salt until sugar is dissolved.
- Add rolled oats, diced apples, cinnamon, baking powder, and nuts (if using) to the wet mixture. Stir until oats are fully submerged.
- Cover the bowl or transfer mixture to a greased 9×13 inch baking dish. Cover tightly and refrigerate for at least 4 hours or overnight.
- Remove from fridge and preheat oven to 350°F (175°C). Pour mixture into the greased 9×13 dish if stored in a bowl. Sprinkle extra cinnamon on top.
- Bake for 35-40 minutes until the top is golden brown and edges are bubbling. The center should be set.
- Let cool in the pan for at least 10 minutes to allow it to set before cutting into squares.
Notes
Do not use instant or steel-cut oats; old-fashioned rolled oats are required for the correct texture. Let the oatmeal cool completely before storing to prevent sogginess. It keeps in the fridge for up to 5 days and can be frozen for up to 3 months.
- Prep Time: 10 minutes
- Cook Time: 40 minutes
- Category: Breakfast
- Cuisine: American
Nutrition
- Serving Size: 1 square
- Calories: 220
- Sugar: 18
- Sodium: 150
- Fat: 4
- Saturated Fat: 1
- Carbohydrates: 42
- Fiber: 4
- Protein: 6
Keywords: baked oatmeal, apple cinnamon, make-ahead breakfast, healthy breakfast, meal prep, fall recipes, oatmeal



