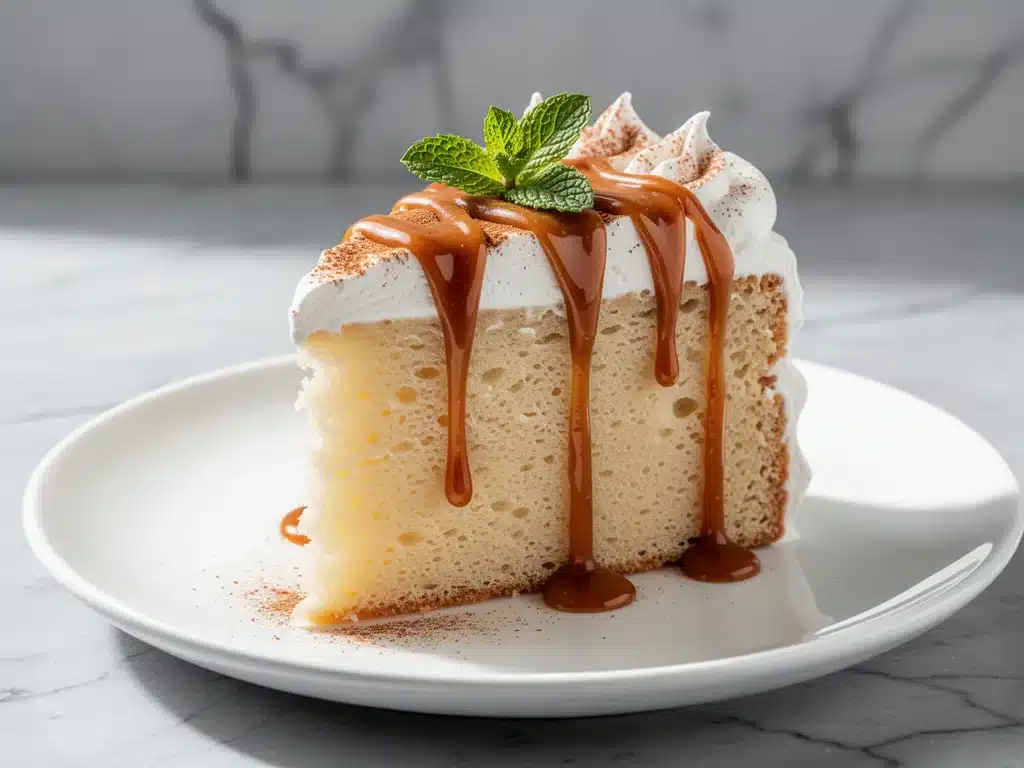
There is a very specific kind of panic that sets in when you realize it’s September 15th, and you promised your family a dessert that honors Mexican Independence Day. You know the drill. You don’t want just any cake. You want that iconic, soaked, impossibly moist cake that tastes like celebration. For years, I fell into the trap of ordering the store-bought version or, worse, settling for a dry sponge that barely held the milk mixture together. It was sad. It was disappointing. And honestly? It was nothing like the tres leches cakes my friends bring to their family gatherings.
That changed last year. I was helping my neighbor, Maria, prepare for her family’s fiesta. She pulled out a cake that was so saturated with cream it looked like a cloud had landed on a plate. I took one bite, and I was hooked. It was sweet but not cloying, airy but dense, and it melted on your tongue. I begged for the recipe. She laughed and said, “It’s not a recipe, it’s a feeling. But okay, I’ll show you.”
That night, I spent hours testing this Mexican Tres Leches Cake in my own kitchen. I burned the meringue. I over-soaked the sponge until it was soup. I under-whipped the cream until it was sad and flat. But I kept going. Because I knew there was a perfect balance out there. And I found it. This version is better than takeout, better than the bakery down the street, and honestly, it’s the only way I make it now. It’s light, it’s fluffy, and it soaks up that three-milk mixture like a sponge—pun intended. If you’ve ever wanted to impress your family with a dessert that looks professional but is actually stupid simple, you need to make this cake.
Why You’ll Love This Homemade Tres Leches Cake
Okay, real talk. Why spend the time making this when you can just buy one? Because store-bought tres leches is often dense, overly sweet, and lacks that airy elegance that makes this dessert special. This homemade version changes the game. Here’s why I keep making this Mexican Tres Leches Cake for every holiday and weekend:
- It’s Actually Light — Most homemade sponges are heavy. Mine uses a technique where you whip the egg whites and yolks separately. This creates a tower of air that stays fluffy even after soaking. It’s like eating a cloud.
- Perfect Soak Every Time — I’ve cracked the code on the ratio. You get that glorious wetness in the center without the bottom turning into mush. It’s the Goldilocks of cakes.
- Less Sweet, More Flavor — By using fresh heavy cream and a touch of vanilla (and sometimes a hint of cinnamon), it tastes rich and creamy without being a sugar bomb. It’s balanced.
- Makes You Look Like a Pro — The meringue topping? It’s dramatic. It’s golden brown peaks that look like they came from a high-end patisserie. Your guests will think you spent all day on it. (Spoiler: It takes about 45 minutes of active work.)
- Make-Ahead Friendly — This cake actually gets better overnight. The flavors meld, the soak deepens, and it becomes even more tender. It’s the ultimate stress-free party dessert.
Once you try this, you’ll never go back to the boxed mix or the grocery store version again. It’s worth every minute.
Ingredients You’ll Need for the Perfect Soak
Here’s the thing about tres leches: the ingredients list is short, but the quality matters. You don’t need fancy equipment, just good basics. I’m particular about a few things here, so pay attention.
For the Sponge Cake
Large eggs (6 whole, room temperature) — This is crucial. Room temp eggs whip up to double their volume much easier than cold ones. I take them out of the fridge 30 minutes before starting. If you’re in a hurry, put them in a bowl of warm water for 5 minutes.
Granulated sugar (1 cup / 200g) — Don’t substitute with brown sugar here. You want that light, airy texture, and brown sugar will weigh it down and make it dense.
All-purpose flour (1 cup / 125g) — I sift mine to remove lumps. This ensures the cake is uniform and tender. If you skip sifting, you might get little flour pockets that ruin the texture.
Salt (½ teaspoon) — Just a pinch to balance the sweetness. Don’t skip it.
Vanilla extract (1 teaspoon) — Use real vanilla. I’ve tried the imitation stuff, and it tastes chemical. For a more authentic Mexican flavor, swap this for 1 teaspoon of vanilla bean paste or a splash of rum.
For the Tres Leches Soak
Evaporated milk (1 can / 12 oz) — This is non-negotiable. It’s milk with about 60% of the water removed. It’s thicker and sweeter than regular milk. I always use Carnation, but any brand works. Do not confuse this with condensed milk.
Sweetened condensed milk (1 can / 14 oz) — This is the thick, syrupy stuff. It provides the sweetness and the sticky texture. Again, Carnation is my go-to, but Nestlé works too.
Whole milk (½ cup / 120ml) — Just regular dairy milk to thin out the heavy stuff so it soaks in easily. Don’t use skim milk; you need the fat for richness.
For the Topping
Heavy whipping cream (2 cups / 480ml) — Cold cream whips best. I keep my bowl in the fridge until the last minute.
Powdered sugar (¼ cup / 30g) — Dissolves instantly in the cream. No grittiness.
Vanilla extract (1 teaspoon) — For flavor.
Cinnamon (1 teaspoon, for dusting) — The final touch that makes it smell like a Mexican bakery.
Equipment Needed
You don’t need a fancy stand mixer, but having the right tools helps. Here’s what I actually use:
Two large mixing bowls — One for yolks, one for whites. Glass or stainless steel works best because they’re easy to clean and don’t retain grease.
Electric mixer — Handheld is fine, but a stand mixer is faster. You need to whip those eggs for several minutes, so an electric one saves your arm.
9×13 inch baking pan — Glass is nice because you can see the bottom browning, but metal conducts heat faster. Just grease it well.
Whisk — For folding the flour in gently. A silicone spatula works too.
Measuring cups and spoons — Accuracy matters in baking.
Offset spatula — For spreading the meringue peaks. It gives you better control than a regular spoon.
How to Make It: Step-by-Step
Alright, let’s make this! I’m walking you through exactly how I do it, including the little tricks I’ve picked up over years of testing.
Step 1: Prep the Pan and Oven (5 minutes)
Preheat your oven to 350°F (175°C). Grease a 9×13 inch pan with butter or non-stick spray. I like to line the bottom with parchment paper for easy removal, but it’s not strictly necessary if you grease it well. Set aside.
Step 2: Whip the Egg Yolks (3 minutes)
Separate your eggs. Put the whites in one clean bowl and yolks in another. Start by whipping the yolks with half the sugar (½ cup) on high speed. They should become pale yellow and thick, about 3 minutes. This step builds the foundation. Scrape down the sides.
Step 3: Whip the Egg Whites (4 minutes)
Wipe your bowl clean. Make sure there’s no yolk in there, or the whites won’t whip. Whip the whites on high until foamy, then slowly add the remaining ½ cup sugar. Continue whipping until you form stiff peaks. This means when you pull the whisk up, the peak stands straight up. Don’t over-whip or they’ll get grainy.
Step 4: Fold Together (3 minutes)
Add the vanilla to the yolks. Then, gently fold the whites into the yolks in three batches. Use a spatula and cut down the middle, sweep along the bottom, and fold over. Do this gently. You want to keep as much air in there as possible. It’s okay if you see a few white streaks initially; keep folding until it’s mostly uniform.
Step 5: Add the Flour (2 minutes)
Sift the flour and salt over the batter. Fold it in gently, just until no dry streaks remain. Do not overmix. The batter should be light, fluffy, and voluminous.
Step 6: Bake the Sponge (25-30 minutes)
Pour the batter into the prepared pan. Smooth the top. Bake for 25-30 minutes. The cake is done when it’s golden brown and springs back when you touch it lightly. Do not overbake, or it will be dry. Let it cool completely in the pan on a wire rack. This is important—it needs to be cool before you soak it.
Step 7: Make the Soak (5 minutes)
While the cake cools, mix the evaporated milk, condensed milk, and whole milk in a large pitcher. Whisk until combined. It will be sweet and thick. Once the cake is cool, poke holes all over the surface with a fork. Don’t go all the way through to the bottom, just deep enough. Pour the milk mixture slowly over the cake. Let it absorb for 20 minutes. You might need to pour it twice.
Step 8: Whip the Topping (5 minutes)
In a cold bowl, whip the heavy cream, powdered sugar, and vanilla until stiff peaks form. Be careful not to over-whip into butter.
Step 9: Assemble and Chill (1 hour+)
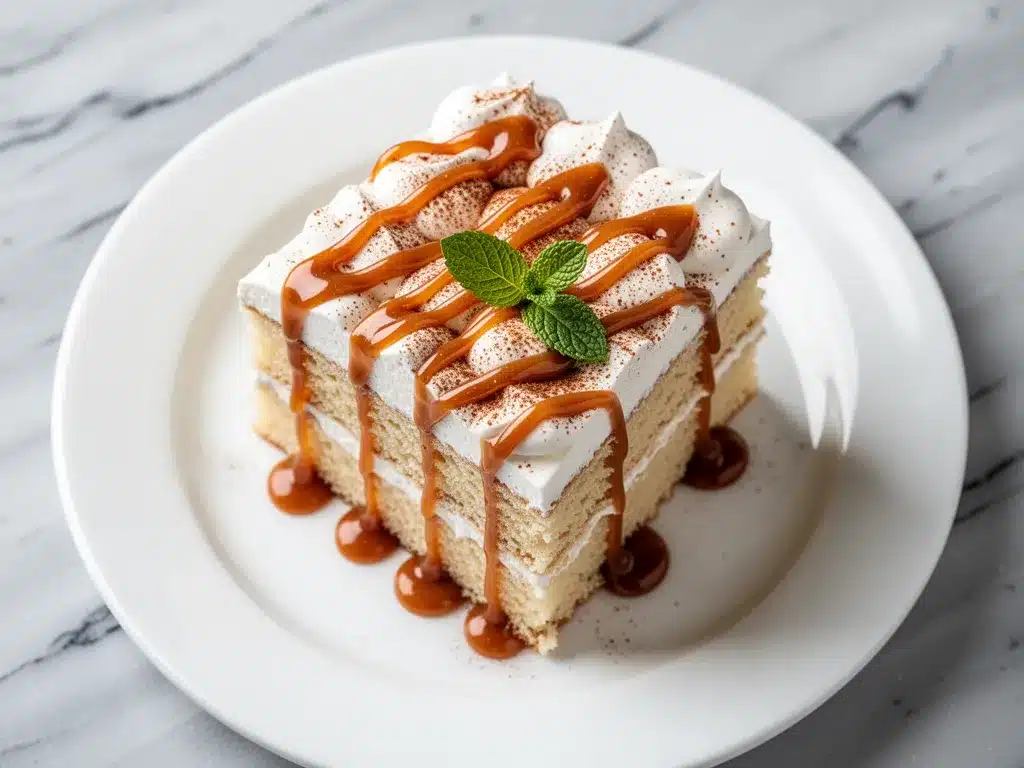
Spread the whipped cream evenly over the soaked cake. Use the offset spatula to create peaks and swirls. Dust generously with cinnamon. Refrigerate for at least 2 hours, preferably overnight. This lets the cake set and the flavors meld.
Expert Tips & Tricks
Here’s everything I’ve learned from making this dozens of times. These tips will save you from my mistakes.
- Room Temperature Eggs — I cannot stress this enough. Cold eggs don’t whip up as high. If you forget, warm them in a bowl of hot water for 5 minutes.
- Clean Bowls — Any grease in the egg white bowl will prevent them from whipping. Wipe the bowl with vinegar or lemon juice before starting.
- Poke Plenty of Holes — The more holes, the better the soak. I use a fork and make a grid pattern. Don’t be shy.
- Chill Everything — Cold cream whips better. Put your bowl and beaters in the fridge for 15 minutes before whipping.
- Don’t Skip the Chill Time — You can eat it right away, but it tastes 10x better after chilling overnight. The cake becomes tender and the flavors deepen.
Common Mistakes
Mistake: Cake is dense — Fix: You overmixed the batter. Fold gently. Also, check your egg whites—they need to be stiff peaks.
Mistake: Soak didn’t absorb — Fix: You didn’t poke enough holes. Or the cake was still warm. Always soak a completely cool cake.
Mistake: Cream is runny — Fix: Your cream wasn’t cold enough, or you didn’t whip it long enough. Use heavy cream (35% fat), not light cream.
Variations & Substitutions
Once you’ve nailed the basic version, here’s how you can mix it up. I’ve tried all of these.
- Coffee Tres Leches — Add 1 tablespoon of instant espresso powder to the milk soak. It adds a rich, adult flavor.
- Lime Zest — Add the zest of one lime to the whipped cream. It cuts the sweetness nicely.
- Chocolate Drizzle — Drizzle melted chocolate over the whipped cream before serving.
- Gluten-Free — Use a 1:1 gluten-free flour blend. The texture might be slightly different, but it still works.
- Dairy-Free — Use coconut milk (full fat) for the soak and coconut cream for the topping. It changes the flavor but keeps the texture.
Serving & Storage
How to Serve: — Slice with a sharp knife. Serve chilled. Garnish with fresh berries or a dollop of extra whipped cream if you’re feeling fancy.
Storage: — Store in the refrigerator, covered, for up to 4 days. It actually gets better each day.
Freezing: — I don’t recommend freezing this cake. The texture of the soaked sponge changes when thawed. It’s best fresh from the fridge.
Nutrition Information
I’m not a nutritionist, but here’s the breakdown if you’re tracking. This is a rich dessert, so enjoy in moderation.
Per Serving (1/12 of cake):
- Calories: 380
- Protein: 6g
- Carbs: 45g
- Fat: 20g
- Sugar: 35g
It’s high in sugar and fat, but also provides calcium from the milk and eggs. If you’re watching carbs, consider a smaller slice or the dairy-free version.
Final Thoughts
So that’s my go-to Mexican Tres Leches Cake! I’ve probably talked your ear off at this point, but when you make a recipe this often, you have a lot to say about it. This cake has saved my holiday dinners more times than I can count. It’s my answer to “what’s for dessert” when I want something special but don’t want to stress.
Make it yours! Try different extracts, add fruit, or change the topping. The best recipes are the ones you adapt. If you make this, drop a comment and let me know what you think! I love hearing how recipes turn out in your kitchen. And if something doesn’t work, tell me that too—I’m here to help troubleshoot.
Happy baking! I hope your kitchen smells as good as mine does right now.
Frequently Asked Questions
Can I use regular milk instead of evaporated milk?
You can, but the texture won’t be the same. Evaporated milk is thicker and sweeter, which helps the cake stay moist without being too watery. If you must substitute, use half-and-half or reduce regular milk slightly to thicken it. But I recommend using evaporated milk for the authentic taste.
Why did my cake sink in the middle?
This usually happens if the oven temperature was too high, or if you opened the oven door too early during baking. Also, if you didn’t whip the egg whites enough, the structure won’t be strong enough to hold the cake up. Make sure your peaks are stiff!
Can I make this cake ahead of time?
Yes! In fact, it’s better made ahead. You can make the cake and soak it up to 24 hours in advance. Just keep it covered in the fridge. The flavors meld and it becomes even more tender.
How do I know when the egg whites are stiff peaks?
Lift the whisk or beaters. The peak should stand straight up without drooping. If it curls over, keep whipping. If it looks grainy or dry, you’ve gone too far.
Can I use a different size pan?
You can, but the baking time will change. If you use a smaller pan, the cake will be thicker and need more time. If you use a larger pan, it will be thinner and bake faster. Keep an eye on it.
Pin This Recipe!
Mexican Tres Leches Cake: 10 Best Easy Homemade Recipe
- Total Time: 2 hours 15 minutes
- Yield: 12 servings 1x
Description
An iconic, soaked, impossibly moist sponge cake that honors Mexican Independence Day. This homemade version is light, fluffy, and perfectly balanced, featuring a three-milk soak and a dramatic meringue topping.
Ingredients
- 6 large eggs, room temperature
- 1 cup (200g) granulated sugar
- 1 cup (125g) all-purpose flour, sifted
- 1/2 teaspoon salt
- 1 teaspoon vanilla extract
- 1 can (12 oz) evaporated milk
- 1 can (14 oz) sweetened condensed milk
- 1/2 cup (120ml) whole milk
- 2 cups (480ml) heavy whipping cream, cold
- 1/4 cup (30g) powdered sugar
- 1 teaspoon vanilla extract
- 1 teaspoon cinnamon, for dusting
Instructions
- Preheat oven to 350°F (175°C). Grease a 9×13 inch pan with butter or non-stick spray and line with parchment paper if desired.
- Separate eggs, placing whites in one clean bowl and yolks in another.
- Whip egg yolks with half the sugar (1/2 cup) on high speed until pale yellow and thick, about 3 minutes.
- Whip egg whites on high until foamy, then slowly add remaining sugar. Continue whipping until stiff peaks form.
- Add vanilla to the yolk mixture. Gently fold egg whites into yolks in three batches using a spatula until mostly uniform.
- Sift flour and salt over the batter. Fold gently until no dry streaks remain.
- Pour batter into prepared pan and bake for 25-30 minutes until golden brown and springs back when touched. Cool completely in the pan on a wire rack.
- While cake cools, whisk together evaporated milk, condensed milk, and whole milk.
- Once cake is cool, poke holes all over the surface with a fork. Pour milk mixture slowly over the cake and let absorb for 20 minutes.
- In a cold bowl, whip heavy cream, powdered sugar, and vanilla until stiff peaks form.
- Spread whipped cream evenly over the soaked cake. Create peaks with an offset spatula and dust with cinnamon.
- Refrigerate for at least 2 hours, preferably overnight, before serving.
Notes
Ensure eggs are room temperature for best whipping results. Use cold cream and chilled bowls for the topping. The cake improves in flavor and texture when made ahead and chilled overnight. Do not freeze, as the texture changes upon thawing.
- Prep Time: 45 minutes
- Cook Time: 30 minutes
- Category: Dessert
- Cuisine: Mexican
Nutrition
- Serving Size: 1/12 of cake
- Calories: 380
- Sugar: 35
- Sodium: 150
- Fat: 20
- Saturated Fat: 12
- Carbohydrates: 45
- Fiber: 1
- Protein: 6
Keywords: Mexican Tres Leches Cake, homemade tres leches, Mexican Independence Day dessert, soaked sponge cake, easy dessert recipe, holiday baking



