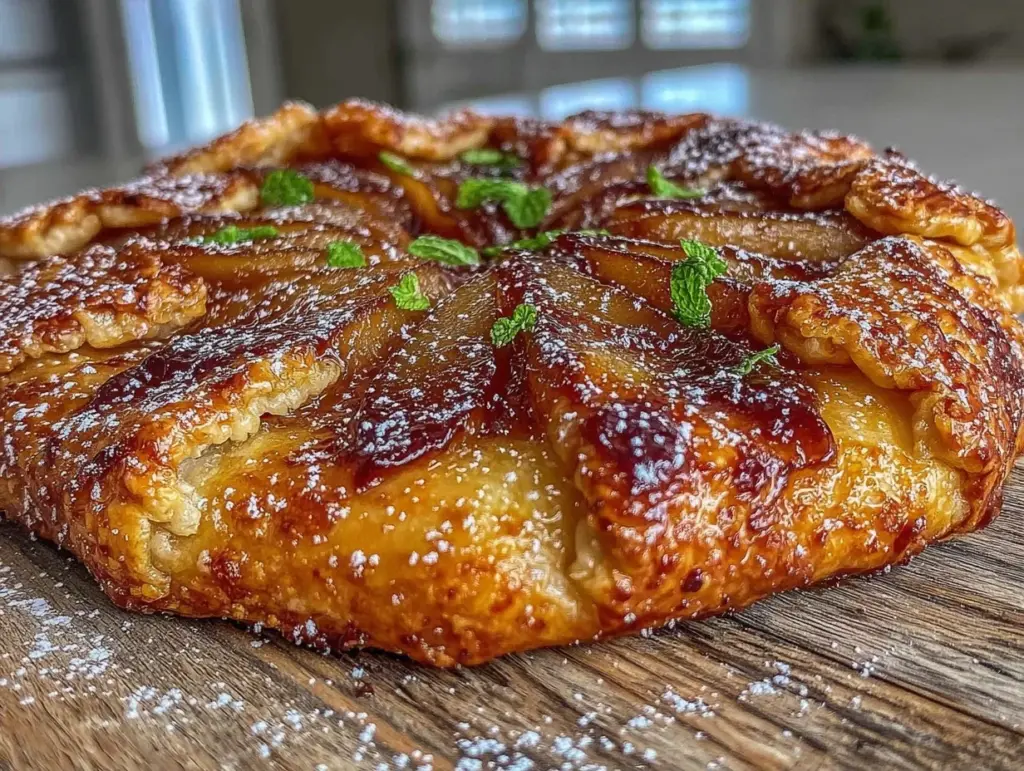
Last Saturday, I found myself staring at a box of pie crusts in the freezer, feeling that familiar pang of guilt. I wanted to make something special for my kids, something that felt like a weekend project rather than just another meal, but I also knew my attention span was limited to about twenty minutes before I started checking my phone. That’s when I spotted a bag of pears in the fruit bowl—slightly soft, perfectly ripe, and begging to be cooked.
I had never poached pears before. Honestly, the idea of simmering fruit in honey and spices sounded like something a pastry chef would do, not a parent trying to keep their sanity intact. But then I remembered those honey-glazed carrots my mom used to make, and I thought, Why not pears? So, I threw together a simple all-butter crust (using that no-knead bread technique logic: keep it simple, keep it cold) and poached some pears in a pot of honey, cinnamon, and vanilla.
What happened next was magic. The kitchen smelled like a bakery, my kids were fascinated by the way the pears turned a deep amber color, and the resulting honey poached pear galette was so good that my seven-year-old asked if we could eat it for breakfast, lunch, and dinner. It’s flaky, it’s sweet but not cloying, and the best part? It’s forgiving. If the crust cracks, that’s just “rustic charm.” If the pears are a little mushy, that’s just “extra cozy.” This recipe has become our go-to weekend bonding activity, and I’ve made it at least a dozen times since that first messy, flour-covered Saturday.
Why You’ll Love This Recipe
There are a few reasons this honey poached pear galette has completely taken over our weekend routine, but let’s be real—it’s mostly because it’s the one dessert my kids actually want to help make. Here’s why it’s worth the oven time:
- Kids Can Actually Help — Seriously. There’s no delicate piping or complex folding required. Kids can peel the pears (with supervision), stir the honey syrup, and fold the crust edges. It’s hands-on cooking without the stress of a broken soufflé.
- Stupid Simple Crust — I use a basic all-butter crust that doesn’t require a food processor. If you can cut butter into flour with a fork or your fingers, you can make this. I’ve walked my teenage daughter through it while she was complaining about homework.
- Poached Pears Are Foolproof — You’re not just throwing raw fruit on dough. Poaching them first ensures they’re tender, infused with flavor, and won’t make the crust soggy. It’s a technique that guarantees success every single time.
- Leftovers Taste Better — The flavors meld overnight. A slice cold from the fridge the next morning tastes incredible with a dollop of yogurt, making it a perfect brunch item too.
- Looks Fancy, Tastes Homey — It looks like something you’d order at a fancy cafe, but it’s essentially a rustic pie. It feels special, but it’s actually quite humble and comforting.
This is my answer to “what do we do this weekend?” when we want to spend time together but don’t want to spend hours in the kitchen. It’s messy, it’s sweet, and it’s delicious.
Ingredients You’ll Need
Here’s the best part: you probably have most of this already. I’m particular about a few things here, mostly because bad ingredients make a bad crust, but for the most part, this is pantry-friendly.
For the Flaky All-Butter Crust
Unsalted butter (1 cup / 226g, cold) — This is non-negotiable. I use high-quality European-style butter if I can find it, but standard Kerrygold or Land O’Lakes works fine. Keep it cold! Cold butter = flaky layers. If it melts before it hits the oven, you lose the lift.
All-purpose flour (2 ½ cups / 315g) — Standard flour. No need to fancy it up. I always measure by spooning it into the cup and leveling it off, never scooping directly, to avoid packing it down.
Salt (1 teaspoon) — Essential for flavor. Don’t skip it, even though it’s a sweet dessert.
Ice water (6-8 tablespoons) — You need ice water to keep the butter cold. I keep a bowl of ice water in the sink while I work. If the water isn’t cold, the butter will start to soften, and your crust will be tough.
For the Honey-Poached Pears
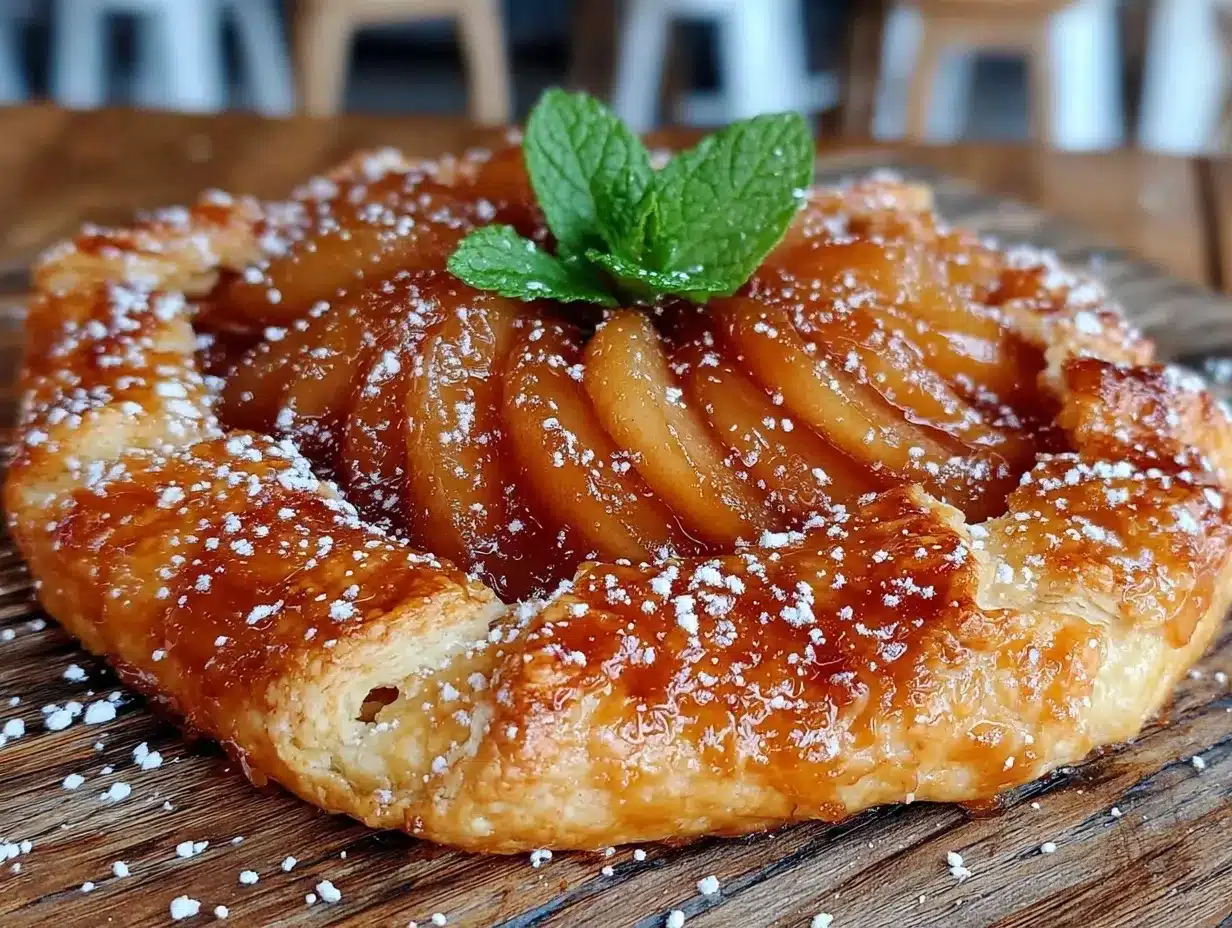
Ripe but firm pears (6 large, such as Bosc or Anjou) — Bosc pears hold their shape best during poaching. Anjou are sweeter but softer. Avoid Bartlett if you want them to stay intact, though they work if you’re careful. They should yield slightly to pressure but not feel mushy.
Honey (1 cup / 300g) — I use a mild honey like clover or orange blossom. Stronger honeys like buckwheat might overpower the delicate pear flavor. This is the sweetener and the flavor base.
Water (2 cups) — To dilute the honey so the pears don’t get too sticky or burnt.
Vanilla bean (1, split and scraped) — Or 2 teaspoons of pure vanilla extract. A vanilla bean adds those beautiful black specks and deep flavor, but extract works in a pinch.
Cinnamon stick (1 large) — Adds warmth and aroma. You’ll remove it later, so no need to overthink it.
Star anise (1 piece) — Optional, but I love the subtle licorice note. It makes the syrup smell incredible. Skip it if your kids are sensitive to anise flavors.
For the Finish
Egg wash (1 egg beaten with 1 tablespoon water) — For that golden, shiny crust. My kids love brushing this on (with a pastry brush, obviously).
Sugar (1-2 tablespoons, for sprinkling) — Adds crunch and sparkle. Turbinado sugar is great for that rustic look.
Vanilla ice cream or whipped cream — For serving. I usually let my kids choose their topping.
Equipment Needed
You don’t need fancy equipment for this. Here’s what I actually use:
Large skillet or saucepan — Wide enough to hold the pears in a single layer. I use a 10-inch skillet. If your pears overlap, just poach them in two batches.
Rolling pin — For the crust. A standard wooden one works fine. My kids love using it.
Baking sheet — To bake the galette. Line it with parchment paper for easy cleanup. Trust me, galettes are messy.
Pastry brush — For the egg wash. Get one your kids can hold safely.
Sharp knife and peeler — For prepping the pears. Adult supervision required here.
Mixing bowls — One large for the crust, one medium for the filling.
Spatula — For stirring the poaching syrup.
How to Make It: Step-by-Step
Alright, let’s make this! I’m walking you through exactly how I do it, including the little tricks I’ve picked up over the years. Grab your aprons.
Step 1: Make the Dough (10 minutes active)
In a large bowl, whisk together the flour and salt. Cut the cold butter into small cubes. Using your fingers or a pastry cutter, work the butter into the flour until the mixture looks like coarse crumbs with some pea-sized pieces of butter remaining. Those butter chunks are what create the flaky layers.
Gradually add the ice water, one tablespoon at a time, mixing gently with a spatula. You only need enough water for the dough to come together. Don’t overwork it! Once it forms a shaggy ball, divide it into two disks (one slightly larger for the bottom, one smaller for the top if you’re doing a double crust, but for a galette, one large disk is usually enough). Wrap in plastic and chill for at least 30 minutes. While the dough chills, we’ll poach the pears.
Step 2: Poach the Pears (20 minutes)
Peel the pears, leaving the stems on if you want a pretty presentation. Cut them in half lengthwise and scoop out the cores with a small spoon. In your skillet, combine the honey, water, vanilla (or bean), cinnamon stick, and star anise. Bring to a simmer over medium heat.
Place the pear halves cut-side up in the syrup. They should be mostly submerged. If not, add a little more water. Simmer gently for 10-15 minutes, basting the pears occasionally with the syrup, until they are tender when pierced with a knife. Remove the pears carefully and let them cool on a plate. Strain the syrup and reserve it—we’ll use it for brushing!
Step 3: Roll Out the Crust (5 minutes)
Preheat your oven to 400°F (200°C). Line a baking sheet with parchment paper. On a floured surface, roll out the larger dough disk into a rough circle, about 12 inches wide. It doesn’t need to be perfect. Transfer it to the baking sheet. If it cracks, just patch it with your fingers.
Step 4: Assemble the Galette (10 minutes)
This is the fun part. Arrange the poached pear halves in the center of the dough, leaving a 2-inch border. Spoon any remaining syrup from the poaching liquid over the pears. Fold the edges of the dough up and over the pears, pleating it as you go. It’s okay if the pears peek out—that’s the rustic style!
Brush the exposed dough with the egg wash and sprinkle generously with sugar. If you have a smaller piece of dough, you can roll it out and cut shapes (hearts, stars) to place on top for decoration. My kids love doing this.
Step 5: Bake (35-40 minutes)
Bake the galette on the middle rack for 35-40 minutes, until the crust is deep golden brown and the syrup is bubbling. If the edges get too dark, cover them with a strip of foil. Let it cool on the baking sheet for at least 15 minutes before slicing. This allows the filling to set a bit, so it doesn’t run everywhere.
Expert Tips & Tricks
Here’s everything I’ve learned from making this dozens of times. These tips will save you from my mistakes.
Keep Everything Cold — The number one reason for a tough crust is warm butter. If your kitchen is hot, put the dough back in the fridge for 10 minutes before rolling. If the butter starts to look shiny or greasy, it’s too warm.
Don’t Skimp on the Salt — Salt balances the sweetness of the honey and pears. It makes the flavor pop. I use flaky sea salt on top after baking for a nice crunch.
Use a Baking Stone or Steel (Optional) — If you have one, preheat it in the oven and bake the galette on it. It gives you a crispier bottom crust. Otherwise, place the baking sheet on the lowest rack to ensure the bottom cooks through.
Reserve the Syrup — The poaching syrup is liquid gold. Brush it on the crust before baking for extra shine and flavor. You can also drizzle it over the finished slices.
Don’t Overfill — It’s tempting to pile on all the pears, but leave enough border for the crust to fold over. If the filling spills out, it’ll burn on the pan.
Variations & Substitutions
Once you’ve nailed the basic version, here’s how you can mix it up. I’ve tried all of these.
Apple Galette — Substitute pears with thinly sliced apples (Granny Smith or Honeycrisp). You don’t need to poach apples; just toss them with sugar and cinnamon and arrange them on the dough.
Rhubarb Compote — Poach rhubarb with the honey and vanilla instead of pears. Add a splash of ginger for a spicy kick. This is a great spring variation.
Berry Galette — Use fresh or frozen berries (blueberries, raspberries). Toss them with a little cornstarch to thicken the juices. No poaching needed.
Gluten-Free — Use a 1:1 gluten-free flour blend. The texture will be slightly more crumbly, but it still works well for a galette.
Vegan — Use vegan butter (like Miyoko’s or Earth Balance) and skip the egg wash (brush with almond milk and sprinkle sugar). Use agave instead of honey if needed.
Serving & Storage
How to Serve: — I usually serve this warm, right out of the oven, with a scoop of vanilla ice cream or a dollop of whipped cream. It’s perfect for brunch, too, especially if you serve it with that crispy Belgian waffles on the side for a big weekend spread.
Leftovers: — Store covered at room temperature for up to 2 days, or in the fridge for up to 4 days. Reheat in a 350°F oven for 10 minutes to crisp up the crust. Microwave will make it soggy.
Freezing: — You can freeze the unbaked galette. Wrap it tightly in plastic and foil. Bake from frozen, adding 10-15 minutes to the baking time. Or, freeze baked slices for up to 3 months.
Nutrition Information
I’m not a nutritionist, but here’s the breakdown if you’re tracking. Per serving (based on 8 slices):
– Calories: 320
– Protein: 4g
– Carbs: 45g
– Fiber: 3g
– Sugar: 28g
– Fat: 14g
– Saturated Fat: 8g
– Cholesterol: 30mg
– Sodium: 180mg
Look, this is a dessert with honey, butter, and sugar. It’s not a diet recipe. But it’s made with real ingredients, and the pears add some fiber and vitamins. When I make it, I usually serve it as a special treat, not a daily staple. Moderation is key!
Final Thoughts
So that’s my honey poached pear galette! I’ve probably talked your ear off at this point, but when you make a recipe this often, you have a lot to say about it. This has saved our weekend mornings more times than I can count. It’s my answer to “what do we do together?” when we want to create something beautiful and tasty.
Make it yours! Try different fruits, different spices, or different shapes. The best recipes are the ones you adapt to your family’s tastes. If you make this, drop a comment and let me know what you think! I love hearing how recipes turn out in your kitchen. And if something doesn’t work, tell me that too—I’m here to help troubleshoot.
Happy cooking! And I hope your kitchen smells half as good as mine does right now.
Frequently Asked Questions
Can I use frozen pears?
You can, but they’ll be much softer and might release more water. If you use frozen pears, thaw them first and pat them dry. You might need to reduce the poaching time since they’re already soft. I prefer fresh for the best texture, but frozen works in a pinch.
Why did my crust shrink in the oven?
This usually happens if the dough wasn’t chilled long enough before rolling, or if you stretched it while rolling. Always chill the dough for at least 30 minutes. When rolling, start from the center and roll outwards, rotating the dough frequently. If it shrinks, just patch it with your fingers.
Can I make this ahead for a dinner party?
Yes! You can assemble the galette and refrigerate it for up to 24 hours before baking. Just take it out of the fridge 15 minutes before baking so the butter isn’t rock hard. Or, bake it the day before and reheat slices gently.
What if I don’t have a vanilla bean?
Use 2 teaspoons of pure vanilla extract. Add it to the poaching syrup along with the honey and water. It won’t have the pretty specks, but the flavor will be just as good.
How do I know when the pears are done poaching?
Pierce a pear with a knife. If it goes in easily with little resistance, they’re done. They should be tender but not falling apart. Overcooked pears will turn to mush.
Can I use maple syrup instead of honey?
You can, but the flavor will be different. Maple syrup has a stronger taste that might overpower the pears. Honey is milder and pairs better with cinnamon and vanilla. If you use maple syrup, try a mix of half honey and half maple syrup.
Is this recipe kid-friendly?
Absolutely! It’s one of the easiest desserts for kids to help with. They can peel the pears (with help), stir the syrup, fold the crust, and brush the egg wash. It’s a great way to get them involved in the kitchen.
Pin This Recipe!
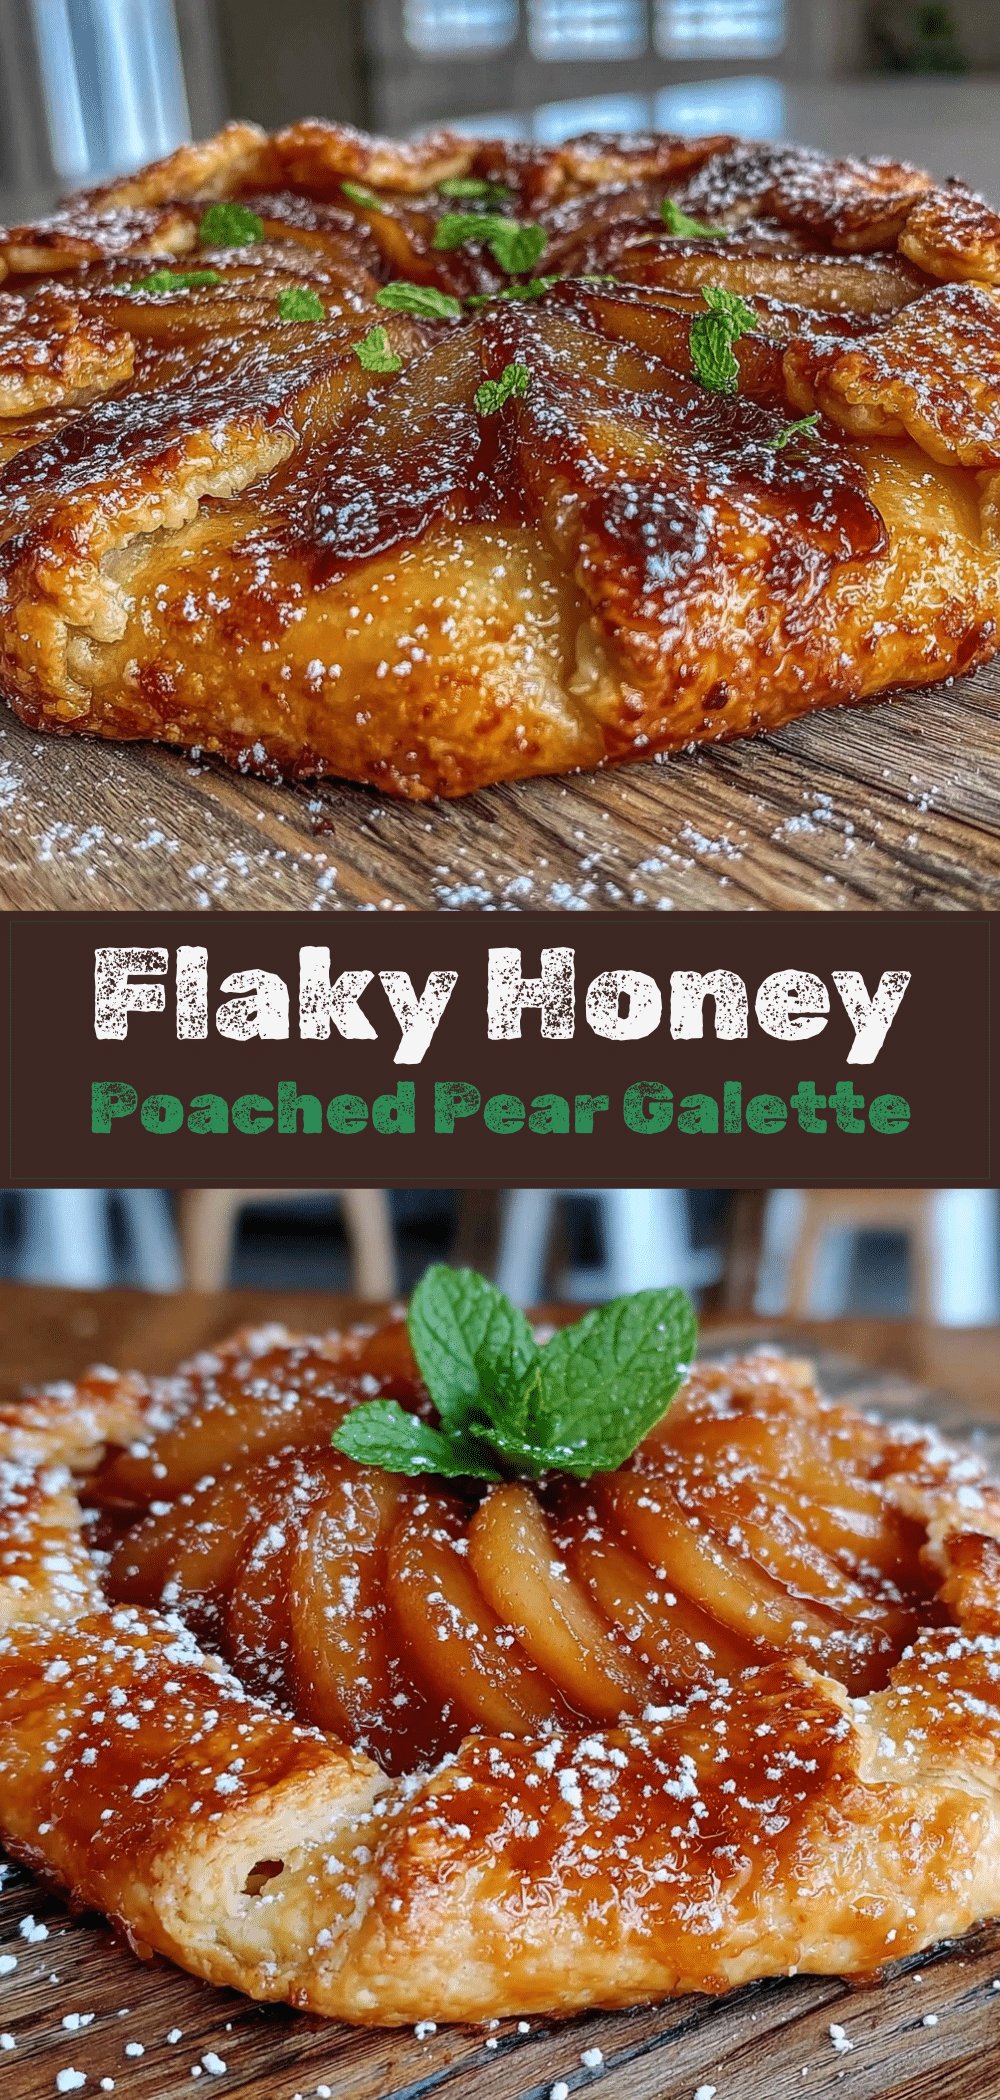
Honey Poached Pear Galette
- Total Time: 70 minutes
- Yield: 8 servings 1x
Description
A rustic, kid-friendly galette featuring all-butter flaky crust and tender pears poached in honey, cinnamon, and vanilla. It’s a forgiving weekend baking project that looks fancy but is simple to make.
Ingredients
- 1 cup (226g) unsalted butter, cold
- 2 ½ cups (315g) all-purpose flour
- 1 teaspoon salt
- 6–8 tablespoons ice water
- 6 large ripe but firm pears (Bosc or Anjou)
- 1 cup (300g) honey
- 2 cups water
- 1 vanilla bean, split and scraped (or 2 tsp pure vanilla extract)
- 1 large cinnamon stick
- 1 piece star anise (optional)
- 1 egg beaten with 1 tablespoon water (for egg wash)
- 1–2 tablespoons sugar (for sprinkling, preferably Turbinado)
Instructions
- In a large bowl, whisk together flour and salt. Cut cold butter into small cubes and work into flour until mixture resembles coarse crumbs with pea-sized butter pieces.
- Gradually add ice water, one tablespoon at a time, mixing gently until dough forms a shaggy ball. Divide into disks, wrap in plastic, and chill for at least 30 minutes.
- Preheat oven to 400°F (200°C). Line a baking sheet with parchment paper.
- Peel pears, leaving stems on if desired. Cut in half lengthwise and scoop out cores.
- In a large skillet, combine honey, water, vanilla, cinnamon stick, and star anise. Bring to a simmer over medium heat.
- Place pear halves cut-side up in the syrup. Simmer gently for 10-15 minutes until tender when pierced with a knife. Remove pears and let cool. Strain and reserve syrup.
- Roll out the larger dough disk into a rough 12-inch circle on a floured surface and transfer to the prepared baking sheet.
- Arrange poached pear halves in the center of the dough, leaving a 2-inch border. Spoon remaining syrup over pears.
- Fold the edges of the dough up and over the pears, pleating as you go. Brush exposed dough with egg wash and sprinkle with sugar.
- Bake on the middle rack for 35-40 minutes until crust is deep golden brown and syrup is bubbling. Cover edges with foil if they get too dark.
- Let cool on the baking sheet for at least 15 minutes before slicing.
Notes
Keep all ingredients cold for a flaky crust. The poaching syrup can be reserved and brushed on the crust for extra shine. Galettes are forgiving; cracks in the crust add to the rustic charm. Store leftovers at room temperature for 2 days or in the fridge for 4 days. Reheat in oven to crisp crust.
- Prep Time: 30 minutes
- Cook Time: 40 minutes
- Category: Dessert
- Cuisine: American
Nutrition
- Serving Size: 1 slice
- Calories: 320
- Sugar: 28
- Sodium: 180
- Fat: 14
- Saturated Fat: 8
- Carbohydrates: 45
- Fiber: 3
- Protein: 4
Keywords: honey poached pear galette, pear dessert, easy baking, kid-friendly recipes, rustic pie, weekend baking, all-butter crust



